
4. 가상머신
4-1. RHEL 9, Cockpit 웹 콘솔 설정
- 가상머신을 관리하기 위한 웹 콘솔 가상머신 플러그인 설치
- 웹 콘솔이 시스템에 설치되어 활성화되어 있는지 확인
[root@localhost /]# systemctl status cockpit.socket
○ cockpit.socket - Cockpit Web Service Socket
     Loaded: loaded (/usr/lib/systemd/system/cockpit.socket; disabled; preset: disabled)
     Active: inactive (dead)
   Triggers: ● cockpit.service
       Docs: man:cockpit-ws(8)
Listen: [::]:9090 (Stream)cockpit-machines플러그인을 설치
[root@localhost /]# dnf install cockpit-machines
Last metadata expiration check: 1:33:14 ago on Thu 21 Mar 2024 12:44:55 PM KST.
Dependencies resolved.
============================================================================================================================================================
 Package                                              Architecture         Version                                            Repository               Size
============================================================================================================================================================
Installing:
 cockpit-machines                                     noarch               308-1.el9                                          appstream               1.1 M
############ (중략) ############
Total download size: 37 M
Installed size: 153 M
Is this ok [y/N]: y
############ (중략) ############
Complete!- 활성화
[root@localhost /]# systemctl enable cockpit.socket
Created symlink /etc/systemd/system/sockets.target.wants/cockpit.socket → /usr/lib/systemd/system/cockpit.socket.
[root@localhost /]# systemctl start cockpit.socket
🔶 웹 콘솔에 액세스
- 참고 : CentOS/RHEL 8에 KVM을 설치하는 방법
- KVM(커널 기반 가상 머신) : Linux에 긴밀하게 통합된 오픈 소스이자 사실상의 표준 가상화 솔루션
- https://localhost:9090 에 로그인
Unable to connect - Firefox can’t establish a connection to the server at localhost:9090.- Windows >
https://192.168.1.999:9090/로 접속하여 확인
- 제한된 접근 해제 > 암호 입력 후 인증 버튼 클릭 > 관리 액세스 모드로 바뀜
- libvirt Hypervisor 드라이버를 실행하도록 설정되어 있는지 확인
[root@localhost /]# virt-host-validate
  QEMU: Checking for hardware virtualization                                 : PASS
  QEMU: Checking if device /dev/kvm exists                                   : PASS
  QEMU: Checking if device /dev/kvm is accessible                            : PASS
  QEMU: Checking if device /dev/vhost-net exists                             : PASS
  QEMU: Checking if device /dev/net/tun exists                               : PASS
  QEMU: Checking for cgroup 'cpu' controller support                         : PASS
  QEMU: Checking for cgroup 'cpuacct' controller support                     : PASS
  QEMU: Checking for cgroup 'cpuset' controller support                      : PASS
  QEMU: Checking for cgroup 'memory' controller support                      : PASS
  QEMU: Checking for cgroup 'devices' controller support                     : PASS
  QEMU: Checking for cgroup 'blkio' controller support                       : PASS
  QEMU: Checking for device assignment IOMMU support                         : WARN (No ACPI DMAR table found, IOMMU either disabled in BIOS or not supported by this hardware platform)
QEMU: Checking for secure guest support : WARN (Unknown if this platform has Secure Guest support)- kvm 모듈이 커널에 로드되었는지 확인
[root@localhost /]# lsmod  | grep kvm
kvm_intel             442368  0
kvm                  1335296  1 kvm_intel
irqbypass 16384 1 kvm- 방화벽 상태는 cockpit 까지 열려있음 (만약 외부 접속이 허용되어 있지 않다면, 방화벽에 cockpit 서비스 추가)
[root@localhost /]# firewall-cmd --add-service=cockpit --permanent
Warning: ALREADY_ENABLED: cockpit
success
[root@localhost /]# firewall-cmd --reload
successhttps://192.168.1.999:9090/로 접속하여 확인- root 계정 접속이 안되어, 사용자 계정으로 로그인 함
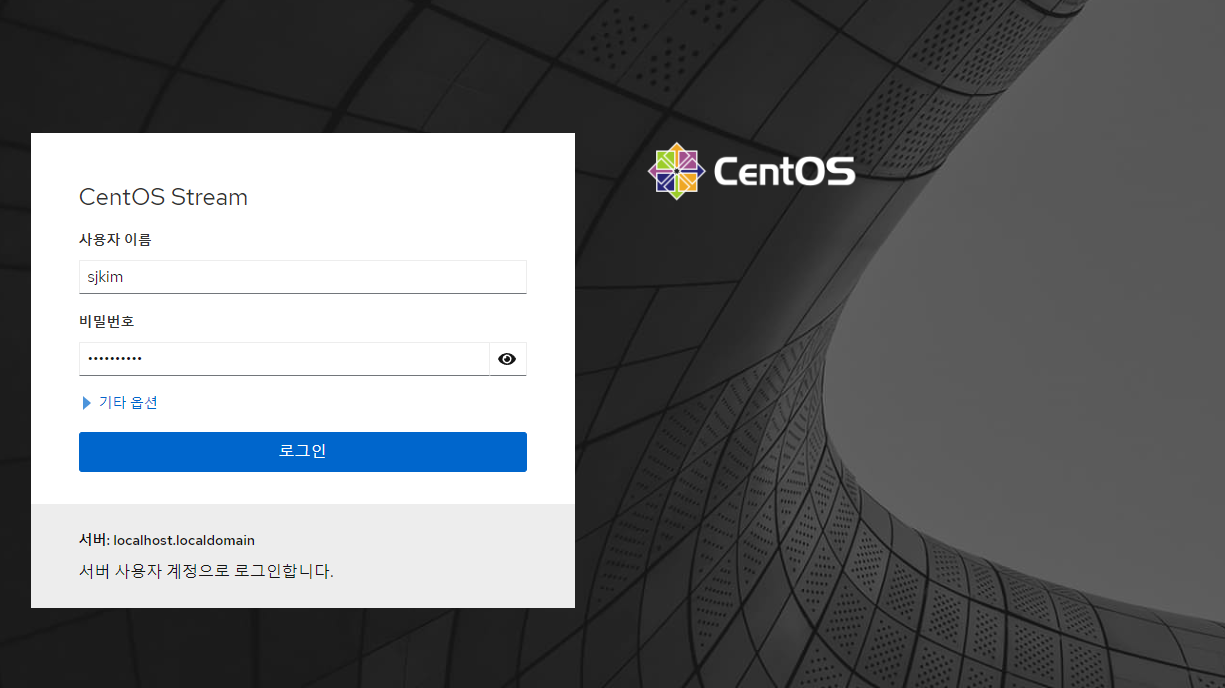
- root 계정 접속이 안되어, 사용자 계정으로 로그인 함
5. Podman
- CentOS 8 버전부터 Docker 대신 Podman 이 기본 Container API 임
- Centos에 Podman 설치하기 - Podman 컨테이너 기초
- Windows >
https://192.168.1.999:9090/로 접속 - 좌측 목록에서 Podman Container 클릭
- '포드맨 서비스가 동작하지 않습니다.' >
부트 시 자동으로 podman 시작클릭
- '포드맨 서비스가 동작하지 않습니다.' >
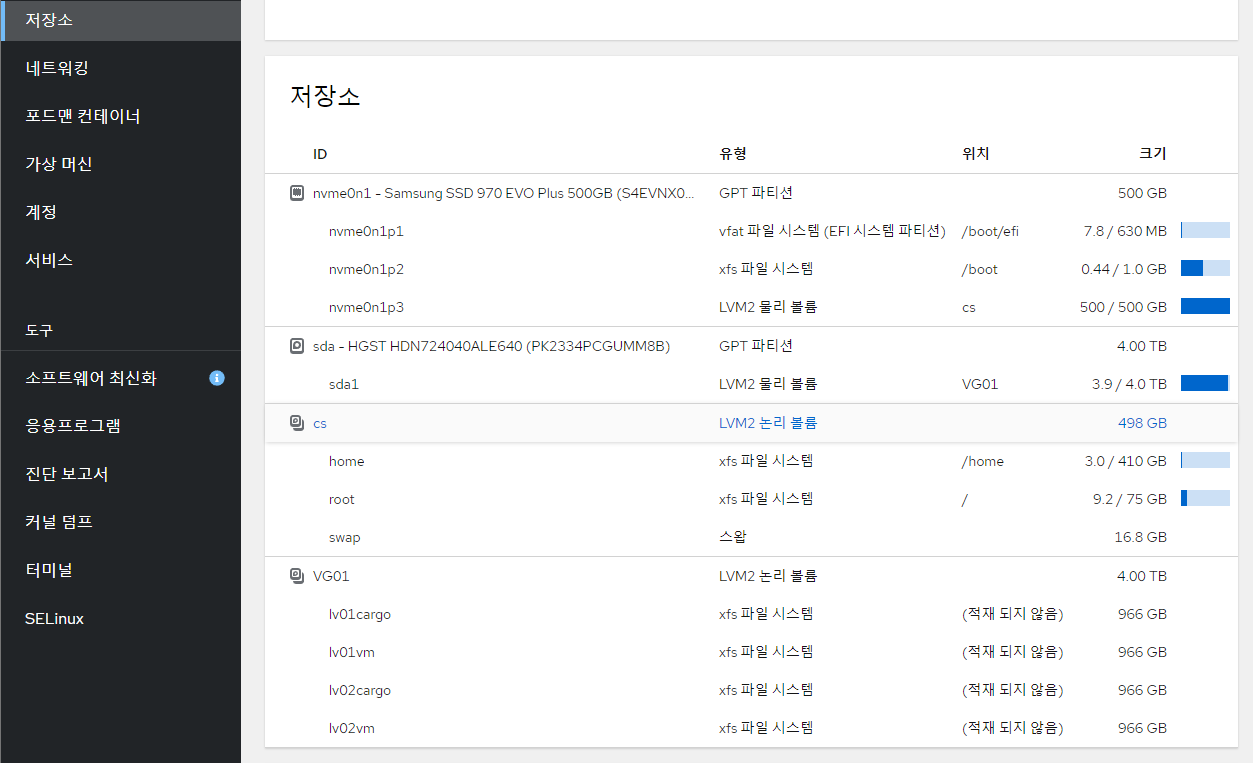
🔶 Podman 저장소
- Podman https://192.168.1.111:9090/storage > MySQL 작업 완료 후 확인해본 모습
5-1. Podman 환경 구성
- registry 접근 정보
[root@localhost /]# view /etc/containers/registries.conf

unqualified-search-registries = ["registry.access.redhat.com", "registry.redhat.io", "docker.io"]
############ (중략) ############
insecure = false
blocked = false // 필요에 따라 차단 등록을 한다- 현재 redhat 계정은 없으므로 실제로 pulling 할 수 없음 (docker.io 만 가능함)
- repo에서 적합한 mysql 찾아보기
🔶 Podman 기본 정보
- 버전 및 설치 환경 정보 확인
[root@localhost system-connections]# podman -v
podman version 4.9.3-dev

[root@localhost system-connections]# podman info

  kernel: 5.14.0-430.el9.x86_64

  remoteSocket:
    exists: false
    path: /run/podman/podman.sock

store:
  configFile: /etc/containers/storage.conf
  graphRoot: /var/lib/containers/storage
  imageCopyTmpDir: /var/tmp
  runRoot: /run/containers/storage
  volumePath: /var/lib/containers/storage/volumes

version:
  APIVersion: 4.9.3-dev
  Built: 1707216158
  BuiltTime: Tue Feb  6 19:42:38 2024
  GitCommit: ""
  GoVersion: go1.21.3
  Os: linux
  OsArch: linux/amd64
  Version: 4.9.3-dev
🔶 podman-compose 버전
- podman-compose 설치 및 버전 확인
[root@localhost ~]# podman-compose version
bash: podman-compose: command not found...
Install package 'podman-compose' to provide command 'podman-compose'? [N/y] y


 * Waiting in queue...
 * Loading list of packages....
The following packages have to be installed:
 gvisor-tap-vsock-6:0.7.3-2.el9.x86_64  Go replacement for libslirp and VPNKit
 podman-compose-1.0.6-3.el9.noarch      Run docker-compose.yml using podman
 podman-plugins-2:5.0.0-1.el9.x86_64    Plugins for podman
 python3-click-8.0.3-1.el9.noarch       Simple wrapper around optparse for powerful command line utilities
 python3-dotenv-0.19.2-3.el9.noarch     Read key-value pairs from a .env file and set them as environment variables
 python3-dotenv+cli-0.19.2-3.el9.noarch Metapackage for python3-dotenv: cli extras
Proceed with changes? [N/y] y

 * Waiting in queue...
 * Waiting for authentication...
 * Waiting in queue...
 * Downloading packages...
 * Requesting data...
 * Testing changes...
 * Installing packages...
podman-compose version: 1.0.6
['podman', '--version', '']
using podman version: 4.9.4-dev
podman-compose version 1.0.6
podman --version
podman version 4.9.4-dev
exit code: 0

[root@localhost ~]# podman-compose version
podman-compose version: 1.0.6
['podman', '--version', '']
using podman version: 4.9.4-dev
podman-compose version 1.0.6
podman --version
podman version 4.9.4-dev
exit code: 0
6. Java
- 현재 Java 는 이미 설치되어 있음
- 11 다운로드 명령어 :
yum install java-11-openjdk-devel.x86_64 - 1.8.0 다운로드 명령어 :
yum install java-1.8.0-openjdk-devel.x86_64
- 11 다운로드 명령어 :
[root@localhost /]# java -version
openjdk version "1.8.0_362"
OpenJDK Runtime Environment (build 1.8.0_362-b08)
OpenJDK 64-Bit Server VM (build 25.362-b08, mixed mode)- yum 패키지 확인하기
[root@localhost /]# yum search openjdk
Last metadata expiration check: 2:28:07 ago on Thu 21 Mar 2024 12:44:55 PM KST.
============================================================= Name & Summary Matched: openjdk ==============================================================
java-1.8.0-openjdk.x86_64 : OpenJDK 8 Runtime Environment
java-1.8.0-openjdk-demo.x86_64 : OpenJDK 8 Demos
############ (중략) ############- 링크 확인
[root@localhost /]# readlink -f /usr/bin/java
/usr/lib/jvm/java-1.8.0-openjdk-1.8.0.362.b09-4.el9.x86_64/jre/bin/java
6-1. JAVA_HOME 환경변수
- CentOS 에서는
/etc/profile.d폴더에custom.sh파일로 개별 설정을 만들도록 권고/etc/profile을 직접 수정하는 방식보다는 목적에 따라
[root@localhost ~]# export JAVA_HOME=$(readlink -f /usr/bin/java | sed "s:bin/java::").bash_profile에만 적용
[root@localhost ~]# env | grep JAVA
JAVA_HOME=/usr/lib/jvm/java-1.8.0-openjdk-1.8.0.362.b09-4.el9.x86_64/jre/- Java 설치 확인
[root@localhost ~]# ls /usr/lib/jvm
java-1.8.0-openjdk-1.8.0.362.b09-4.el9.x86_64  jre-1.8.0          jre-1.8.0-openjdk-1.8.0.362.b09-4.el9.x86_64
jre                                            jre-1.8.0-openjdk  jre-openjdk
🔶 Java 버전 변경 시
- Java 버전
alternatives
[root@localhost ~]# alternatives --config java

There is 1 program that provides 'java'.

  Selection    Command
-----------------------------------------------
*+ 1           java-1.8.0-openjdk.x86_64 (/usr/lib/jvm/java-1.8.0-openjdk-1.8.0.362.b09-4.el9.x86_64/jre/bin/java)

Enter to keep the current selection[+], or type selection number: 1- JAVA_HOME 은 source 로 구동하거나 재로그인을 해야 변경됨
[root@localhost ~]# source .bash_profile
# 환경변수 변경된 내용 확인
[root@localhost ~]# env | grep JAVA
JAVA_HOME=/usr/lib/jvm/java-1.8.0-openjdk-1.8.0.362.b09-4.el9.x86_64/jre/- alternatives 심볼릭 링크 생성 상태 확인
[root@localhost ~]# ls -l /etc/alternatives/jre*
lrwxrwxrwx. 1 root root 62 Mar 15 09:48 /etc/alternatives/jre -> /usr/lib/jvm/java-1.8.0-openjdk-1.8.0.362.b09-4.el9.x86_64/jre
lrwxrwxrwx. 1 root root 62 Mar 15 09:48 /etc/alternatives/jre_1.8.0 -> /usr/lib/jvm/java-1.8.0-openjdk-1.8.0.362.b09-4.el9.x86_64/jre
lrwxrwxrwx. 1 root root 57 Mar 15 09:48 /etc/alternatives/jre_1.8.0_openjdk -> /usr/lib/jvm/jre-1.8.0-openjdk-1.8.0.362.b09-4.el9.x86_64
lrwxrwxrwx. 1 root root 62 Mar 15 09:48 /etc/alternatives/jre_openjdk -> /usr/lib/jvm/java-1.8.0-openjdk-1.8.0.362.b09-4.el9.x86_64/jre
개린이