AuthenticationManager
Authentication Manager
사용자 아이디/비밀번호 인증을 처리하는 곳
➡️ 유효한 인증인지 확인
➡️ 인자로 받은 Authentication이 유효한 인증인지 확인하고,
"Authentication" 객체를 리턴
사용자의 요청 내에 담긴 "Authentication"를 Authentication Manager 에 넘겨주고, AuthenticationProvider에서 인증을 처리한다.
➡️ Authentication Manager은 인자로 받은 Authentication을 Provider을 통해, 유효한지 처리하여, Authentication 객체를 리턴한다.
Authentication
인자로 받은 필요한 정보(username, password , jwt 등..)로 만든 객체
Authentication 객체 리턴
- Principal : UserDetailsService에서 리턴한 객체(User)
- Credentials
- GrantedAuthorities : 권한
AuthenticationManager 사용하기
SecurityConfig.java
rest에서 detailservice를 사용할 수 없다
➡️ AuthenticationManager 사용하기
직접 생성한 service 등록 ⇒ 사용하지 않도록 설정
http.userDetailsService(securityLoginService); // rest ⇒ detailservice를 못씀
sessionCreationPolicy 옵션값
- ALWAYS : 항상 세션생성
- IF_REQUIRED : 기본값
- NEVER : 생성하지만 기존것이 존재하면 기존것을 사용
- STATELESS 생성하지 않고 기존것도 사용하지 않음
// 로그인시 세션을 서버에 저장하지 않음
// 옵션값 : ALWAYS : 항상 세션생성 / IF_REQUIRED : 기본값
// NEVER : 생성하지만 기존것이 존재하면 기존것을 사용 / STATELESS 생성하지 않고 기존것도 사용하지 않음
	http.sessionManagement().sessionCreationPolicy(SessionCreationPolicy.STATELESS);

// post호출시 csrf키를 요구하지 않도록 설정
	http.cors().disable();
...

// userDetailsService 대체로 사용
    @Bean
    public AuthenticationManager authenticationManager(
        AuthenticationConfiguration authenticationConfiguration) throws Exception{
            return authenticationConfiguration.getAuthenticationManager();
        }
회원가입
Application.java
Application에 생성한 restcontroller 파일 위치 등록
// 서비스,컨트롤러 환경설정
@ComponentScan(basePackages = {
	"com.example.service",
	"com.example.controller",
	"com.example.restcontroller",
	"com.example.config",
	"com.example.handler"

})
restcontroller/MemberRestController.java
@RestController
@RequestMapping(value = "/api/member")
@RequiredArgsConstructor
public class MemberRestController {
// 암호화를 위해 만들었던 @Bean객체 가져와 사용 @Bean => public PasswordEncoder passwordEncoder(){
final PasswordEncoder passwordEncoder;
// 회원가입
@PostMapping(value = "/join.json")
public Map<String, Object> joinPOST(@RequestBody Member member){
System.out.println(member.toString());
Map<String, Object> map = new HashMap<>();
try {
// 사용자가 입력한 암호 암호화 하여 저장
String hashpw = passwordEncoder.encode(member.getUserpw());
member.setUserpw(hashpw);
memberRepository.save(member);
map.put("status", 200);
} catch (Exception e) {
map.put("status", -1);
map.put("result", e.getMessage());
}
return map;
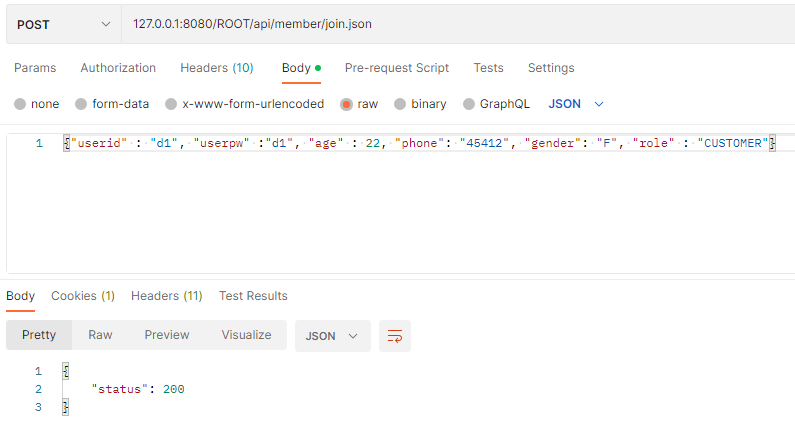
}결과사진
로그인시 토큰 발행
토큰 발행 라이브러리 설치
➡️ 토큰 발행 라이브러리는 다양한데 기본기능이 가능한 라이브러리면 다른 라이브러리를 사용해도 무관하다
pom.xml
<!-- jjwt -->
<dependency>
<groupId>jakarta.xml.bind</groupId>
<artifactId>jakarta.xml.bind-api</artifactId>
<version>2.3.2</version>
</dependency>
JwtUtil.java
@Configuration
public class FilterConfig {

    // 필터를 통과할 url설정하기
    @Bean
    public FilterRegistrationBean<JwtFilter>
        filterRegistrationBean(JwtFilter jwtFilter){
            FilterRegistrationBean<JwtFilter> bean
                = new FilterRegistrationBean<>();
            bean.setFilter(jwtFilter);

            // ex) 회원정보수정, 판매자페이지전체는 jwtFilter동작됨
            bean.addUrlPatterns("/api/member/update.json", "/api/seller/*");

            return bean;
        }
}
Application.java
applicarion환경설정에 생성한 jwt 파일 위치 등록
// 서비스,컨트롤러 환경설정
@ComponentScan(basePackages = {
	"com.example.service",
	"com.example.controller",
	"com.example.restcontroller",
	"com.example.config",
	"com.example.jwt",
	"com.example.handler"

})
MemberRestController.java
    // 로그인
    // 아이디, 암호, 권한이 와야한다
    // {"userid" : "b1", "userpw" :"b1", "role" : "CUSTOMER"}
    @PostMapping(value="/login.json")
    public Map<String, Object> loginPOST(@RequestBody Member member) {
        Map<String, Object> map = new HashMap<>();
        try {
            // 권한정보 변경을 위한 문자배열
            String [] strRole = { member.getRole() };

            // 문자배열을 Collection타입으로 변환
            Collection<GrantedAuthority> role = AuthorityUtils.createAuthorityList(strRole);

            // 매니저를 이용한 인증, userdetailservice와 같은 기능
            UsernamePasswordAuthenticationToken token = new UsernamePasswordAuthenticationToken(member.getUserid(), member.getUserpw(), role);
            // userdetailservice를 사용하지 못하니 같은 기능의 authenticationManager를 사용한다
            authenticationManager.authenticate(token);
            map.put("status", 200);
            map.put("result", JwtUtil.generateToken(member.getUserid(), member.getRole()));

        } catch (Exception e) {
            map.put("status", -1);
            map.put("result", e.getMessage());
        }

        return map;
    }
SecurityConfig.java
post호출시 csrf키를 요구하지 않도록 설정
이때 http.csrf().disable(); = 전체해제는 보안상의 이유로 권장하지 않는다
csrf키를 요구하지 않을 주소만 지정하여 해제한다
http.csrf().ignoringAntMatchers("/api/**");= api로 시작하는 주소만 해제
// post호출시 csrf키를 요구하지 않도록 설정
        // http.csrf().disable(); //=>전체 해제 (비권장)
        http.csrf().ignoringAntMatchers("/api/**"); //=> api로 시작하는 주소만 해제
        http.headers().frameOptions().sameOrigin();
회원정보변경
JwtFilter.java
로그인 회원가입은
토큰 발행전이니 필터가 필요하지 않다
회원정보 수정은 필터 필요
필터설정
FilterConfig.java
필터를 통과할 url설정하기
JwtFilter.java
판매자/고객 필터 따로 생성하는 경우
filter를 하나 더 만들어서 사용하는게 더 관리하기 편하다
하나의 필터에 관리자/고객의 필터를 따로 구분하여 생성하는것 보다
공통으로 적용될 필터 하나
각 권한별 적용될 필터 로 구분하여 적용해주는게 유지관리가 편하다
JwtFilter1.java ⇒ 판매자용
FilterConfig.java
// 판매자용
    @Bean
    public FilterRegistrationBean<JwtFilter>
        filterRegistrationBean1(JwtFilter jwtFilter1){
            FilterRegistrationBean<JwtFilter> bean
                = new FilterRegistrationBean<>();
            bean.setFilter(jwtFilter1);

            // ex) 회원정보수정, 판매자페이지전체는 jwtFilter동작됨
            bean.addUrlPatterns("/api/seller*");

            return bean;
        }