
$ npx create-react-app "생성할 프로젝트 이름" --template typescript이 때 "생성할 프로젝트 이름' 대신에 .을 입력해주면 터미널에 있는 경로에서 cra가 생성되어진다!
ESLint 설치
1. default config 지우기(package.json)
CRA로 프로젝트를 생성하면 package.json에서 기본적으로 세팅되어있는 아래 부분을 지운다.
  "eslintConfig": {
    "extends": [
      "react-app",
      "react-app/jest"
    ]
  },
2. install eslint
npm install eslint --save-dev3. setup eslint
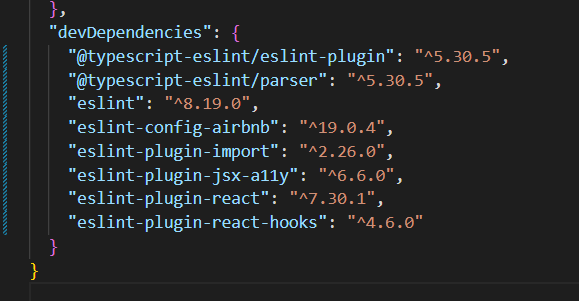
npx eslint --init


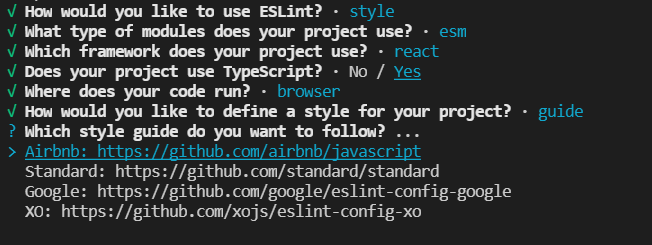
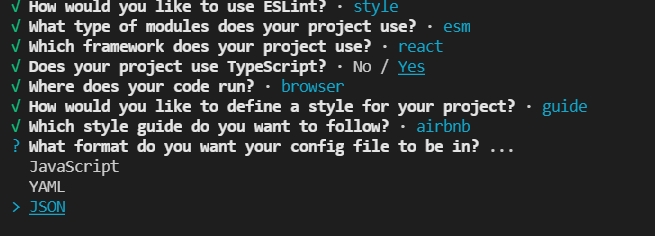


위와 같은 절차를 거치게 되면 자연스럽게 설치가 되어진다!
4. Running ESLint
😀 sample: JSX not allowed in files with extension '.tsx'
(확장자가 '.tsx' 인 파일에서는 jsx가 허용되지 않습니다)
⭐ solution
eslintrc.json
"rules":{
  "react/jsx-filename-extension":["warn",{"extensions":[".tsx"]} }
}
😀 sample: import/no-unresolved
Unable to resolve path to module './App'.
(모듈 './App'에 대한 경로를 확인할 수 없습니다.)
⭐ solution
eslintrc.json
"rules": {
    ...
    "import/no-unresolved": "off"
  }
😀 sample: import/extensions
⭐ solution
eslintrc.json
"rules": {
    ...
    "import/extensions": "off"
  }
😀 sample: react/react-in-jsx-scope
'React' must be in scope when using JSX
⭐ solution
eslintrc.json
"rules": {
    ...
    "react/react-in-jsx-scope": "off"
  }
😀 sample: react/jsx-filename-extension
⭐ solution
eslintrc.json
"rules":  {
  "react/jsx-filename-extension": [
      2,
      { "extensions": [".js", ".jsx", ".ts", ".tsx"] }
    ]
},
Prettier
ESLint와 Prettier를 사용하다보면 충돌이 생기게 된다!
그래서 eslint-config-prettier를 설치해주어야한다.
이것을 사용하게 된다면 ESLint 는 자바스크립트 문법 관련된 것들만 관리하게 되고, 코드스타일 관련 작업은 prettier 가 담당하게된다!!
npm install --save-dev eslint-config-prettier.prettierrc
{
  "singleQuote": true,
  "semi": true,
  "useTabs": false,
  "tabWidth": 2,
  "trailingComma": "all",
  "printWidth": 80
}
규칙은 다음과 같다.
- 문자열을 사용 할 때에는 ' 를 사용합니다.
- 코드는 ; 로 끝나야합니다.
- 탭 대신에 스페이스를 사용합니다.
- 들여쓰기 크기는 2칸입니다.
- 객체나 배열을 작성 할 때, 원소 혹은 key-value 의 맨 뒤에있는 것에도 쉼표를 붙입니다.
- 한 줄이 80칸이 넘지 않도록 합니다
.eslintrc.json
"extends": [...,"prettier"],이렇게 하면 완료다!!
잘 적용이 되는지 확인하기 위해서는
App.jsx
const a = () => {
  return "2";
};
코드를 넣고 저장하면 아래와 같이 바뀌면 대성공이다!
const a = () => '2';혹시라도 ctrl + s를 눌렀는데도 변경이 되지 않는다면,
1) VSCode 의 설정을 열어서
2) Format On Save 를 검색해서 체크를 활성화해준다!
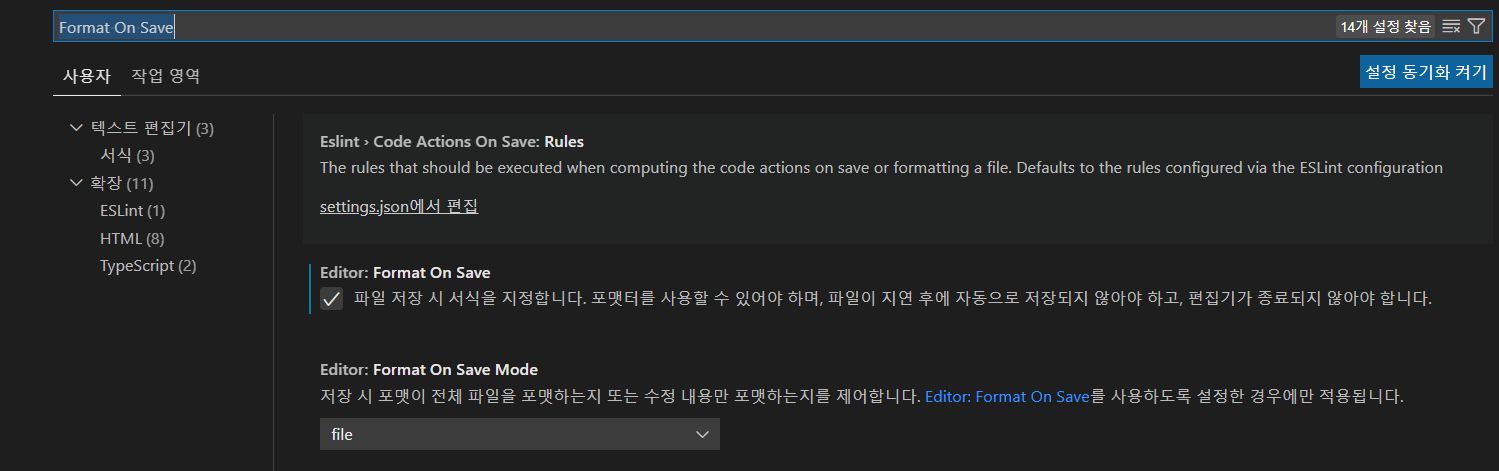
3) 그 다음엔 그 다음엔 ESLint 를 검색해서 Enable 체크를 활성화해주면 된다!

끗~!
출처)
https://velog.io/@velopert/eslint-and-prettier-in-react
https://velog.io/@he0_077/React-Typescript-eslint-prettier-%EC%84%A4%EC%A0%95#what-is-eslint