이번 프로젝트를 진행하면서 달력이 필요한 부분이 있어서
full-calendar와react-calendar를 고민하던 중, 만났던 이슈사항을 정리해보려고 한다.
현재 상황
nextJScss-modulesscss
이렇게 사용하고 있다.
react-calendar를 구글링을 많이 해보고
눈으로 보고 머리로 이해한 후, 설치 했다.
react-calendar 설치 & 기본적용
npm i react-calendar
yarn add react-calendar
요로코롬 설치 해준 뒤, 코드에 기본 적용을 해야한다.
import React, { useState } from 'react';
import Calendar from 'react-calendar';
import 'react-calendar/dist/Calendar.css'; // css import

function MyApp() {
  const [value, onChange] = useState(new Date());

  return (
    <div>
      <Calendar onChange={onChange} value={value} />
    </div>
  );
}
공식문서에도 설명이 잘 나와있다.
그리고 기존에 있는 스타일링을 기반으로 구축하려면 css를 불러와 스타일링을 가지고 올 수 있다고 한다.
If you want to use default react-calendar styling to build upon it, you can import react-calendar's styles by using:
기본 반응 달력 스타일을 사용하여 이를 기반으로 구축하려면 다음을 사용하여 반응 달력의 스타일을 가져올 수 있습니다.
필요에 따라 css파일을 import해오면 된다.
import 'react-calendar/dist/Calendar.css';기본 캘린더 디자인
이렇게 기본스타일과 기본기능이 된 달력의 모양을 확인할 수 있다.
Custom 캘린더 디자인하기
여기서부터 나의 실수로 인해 시간을 날려먹고 삽질이 시작되었다.
위의 말했듯이 나는 css-module기반의 scss를 사용하고 있었다.
스타일을 수정하기위해 저장하던 것 처럼 동일하게 파일을 생성하고 불러와 동일하게 작업을 했다.
폴더구조
👉🏻 /writing 폴더내부에 page.tsx, page.module.scss페이지를 각 각 만들었다.
일단은 page.module.scss파일에 모든 작업을 한 후,
나중에 캘린더부분만 따로 빼서 캘린더 스타일 파일을 만들 생각이 었다.
하즤만,,
page.module.scss파일에 작성한 css코드들은 전혀 먹히지 않고, 말을 듣지 않았다.
지금 생각하면 당연한 결과였즤만, 나는 하루이상을 날려먹은 것 같다.
css-module로는 커스텀 할 수 없습니다.
그렇게 나는..
커스텀 하기위해 우여곡절을 겪고 그렇게 단순하게 성공했다.
/* calendarCustom.css */

.react-calendar {}

/* 월 */
.react-calendar__navigation {}
.react-calendar__navigation button {}
.react-calendar__navigation button:disabled {}
.react-calendar__navigation button:enabled:hover,
.react-calendar__navigation button:enabled:focus {}

/* 일 */
.react-calendar__month-view__weekdays {}
.react-calendar__month-view__weekdays__weekday {}
.react-calendar__month-view__days__day--neighboringMonth {}
.react-calendar__month-view__weekdays__weekday abbr {}

.react-calendar__year-view .react-calendar__tile,
.react-calendar__decade-view .react-calendar__tile,
.react-calendar__century-view .react-calendar__tile {}

.react-calendar__tile {}
.react-calendar__tile--active {}
.react-calendar__tile--now {}
.react-calendar__tile--hasActive {}

.react-calendar__tile:enabled:hover,
.react-calendar__tile:enabled:focus {}

.react-calendar__tile--active:enabled:hover,
.react-calendar__tile--active:enabled:focus {}

.react-calendar__tile--now:enabled:hover,
.react-calendar__tile--now:enabled:focus {}

.react-calendar__tile--hasActive:enabled:hover,
.react-calendar__tile--hasActive:enabled:focus {}
깨달은 점
👉🏻 라이브러리는 모듈을 사용하지 않고, 오직 css파일로만 생성한 후 사용한다.
❗️ module을 사용해 커스텀을 했다면, 파일이 압축되어 읽히는 부분에서 문제가 발생해서 적용되지 않는 다는 점을 알게 되었다.
화살표 이미지 넣기
화살표의 디자인을 변경하고 싶다면,
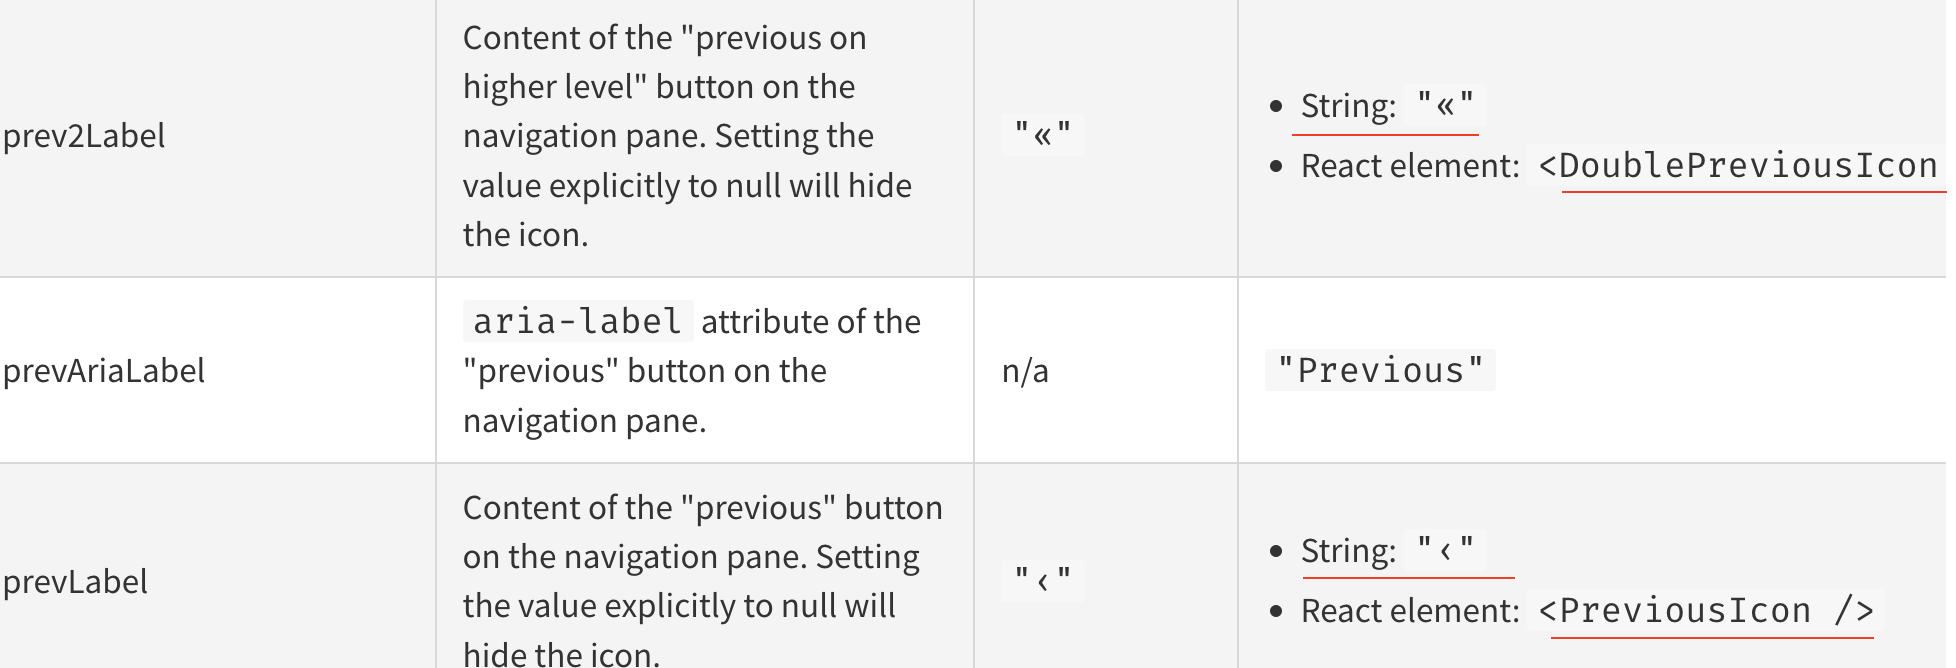
이렇게 컴포넌트를 따로 생성해 만들어준 뒤, 해당 컴포넌트를 불러오면 된다.
const PreviousIcon = () => {
	<img src={src} alt={alt} />
}

<Calendar
	prevLabel={<PreviousIcon />}
/>
클릭한 날짜 따로 띄우기
나는 원하는 날짜를 글쓰기 페이지에는 input값에 사용하고,
캘린더 페이지에서는 오른쪽 섹션에 보여주기 위해서 그 부분은 따로 마크업했다.
 <Calendar onChange={onChange} value={value} />
 	<div className="text-gray-500 mt-4">
 		{dayjs(value).format("YYYY년 MM월 DD일")}
	</div>
react-calendar 기능 Custom
캘린더의 부가기능들은
npm react-calendar공식문서에 잘 나와있으니 필요한 부분은 문서를 보고 적용하면 될거 같다.
<Calendar
	onChange={onChange} // useState로 포커스 변경 시 현재 날짜 받아오기
 	// 날'일' 제외하고 숫자만 보이도록 설정 ( 하나의 숫자일 때, 0을 제외 'D')
    formatDay={(locale, date) => moment(date).format("D")}
    value={value}
    minDetail="month" // 상단 네비게이션에서 '월' 단위만 보이게 설정
    maxDetail="month" // 상단 네비게이션에서 '월' 단위만 보이게 설정
    navigationLabel={null}
    showNeighboringMonth={false} //  이전, 이후 달의 날짜는 보이지 않도록 설정
    className="mx-auto w-full text-sm border-b"
    tileContent={({ date, view }) => {
      	// 날짜 타일에 컨텐츠 추가하기 (html 태그)
    	// 추가할 html 태그를 변수 초기화
    	let html = [];
    	// 현재 날짜가 post 작성한 날짜 배열(mark)에 있다면, dot div 추가
    	if (mark.find((x) => x === moment(date).format("YYYY-MM-DD"))) {
      html.push(<div className="dot"></div>);
    }
    	// 다른 조건을 주어서 html.push 에 추가적인 html 태그를 적용할 수 있음.
    	return (
      		<>
        		<div className="flex justify-center items-center absoluteDiv">
		         {html}
        		</div>
      		</>
    	);
  	}}
/>
결과
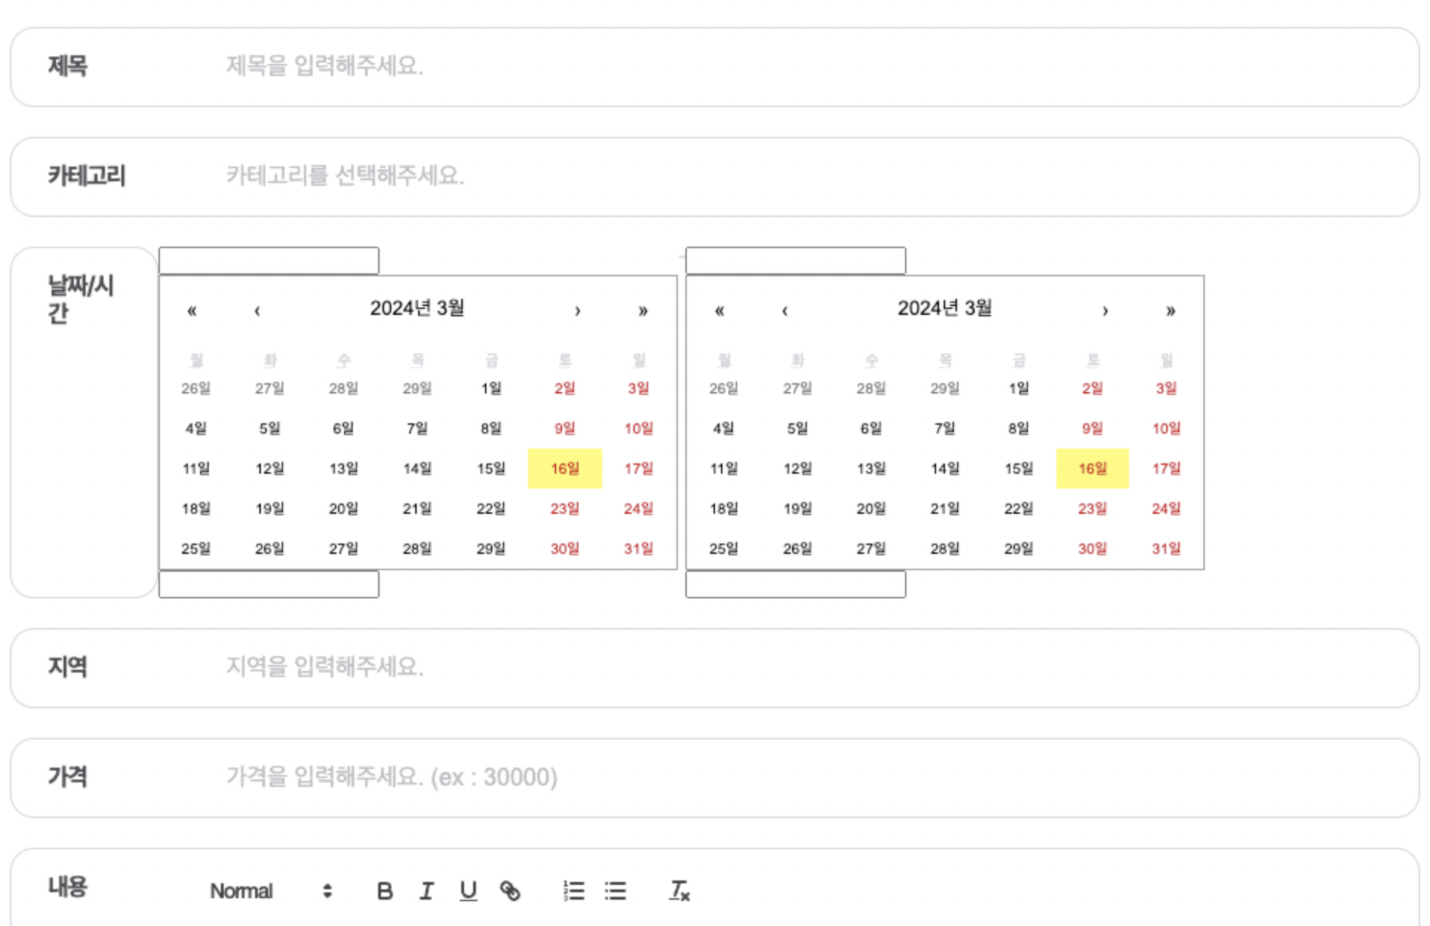
글쓰기 페이지의 캘린더

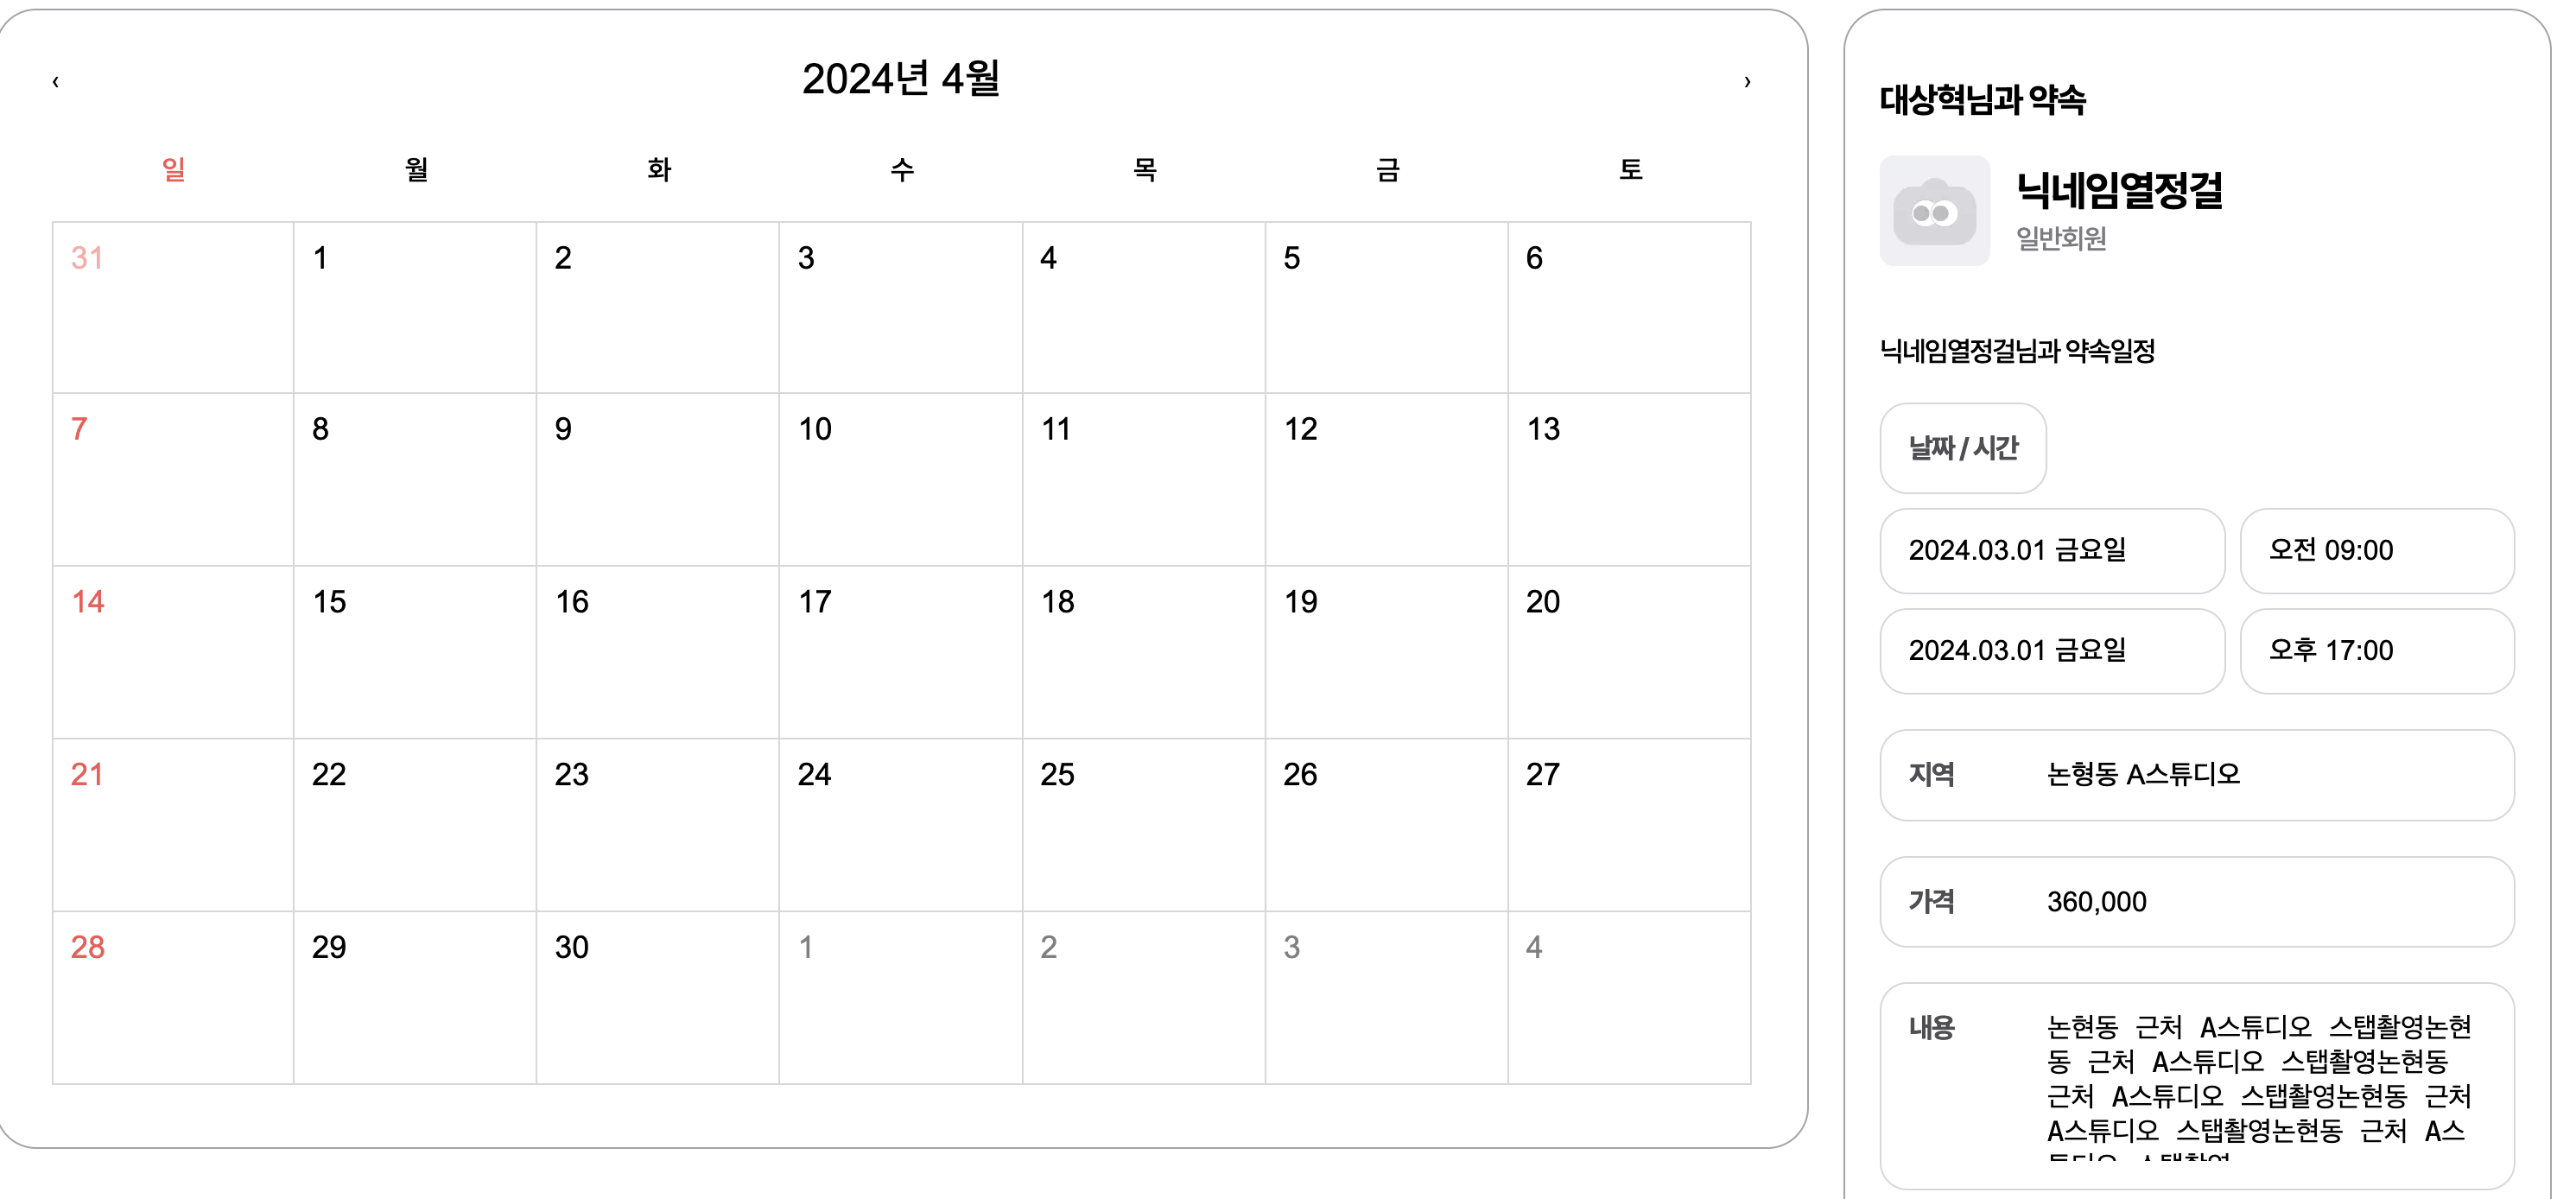
캘린더 페이지의 캘린더
이렇게 우여곡절의 "캘린더 커스텀"을 완료 했다 !
1. 공식문서를 잘 읽자.
2. 라이브러리는 .css 파일로 작성하자.

한창 이것땜에 삽질하고있었는데... 저만 그런게 아녔군요 해결책 자세히 작성해주셔서 감사합니다!!