스파르타 코딩클럽 내일배움캠프 iOS 앱개발 기초 프로젝트
1. UISegmentedControl에서 Segment 선택 시 CollectionView에 적절한 데이터 뿌려주기
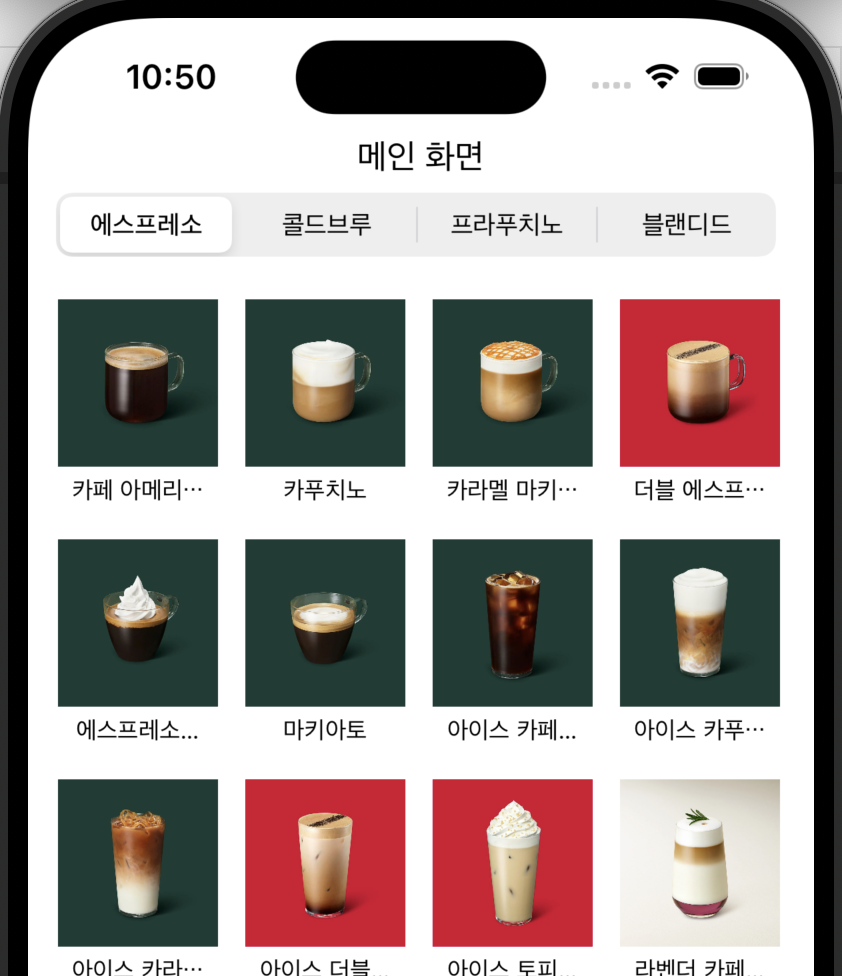
- 위의 화면에서 UISegmentControl에 나타난 에스프레소, 콜드브루 등의 메뉴를 탭했을 때, 아래에 위치한 CollectionView에서 적절한 이미지와 텍스트로 이루어진 셀이 나타나도록 하는 것이 목표였다.
- 아래와 같은 코드로 구현을 해봤다.
@IBAction func selectionValueChanged(_ sender: Any) {
        print(CategorySelection.selectedSegmentIndex)
        switch CategorySelection.selectedSegmentIndex {
        case 1:
            collectionsToDisplay = Menu.coldBrew
        case 2:
            collectionsToDisplay = Menu.frappucchino
        case 3:
            collectionsToDisplay = Menu.blended
        default:
            collectionsToDisplay = Menu.espresso
        }
        // MenuCollectionview에 들어가는 데이터를 다시 로드
        MenuCollectionView.reloadData()
    }

    // CollectionViewCell에 할당할 데이터를 담는 배열 선언
    lazy var collectionsToDisplay: [Menu] = Menu.espresso
이 코드는 전체 뷰를 제어하는 ViewController 클래스 안에 위치한 코드이다.
서로 다른 세그먼트를 선택할 때 마다 UISegmentedControl.selectedSegmentIndex가 변하는 것을 이용하여, switch 구문으로 CollectionViewCell에 할당할 데이터를 담는 배열을 바꿔줄 수 있도록 했다.
	func collectionView(_ collectionView: UICollectionView, numberOfItemsInSection section: Int) -> Int {
        return collectionsToDisplay.count
    }

    func collectionView(_ collectionView: UICollectionView, cellForItemAt indexPath: IndexPath) -> UICollectionViewCell {
        let cell = MenuCollectionView.dequeueReusableCell(withReuseIdentifier: "menuCollectionViewCell", for: indexPath) as! MenuCollectionViewCell

        cell.setCell(collectionsToDisplay[indexPath.row])
        return cell
    }
ViewController 안에 위치한 이 코드로 셀을 그려줄 수 있도록 했다. collectionView(_ collectionView:, cellForItemAt:) 함수 내부에 선언된 setCell(_ menu: Menu) 함수는 셀을 담당하는 클래스인 MenuCollectionViewCell 클래스 하위에 선언해줬다.
class MenuCollectionViewCell: UICollectionViewCell {

    @IBOutlet weak var menuImage: UIImageView!
    @IBOutlet weak var menuName: UILabel!

    var menu: Menu?

    func setCell(_ _menu: Menu) {
        menu = _menu

        self.menuImage.image = UIImage(named: _menu.image)
        self.menuName.text = _menu.name
    }
}
위와 같은 UICollectionViewCell 객체 내부에 setCell 함수를 구현해서 셀을 잘 그려줄 수 있도록 했다.
2. Storyboard에서 CollectionViewCell의 크기 설정
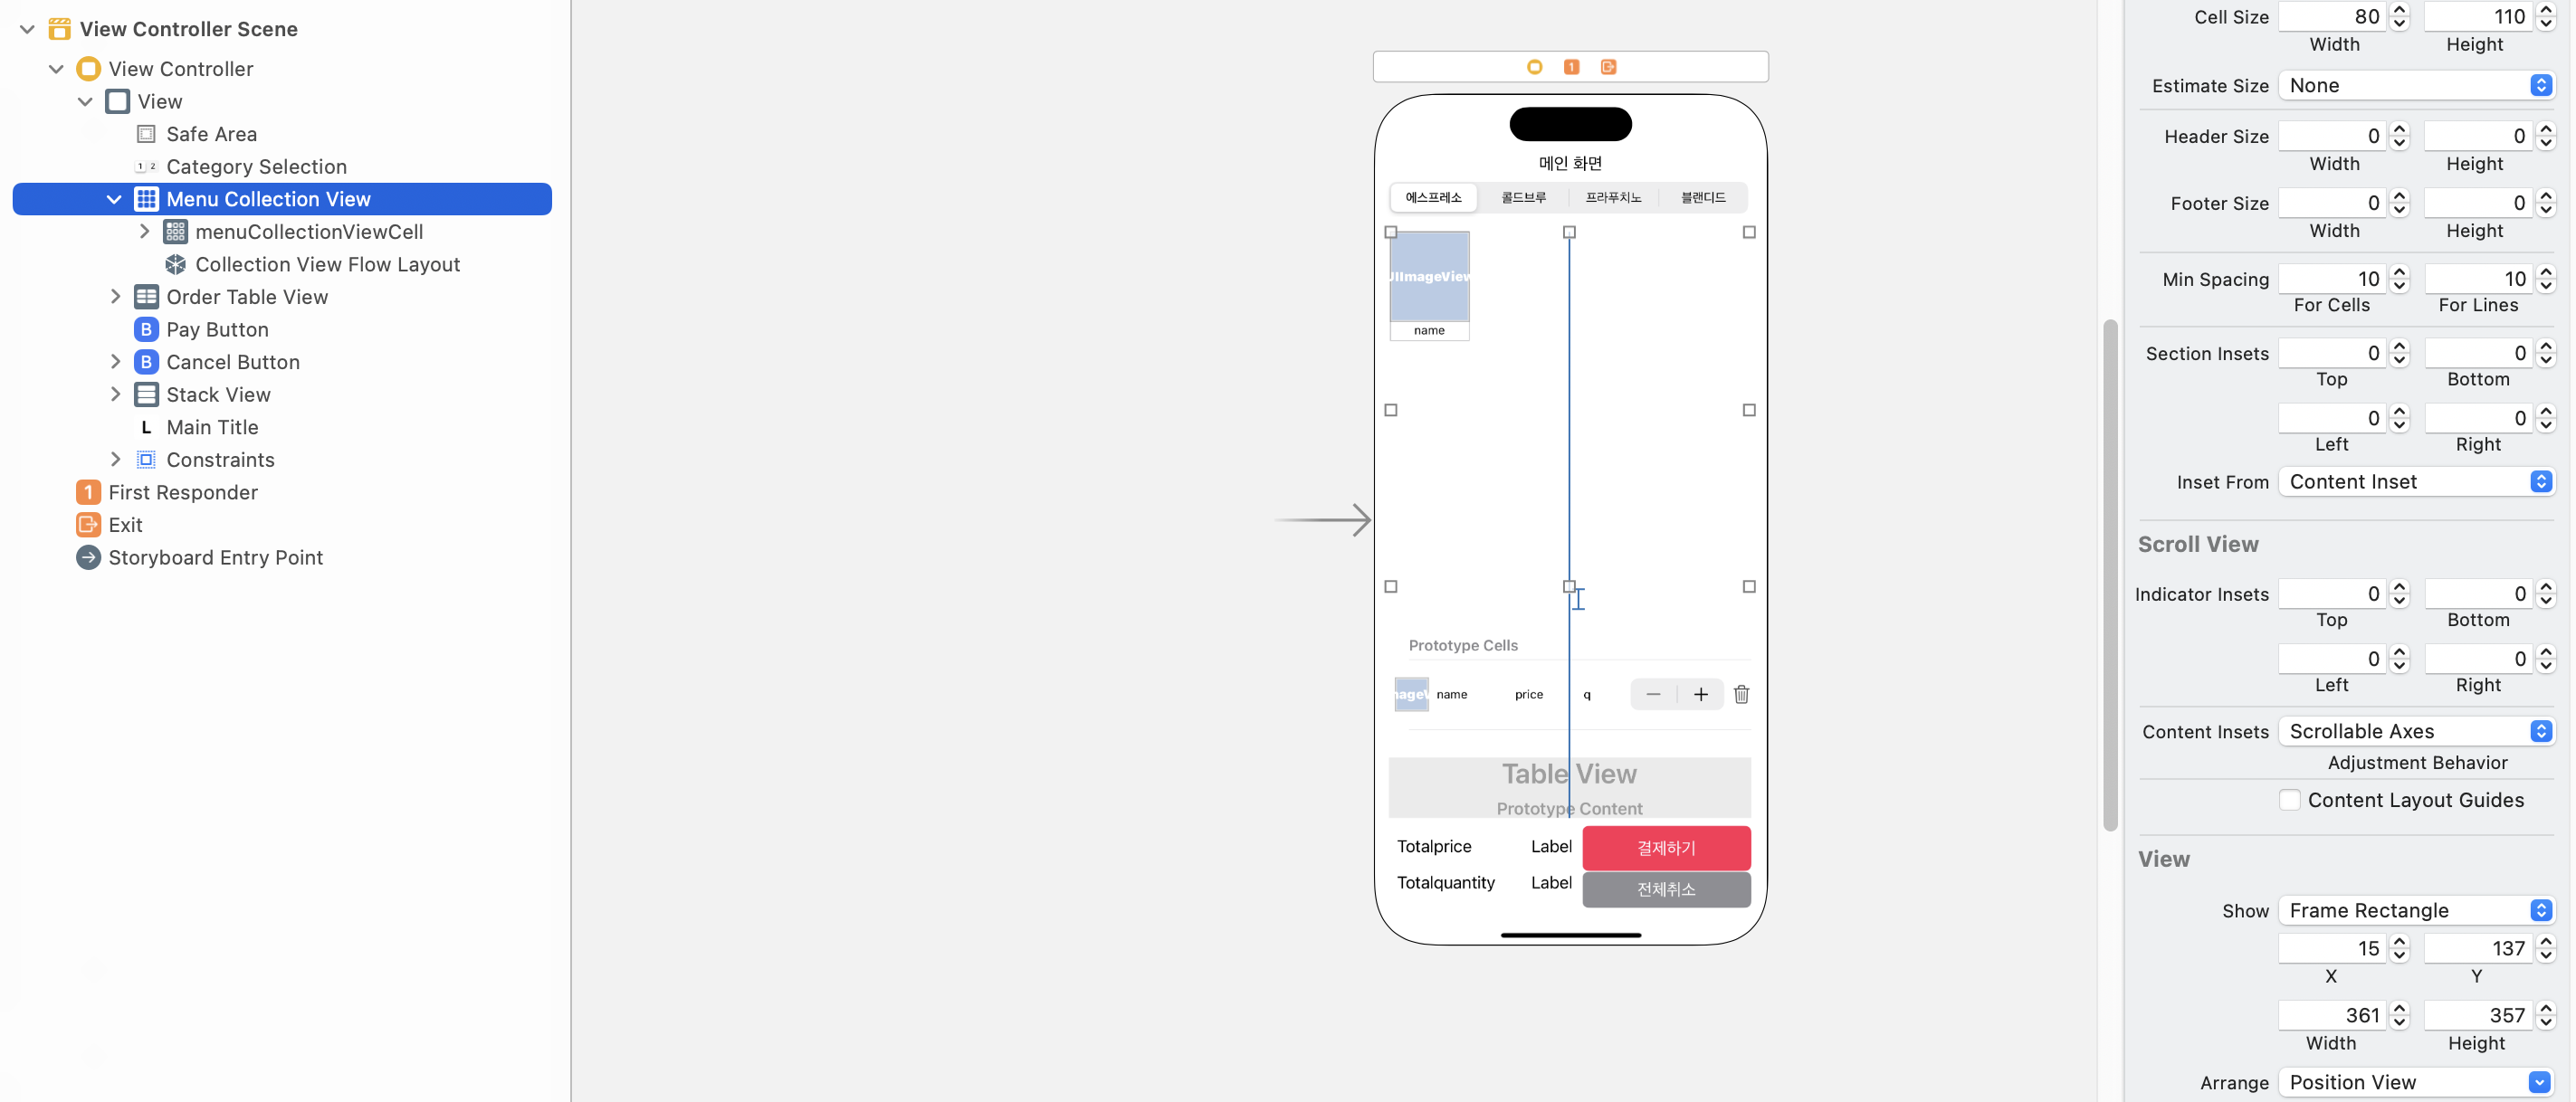
- CollectionView 의 Size Inspector를 보면,
Cell Size: width = 80, height = 110로 설정이 되어있고, 아래에 Estimate Size가 None으로 설정되어 있는 것을 볼 수 있다. - 추측컨데, 인스펙터에서 설정할 수 있는 Cell Size 안의 수치는 코드베이스로 셀의 크기를 설정할 때
UICollectionViewDelegateFlowLayout메소드로 설정하는 것과 같은 역할을 하는 것으로 보인다. 이 때Estimate Size = None으로 설정해주어여 해당 구문이 정상적으로 적용되는 것 같다.
UISegmentedControl을 사용해서 데이터를 보내주는 여러 예제를 보고 구현을 진행했는데, 성공적으로 구현이 된 것 같다.
과제를 제출한 후 피드백을 받고, 지금 이해한 부분이 제대로 된 것인지 체크한 다음에 작성하는 TIL에서 정확히 정리하도록 하겠다!

iOS 개발자가 되고 싶어요