졸업 프로젝트 BellyWelly의 서버 개발을 맡았다.
서버는 Springboot로 만들고 AWS와 Docker를 이용하여 배포할 예정이다.
DB는 MySQL을 사용하고, 사용자 회원가입 및 로그인 시 사용하는 JWT 리프레시 토큰을 저장하기 위해 Redis도 도입할 것이다.
❓ 기술 스택 선택 이유
-
Springboot
1) spring-boot-stater를 통한 dependency 관리 자동화
2) 내장 톰캣 (내장 웹서버)
3) 설정 자동화 (AutoConfiguraton)
4) 독립적으로 실행 가능한 배포 -
Docker
도커를 이용해서 배포해본 경험이 없어서 이번 프로젝트에서 꼭 써보고 싶었다! -
MySQL
우리 서비스의 데이터를 저장하기에 RDB가 적합할 것이라고 판단하였고,
RDB 중 무료로 사용 가능하고 가장 친숙한 MySQL을 선택하였다. -
redis
In-memory DB로, 빠른 액세스 속도를 보장하기 때문에 리프레시 토큰 저장소로 가장 많이 쓰인다.
졸업 프로젝트 서버 구축 시작!
1. JAVA 17 설치
brew install openjdk@17
2. Spring Initializr(https://start.spring.io/)에서 초기 설정하기
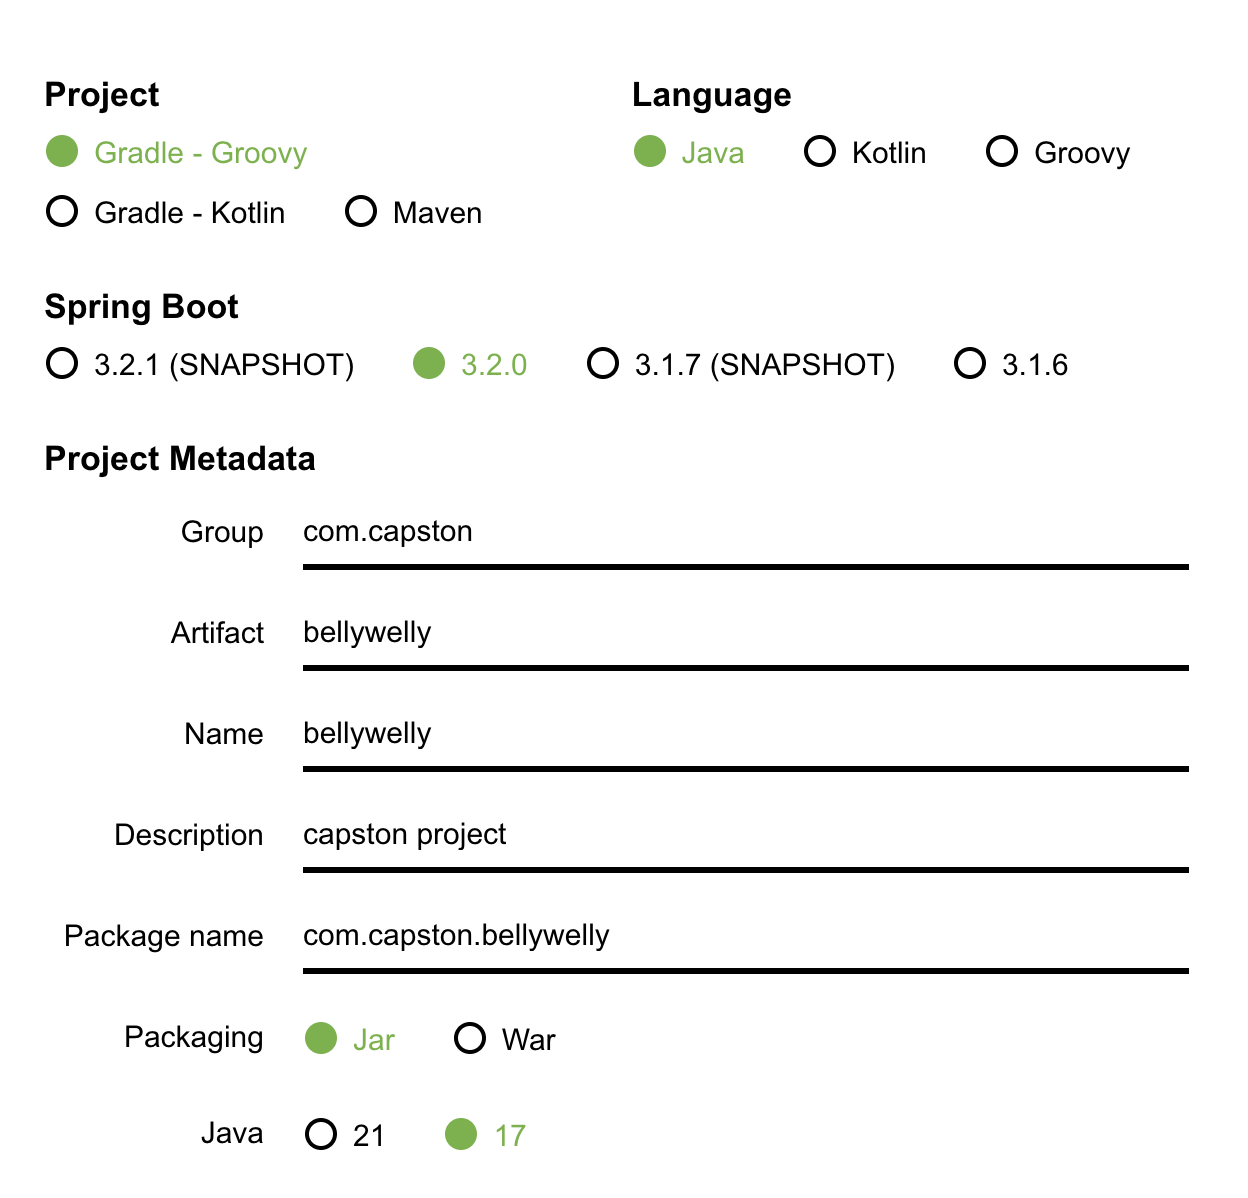
- 의존성은 프로젝트를 받은 후
build.gradle에서 설정하겠다.
3. build.gradle 설정
plugins {
    id 'java'
    id 'org.springframework.boot' version '3.2.0'
    id 'io.spring.dependency-management' version '1.0.15.RELEASE'
}

group = 'com.capston'
version = '0.0.1-SNAPSHOT'

java {
    sourceCompatibility = '17'
}

onfigurations {
    compileOnly {
        extendsFrom annotationProcessor
    }
}

repositories {
    mavenCentral()
}

dependencies {
    // spring
    implementation 'org.springframework.boot:spring-boot-starter-web'
    implementation 'org.springframework.boot:spring-boot-starter-security'
    implementation 'org.springframework.boot:spring-boot-starter-validation'
    // lombok
    compileOnly 'org.projectlombok:lombok'
    annotationProcessor 'org.projectlombok:lombok'
    // jwt
    implementation 'io.jsonwebtoken:jjwt-api:0.12.3'
    runtimeOnly 'io.jsonwebtoken:jjwt-impl:0.12.3'
    runtimeOnly 'io.jsonwebtoken:jjwt-jackson:0.12.3'
    // swagger
    implementation 'org.springdoc:springdoc-openapi-ui:1.7.0'
    implementation 'org.springdoc:springdoc-openapi-security:1.7.0'
    // database
    implementation 'org.springframework.boot:spring-boot-starter-data-redis'
    implementation 'org.springframework.boot:spring-boot-starter-data-jpa'
    runtimeOnly 'com.mysql:mysql-connector-j'
    // test
    testRuntimeOnly 'com.h2database:h2'
    testImplementation 'org.springframework.boot:spring-boot-starter-test'
}

tasks.named('test') {
    useJUnitPlatform()
}
4. application.yml 설정
# 스프링 및 데이터베이스 설정
spring:
  datasource:
    driver-class-name: com.mysql.cj.jdbc.Driver
    url: jdbc:mysql://localhost:3306/bellywelly?serverTimezone=UTC&characterEncoding=UTF-8
    username: {username}
    password: {password}
  jpa:
    generate-ddl: true
    hibernate:
      ddl-auto: update
    properties:
      hibernate:
        dialect: org.hibernate.dialect.MySQL5InnoDBDialect
  redis:
    host: localhost
    port: 6379

# 로깅 설정
logging:
  level:
    com.capston.bellywelly: debug
    sql: debug

# swagger 설정
springdoc:
  swagger-ui:
    path: /docs

# jwt 설정
jwt:
  secret: {jwt-secret}