
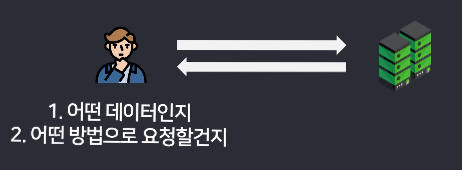
서버란?
데이터 달라고 하면 데이터 보내주는 프로그램

그냥 데이터를 달라고 하면 안준다!
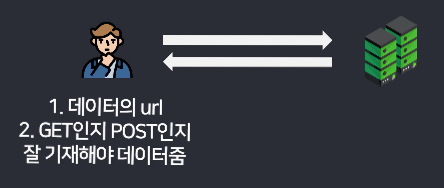
GET/POST 요청하는 방법
- GET요청 : 서버에 있던 데이터를 읽고싶을 때 주로 사용
- POST : 서버로 데이터를 보내고 싶을 때 사용 (서버는 유저데이터를 DB에 저장해주는 역할도 한다)
GET 요청을 날리는 가장 쉬운 방법은 브라우저 주소창이다
POST 요청하는 방법은 <form action="요청할url" ethod="post">
GET, POST 요청을 날렸을 때 단점은 브라우저가 새로고침 되는 것
AJAX
서버에 GET, POST 요청을 할 때 새로고침 없이 데이터를 주고받을 수 있게 도와주는 간단한 브라우저 기능
jQuery로 AJAX 요청하기
$.get() 이라는 함수 쓰고 안에 url 기입하기
$.get('https://codingapple1.github.io/hello.txt').done(function(data){
  console.log(data)
});
-> 인삿말 출력
데이터가 어디 들어있냐면 .done 아니면 .then 뒤에 붙이고 콜백함수를 넣고 파라미터를 하나 만들면 거기에 들어있다
(위 예제에서 data)
$.post('url~~', {name : 'kim'})-> POST 요청 날리기
$.get('https://codingapple1.github.io/hello.txt')
  .done(function(data){
    console.log(data)
  })
  .fail(function(error){
    console.log('실패함')
  });
ajax 요청 성공 시 .done 안에 있는 코드 실행
ajax 요청 실패 시 .fail 안에 있는 코드 실행
jQuery가 아닌 쌩JS에서는 fetch 사용하여 ajax 요청
fetch('https://codingapple1.github.io/price.json')
  .then(res => res.json())
  .then(function(data){
    console.log(data)
  })
  .catch(function(error){
    console.log('실패함')
  });
fetch함수는 Edge브라우저 이상에서만 동작한다
.then(res => res.json())코드가 한줄 더 필요한 이유는
서버와 데이터를 주고받을 때에는 문자만 주고받을 수 있다 (ex. array object 는 전송 불가능)
하지만 아까 { price : 5000 } 이런 object 를 무리없이 받아올 수 있는 이유는?
object를 JSON으로 바꿔서 전송했기 때문이다
jQuery의 $.get() 이런건 JSON으로 자료가 도착하면 알아서 array/object 자료로 바꿔줌
하지만 기본함수 fetch()는 JSON으로 자료가 도착하면 알아서 바꿔주지 않는다
   <div class="container">
     <div class="row">
       <div class="col-sm-4">
         <img src="https://via.placeholder.com/600" class="w-100" />
         <h5>Card title</h5>
         <p>가격 : 70000</p>
       </div>
       <div class="col-sm-4">
         <img src="https://via.placeholder.com/600" class="w-100" />
         <h5>Card title</h5>
         <p>가격 : 70000</p>
       </div>
       <div class="col-sm-4">
         <img src="https://via.placeholder.com/600" class="w-100" />
         <h5>Card title</h5>
         <p>가격 : 70000</p>
       </div>
     </div>
   </div>

   <script>
     var products = [
       { id: 0, price: 70000, title: "Blossom Dress" },
       { id: 1, price: 50000, title: "Springfield Shirt" },
       { id: 2, price: 60000, title: "Black Monastery" },
     ];
     $(".col-sm-4:nth-child(1) h5").html(products[0].title);
     $(".col-sm-4:nth-child(1) p").html(products[0].price);
     $(".col-sm-4:nth-child(2) h5").html(products[1].title);
     $(".col-sm-4:nth-child(2) p").html(products[1].price);
     $(".col-sm-4:nth-child(3) h5").html(products[2].title);
     $(".col-sm-4:nth-child(3) p").html(products[2].price);
   </script>
새로 만든 div container에 html 생성 완료!
강의에선?
    <script>
      var products = [
        { id: 0, price: 70000, title: "Blossom Dress" },
        { id: 1, price: 50000, title: "Springfield Shirt" },
        { id: 2, price: 60000, title: "Black Monastery" },
      ];

      var 템플릿 = `<div class="col-sm-4">
        <img src="https://via.placeholder.com/600" class="w-100">
        <h5>${products[0].title}</h5>
        <p>가격 : ${products[0].price}</p>
      </div>`;
      $(".row").append(템플릿);

      var 템플릿 = `<div class="col-sm-4">
        <img src="https://via.placeholder.com/600" class="w-100">
        <h5>${products[1].title}</h5>
        <p>가격 : ${products[1].price}</p>
      </div>`;
      $(".row").append(템플릿);

      var 템플릿 = `<div class="col-sm-4">
        <img src="https://via.placeholder.com/600" class="w-100">
        <h5>${products[2].title}</h5>
        <p>가격 : ${products[2].price}</p>
      </div>`;
      $(".row").append(템플릿);
    </script>
이 코드를 반복문으로 다시 바꿈
var products = 생략;

products.forEach((a, i)=>{
      var 템플릿 =
      `<div class="col-sm-4">
        <img src="https://via.placeholder.com/600" class="w-100">
        <h5>${products[i].title}</h5>
        <p>가격 : ${products[i].price}</p>
      </div>`;
      $('.row').append(템플릿)
});