개발 블로그의 기념비적인 첫 글을 작성하게 되었다.
다양한 주제가 있겠지만 첫 글이니만큼, 얼마 전에 생겼던 가벼운 궁금증에 대해 알아보고자 한다.
토스의 아래로 스크롤하기 버튼
이 주제는 얼마 전 토스 앱을 사용하다가 발견하면서 생긴 의문인데, 약관 동의와 유사한 화면에서 버튼을 누르면 특정 지점으로 자동으로 스크롤 되는 기능을 보게 되었다.
사실 유저가 제스처로 하는 스크롤 외에는 다른 방법을 생각해본 적이 없는 내 입장에서는 흥미가 생기는 기능이었다.
그래서 어떻게 이 기능을 구현할 수 있을지 한 번 고민해본 흔적을 기록해보려고 한다.
ScrollViewReader?
우선은 제스처가 아닌 프로그래밍 방식으로 스크롤 하는 방법을 찾아보다가 ScrollViewReader라는 것을 발견했다.
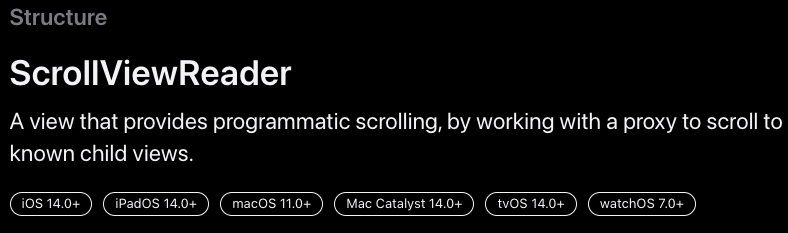
공식문서에 정의된 내용으로는 "proxy를 이용하여 프로그래밍 방식으로 ScrollView 내의 하위 뷰로 스크롤할 수 있는 기능을 제공하는 View" 라고 적혀있다.
정의만 보았을때는 아직은 사용법이 감이 오지 않으니 문서를 하나씩 살펴보자.
Apple 공식문서 예시
@Namespace var topID
@Namespace var bottomID
var body: some View {
ScrollViewReader { proxy in
ScrollView {
Button("Scroll to Bottom") {
withAnimation {
proxy.scrollTo(bottomID)
}
}
.id(topID)
VStack(spacing: 0) {
ForEach(0..<100) { i in
color(fraction: Double(i) / 100)
.frame(height: 32)
}
}
Button("Top") {
withAnimation {
proxy.scrollTo(topID)
}
}
.id(bottomID)
}
}
}
func color(fraction: Double) -> Color {
Color(red: fraction, green: 1 - fraction, blue: 0.5)
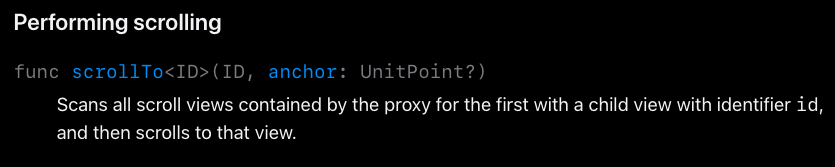
}코드를 읽어보니 ScrollViewReader로 ScrollView를 감싸주고, 하위 View에 ID를 달아준 뒤, proxy.scrollTo 메서드를 통해 해당 View의 위치로 이동하는 것 같았다.
내 코드에 적용하기 전에 proxy에 대해서도 한번 찾아보자.
ScrollViewProxy
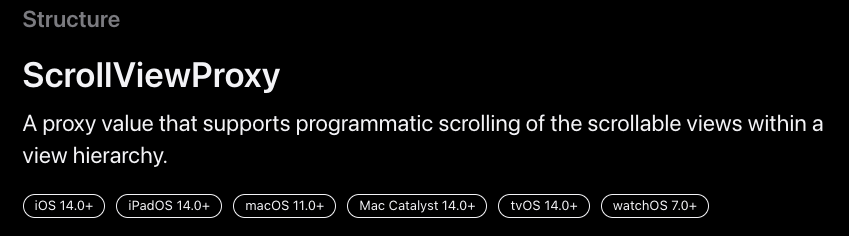
View 계층 내에서 프로그래밍 스크롤 방식을 제공하는 proxy 값이라고 한다.
ID는 스크롤 가능한 대상 View를 식별하기 위한 식별자로 되어있으며, 문서에는 기재되어있지 않지만 Hashable을 준수하는 값이 들어가면 된다고 한다.
Hashable도 항상 채택만 해보고 따로 찾아보지 않았는데, 다음 기회에 한번 제대로 이해해봐야겠다.
아래로 스크롤하기 버튼 동작 구현
ScrollView
 		VStack {
            // MARK: -ScrollView : proxy로 스크롤을 조절할 수 있는 ScrollView
            ScrollViewReader { proxy in
                ScrollView {
                    VStack(alignment : .leading) {
                        ForEach(scrollViewModel.scrollModels.indices) { index in
                            Text(scrollViewModel.scrollModels[index].title)
                                .font(.largeTitle.bold())
                                .padding(.bottom, 20)
                                .id(IDList[index])

                            Text(scrollViewModel.scrollModels[index].content)
                                .font(.body)
                                .padding(.bottom, 60)

                        }
                        .padding(.horizontal, 20)
                    }
                }
            }
        }
        .padding(.top, 20)
우선 약관으로 쓸 내용은 Apple 공식 홈페이지의 웹페이지 이용 약관을 참고했다.
먼저 ScrollViewReader로 ScrollView를 감싸주고 ForEach로 이용약관을 섹션별로 담아둔 배열 scrollModels를 돌면서 뷰를 그려주었다.
그리고 미리 [0,1,2,3]을 담아둔 IDList를 index로 접근해서 약관 섹션의 타이틀 텍스트에 각각 달아주었다.
Button
				// MARK: -Button : 화면 하단에 고정 위치로 존재하는 버튼
                if let lastID = IDList.last {
                    if currentID < lastID {
                        Button {
                            increaseID()
                            withAnimation {
                                proxy.scrollTo(IDList[currentID])
                            }
                        } label: {
                            Text("아래로 스크롤하기")
                                .modifier(ScrollOverlayButtonModifier(isAgreeDone: $isAgreeDone))
                        }
                    } else {
                        agreeButton
                    }
                }
다음으로 누를 때마다 proxy의 scrollTo 메서드를 호출해서 다음 ID의 위치로 이동할 수 있는 버튼을 생성해주었다.
이 때 animation을 달아주어서 즉시 이동하지 않고, 스크롤 되듯이 이동하도록 했다.
ID가 List 끝에 도달하면 버튼을 '동의하기' 버튼으로 변경해주었다.
코드를 작성하고 실행해보니 작동은 하는데 뭔가 이상하다. 다음 타이틀이 뷰의 가장 위쪽에 오도록 스크롤이 되야하는데, 가장 아래쪽에 나타나는 지점에서 스크롤이 멈춘다.
공식문서를 다시 찾다보니 scrollTo의 파라미터 중 anchor가 있는 것을 발견했다.
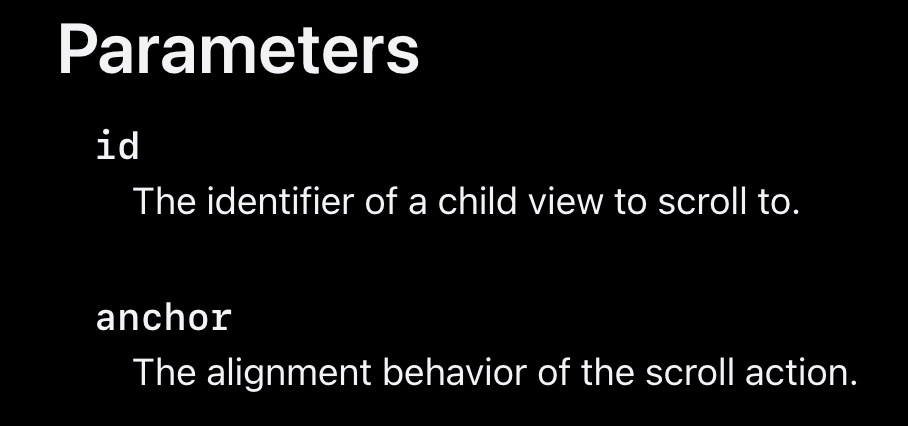
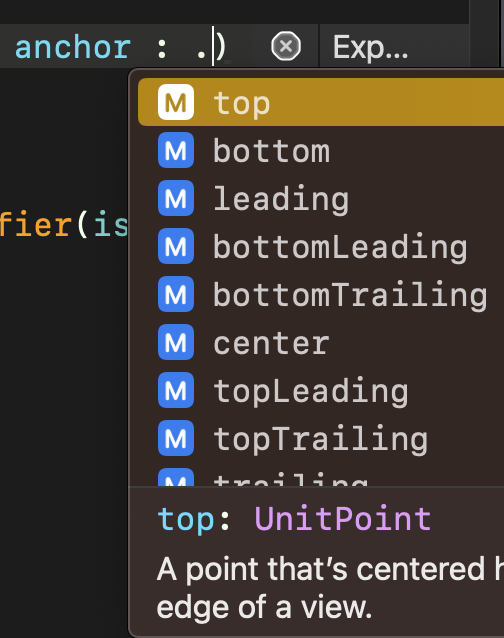
Scroll 동작의 alignment를 설정해줄 수 있는 파라미터로 이렇게 정렬 기준 위치를 잡아줄 수 있다.
anchor를 top으로 적용해주니까 의도한대로 잘 나오는 것을 확인할 수 있었다.
처음에는 토스의 UX에 감탄하면서 호기심이 생겨서 알아보게 되었지만, 구현하고보니 채팅창 View에서 실시간으로 신규 채팅이 생성되었을 때, 자동으로 스크롤을 내려주도록 하는데도 활용할 수 있을 것 같다.
전체 코드
import SwiftUI

struct MyScrollView: View {

    let IDList : [Int] = [0,1,2,3]

    @ObservedObject var scrollViewModel : ScrollViewModel = ScrollViewModel(
        scrollModels: [scrollModel1, scrollModel2, scrollModel3, scrollModel4]
    )
    @State private var currentID : Int = 0
    @State private var isAgreeDone : Bool = false

    var body: some View {
        VStack {
        // MARK: -ScrollView : proxy로 스크롤을 조절할 수 있는 ScrollView
            ScrollViewReader { proxy in
                ScrollView {
                    VStack(alignment : .leading) {
                        ForEach(scrollViewModel.scrollModels.indices) { index in
                            Text(scrollViewModel.scrollModels[index].title)
                                .font(.largeTitle.bold())
                                .padding(.bottom, 20)
                                .id(IDList[index])

                            Text(scrollViewModel.scrollModels[index].content)
                                .font(.body)
                                .padding(.bottom, 60)

                        }
                        .padding(.horizontal, 20)
                    }
                }
                // MARK: -Overlay : 화면 하단에 고정 위치로 존재하는 버튼 파트
                if let lastID = IDList.last {
                    if currentID < lastID {
                        Button {
                            increaseID()
                            withAnimation {
                                proxy.scrollTo(IDList[currentID])
                            }
                        } label: {
                            Text("아래로 스크롤하기")
                                .modifier(ScrollOverlayButtonModifier(isAgreeDone: $isAgreeDone))
                        }
                    } else {
                        agreeButton
                    }
                }
            }
        }
        .padding(.top, 20)
    }

    // MARK: -Button : 동의하기 버튼
    private var agreeButton : some View {
        Button {
            isAgreeDone = true
        } label: {
            Text(isAgreeDone ? "동의 완료" : "동의하기")
                .modifier(ScrollOverlayButtonModifier(isAgreeDone: $isAgreeDone))
        }
        .disabled(isAgreeDone)
    }

    // MARK: -Func : 현재 proxy ID를 1씩 증가시키는 함수
    private func increaseID() {
        self.currentID += 1
    }

}

// MARK: -Modifier : Overlay 버튼 Modifier
struct ScrollOverlayButtonModifier : ViewModifier {
    @Binding var isAgreeDone : Bool
    var backgroundColor : Color {
        return isAgreeDone ? .gray : .blue
    }

    func body(content: Content) -> some View {
        content
            .bold()
            .padding(.vertical, 10)
            .frame(width : 250)
            .foregroundColor(.white)
            .background(backgroundColor)
            .cornerRadius(15)
            .shadow(radius: 10)
            .padding(.bottom, 20)
    }
}