[Spring Framework] 스프링 프레임워크와 MyBatis 연결하여 api 만들기 - IntelliJ로 스프링 프레임워크 프로젝트 생성
INTRO
지난번에 오라클 클라우드에서 서버를 만들고 DB 연결하는 것까지 완료했었다. 이번에는 백엔드 api를 만들 생각이고, 스프링 프레임워크에 마이바티스를 연결하여 테스트 api를 실행하는 것까지 진행할 예정이다. 툴은 인텔리제이를 사용하여 진행한다.
순서는
1. 스프링 프레임워크 프로젝트 생성
2. 스프링 프레임워크 MyBatis 연동
3. Postman 을 통해 테스트API를 JSON 타입으로 호출
순서로 진행할 계획이다.
스프링 프레임워크에 대한 설명은 편의상 넣지 않았다.
선행 작업
- IntelliJ 설치
- Tomcat 등 구성요소들 설치
스프링 프레임워크 프로젝트 생성하기
Maven 프로젝트 생성하기
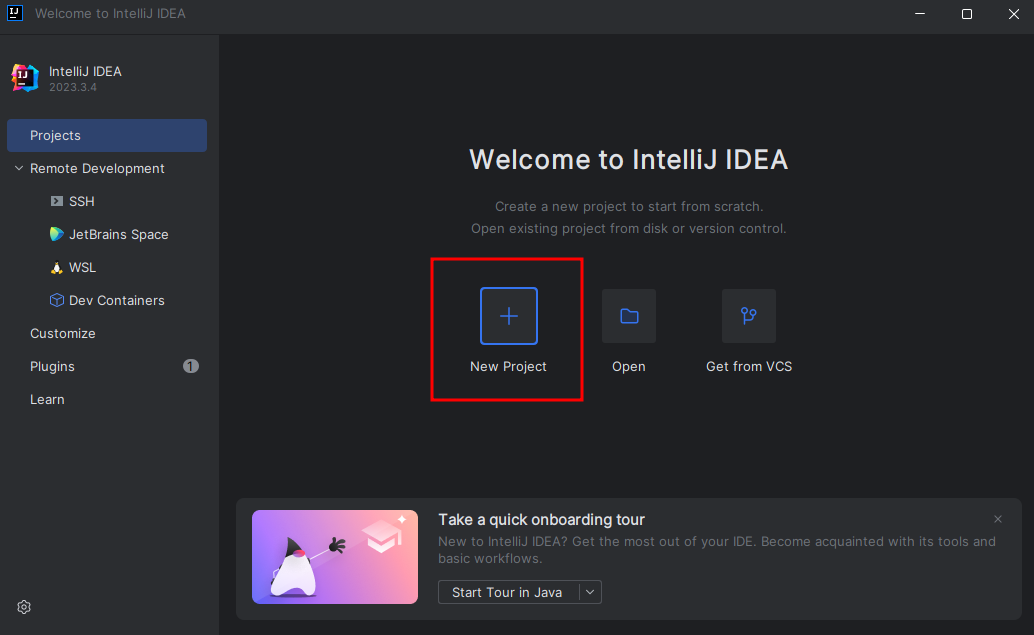
우선 인텔리제이를 실행해서 New Project 를 누른다.
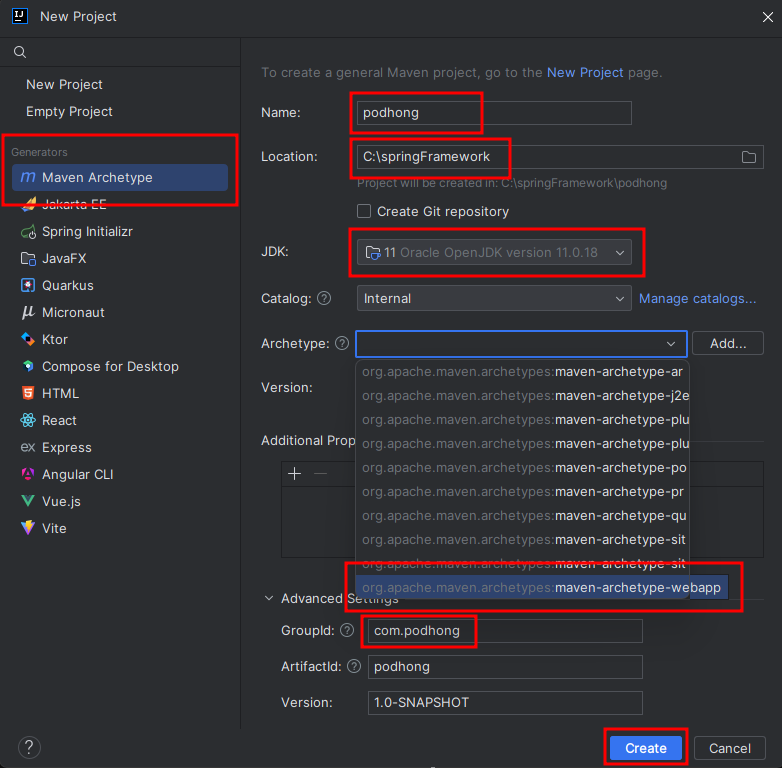
그러면 새 프로젝트를 만드는 창이 나오는데 여기서 왼쪽 Generators 에서 Maven Archetype 를 선택하고 이름, 경로, JDK 버전, GroupId(보통 도메인 역순)을 선택한다. 그리고 Archetype 을 maven-archetype-webapp 으로 설정한 뒤 create 를 눌러준다.
pom.xml dependency 설정하기
이제 pom.xml 파일에 스프링 프레임워크에 관련된 의존성을 추가해야된다. <dependencies></dependencies> 안에 다음 내용을 추가해준다. 넣고나면 찾을 수 없다고 빨간 줄이 주루룩 나올텐데, 오른쪽 툴바에 m 로고를 누르고 리로드 모양 버튼 reload all maven projects를 클릭하면 에러가 사라진다.
<dependency>
      <groupId>junit</groupId>
      <artifactId>junit</artifactId>
      <version>3.8.1</version>
      <scope>test</scope>
    </dependency>
    <!-- spring  -->
    <dependency>
      <groupId>org.springframework</groupId>
      <artifactId>spring-context</artifactId>
      <version>4.3.18.RELEASE</version>
    </dependency>

    <dependency>
      <groupId>org.springframework</groupId>
      <artifactId>spring-beans</artifactId>
      <version>4.3.18.RELEASE</version>
    </dependency>

    <dependency>
      <groupId>org.springframework</groupId>
      <artifactId>spring-core</artifactId>
      <version>4.3.18.RELEASE</version>
    </dependency>

    <dependency>
      <groupId>org.springframework</groupId>
      <artifactId>spring-aop</artifactId>
      <version>4.3.18.RELEASE</version>
    </dependency>

    <!-- spring mvc -->
    <dependency>
      <groupId>org.springframework</groupId>
      <artifactId>spring-webmvc</artifactId>
      <version>4.3.18.RELEASE</version>
    </dependency>

    <dependency>
      <groupId>org.springframework</groupId>
      <artifactId>spring-web</artifactId>
      <version>4.3.18.RELEASE</version>
    </dependency>

    <dependency>
      <groupId>javax.servlet</groupId>
      <artifactId>javax.servlet-api</artifactId>
      <version>3.1.0</version>
      <scope>provided</scope>
    </dependency>

    <dependency>
      <groupId>javax.servlet.jsp.jstl</groupId>
      <artifactId>jstl-api</artifactId>
      <version>1.2</version>
      <type>jar</type>
    </dependency>

    <dependency>
      <groupId>javax.servlet.jsp</groupId>
      <artifactId>jsp-api</artifactId>
      <version>2.2</version>
      <scope>provided</scope>
    </dependency>

    <dependency>
      <groupId>cglib</groupId>
      <artifactId>cglib</artifactId>
      <version>2.2.2</version>
    </dependency>

    <dependency>
      <groupId>org.springframework</groupId>
      <artifactId>spring-jdbc</artifactId>
      <version>4.3.18.RELEASE</version>
    </dependency>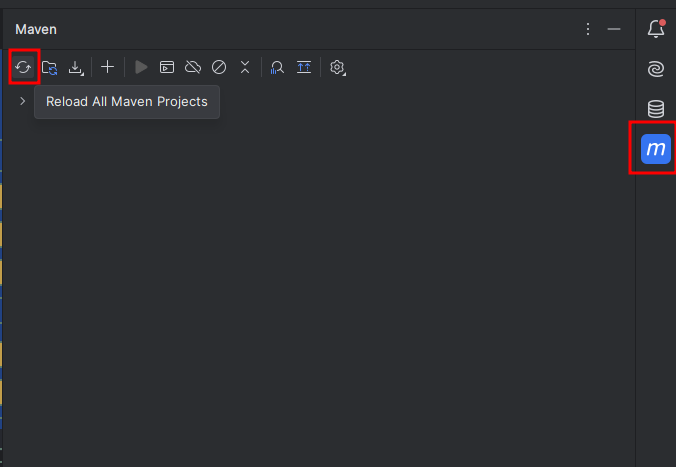
web.xml 수정하기
web.xml 은 기본적으로 src/main/webapp/WEB-INF 아래에 자동으로 생성되어있다. web.xml 안에 아래 코드를 작성해준다.
<?xml version="1.0" encoding="UTF-8"?>
<web-app xmlns="http://xmlns.jcp.org/xml/ns/javaee"
xmlns:xsi="http://www.w3.org/2001/XMLSchema-instance"
xsi:schemaLocation="http://xmlns.jcp.org/xml/ns/javaee http://xmlns.jcp.org/xml/ns/javaee/web-app_4_0.xsd"
version="4.0">
<display-name>Spring MVC</display-name>
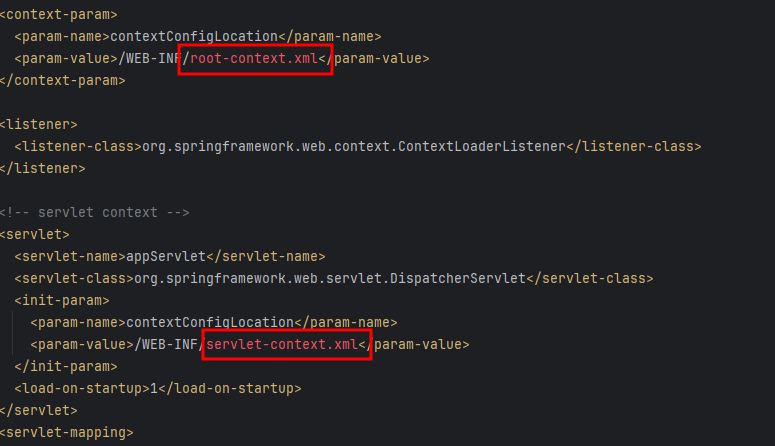
<!-- Root context -->
<context-param>
<param-name>contextConfigLocation</param-name>
<param-value>/WEB-INF/root-context.xml</param-value>
</context-param>
<listener>
<listener-class>org.springframework.web.context.ContextLoaderListener</listener-class>
</listener>
<!-- servlet context -->
<servlet>
<servlet-name>appServlet</servlet-name>
<servlet-class>org.springframework.web.servlet.DispatcherServlet</servlet-class>
<init-param>
<param-name>contextConfigLocation</param-name>
<param-value>/WEB-INF/servlet-context.xml</param-value>
</init-param>
<load-on-startup>1</load-on-startup>
</servlet>
<servlet-mapping>
<servlet-name>appServlet</servlet-name>
<url-pattern>/</url-pattern>
</servlet-mapping>
<!-- encoding filter -->
<filter>
<filter-name>encodingFilter</filter-name>
<filter-class>
org.springframework.web.filter.CharacterEncodingFilter
</filter-class>
<init-param>
<param-name>encoding</param-name>
<param-value>UTF-8</param-value>
</init-param>
</filter>
<filter-mapping>
<filter-name>encodingFilter</filter-name>
<url-pattern>/*</url-pattern>
</filter-mapping>
</web-app>그러면 에러가 아래 그림처럼 두 개가 있을텐데, 해당 파일이 없어서 에러가 난 것이다.
root-context.xml, servlet-context.xml 생성하기
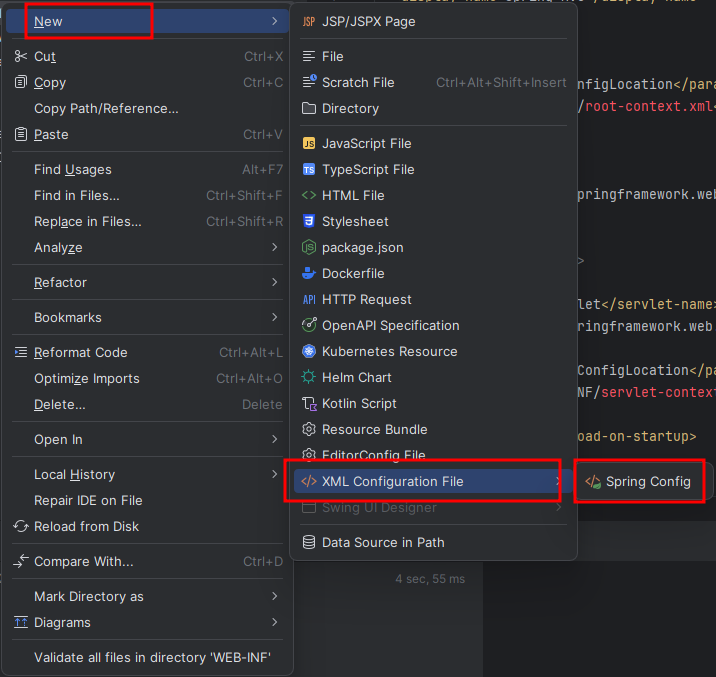
두 개 파일은 일반 xml로 생성하면 안되고 Spring Config 파일로 생성해야된다.
[WEB-INF] 폴더 우클릭 > New > XML Configuration File > Spring Config 를 클릭해서 두 개 파일을 생성한다.
두 파일을 생성한 뒤 servlet-context.xml 파일 내용만 아래 코드로 변경해준다.
<?xml version="1.0" encoding="UTF-8"?>
<beans xmlns="http://www.springframework.org/schema/beans"
       xmlns:mvc="http://www.springframework.org/schema/mvc"
       xmlns:xsi="http://www.w3.org/2001/XMLSchema-instance"
       xmlns:context="http://www.springframework.org/schema/context"
       xsi:schemaLocation="http://www.springframework.org/schema/beans
        http://www.springframework.org/schema/beans/spring-beans.xsd
        http://www.springframework.org/schema/mvc
        http://www.springframework.org/schema/mvc/spring-mvc.xsd
        http://www.springframework.org/schema/context http://www.springframework.org/schema/context/spring-context.xsd">

    <!-- This tag registers the DefaultAnnotationHandlerMapping and
         AnnotationMethodHandlerAdapter beans that are required for Spring MVC  -->
    <mvc:annotation-driven />
    <!-- This tag allows for mapping the DispatcherServlet to "/" -->
    <mvc:default-servlet-handler />

    <!-- Process annotations on registered beans like @Autowired... -->
    <context:annotation-config/>
    <!-- 컴포넌트 스캔 -->
    <context:component-scan base-package="com.example.mvcproject" />

    <!-- view 사용하면 아래 주석 해제 -->
    <!--<bean id="viewResolver"
          class="org.springframework.web.servlet.view.InternalResourceViewResolver">
        <property name="prefix" value="/WEB-INF/views/" />
        <property name="suffix" value=".jsp" />
    </bean>-->

</beans>
그러면 컴포넌트 스캔 부분에 오류가 발생하는데

base-package 를 자신의 groupId/artifactId로 변경한다. artifactId 는 보통 프로젝트명과 동일하다.
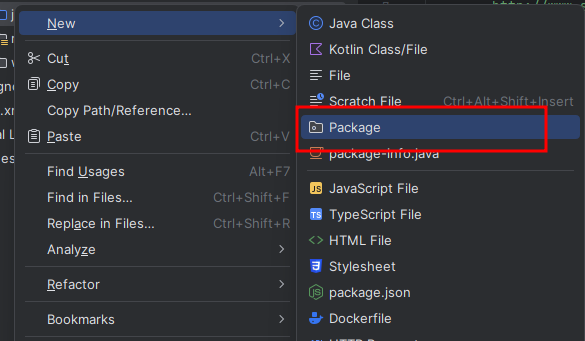
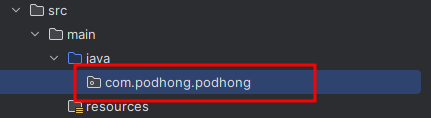
그 후 프로젝트 main 폴더 아래에 java 디렉토리를 추가해주고
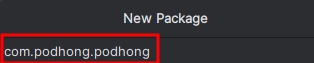
java 디렉토리 우클릭 > New > Package
를 한 뒤, com.example.project 패키지를 추가해준다.
Spring Module, Application Context 추가하기
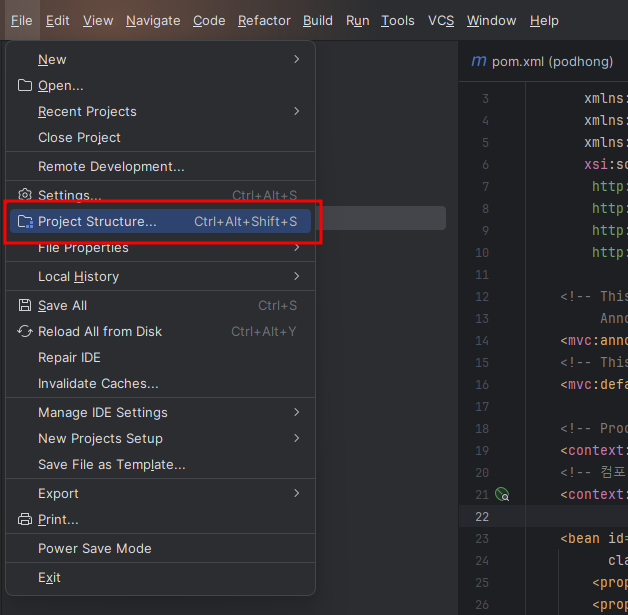
왼쪽 상단 메뉴를 클릭하여
File > Project Structure... 를 클릭
또는 ctrl + alt + shift + s 를 클릭
하여 프로젝트 구조 설정 창으로 들어간다.
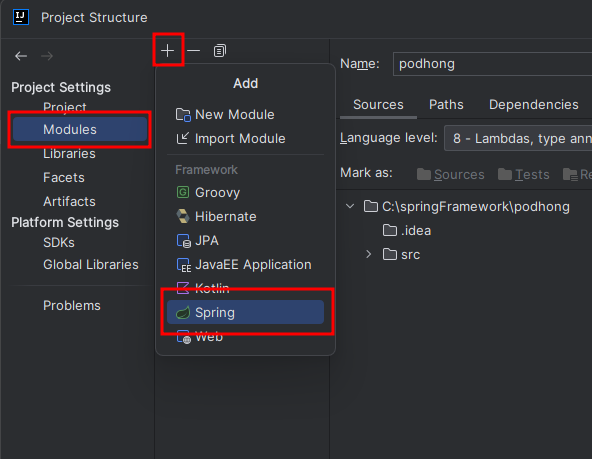
프로젝트 구조 창에 들어왔으면 왼쪽 메뉴에서
Modules 선택 > + 버튼 클릭 > Spring 을 한다.
+ 버튼 누른 후 위에서 생성한 xml 파일들을 선택해준 뒤 OK를 클릭한다.
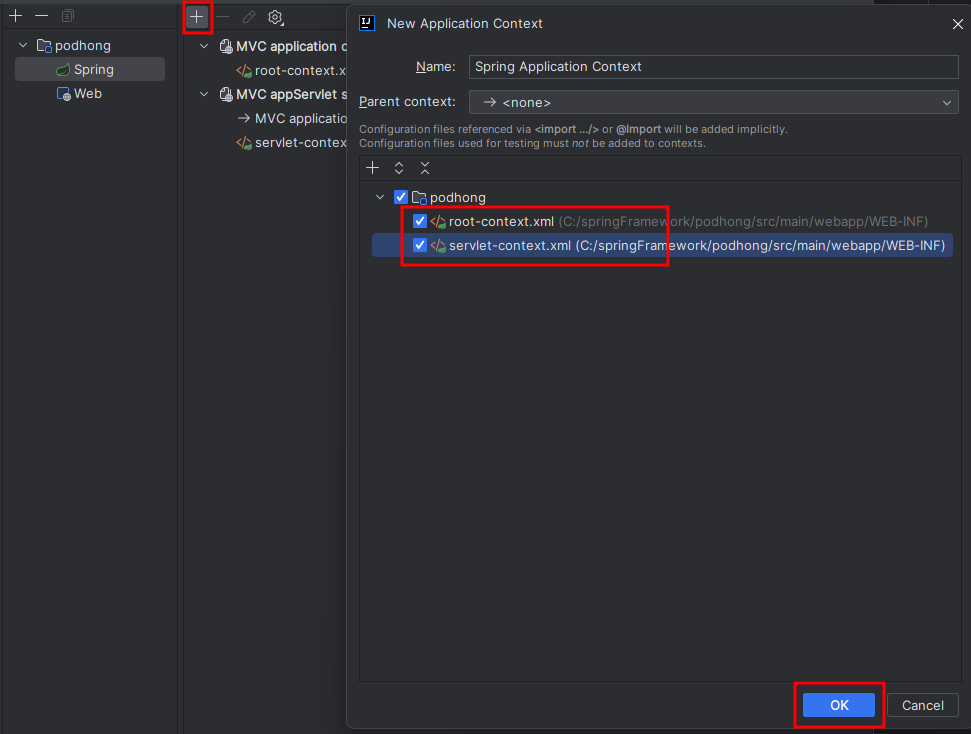
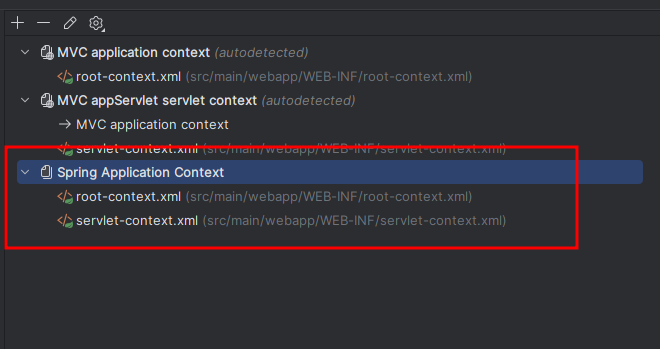
굿
컨트롤러, 뷰 만들기
설정이 잘 됐는지 확인하기 위해 컨트롤러를 만들어준다.
컨트롤러는 위에서 만든 패키지 안에 controller 패키지를 하나 더 만들어서 거기에 생성했다. 컨트롤러를 생성해준 뒤 샘플 코드를 작성해서 넣어주었다. 샘플 코드를 나중에 Json 형태로 반환할 것이기 때문에 @RestController 어노테이션을 사용했다.
package com.podhong.podhong.controller;

import org.springframework.web.bind.annotation.GetMapping;
import org.springframework.web.bind.annotation.RequestMapping;
import org.springframework.web.bind.annotation.RestController;

@RestController
@RequestMapping("/*")
public class HomeController {

    @GetMapping("/")
    public String sample(){
        return "hello";
    }
}
Tomcat 설정
이제 톰캣 설정만 해주고 실행시키면 끝이다.
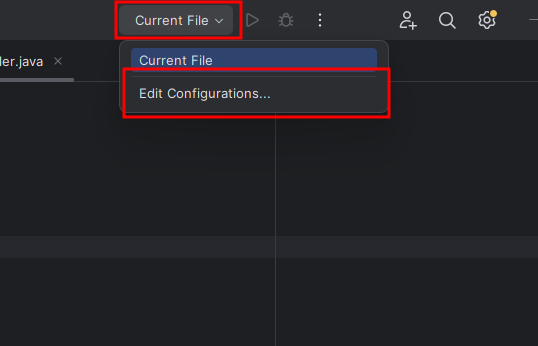
처음엔 Config 파일이 설정되어있지 않아 오른쪽 상단에 Current File 이라고 되어있을 것이다. 여기를 클릭해서 Edit Configurations... 를 클릭한다.
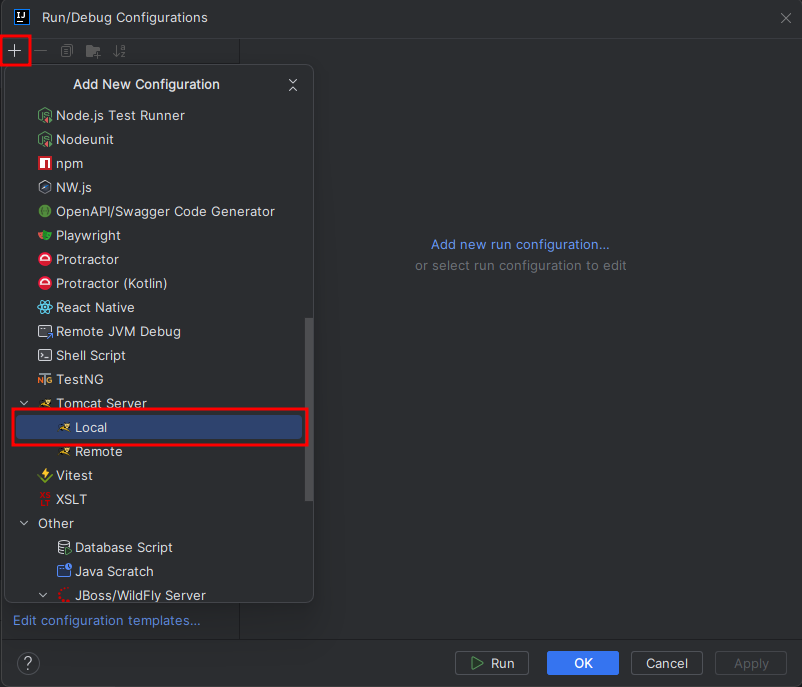
Config 창에 들어왔으면
상단 + 버튼 클릭 > Tomcat Server > Local 클릭한다.
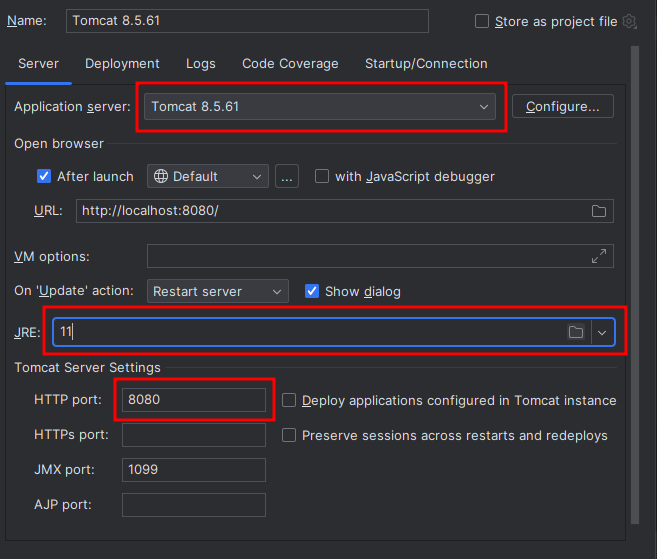
서버를 선택하고, JRE를 프로젝트랑 맞는 버전으로 변경해주고, 포트를 변경한다. 중간에 After launch 를 체크하면 실행할 때마다 창이 새로 열리니, 필요한 사람들은 사용하도록 하자. 필자는 나중에 불편해서 껐다.
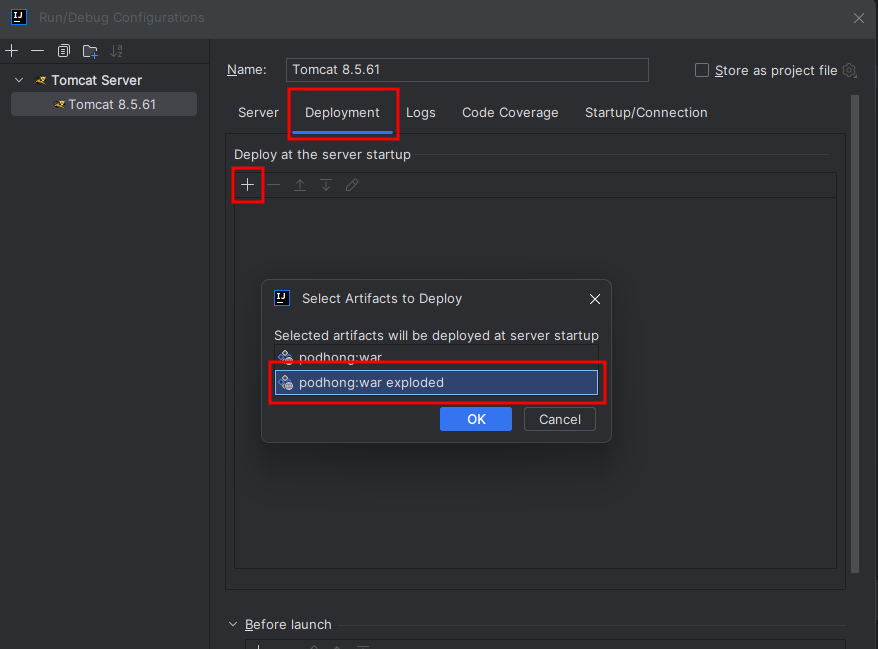
그 후 Deployment 탭으로 가서
+ 버튼 클릭 > Artifact... 클릭 > war exploded 클릭
을 하여 추가해준다.
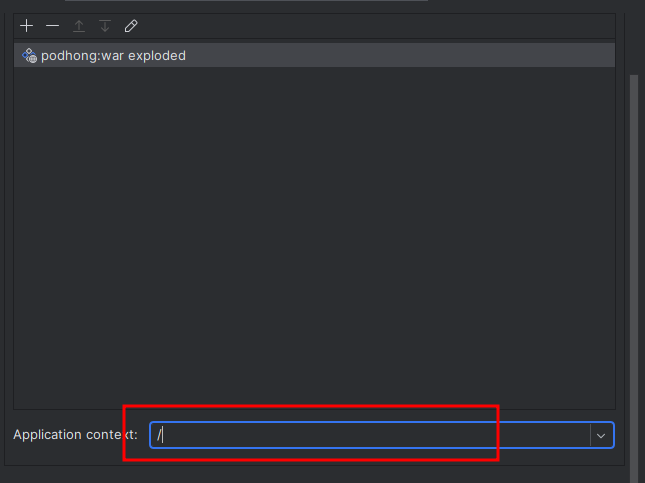
정상적으로 생성되었으면 아래 Application context 를 / 로 수정한 뒤 OK를 눌러 설정을 완료한다.
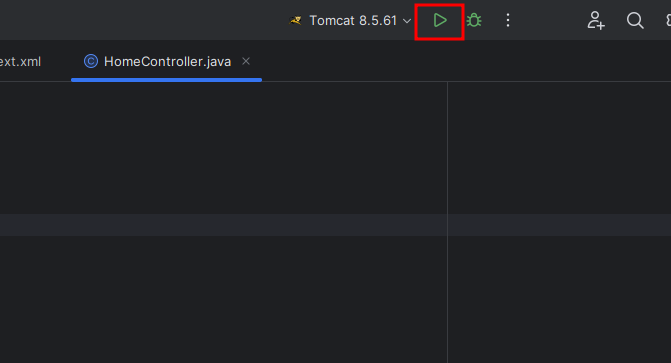
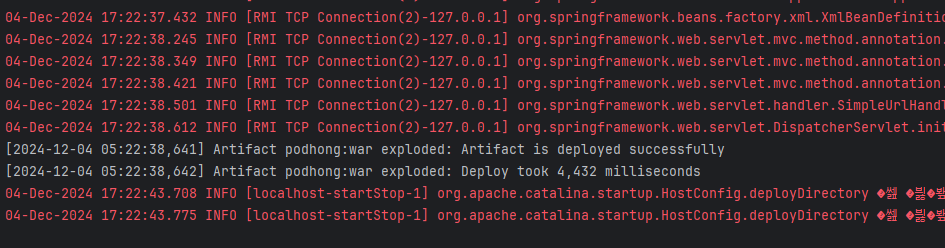
아까 Current File 이 방금 생성한 Tomcat 으로 변경되어있을 것이다. 오른쪽에 실행 or 디버깅 버튼을 눌러서 실행시켜주면
브라우저에서 아까 컨트롤러에 작성해둔 경로로 이동해보면
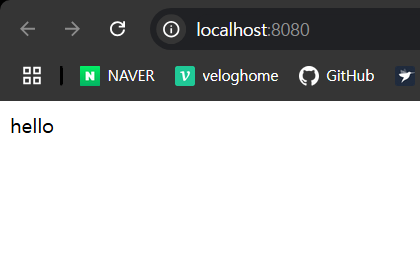
정상적으로 작동한다.