새 프로젝트 생성
인텔리제이 File → New → Project…
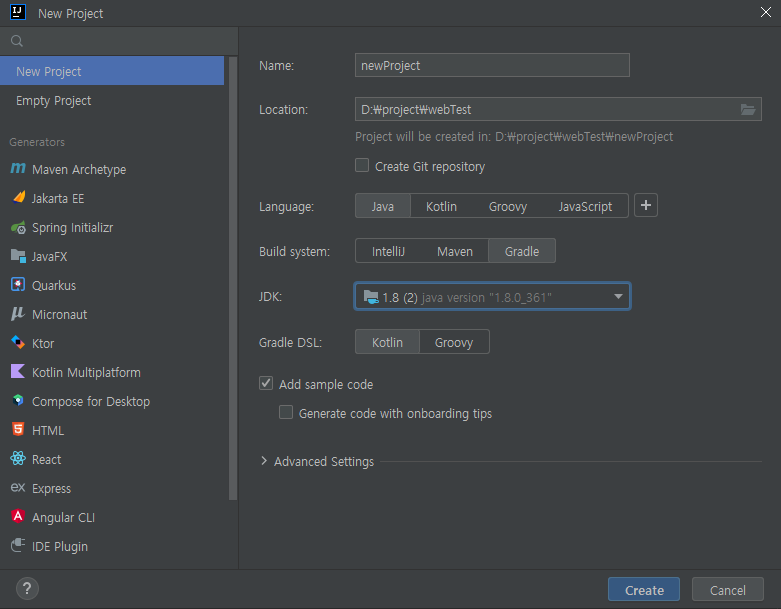
JDK : 원하는 jdk 버전 등록
Gradle DSL : Kotlin
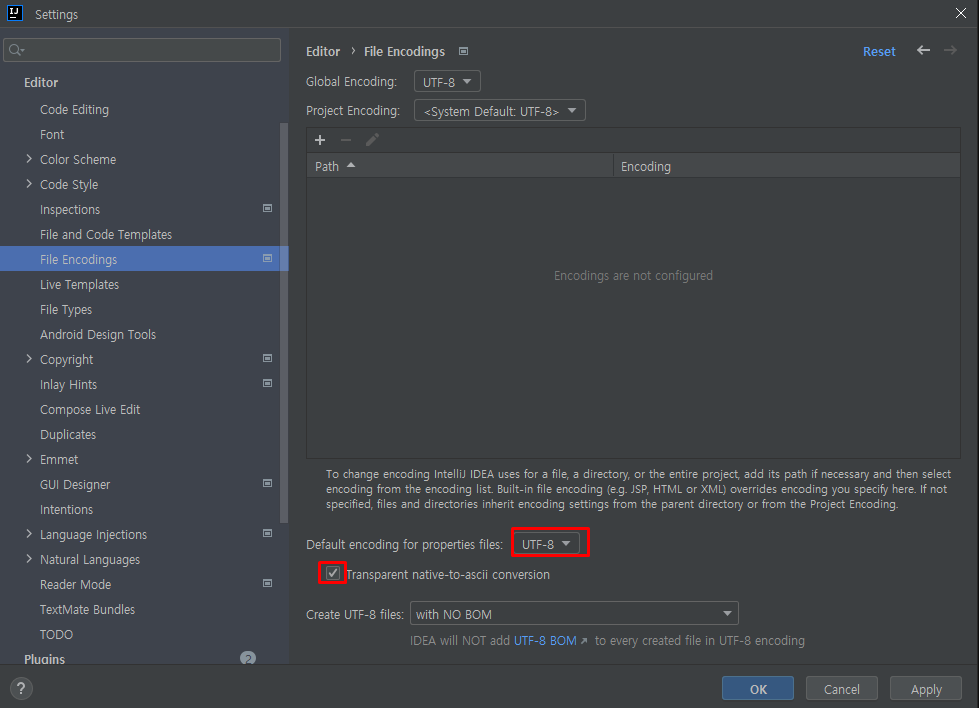
인텔리제이 환경설정 (File → Settings)
Editor → File Encodings
Build, Execution, Deployment → Build Tools → Gradle
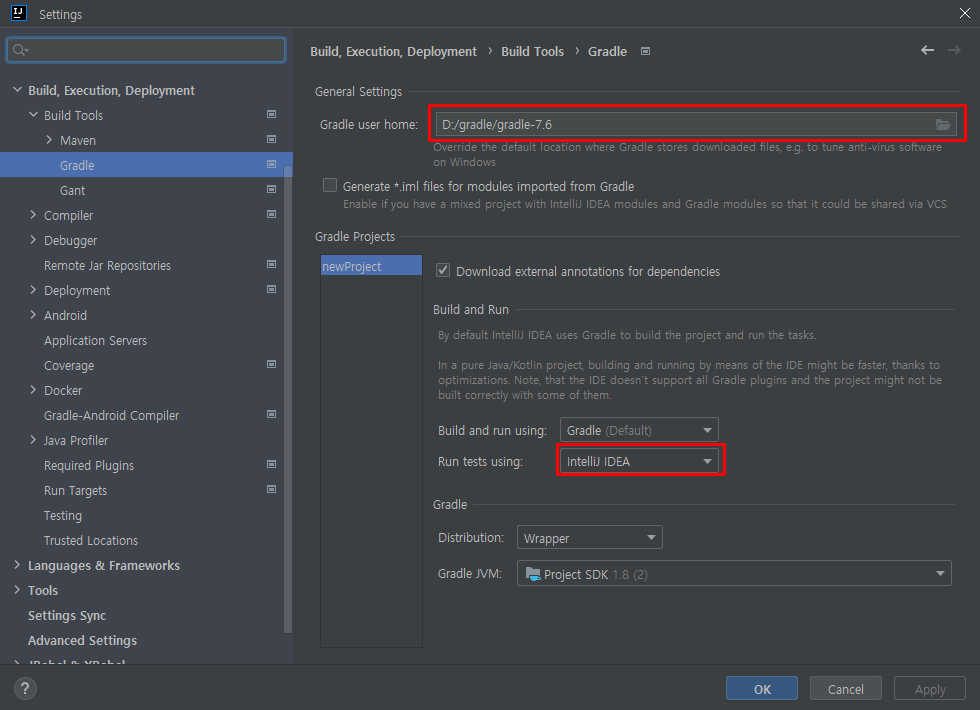
- Gradle user home : 사용하는 Gradle 버전 불러오기
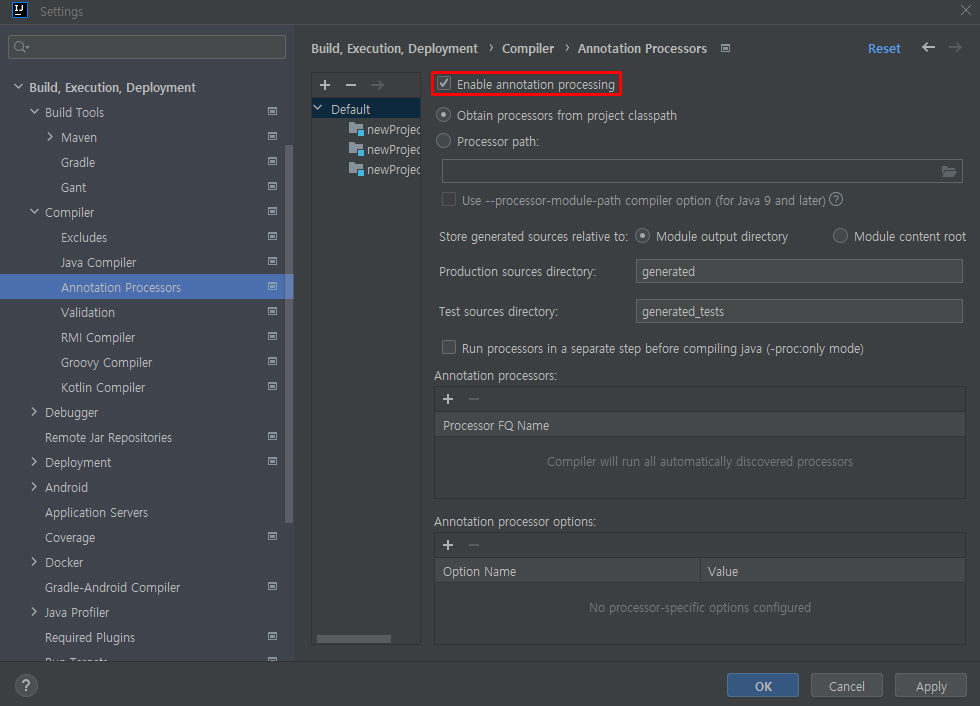
Build, Execution, Deployment → Compiler → Annotaion Processors
외부 라이브러리 의존성 주입
build.gradle.kts
plugins {
    id("java")
	id("war")
}

group = "org.example"
version = "1.0-SNAPSHOT"

repositories {
    mavenCentral()
}

dependencies {
    testImplementation("org.springframework:spring-test:4.2.0.RELEASE")
    testImplementation("junit:junit:4.12")

    compileOnly("org.projectlombok:lombok:1.18.22")
    compileOnly("javax.servlet:javax.servlet-api:3.1.0")

    implementation("org.springframework:spring-context:4.2.0.RELEASE")
    implementation("org.springframework:spring-webmvc:4.2.0.RELEASE")
}

tasks.test {
    useJUnitPlatform()
}- plugins 에 id(”war”) 추가
- 각 라이브러리의 버전은 본인 프로젝트에 맞게 지정
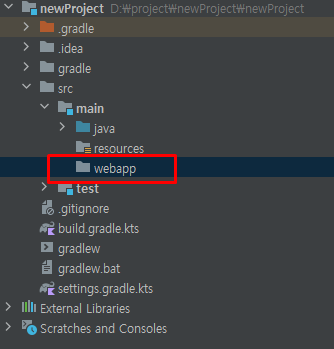
웹 프로젝트 구성
src → main 폴더 하위에 webapp 디렉토리 생성
webapp 하위에 WEB-INF 폴더 생성
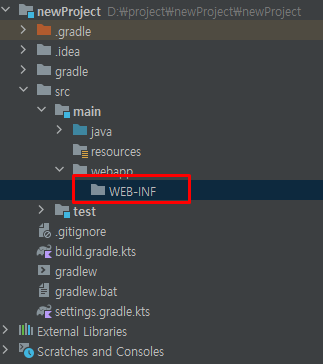
web.xml 생성
File → Project Structure
📌 build.gradle.kts 에 id("war") 를 추가하지 않았다면 아티팩트가 나타나지 않음
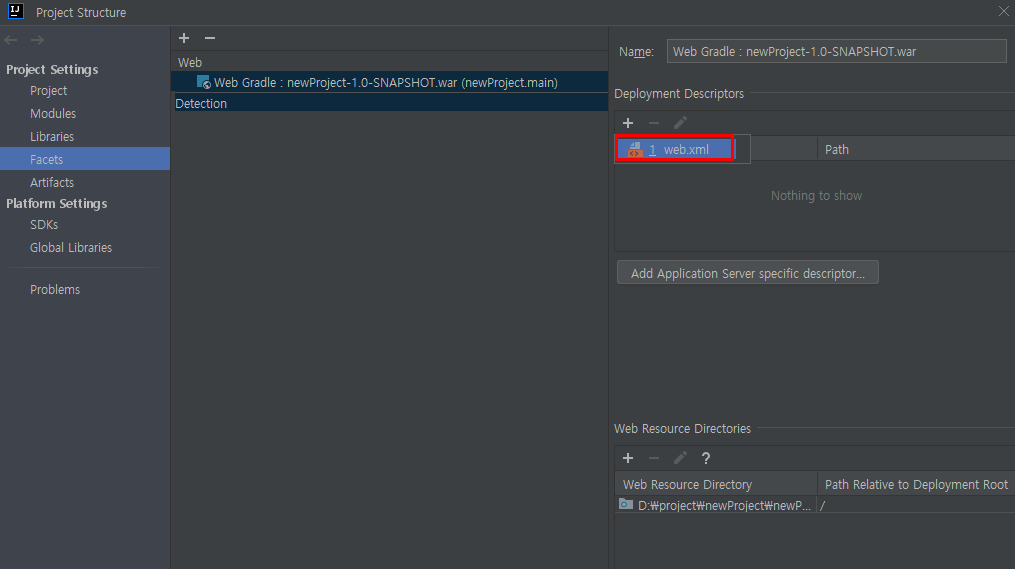
- Facets에서 Web 항목의 아티팩트를 선택하고 우측의 + 버튼을 클릭하여 web.xml 추가
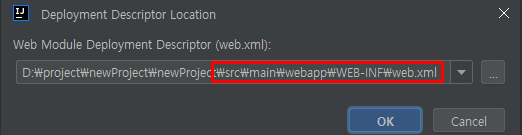
- webapp > WEB-INF 하위에 위치하도록 조정
root-context.xml 생성
WEB-INF 하위에 views폴더, spring 폴더 생성, spring 하위에 appServlet 폴더 생성
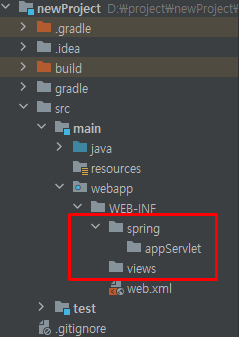
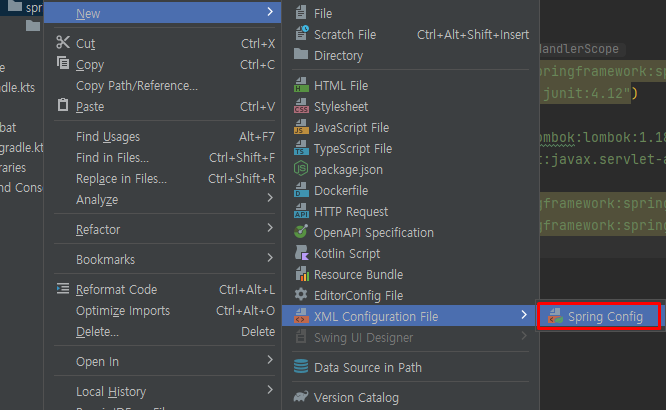
spring 폴더 내에 root-context.xml 생성
spring 우클릭 → New → XML Configuration File → Spring Config
root-context.xml
<?xml version="1.0" encoding="UTF-8"?>
<beans xmlns="http://www.springframework.org/schema/beans"
       xmlns:xsi="http://www.w3.org/2001/XMLSchema-instance"
       xsi:schemaLocation="http://www.springframework.org/schema/beans http://www.springframework.org/schema/beans/spring-beans.xsd">

</beans>- 자동 생성된 내용은 건들지 않습니다.
servlet-context.xml 생성
root-context.xml 와 같은 방식으로 appServlet 폴더 내에 servlet-context.xml 생성
servlet-context.xml
<?xml version="1.0" encoding="UTF-8"?>
<beans xmlns="http://www.springframework.org/schema/beans"
       xmlns:xsi="http://www.w3.org/2001/XMLSchema-instance"
       xmlns:mvc="http://www.springframework.org/schema/mvc"
       xmlns:context="http://www.springframework.org/schema/context"
       xsi:schemaLocation="http://www.springframework.org/schema/beans http://www.springframework.org/schema/beans/spring-beans.xsd
                            http://www.springframework.org/schema/mvc https://www.springframework.org/schema/mvc/spring-mvc.xsd
                            http://www.springframework.org/schema/context https://www.springframework.org/schema/context/spring-context.xsd">

    <mvc:annotation-driven/>

    <bean class="org.springframework.web.servlet.view.InternalResourceViewResolver">
        <property name="prefix" value="/WEB-INF/views/" />
        <property name="suffix" value=".jsp" />
    </bean>

</beans>- 위와 같이 내용 수정
Controller 클래스 생성
-
src → main → java → 그룹 에 있던 main.java 삭제
-
controller 패키지 추가 후 컨트롤러 클래스 생성

-
servlet-context.xml 수정
<?xml version="1.0" encoding="UTF-8"?>
<beans xmlns="http://www.springframework.org/schema/beans"
       xmlns:xsi="http://www.w3.org/2001/XMLSchema-instance"
       xmlns:mvc="http://www.springframework.org/schema/mvc"
       xmlns:context="http://www.springframework.org/schema/context"
       xsi:schemaLocation="http://www.springframework.org/schema/beans http://www.springframework.org/schema/beans/spring-beans.xsd
                            http://www.springframework.org/schema/mvc https://www.springframework.org/schema/mvc/spring-mvc.xsd
                            http://www.springframework.org/schema/context https://www.springframework.org/schema/context/spring-context.xsd">

    <mvc:annotation-driven/>

    <bean class="org.springframework.web.servlet.view.InternalResourceViewResolver">
        <property name="prefix" value="/WEB-INF/views/" />
        <property name="suffix" value=".jsp" />
    </bean>

    <context:component-scan base-package="org.example.controller"/>
</beans>- 컨트롤러를 스캔할 수 있도록 방금 생성한 controller 패키지 정보 추가
web.xml 내용 수정
<?xml version="1.0" encoding="UTF-8"?>
<web-app xmlns="http://xmlns.jcp.org/xml/ns/javaee"
xmlns:xsi="http://www.w3.org/2001/XMLSchema-instance"
xsi:schemaLocation="http://xmlns.jcp.org/xml/ns/javaee http://xmlns.jcp.org/xml/ns/javaee/web-app_4_0.xsd"
version="4.0">
<!-- 한글깨짐 방지 -->
<filter>
<filter-name>encoding</filter-name>
<filter-class>org.springframework.web.filter.CharacterEncodingFilter</filter-class>
<init-param>
<param-name>encoding</param-name>
<param-value>UTF-8</param-value>
</init-param>
</filter>
<filter-mapping>
<filter-name>encoding</filter-name>
<url-pattern>/*</url-pattern>
</filter-mapping>
<!-- root-context -->
<context-param>
<param-name>contextConfigLocation</param-name>
<param-value>/WEB-INF/spring/root-context.xml</param-value>
</context-param>
<listener>
<listener-class>org.springframework.web.context.ContextLoaderListener</listener-class>
</listener>
<!-- servlet-context -->
<servlet>
<servlet-name>appServlet</servlet-name>
<servlet-class>org.springframework.web.servlet.DispatcherServlet</servlet-class>
<init-param>
<param-name>contextConfigLocation</param-name>
<param-value>/WEB-INF/spring/appServlet/servlet-context.xml</param-value>
</init-param>
<load-on-startup>1</load-on-startup>
</servlet>
<servlet-mapping>
<servlet-name>appServlet</servlet-name>
<url-pattern>/</url-pattern>
</servlet-mapping>
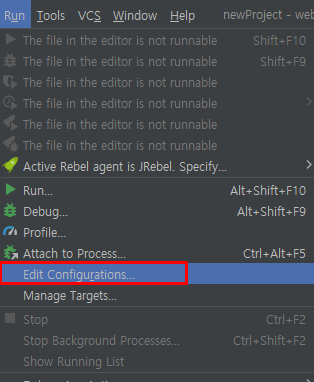
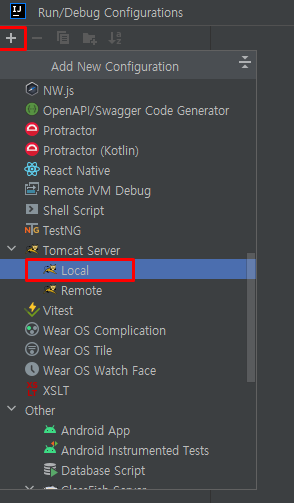
</web-app>톰캣 설정
Run → Edit Configurations… 클릭

- Application server : 다운받아 놓은 톰캣 지정
- VM options : 한글 깨짐 방지를 위해 -Dfile.encoding=UTF-8 입력
- HTTP port, JMX port: 원하는 포트로 지정

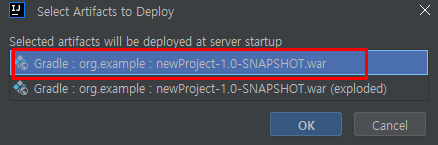
Deployment 탭에서 Artifact 추가
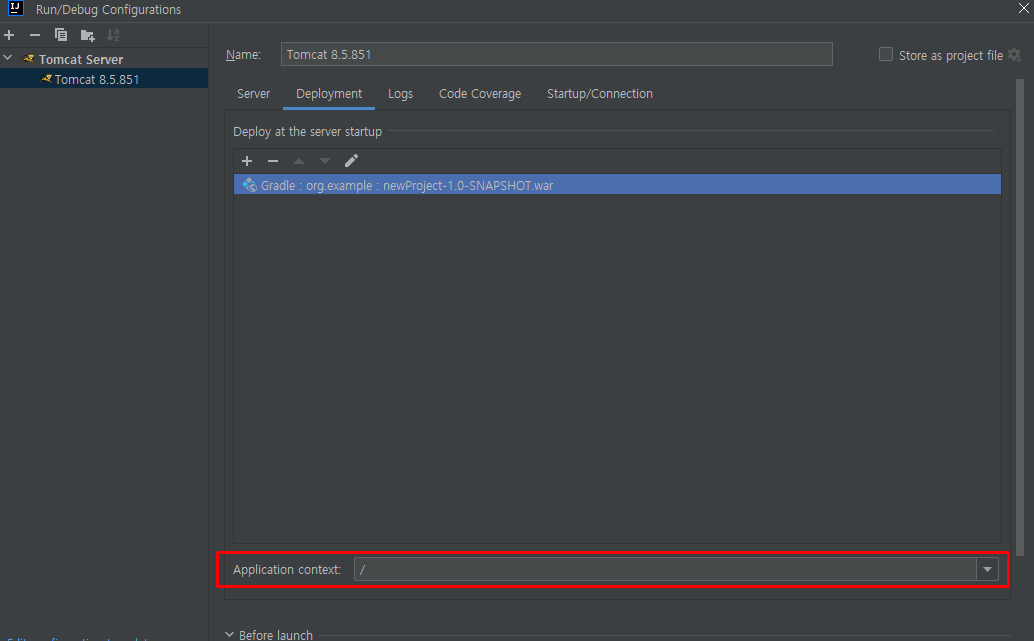
Application context 는 / 만 남도록 수정
컨트롤러 및 뷰 페이지 생성 후 테스트
Controller
package org.example.controller;

import org.springframework.stereotype.Controller;
import org.springframework.web.bind.annotation.RequestMapping;

@Controller
public class HomeController {

    @RequestMapping("/")
    public String home() {
        return "index";
    }
}
index.jsp : webapp → WEB-INF → views 폴더 내에 위치
<%@ page contentType="text/html;charset=UTF-8" language="java" %>
<html>
<head>
<title>HOME</title>
</head>
<body>
<h1>Index</h1>
</body>
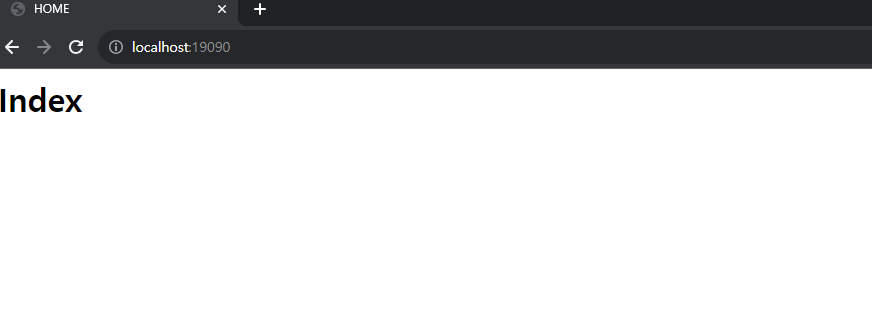
</html>톰캣 실행 후 URL 접속
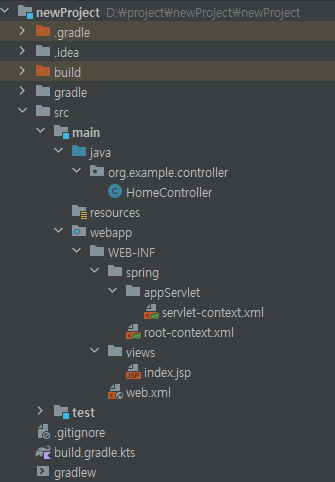
전체 디렉토리 구조