서론
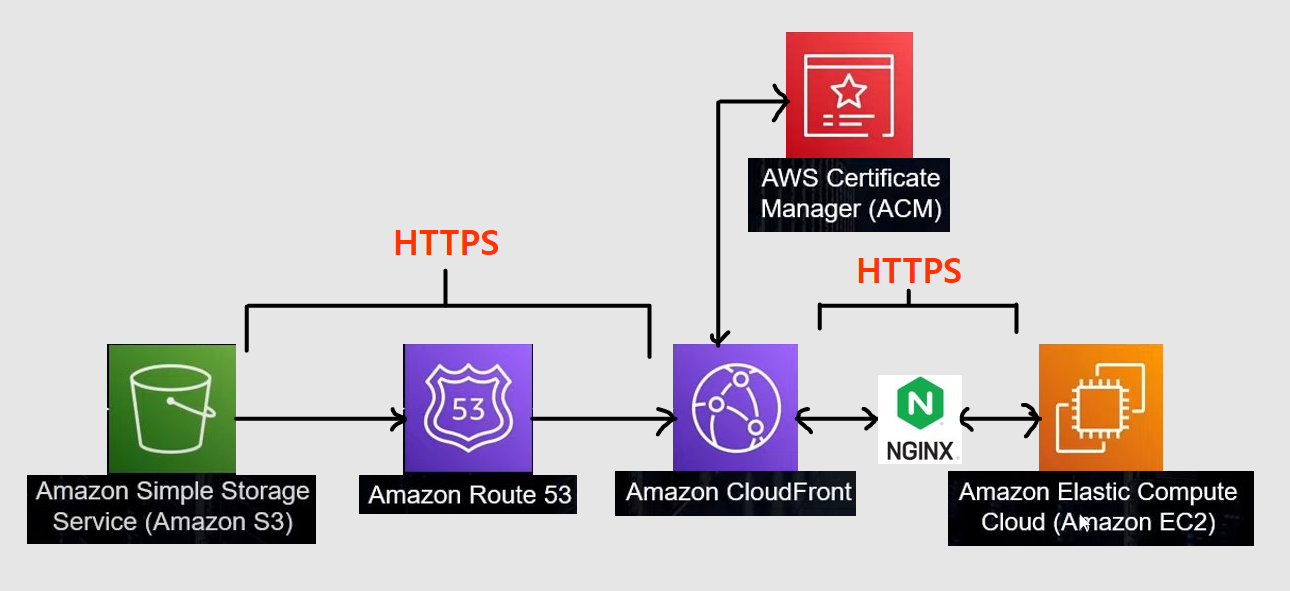
이미 s3는 cloudFront 연결해서 https정상 처리 되는 상태다.
(유튜브 그대로 따라하면 됨 특별할거 없었음)
아래와 같은 방식으로 연결하려고 하는데 ec2 주소를 Route53에 레코드 생성을 통해 추가하면 편하게 연결할 수 있지만 과금이슈가 발생할 수 있다.

따라서 나는 리버스 프록시(Nginx)를 이용해 요청을 받을 수 있도록 하고 서버도 https 연결을 할 수 있도록 인증서를 사용하고자 한다.
ssl 인증서와 ip
ip주소는 ssl 인증서 발급이 안된다.
따라서 ec2도 도메인 연결을 해야겠다.
그런데 ec2 주소는 계속 바뀔 수 있다. 따라서 Elastic IP를 할당해 매번 변경되는 번거로움을 줄여보자.
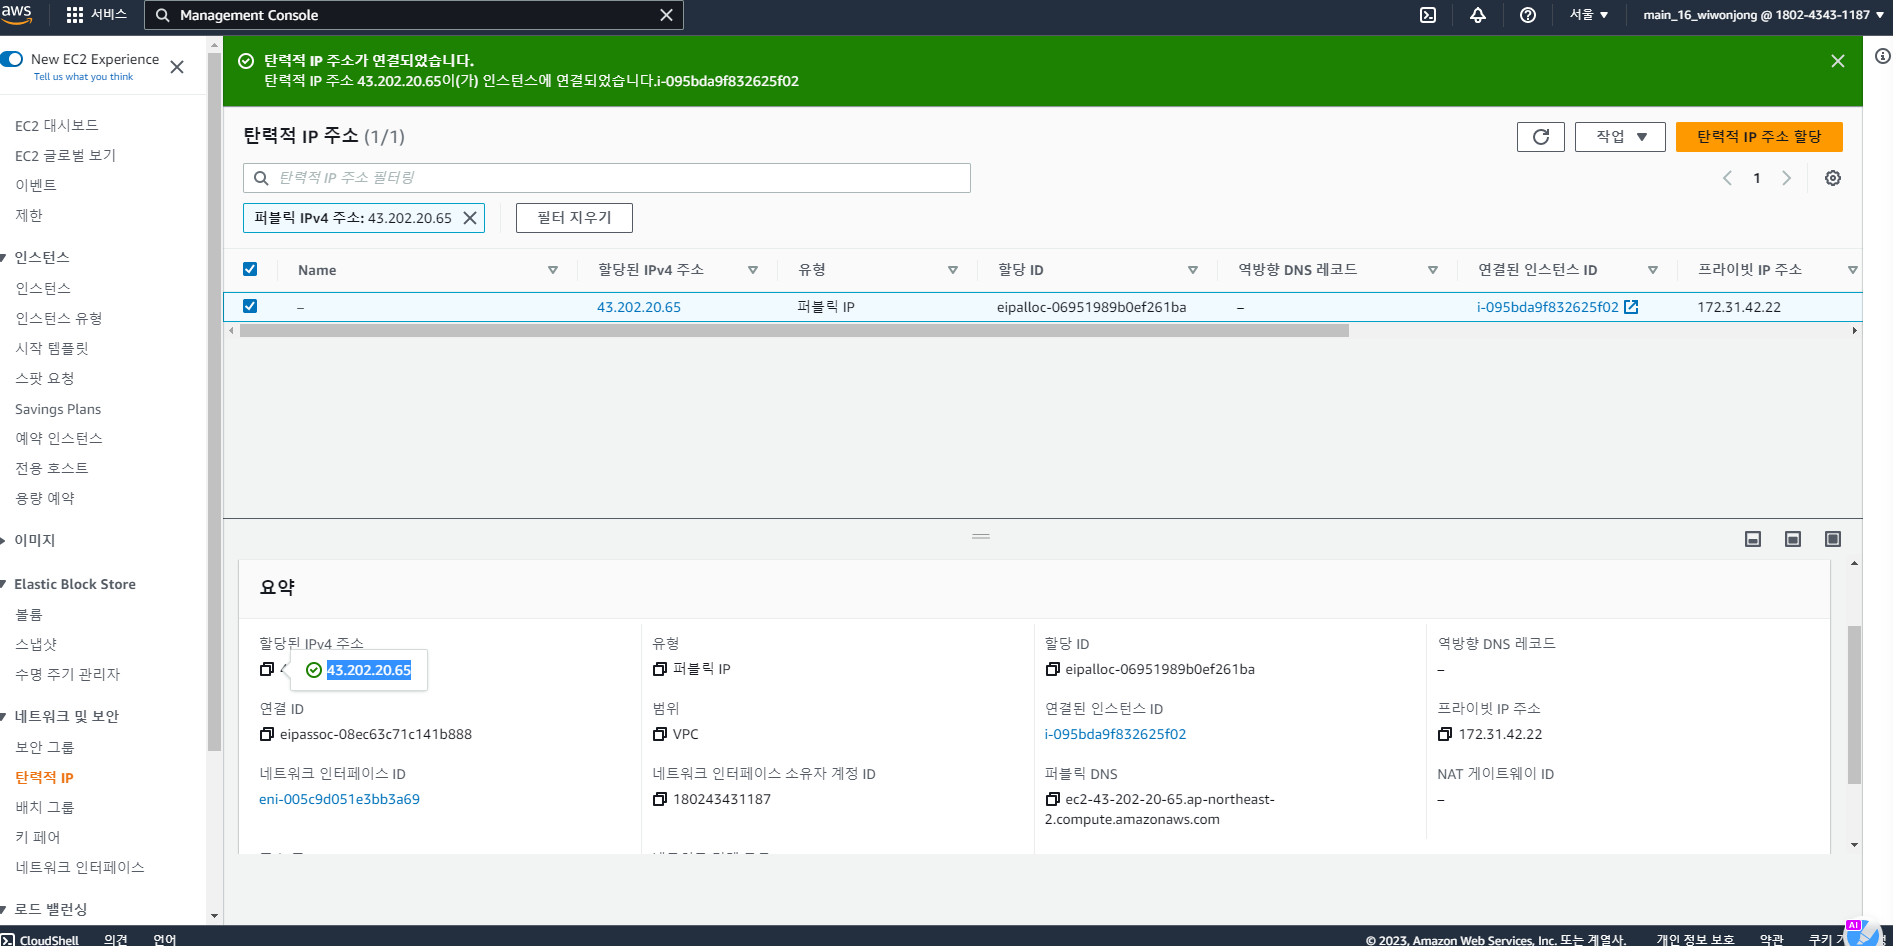
위와 같이 설정하면 43.202.20.65 이 주소는 변하지 않고 내 ec2 인스턴스와 연결된다!
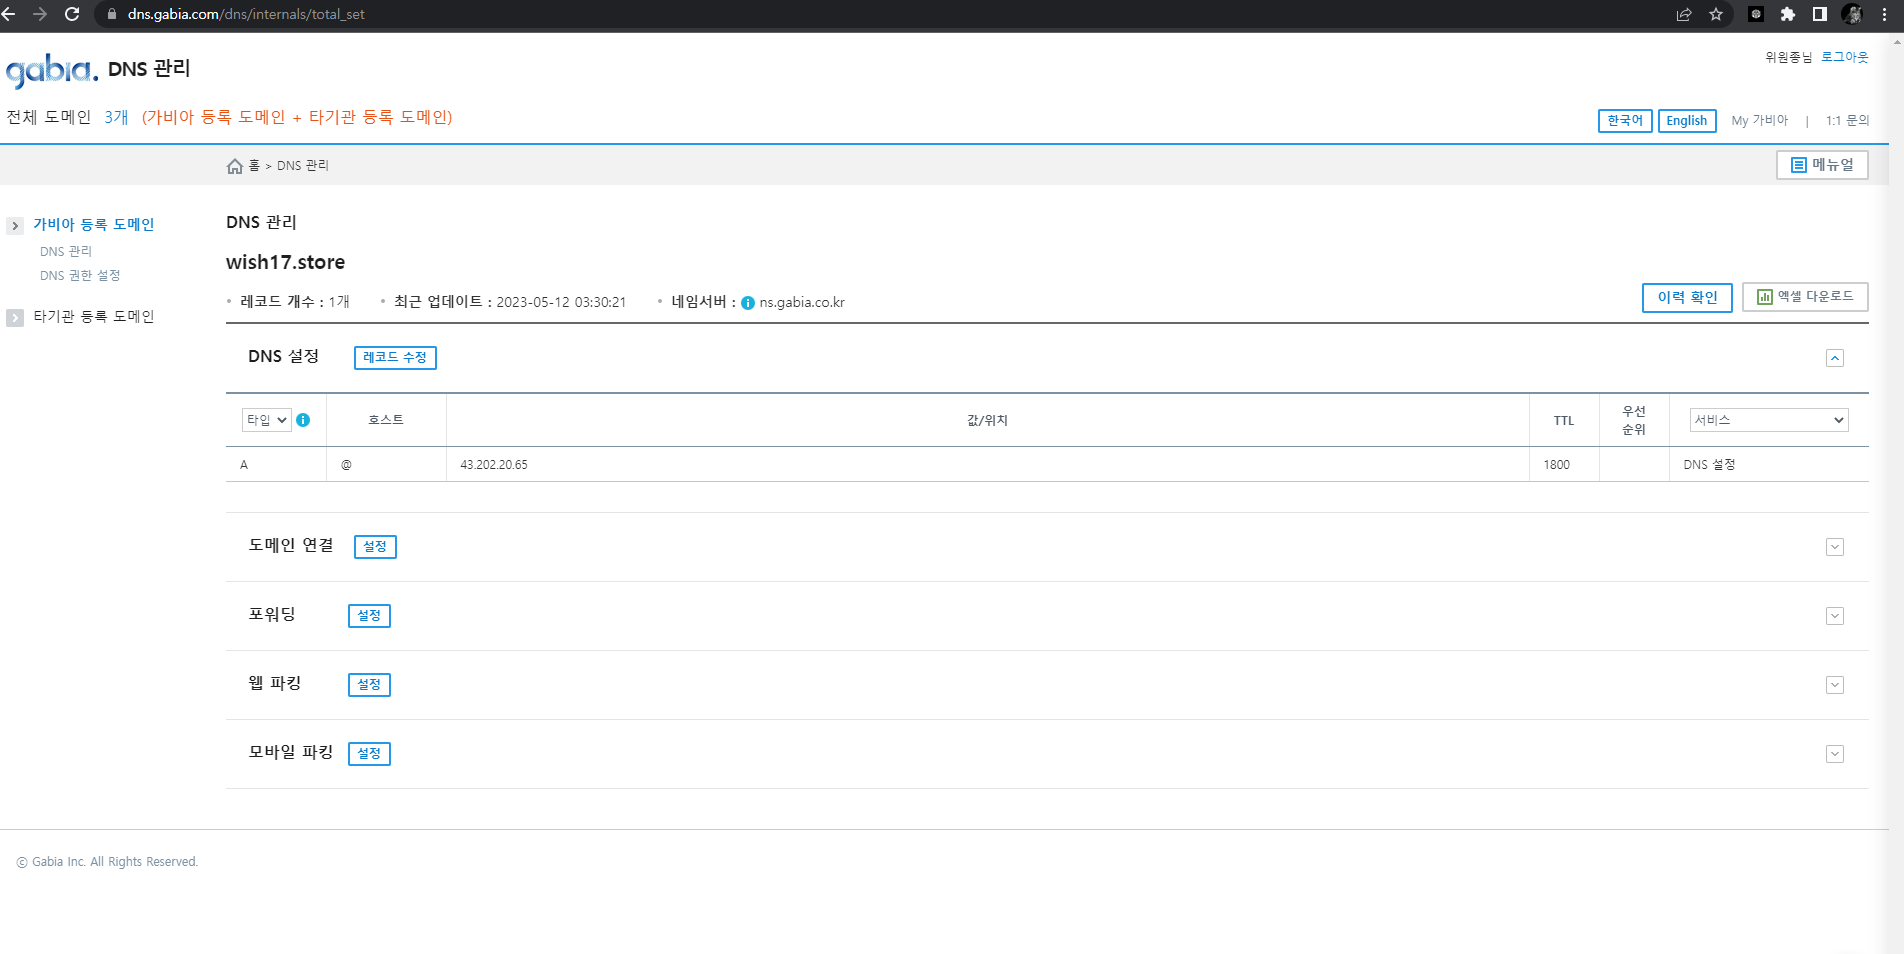
위 주소를 새로 구매한 도메인주소https://wish17.store/와 연결했다.
Nginx(리버스 프록시)
- Nginx 설치
sudo apt-get update
sudo apt-get install nginx- Let's Encrypt를 이용해 SSL 인증서를 발급받는다. Certbot이라는 도구를 사용하면 간단하게 할 수 있다.
sudo apt-get install certbot python3-certbot-nginx
sudo certbot --nginx- Nginx 설정 파일을 편집
sudo nano /etc/nginx/sites-available/defaultserver {
listen 80 default_server;
listen [::]:80 default_server;
# SSL configuration
listen 443 ssl;
server_name wish17.store;
listen [::]:443 ssl default_server;
ssl_certificate /etc/letsencrypt/live/wish17.store/fullchain.pem;
ssl_certificate_key /etc/letsencrypt/live/wish17.store/privkey.pem;
root /var/www/html;
# Add index.php to the list if you are using PHP
index index.html index.htm index.nginx-debian.html;
location / {
proxy_pass http://localhost:8080;
proxy_set_header X-Real-IP $remote_addr;
proxy_set_header Host $host;
proxy_set_header X-Forwarded-For $proxy_add_x_forwarded_for;
}
}
// nginx 재시작
sudo service nginx restart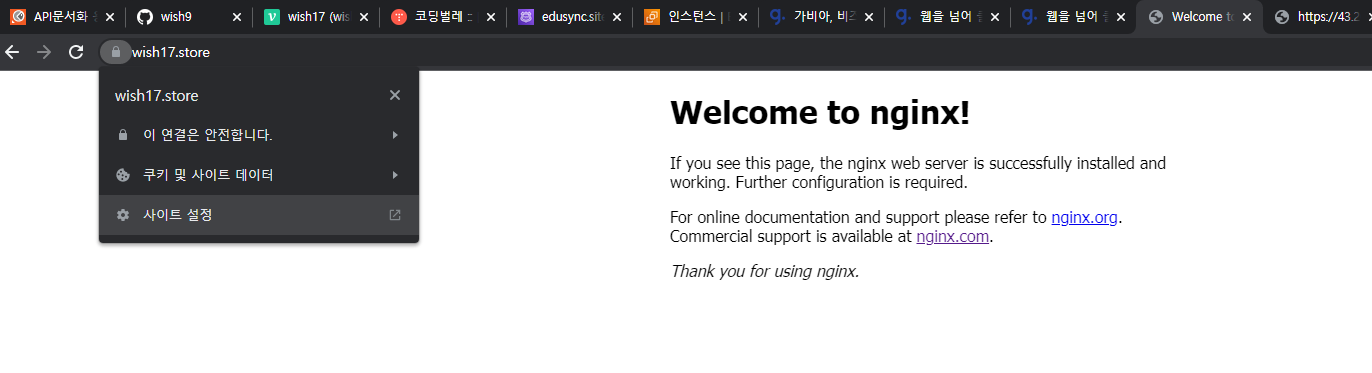
정상적으로 https로 접근 가능하다!!
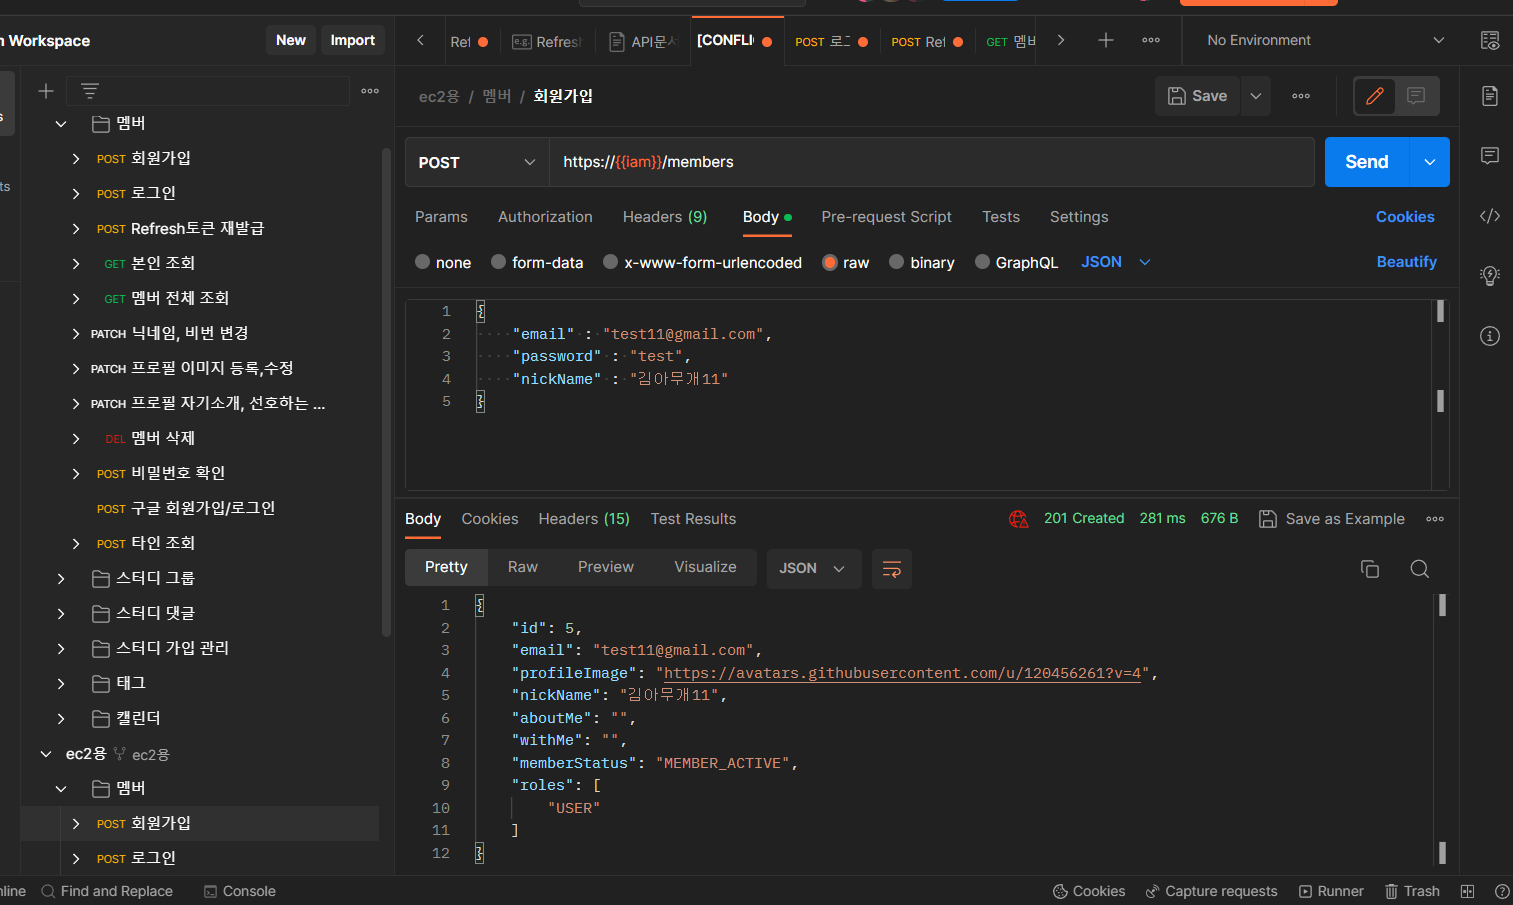
postman으로 포트번호(8080) 빼고 요청을 보내도 정상적으로 처리된다!!