이 글은 기존 운영했던 WordPress 블로그인 PyxisPub: Development Life (pyxispub.uzuki.live) 에서 가져온 글 입니다. 모든 글을 가져오지는 않으며, 작성 시점과 현재 시점에는 차이가 많이 존재합니다.
작성 시점: 2018-03-03
도입
최근에 앱을 개발하면서 자주 커스텀 뷰를 많이 쓰게 된다.
보통 앱들 보면 타이틀 바 라던가 그런 공통적 요소가 많이 있는데, 한 번만 잘 설계해두면 xml의 속성만을 바꾸는 것으로 쉽게 되니 빠르게 개발하기엔 좋다.
그러나... XML의 속성이 10개 이상 넘어갈 경우에는 무심코 머리를 짚게 된다.
val typedArray = context.obtainStyledAttributes(attrs, R.styleable.CombinedButton) ?: return
textPrimary = typedArray.getString(R.styleable.CombinedButton_textPrimary)
textSecondary = typedArray.getString(R.styleable.CombinedButton_textSecondary)
textPrimaryColor = typedArray.getColor(R.styleable.CombinedButton_textPrimaryColor, Color.BLACK)
textSecondaryColor = typedArray.getColor(R.styleable.CombinedButton_textSecondaryColor, Color.BLACK)
textPrimarySize = typedArray.getDimension(R.styleable.CombinedButton_textPrimarySize, resources.getDimensionPixelSize(R.dimen.combined_text_view_default_size).toFloat())
textSecondarySize = typedArray.getDimension(R.styleable.CombinedButton_textSecondarySize, resources.getDimensionPixelSize(R.dimen.combined_text_view_default_size).toFloat())
textExtraSpace = typedArray.getInt(R.styleable.CombinedButton_textExtraSpace, 1)
fontPrimaryText = typedArray.getString(R.styleable.CombinedButton_fontPrimaryText)
fontSecondaryText = typedArray.getString(R.styleable.CombinedButton_fontSecondaryText)
textPrimaryStyle = typedArray.getInt(R.styleable.CombinedButton_textPrimaryStyle, 0)
textSecondaryStyle = typedArray.getInt(R.styleable.CombinedButton_textSecondaryStyle, 0)
아마 1월 31일 쯔음에 Reflection 을 이용해서 비슷한 걸 만든 기억(https://velog.io/@windsekirun/Injection-by-Annotation-in-Kotlin-parse-AttributeSet)이 있지만, 오히려 기존에 했던 것과 그렇게 차이가 나지 않아 안 쓰게 되었다.
그러면, 좀 더 자동화되는 라이브러리를 만들어서 혼자 잘 쓰자! 라고 생각해서 심야 영화를 본 뒤 카페에서 공부하면서 작업한 결과, 오늘 소개한 AttributeParser 가 완성되게 되었다.
이론 기술
처음으로 Reflection 기반의 Annotation Processing 가 아닌, Annotation Processor 를 통한 Annotation Processing 기반으로 작성되었다. 가볍게 쓰고 + private 같은거를 싹다 무시하고 개발하기에는 Reflection가 최고이지만 각각 장단점이 있길 마련이다.
florent37의 Dagger-Auto-inject 를 포크해서 기능 추가할 때 살짝 Annotation Processor 를 공부한 적은 있지만, 처음부터 설계하고 작성하기는 처음이다.
간단히 Annotation Processor 에 대해 설명하자면, 컴파일 시간에 대상 어노테이션을 긁어 모아 클래스 파일을 생성하고, 그걸 사용하는 개념이다. Dagger, DataBinding, ButterKnife, Glide, PermissionDispatcher 등 이미 많은 라이브러리에서 사용되고 있고, 런타임 시간이 아닌 컴파일 시간에 실행되 오버헤드가 없고, 런타임에 포함되는 코드가 적거나 없고, 실제로 생성된 코드를 보며 디버깅 하기 쉽다는 등 장점이 많다.
그러면 왜 지금까지 Reflection만을 사용했는가.. 하면, annotation processor 는 컴파일 시간때 클래스 파일을 생성하므로 JavaPoet 같은라이브러리를 사용하여 자바 코드를 직접 작성해야 한다. 보통 코드를 짤 때 IDE의 지원을 받아서 실제로 키보드로 치는 코드 양은 적으나 annotation processor 를 위해 작성하는 코드는 IDE의 지원을 일절 받을 수 없는 맨땅의 코드라 처음 입문하기가 상당히 어렵다. 시간도 많이 들어가기도 하고. 그에 대비해 Reflection 는 상대적으로 빠른 시간 안에 기능을 구현할 수 있어 Reflection 을 적극적으로 사용하게 된 것이다.
그러다가 실제로 작성해보고 싶기도 했고, 자동화의 끝판왕은 자동 코드 파일 생성이라고 굳게 믿고 있기 때문에 Annotation Processor로 구현하기로 마음을 먹은 것이다.
설계
1월 31일날 만든 AttrParser 의 단점을 먼저 살펴보자.
맨 위의 TypeArray.getString() 을 반복하지 않아도 된다는 장점은 있지만...
- 쓸데없이 annotation 을 하나로 통합해서 type를 계속 적어줘야 한다.
- 같은 이유로 default value를 설정할 때, boolean 이나 float 를 int형으로 바꿔서 하고 있어 매우 헷갈린다
- Index를 수동으로 적어줘야 한다.
라는 단점이 있다. 개인적으로 느낀거지만 이전과 다를 바가 없다고 느꼈다.
그래서, 이번 AttributeParser 는 아래 사항을 주안점으로 삼았다.
- Annotation Processor 를 이용한 코드 파일 생성
- 각 type에 따른 Annotation 분리
- 자동 로그 출력 기능 (타입, 변수명, 실제 값까지)
Annotation Processor를 사용하기 위해서는 총 2개의 모듈이 필요하다. 하나는 annotation 이나 기타 클래스를 담은 일반 라이브러리와 annotation 모듈을 의존하는 compiler 모듈이다. 그리고 데모 앱에서는 이 두개 모듈을 각각 implementation, annotationProcessor (또는 kapt) 로 구성할 필요가 있다.
어노테이션들은 다음같이 구성했다.
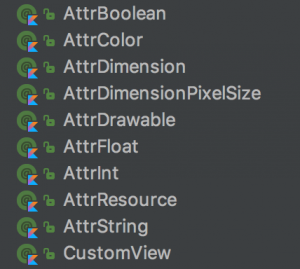
package pyxis.uzuki.live.attribute.parser.annotation

@Target(AnnotationTarget.FIELD)
@Retention(AnnotationRetention.SOURCE)
annotation class AttrInt(val value: String = "", val defValue: Int = 0)
총 5줄 정도의 아주 간단한 어노테이션이다.
대충 잡은 설계로는, CustomView 어노테이션으로 커스텀 뷰 단위를 나누고, 그 안에서 Attr 어노테이션의 위치와 필드명, 타입을 찾는다. 그리고 서로 매핑하여 데이터를 가공하고, CustomView 어노테이션이 붙은 클래스를 기반으로 하는 커스텀 클래스를 만든다. 그 안에서 각각의 값을 가지고 있기 위한 field들과 적용하기 위한 메서드들이 생성될 것이다.
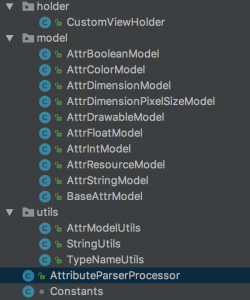
컴파일러 모듈은 조금 더 많은데, 각각 어노테이션을 매핑하기 위한 모델이나 홀더, 그리고 유틸과 상수값들을 정의하고, AttributeParserProcessor 란 클래스에서 이 클래스들을 사용하여 생성하는 역할을 한다.
AttributeParserProcessor 에서는 처음으로 지정된 어노테이션이 어느 위치에 있는지 전부 찾아서 매핑한 다음, CustomView 어노테이션의 갯수만큼 반복을 돌려서 안에 있는 Attr 어노테이션 등을 파싱하는 것이다.
Reflection 과 다르게 Annotation Processor 는 런타임 코드에 바로 주입될 수 없으므로 파싱한 결과는 우선 생성된 클래스의 private static 필드로서 가지고 있고, 사용자가 apply 메서드 등을 부르면 해당 값에 설정하는 역할을 할 것이다.
이런 과정을 거쳐서 생성된 클래스가 바로 밑의 클래스이다.
package pyxis.uzuki.live.attribute.parser;

import android.content.res.TypedArray;
import android.util.AttributeSet;
import java.lang.String;
import pyxis.uzuki.live.attribute.parser.demo.R;
import pyxis.uzuki.live.attribute.parser.demo.StyleView;

public class StyleViewAttributes {
  private static boolean booleanTest;

  private static int colorTest;

  private static float dimensionTest;

  private static int intTest;

  private static float floatTest;

  private static int resourceTest;

  private static String stringTest;

  private R r;

  public static void apply(StyleView styleView, AttributeSet set) {
    apply(styleView, styleView.getContext().obtainStyledAttributes(set, R.styleable.StyleView));
  }

  public static void apply(StyleView styleView, TypedArray array) {
    bindAttributes(array);

    styleView.booleanTest = booleanTest;
    styleView.colorTest = colorTest;
    styleView.dimensionTest = dimensionTest;
    styleView.intTest = intTest;
    styleView.floatTest = floatTest;
    styleView.resourceTest = resourceTest;
    styleView.stringTest = stringTest;
  }

  public static void printVariables() {
    android.util.Log.d("StyleView", "==================== StyleView ====================" +
    "\\nboolean booleanTest = " + booleanTest +
    "\\nint colorTest = " + colorTest +
    "\\nfloat dimensionTest = " + dimensionTest +
    "\\nint intTest = " + intTest +
    "\\nfloat floatTest = " + floatTest +
    "\\nint resourceTest = " + resourceTest +
    "\\njava.lang.String stringTest = " + stringTest +
    "\\n====================================================");
  }

  private static void bindAttributes(TypedArray array) {
    if (array == null) return;

    booleanTest = array.getBoolean(R.styleable.StyleView_booleanTest, false);
    colorTest = array.getColor(R.styleable.StyleView_colorTest, 0);
    dimensionTest = array.getDimension(R.styleable.StyleView_dimensionTest, 0.0f);
    intTest = array.getInt(R.styleable.StyleView_intTest, 0);
    floatTest = array.getFloat(R.styleable.StyleView_floatTest, 0.0f);
    resourceTest = array.getResourceId(R.styleable.StyleView_resourceTest, 0);
    stringTest = array.getString(R.styleable.StyleView_stringTest);

    array.recycle();
  }
}
물론, 사용자가 위의 클래스를 신경 쓸 필요는 전혀 없다. 단순히 apply 에 필요한 파라미터만 주입해주면 값이 설정되는 구조이다.
마무리
평소에 그나마 공부를 해왔던 덕분에, 실제로 만드는 시간은 약 7시간 정도 걸린 것 같다.
실제로 써보니 Reflection 보다 강력한 부분도 있었고, 좀 안 좋은 부분도 있었지만 설계만 잘 하면 오래토록 쓸 수 있을 것 같다.
마지막으로, 오늘 만든 라이브러리는 당연하겠지만 Github에 업로드 되어있다.
bintray 에 업로드도 요청했으니, 아마 오늘 밤쯤에는 올라가지 않을까 싶다.