
저번에 signIn 함수를 작동시켜서 Spotify 로그인 페이지를 정상적으로 나타나게 하고 이후로 Adapter 연결 과정과 어떤 문제점들이 있었는지 적어보려고 한다
Prisma Adapter 설치
Adapter를 설정하기 전에 Adapter를 간략하게 설명하면 사용자, 계정, 세션 등에 대한 데이터를 저장하는 데 사용하려는 데이터 베이스 또는 백엔드 시스템에 애플리케이션을 연결하는 모듈을 의미한다고 한다.
설치
npm install @prisma/client @auth/prisma-adapter
npm install prisma --save-dev
코드 수정
기존에 있었던 auth.ts 코드를 아래 처럼 작성한다.
import NextAuth from "next-auth";
import { PrismaAdapter } from "@auth/prisma-adapter"
import { PrismaClient } from "@prisma/client"

import Spotify from "next-auth/providers/spotify";

export const prisma = new PrismaClient();

export const { handlers, auth, signIn, signOut } = NextAuth({
  providers: [
    Spotify({
      clientId: process.env.SPOTIFY_CLIENT_ID,
      clientSecret: process.env.SPOTIFY_CLIENT_SECRET,
    }),
  ],
   adapter: PrismaAdapter(prisma),
});
Schema
MongoDB와 Prisma를 연동하여 사용할 거기 때문에 공식 문서에서 그대로 제공해 주는 Schema 코드를 작성한다. 코드가 꽤나 길어서 어렵다고 생각이 들 수도 있지만 로그인을 했을 경우 이런 데이터들을 제공해 주는구나 생각했다. 그리고 .env 파일을 새롭게 생성하여 DATABASE_URL 환경 변수를 추가해줘야 한다.
datasource db {
  provider = "mongodb"
  url      = env("DATABASE_URL")
}

generator client {
  provider = "prisma-client-js"
}

model User {
  id            String          @id @default(auto()) @map("_id") @db.ObjectId
  name          String?
  email         String?         @unique
  emailVerified DateTime?
  image         String?
  accounts      Account[]
  sessions      Session[]
  // Optional for WebAuthn support
  Authenticator Authenticator[]

  createdAt DateTime @default(now())
  updatedAt DateTime @updatedAt
}

model Account {
  id                String  @id @default(auto()) @map("_id") @db.ObjectId
  userId            String  @db.ObjectId
  type              String
  provider          String
  providerAccountId String
  refresh_token     String? @db.String
  access_token      String? @db.String
  expires_at        Int?
  token_type        String?
  scope             String?
  id_token          String? @db.String
  session_state     String?

  createdAt DateTime @default(now())
  updatedAt DateTime @updatedAt

  user User @relation(fields: [userId], references: [id], onDelete: Cascade)

  @@unique([provider, providerAccountId])
}

model Session {
  id           String   @id @default(auto()) @map("_id") @db.ObjectId
  sessionToken String   @unique
  userId       String   @db.ObjectId
  expires      DateTime
  user         User     @relation(fields: [userId], references: [id], onDelete: Cascade)

  createdAt DateTime @default(now())
  updatedAt DateTime @updatedAt
}

model VerificationToken {
  id         String   @id @default(auto()) @map("_id") @db.ObjectId
  identifier String
  token      String
  expires    DateTime

  @@unique([identifier, token])
}

// Optional for WebAuthn support
model Authenticator {
  credentialID         String  @id @map("_id")
  userId               String  @db.ObjectId
  providerAccountId    String
  credentialPublicKey  String
  counter              Int
  credentialDeviceType String
  credentialBackedUp   Boolean
  transports           String?

  user User @relation(fields: [userId], references: [id], onDelete: Cascade)

  @@unique([userId, credentialID])
}
그 후 npx prisma generate 명령어를 터미널에서 실행한다.
Error 발생
이제 모든 설정이 다 됐다고 생각했고 npm run dev 커맨드를 실행했을때도 에러가 발생하지 않고 생각보다 쉽게 해결했다고 생각했다. 그러나 로그인을 했을 경우 database에 데이터가 들어왔지만 아래 사진처럼 오류가 발생했다.

검색해보니 Edge 런타임과 호환되지 않는 오류라고 한다. 공식 문서에서도 사용하는 일부 라이브러리 또는 ORM 패키지는 아직 준비되지 않았을 수 있다고 한다.
Auth.js는 두 가지 세션 전략을 지원한다고 한다. 어댑터를 사용하는 경우 기본적으로 데이터베이스 전략이 사용된다. 하지만 지금은 Edge 런타임/인프라와 호환되지 않기 때문에 JWT 전략을 강제한다고 나와있다. JWT와 Database 세션 전략은 따로 정리를 할 것 같다.
JWT 전략 취하기
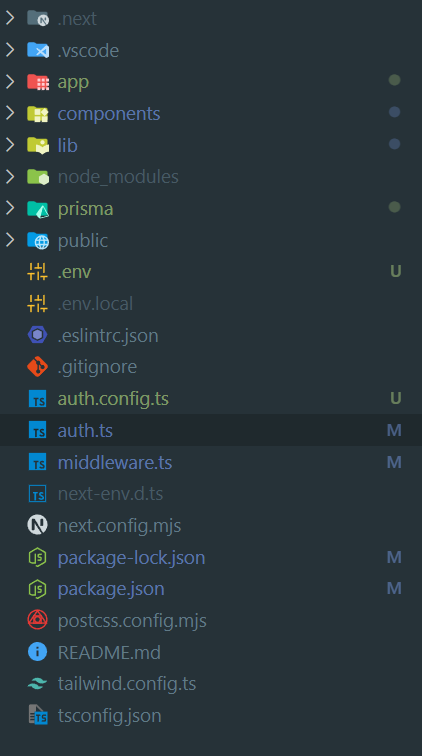
프로젝트 구조
auth.config.ts 파일 생성
Auth.js 구성 옵션이 포함된 객체를 export 하는 파일을 만들고 어댑터에 의존하지 않는 모든 일반 구성을 여기에 넣을 수 있다고 한다.
예시를 보고 작성한 실제 프로젝트 auth.config.ts 코드
import Spotify from "next-auth/providers/spotify";
import type { NextAuthConfig } from "next-auth";

export default {
  providers: [
    Spotify({
      clientId: process.env.SPOTIFY_CLIENT_ID,
      clientSecret: process.env.SPOTIFY_CLIENT_SECRET,
    }),
  ],
} satisfies NextAuthConfig;
auth.ts 파일 수정
기존에 작성했던 auth.ts 파일에 변경 사항은 다음과 같다.
1. prisma 객체를 lib폴더에 prisma.ts 파일에서 export const prisma = new PrismaClient();
이렇게 하지 않으면 아래 오류가 발생한다.
warn(prisma-client) Already 10 Prisma Clients are actively running
2. session: {strategy: "jst"} 추가
3. ...authConfig 추가
import { PrismaAdapter } from "@auth/prisma-adapter";
import NextAuth from "next-auth";

import authConfig from "./auth.config";
import { prisma } from "./lib/prisma";

export const { handlers, auth, signIn, signOut } = NextAuth({
  adapter: PrismaAdapter(prisma),
  session: { strategy: "jwt" },
  ...authConfig,
});
middleware.ts 파일 수정
import { NextRequest } from "next/server";
import authConfig from "./auth.config";
import NextAuth from "next-auth";

const { auth } = NextAuth(authConfig);
export default auth(async function middleware(req: NextRequest) {
  // Your custom middleware logic goes here
});
이제 이렇게 한 후 로그인을 하면
authjs.session-token 이름으로 저정된 쿠키를 확인할 수 있다. signOut 함수를 사용하면 정보가 삭제된다.

나의 실제 세션 사용 사례는 아래처럼 auth() 호출하여 세션 정보를 받은 뒤 조건에 따라 로그인 버튼을 보여주거나 로그아웃 버튼을 보여주도록 작성했다.


위에서 데이터 베이스에 실제 데이터가 들어온다고 하였는데 지금은 jwt 전략을 사용하기 때문에 user와 account 컬렉션에만 데이터가 들어온다.
acccount 컬렉션
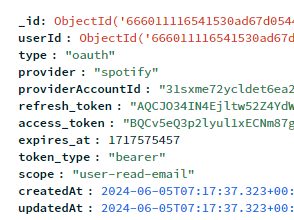
토큰에 대한 정보는 나중에 api로 데이터를 요청할 때 필요하다고 하므로 다음에는 어떻게 저 데이터를 이용하는지 작성해보겠다. 글만 보면 금방 한 것 같지만...삽질을 많이했다.
