구성
- splunk enterprise(se) ip: 192.168.237.130
- splunk forwarder ip: 192.168.237.131
상황
- forwarder의 리눅스 서버의 데이터(로그파일)를 se 서버로 보내야 함.
과정
- se를 실행시키고 web접속
- forwarder 서버 위주로 명령 입력
- port 8089 = management
- port 9997 = data
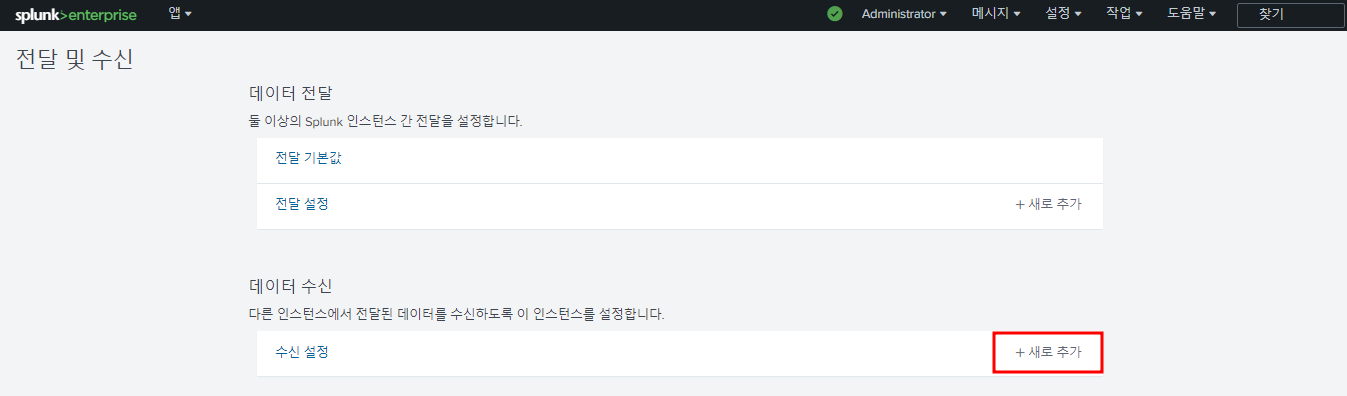
- 설정 → 데이터 전달 및 수신
- se 서버와 forwarder 서버의 방화벽을 둘 다 풀어준다. (예시에서는 배포서버에서만 풀었는데 검색용 서버의 방화벽을 풀지 않으면 스플렁크 web 서버에 접속할 수 없음)

배포용 리눅스 서버에 아래의 명령을 입력하여 실행
/opt/splunkforwarder/bin/splunk start --accept-license 배포 서버가 실행되면
/opt/splunkforwarder/bin/splunk set deploy-poll 192.168.237.130:8089를 입력하여 배포 관리자를 설정한 후 splunk forwarder 재시작
그러면 web 화면에서 다음과 같이 클릭
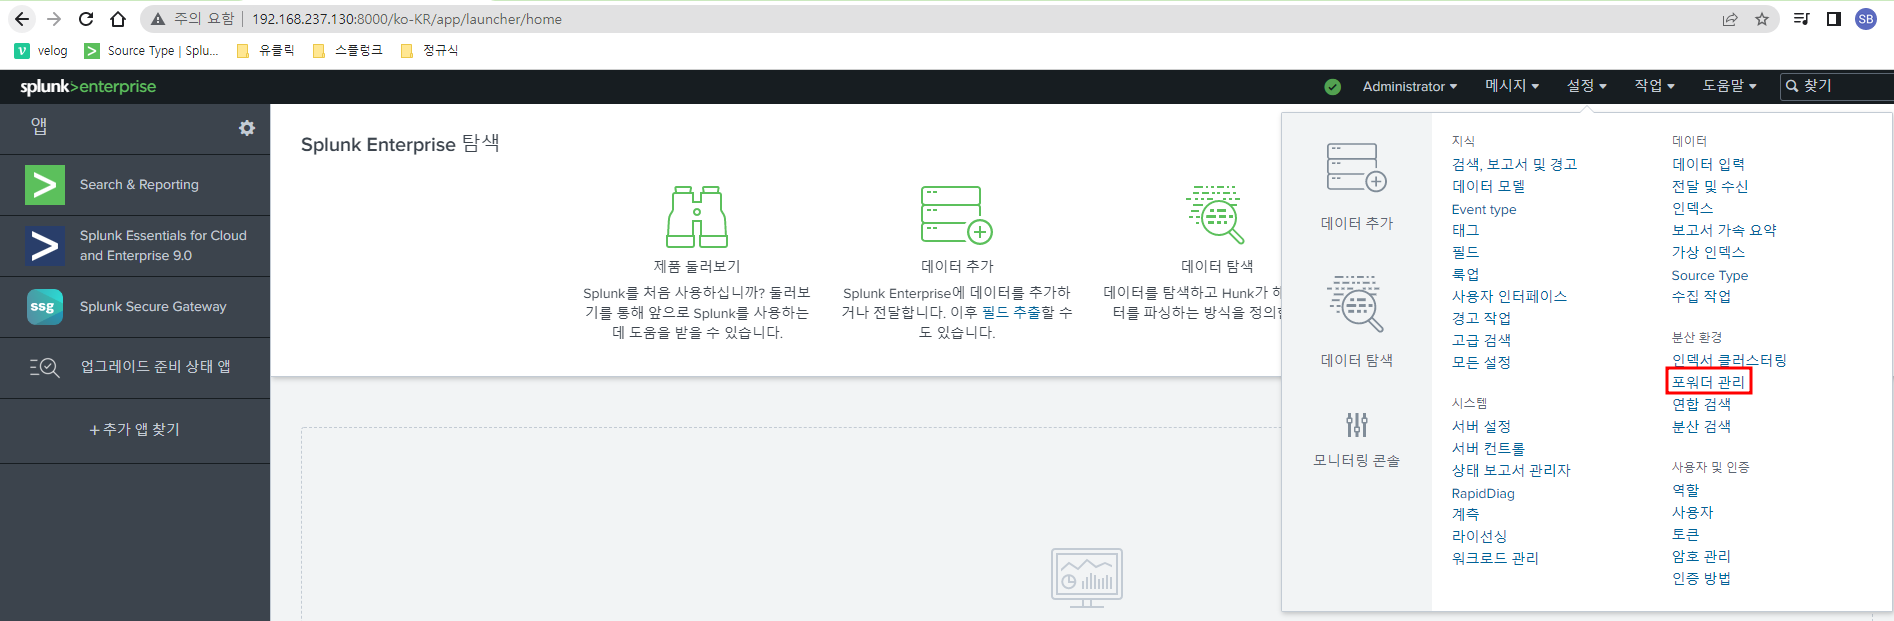
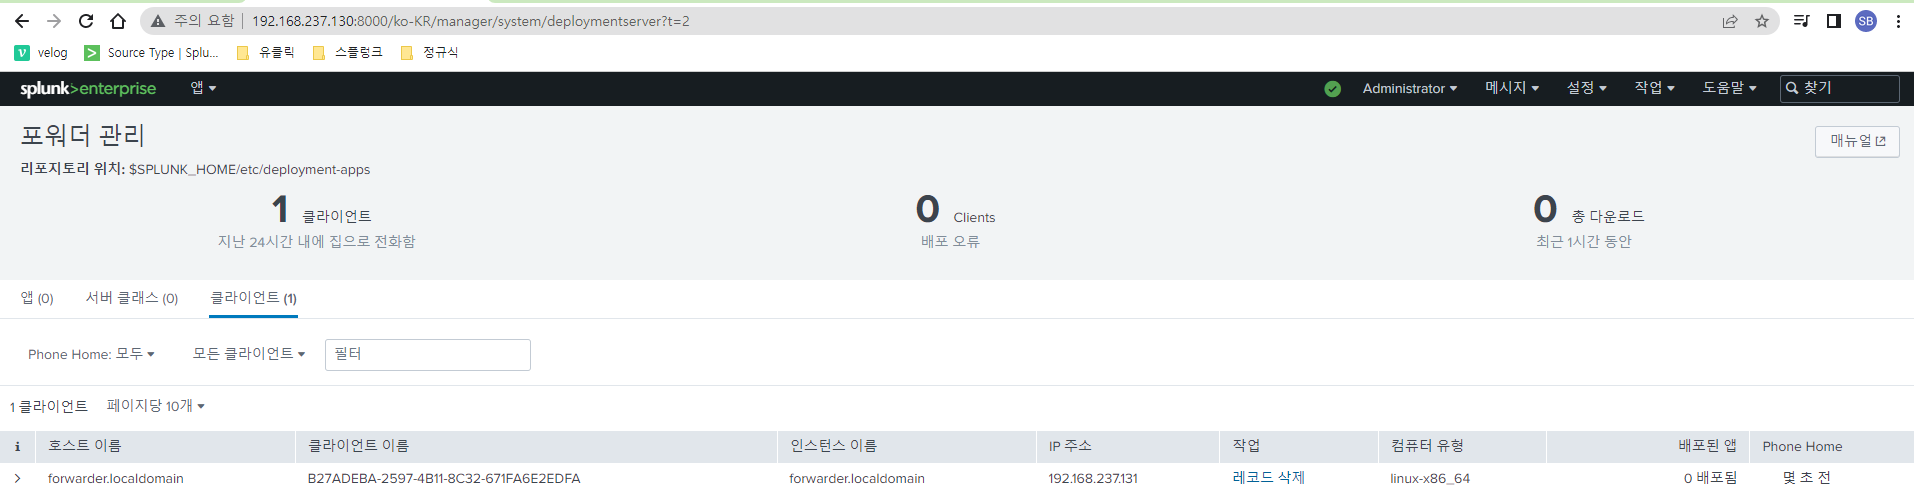
배포용 서버가 등록된 걸 확인할 수 있음
그리고 아래의 명령어를 통해 해당 ip 및 port로 데이터를 전송하도록 설정한 후 스플렁크가 로그파일을 실시간으로 읽어들일 경로를 설정
/opt/splunkforwarder/bin/splunk add forward-server 192.168.237.130:9997

/opt/splunkforwarder/bin/splunk add monitor /var/log
/var/log 경로에 있는 파일을 읽어들이도록 설정했음 그리고 재시작
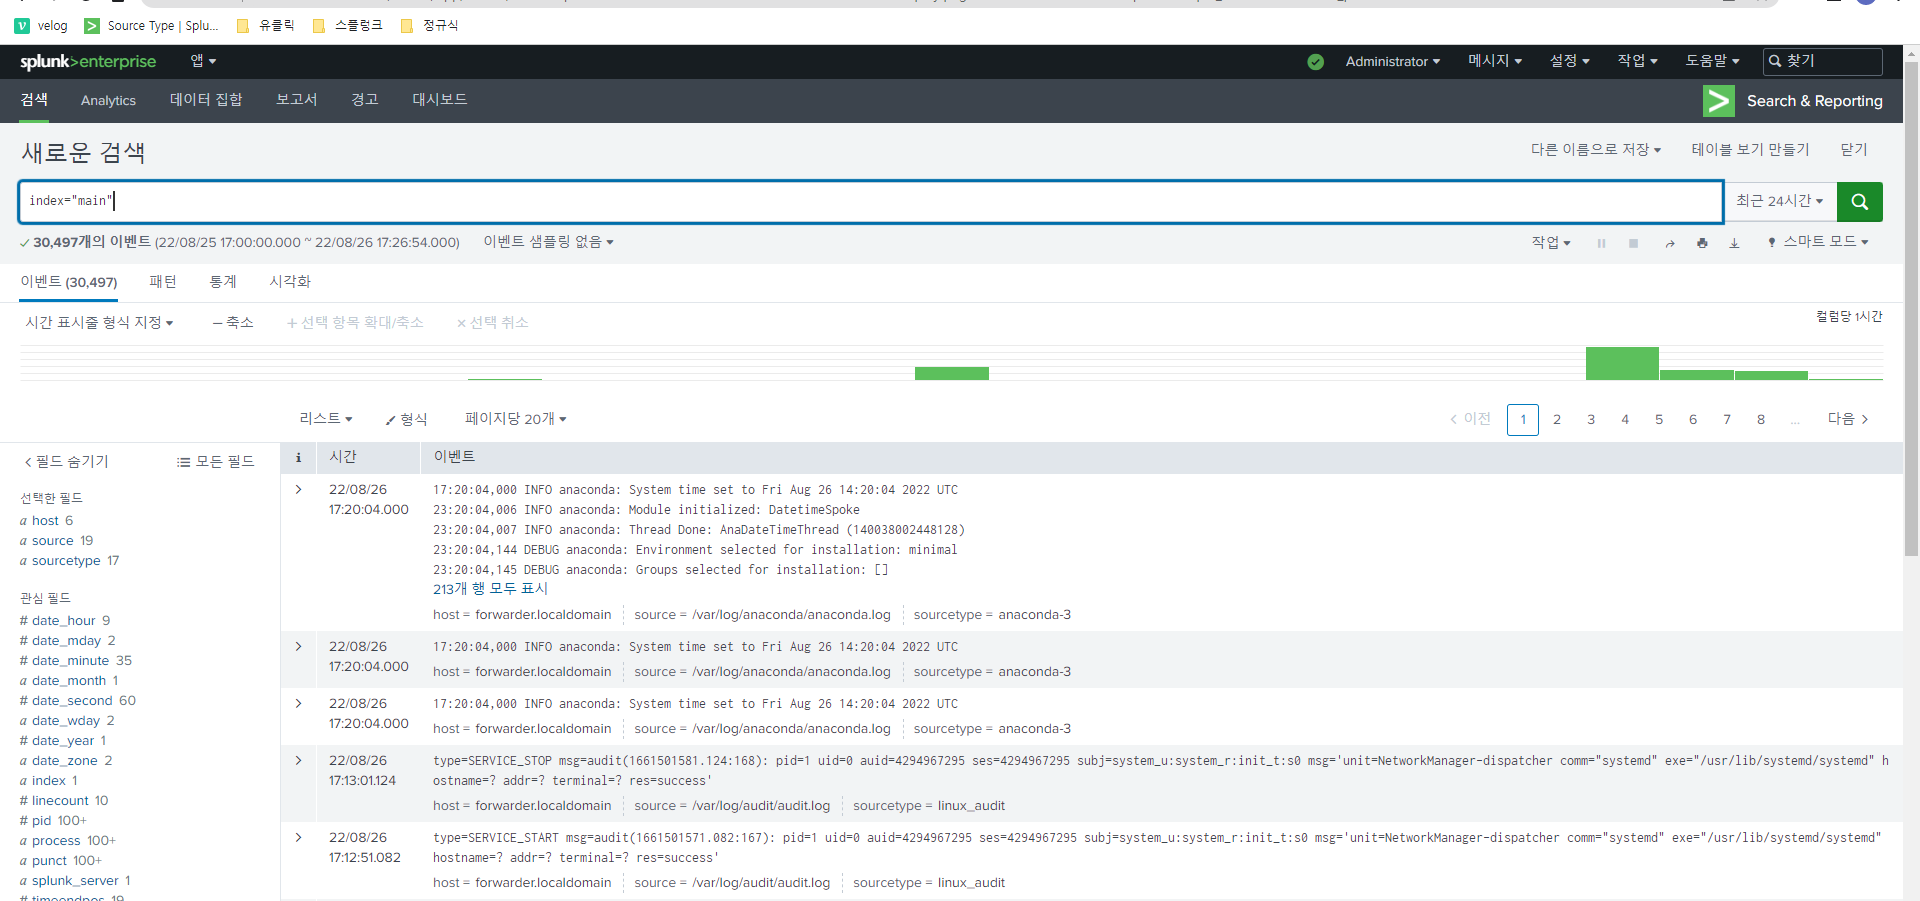
인덱스를 설정하지 않았기 때문에 main index로 등록됨
p.s
위의 과정 중 포워더 관리가 다르면 아래의 내용과 일치하는지 확인해보자
vi /opt/splunkforwarder/etc/system/local/outputs.confdisable = false 가 없어서 안되다가 추가하니까 됐으니까
[tcpout]
defaultGroup = default-autolb-group

[tcpout:default-autolb-group]
disable = false
server = 192.168.237.130:9997

[tcpout-server://192.168.237.130:9997]
ps: 터미널로 자동 설정하는 방법 외에 vi(편집기)를 활용하여 forwarder 설정 방법
1. inputs.conf의 경로지정 방법
1-1. /opt/splunkforwarder/etc/system/local/inputs.conf
1-2. /opt/splunkforwarder/etc/apps/search/local/inputs.conf
1-1의 방법은 사용을 기피함 이유는 찾아봐야함.
→ forwarder 서버에서 데이터를 읽는다면 크게 두가지 경우로 구분할 수 있음.
1. /opt/splunkforwarder/etc/system/local
2. /opt/splunkforwarder/etc/apps/search/local
1번 경로는 스플렁크의 기본 경로로 업그레이드를 하면 변경 사항이 초기화됨.
2번 경로는 사용자가 변경한 것이 유지되므로 특별한 경우가 아니라면 2번 경로를 활용하자.
2. 유의점
2-1. 파일을 읽어들일 경로나 파일의 이름을 각각 다르게 주어야한다.
ex. /opt/splunkforwarder/etc/system/local/inputs.conf
[default]
host = sbyoun

[monitor:///root/*.txt]
index=idx01_test
sourcetype=st01_type01
disable=0

[monitor:///root/*.txt]
index=idx02_test
sourcetype=st01_type01
disable=0
위의 경우 동일한 경로에 동일한 파일을 읽어들이기 때문에 아래 있는 idx02_test 인덱스를 건너뜀 → 따라서 모니터 경로나 파일의 이름을 각각 다르게 주어야함
2-2. 스플렁크 자체에서 한번 읽어들인 파일은 지나치게 되어 있음. 따라서, fishbucket(일종의 캐시파일)을 삭제하고 다시 추가해야함.
rm -rf /opt/splunkforwarder/var/lib/splunk/fishbucket하위 디렉토리까지 모두 삭제하고 배포서버를 재시작하면 읽어들임
- SE웹페이지에서 sourcetype 하고 설정하면 다양한 방식으로 이벤트를 구분 가능함.
inputs.conf의 현 상태
[default]
host = sbyoun

[monitor:///root/*.txt]
index=idx02_test
disable=0
sourcetype=st01_type01
disable=0