Spring Security가 어떤 과정으로 Authentication 처리를 하는지, 그리고 실제로 어떻게 구현하는지 알아보도록 하자.
인증(Authentication)과 권한(Authorization)
먼저 스프링 시큐리티에서 애플리케이션 보안을 구성하는 두 가지 영역에 대해 간단하게 설명해 보도록 하겠습니다. 이 두 영역은 사실상 스프링 시큐리티의 핵심이라고 볼 수 있습니다.
인증(Authentication)은 보호된 리소스에 접근하는 대상, 즉 사용자에게 적절한 접근 권한이 있는지 확인하는 일련의 과정을 의미합니다. 이 때 보호된 리소스에 접근하는 대상(사용자)을 접근 주체(Principal)이라고 합니다. 권한(Authorization)은 인증절차가 끝난 접근 주체가 보호된 리소스에 접근 가능한지를 결정하는 것을 의미합니다. 이 때 권한을 부여하는 작업을 인가(Authorize)라고 합니다.
쉽게 말하면 인증은 아이디와 비밀번호를 입력 받아 로그인 하는 과정 자체를 의미하는 것이고 권한이 필요한 리소스에 접근하기 위해서는 당연히 이러한 인증 과정을 거쳐야 합니다. 스프링 시큐리는 이런 인증 매커니즘을 간단하게 만들 수 있도록 다양한 옵션들을 제공하고 있습니다. 또한 스프링 시큐리티는 웹 요청이나 메소드 호출, 도메인 인스턴스에 대한 접근 등 상당히 깊은 수준의 권한 부여를 제공하고 있습니다
1. Spring Security 처리 과정
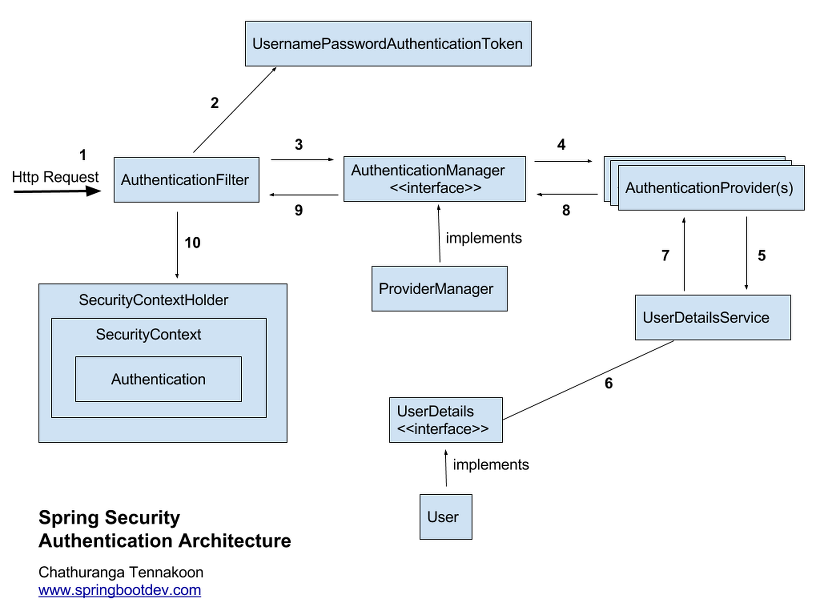
1. 사용자가 로그인 정보와 함께 인증 요청(Http Request)
2. AuthenticationFilter가 이 요청을 가로챕니다. 이 때 가로챈 정보를 통해 UsernamePasswordAuthenticationToken이라는 인증용 객체를 생성합니다.
3. AuthenticationManager의 구현체인 ProviderManager에게 UsernamePasswordAuthenticationToken 객체를 전달합니다.
4. 다시 AuthenticationProvider에 UsernamePasswordAuthenticationToken 객체를 전달합니다.
5. 실제 데이터베이스에서 사용자 인증정보를 가져오는 UserDetailsService에 사용자 정보(아이디)를 넘겨줍니다.
6. 넘겨받은 사용자 정보를 통해 DB에서 찾은 사용자 정보인 UserDetails 객체를 만듭니다. 이 때 UserDetails 는 인증용 객체와 도메인용 객체를 분리하지 않고 인증용 객체에 상속해서 사용하기도 합니다.
7. AuthenticationProvider는 UserDetails를 넘겨받고 사용자 정보를 비교합니다.
8. 인증이 완료되면 권한 등의 사용자 정보를 담은 Authentication 객체를 반환합니다.
9. 다시 최초의 AuthenticationFilter에 Authentication 객체가 반환됩니다.
10. Authentication 객체를 SecurityContext에 저장합니다.
최종적으로 SecurityContextHolder는 세션 영역에 있는 SecurityContext에 Authentication 객체를 저장합니다. 세션에 사용자정보를 저장한다는 것은 스프링 시큐리티가 전통적인 세션-쿠키 기반의 인증 방식을 사용한다는 것을 의미합니다.
2. Security 적용
security 적용은 해당 문서를 참고하였습니다.
https://spring.io/guides/gs/securing-web/
security적용을 위해 해당 프로젝트 pom.xml Dependency들을 추가해줍니다.
	<dependency>
		<groupId>org.springframework.boot</groupId>
		<artifactId>spring-boot-starter-thymeleaf</artifactId>
	</dependency>
	<dependency>
		<groupId>org.springframework.boot</groupId>
		<artifactId>spring-boot-starter-web</artifactId>
	</dependency>
	<dependency>
		<groupId>org.springframework.boot</groupId>
		<artifactId>spring-boot-starter-security</artifactId>
	</dependency>
	<dependency>
		<groupId>org.springframework.security</groupId>
		<artifactId>spring-security-test</artifactId>
		<scope>test</scope>
	</dependency>
그리고 home.html, hello.html 파일을 생성해줍니다.
home.html
<!DOCTYPE html>
<html xmlns="http://www.w3.org/1999/xhtml" xmlns:th="https://www.thymeleaf.org" xmlns:sec="https://www.thymeleaf.org/thymeleaf-extras-springsecurity3">
    <head>
        <title>Spring Security Example</title>
    </head>
    <body>
        <h1>Welcome!</h1>

        <p>Click <a th:href="@{/hello}">here</a> to see a greeting.</p>
    </body>
</html>
hello.html
<!DOCTYPE html>
<html xmlns="http://www.w3.org/1999/xhtml" xmlns:th="https://www.thymeleaf.org" xmlns:sec="https://www.thymeleaf.org/thymeleaf-extras-springsecurity3">
    <head>
        <title>Spring Security Example</title>
    </head>
    <body>
        <h1>Welcome!</h1>

        <p>Click <a th:href="@{/hello}">here</a> to see a greeting.</p>
    </body>
</html>
그리고 정적 자원을 제공하는 클래스를 생성하여 아래와같이 설정합니다.
import org.springframework.context.annotation.Configuration;
import org.springframework.web.servlet.config.annotation.ViewControllerRegistry;
import org.springframework.web.servlet.config.annotation.WebMvcConfigurer;
@Configuration
public class webMvcConfig implements WebMvcConfigurer {
@Override
public void addViewControllers(ViewControllerRegistry registry) {
registry.addViewController("/home").setViewName("home");
registry.addViewController("/").setViewName("home");
registry.addViewController("/hello").setViewName("hello");
registry.addViewController("/login").setViewName("login");
}
}
이렇게 home으로 요청이오면 /home으로 가고, hello로 요청이오면 /hello로 갑니다.
여기서 실행을 시켜보면
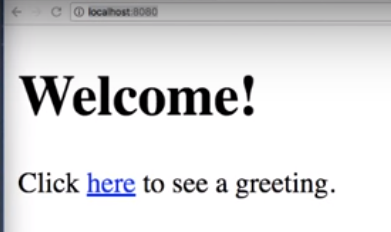
화면이 나올 것이고 here를 누르면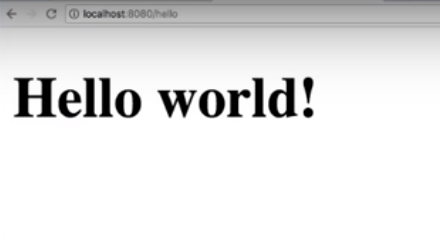
화면이 이동되는 걸 확인 할 수있습니다.
여기까지 되었으면 이제 로그인하지 않은 사용자들은 hello 페이지를 이동할 수 없게 security를 적용해보겠습니다.
WebSecurityConfig.java
WebSecurityConfig를 생성해줍니다.
@Configuration
@EnableWebSecurity // 스프링부트가 제공해주는 시큐리티 설정이 날아감 ->커스텀마이징하기위해
public class WebSecurityConfig extends WebSecurityConfigurerAdapter {
@Override
protected void configure(HttpSecurity http) throws Exception {
http
.authorizeRequests() // 요청을 어떻게 보안을 할 것인지, 사용권한 체크
// /about 요청에 대해서는 로그인을 요구함
.antMatchers("/", "/home").permitAll() // "/","/home" 인증 필요없음
.anyRequest().authenticated() // "/", "/home" 제외한 나머지는 인증 필요
.and()
.formLogin() // 로그인 페이지 요청
.loginPage("/login")
.permitAll()
.and()
.logout()
.permitAll();
}
@Bean
@Override
public UserDetailsService userDetailsService() {
UserDetails user =
User.withDefaultPasswordEncoder()
.username("user")
.password("password")
.roles("USER")
.build();
return new InMemoryUserDetailsManager(user);
}
}
login.html 파일 생성
<!DOCTYPE html>
<html xmlns="http://www.w3.org/1999/xhtml" xmlns:th="https://www.thymeleaf.org"
      xmlns:sec="https://www.thymeleaf.org/thymeleaf-extras-springsecurity3">
    <head>
        <title>Spring Security Example </title>
    </head>
    <body>
        <div th:if="${param.error}">
            Invalid username and password.
        </div>
        <div th:if="${param.logout}">
            You have been logged out.
        </div>
        <form th:action="@{/login}" method="post">
            <div><label> User Name : <input type="text" name="username"/> </label></div>
            <div><label> Password: <input type="password" name="password"/> </label></div>
            <div><input type="submit" value="Sign In"/></div>
        </form>
    </body>
</html>
hello.html 수정
logout 추가
<!DOCTYPE html>
<html xmlns="http://www.w3.org/1999/xhtml" xmlns:th="https://www.thymeleaf.org"
      xmlns:sec="https://www.thymeleaf.org/thymeleaf-extras-springsecurity3">
    <head>
        <title>Hello World!</title>
    </head>
    <body>
        <h1 th:inline="text">Hello [[${#httpServletRequest.remoteUser}]]!</h1>
        <form th:action="@{/logout}" method="post">
            <input type="submit" value="Sign Out"/>
        </form>
    </body>
</html>
이렇게 설정을 하고 실행을 해보고, here를 누르면 here은 "/html"을 요청하게 되지만, security에 "/", "/home"만 통과하고 나머지는 인증을 받아야하고, 인증이 안되었으면 "/login" 으로 이동시키는 설정을 적용 하였기 때문에 login페이지로 이동이 되는걸 볼 수 있습니다.
간단하게 security를 적용 시켜 보았습니다.
