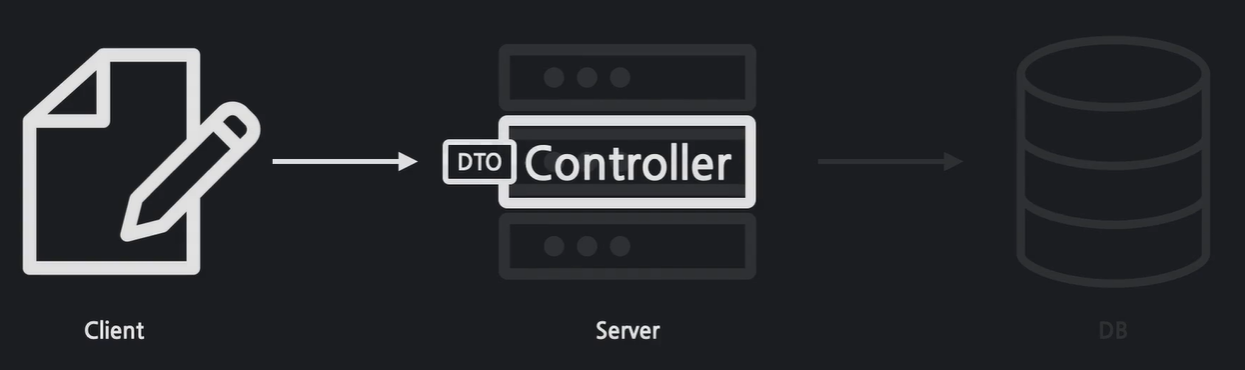
사용자로부터 폼 데이터를 받고, 이를 컨트롤러에서 확인하기
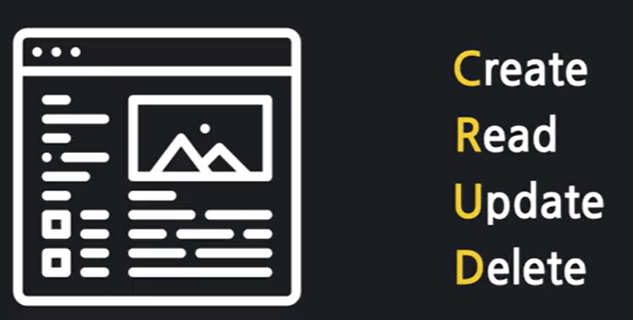
1. Create
: 사용자의 입력이 DB라는 창고에 저장되는 과정 (이번 실습에서는 데이터를 받아서 확인하는 것까지 진행)
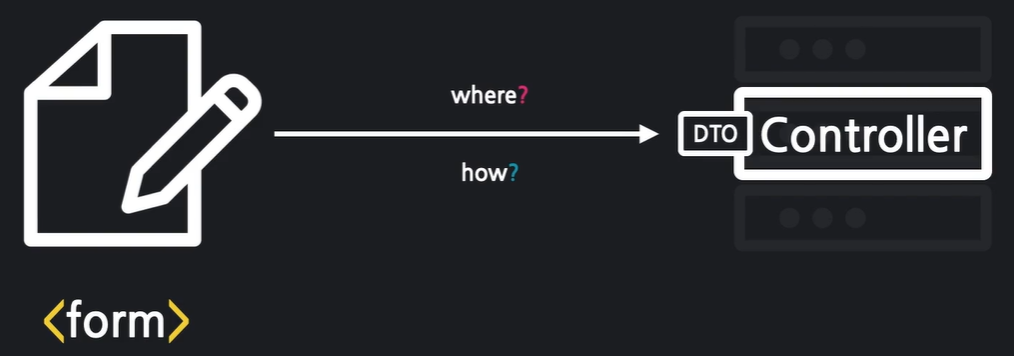
- form 태그에 데이터를 어디에(where) 보낼지, 어떻게(how) 보낼지 적어줘야 함
- form 데이터는 전송이 되고 Controller는 이를 객체에 담아 받음 -> 이때 form 데이터를 받는 객체 : DTO라고 함
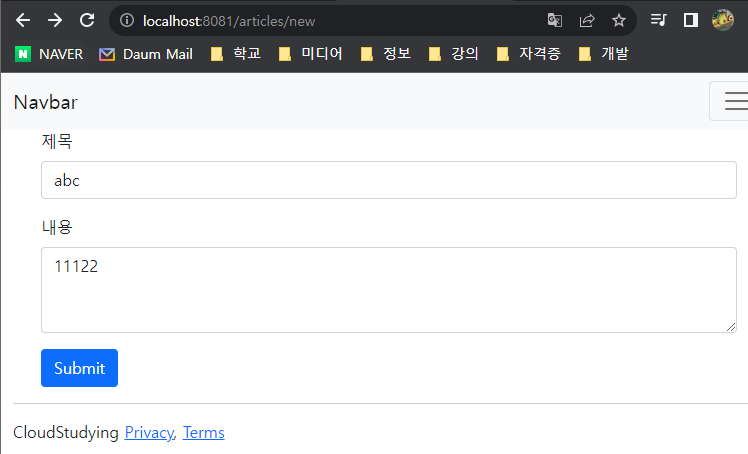
1) 입력폼 만들기 -> new.mustache
2) 컨트롤러 추가 -> @GetMapping("/articles/new")
3) 폼 데이터 전송 -> action="/articles/create" method="post"
4) 폼 데이터 받기 -> @PostMapping("/articles/create")
5) DTO 작성하기 -> ArticleForm.java (폼 데이터를 받아올 그릇 역할)
6) 입력값 이름 주기 -> input name 속성
[form 태그]
- action : 어디에 보낼지
- method : 어떻게 보낼지 (post / get)
[input 태그]
- name : DTO의 필드명과 동일한 이름을 넣어줘야 함 (DTO 연결)
[src/main/resources/templates/articles - new.mustache]
{{>layouts/header}}

<form class="container" action="/articles/create" method="post">
  <div class="mb-3">
    <label class="form-label">제목</label>
    <input type="text" class="form-control" name="title">
  </div>
  <div class="mb-3">
    <label class="form-label">내용</label>
    <textarea class="form-control" rows="3" name="content"></textarea>
  </div>
  <button type="submit" class="btn btn-primary">Submit</button>
</form>

{{>layouts/footer}}
[com.example.firstproject.controller - ArticleController.java]
package com.example.firstproject.controller;
import org.springframework.stereotype.Controller;
import org.springframework.web.bind.annotation.GetMapping;
import org.springframework.web.bind.annotation.PostMapping;
import com.example.firstproject.dto.ArticleForm;

@Controller
public class ArticleController {

	@GetMapping("/articles/new")
	public String newArticleForm() {
		return "articles/new";
	}

	@PostMapping("/articles/create") // POST 방식으로 전송
	public String createArticle(ArticleForm form) {

		System.out.println(form.toString());
		return "";
	}
}
[com.example.firstproject.dto - ArticleForm.java]
: 폼 데이터를 받아올 그릇 역할
package com.example.firstproject.dto;
public class ArticleForm {
private String title;
private String content;
// 생성자 추가
public ArticleForm(String title, String content) {
this.title = title;
this.content = content;
}
@Override
public String toString() {
return "ArticleForm [title=" + title + ", content=" + content + "]";
}
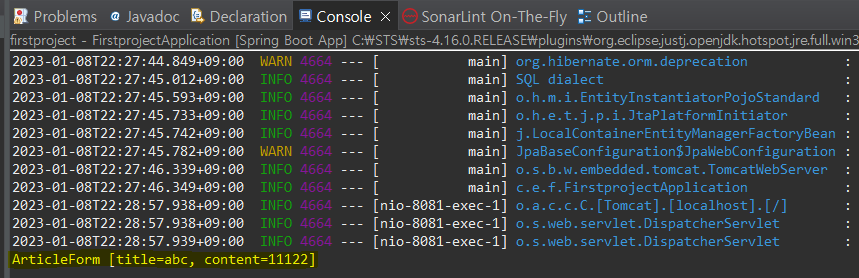
}[결과]
이 게시물은 홍팍님의 인프런 강의를 보고 정리한 게시물 입니다.