[Flutter] 상태 관리 3편(State Management) - Get X [Simple]
State Management
상태 관리 3편(State Management) - Get X [Simple]
상태 관리(State Management) 1편 - State Ful
상태 관리(State Management) 2편 - Value Listenerable
상태 관리(State Management) 4편 - Get X [Reactive]
상태 관리(State Management) 5편 - Provider
상태 관리(State Management) 6편 - Bloc
상태 관리(State Management) 7편 - Cubit
상태 관리(State Management) 8편 - Riverpod
상태 관리(State Management) 9편 - Mobx
Top 7 Flutter State Management Libraries In 2022
Most Popular Packages for State Management in Flutter (2023)
이번 글부터 상태 관리 라이브러리를 사용하여 상태 관리 하는 방법에 대해서 알아보겠다.
먼저 Dart Packages에서 상태 관리 라이브러리 중 인기가 가장 많은 Get에 대해 알아보자.
Get 또는 GetX라고 불리는 상태 관리의 끝판왕이라고 많은 사람들이 소개하는 대표적인 상태 관리 라이브러리 중 하나다.
Get은 Bloc이나 Provider가 사용하는 Stream, Notifier를 사용하지 않은 라이브러리라고 소개하고 있다.
다른 글에서 자세히 다루겠지만 Get은 상태 관리 뿐만 아니라 Router, Localization, Utils 등 다양한 기능을 포함하고 있는 라이브러리이다.
저는 주로 사용하는 상태 관리는 provider이고 프로젝트 규모를 개발할 때는 당연히 Bloc으로 개발을 하고있다. Get은 현재 회사에서 사용하고 있다보니 결국 3대 상태 관리 라이브러리를 모두 접하고 있지만 개인적으로 Get은 추천하지는 않은 라이브러리이다..
물론 Get은 정말 강력한 기능 등을 제공하지만 provider와 같이 규모가 커지면 Bloc에 비해 복잡해지고 유지 보수가 점점 난해해진다. 그래도 provider는 규모에 따라 Bloc과 조합하여 사용하기도 하는데, Get은 다른 라이브러리들과 조합할 일도 없고, 워낙 의존성이 강한 라이브러리라 한 번 도입하면 안쓸수도 없어서 애매해지는 것 같다.
하지만 Flutter를 처음 접하시거나 상태관리를 배워보고 싶으시다면 Get이 가장 좋은 선택일 수도 있다. 이전 개발사에서는 글로벌 플랫폼이라 Get의 라우트와 현지화 기능이 너무 강력해서 Bloc, Provider, Get 3개를 전부 사용한 적도 있었다.
Get의 상태 관리에는 크게 Simple 방식과 Reactive 방식이 있다.
Simple 방식은 GetController에서 update 함수를 실행시켜 상태 변화를 알려주는 방식으로 작동이 되어서 다른 라이브러들의 상태 변경 알림 방식과 비슷하다.
여기서는 Simple 방식을 다뤄볼 예정이고, 다음 글에서 Reactive 방식에 대해서 작성할 예정이다.
dependencies
Get 라이브러리를 추가해 준다.
Get을 사용하기 위해서는 MaterialApp으로 시작되는 부분을 GetMaterialApp으로 변경해 주어야 하는데, 여기서는 상태 관리만 사용하기 때문에 변경해주지 않았다.
다른 라우터나 유틸리티 기능을 사용하려면 변경해야 한다.
get: ^4.6.5Count App
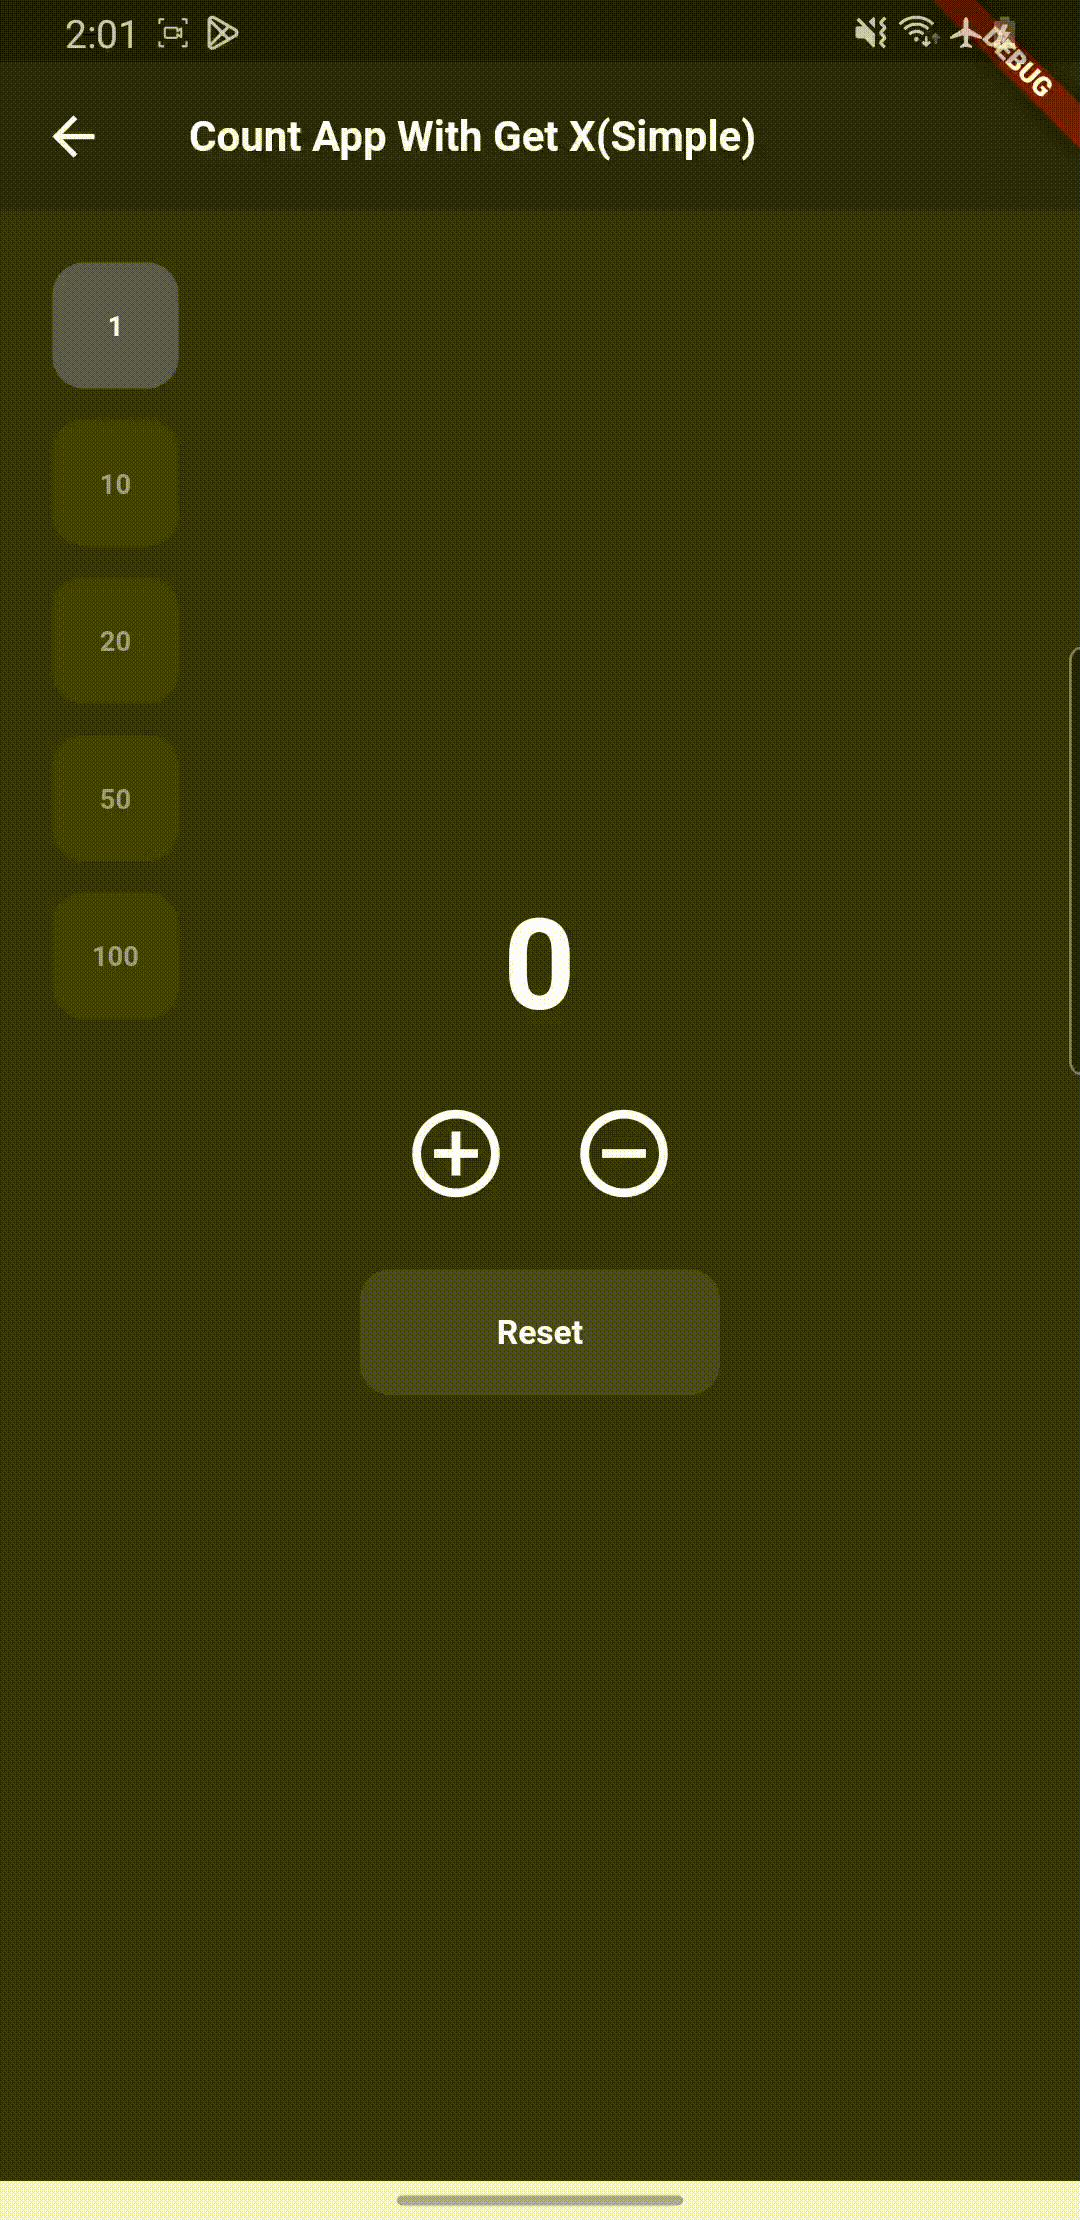
카운터 앱은 Flutter 프로젝트 최초 생성시 기본으로 있는 카운트 앱을 약간 변형하여 리셋 기능을 추가하고 단순히 카운트 상태를 증가/감소만 하는 것이 아닌 얼마 만큼을 증가/감소 시킬지에 대한 상태를 추가하여 해당 값 만큼 증가/감소하는 기능을 가지게끔 만든 예제이다.
모든 상태관리 예제는 해당 기능을 가진 카운트 앱으로 만들어 볼 것이다.
UI
앞으로 모든 상태관리에 동일한 UI파일을 사용할 거여서 상태관리 편에서 UI 내용은 다른 글과 동일할 것이다.
UI는 가운데 카운트를 보여줄 숫자가 있고 바로 하단 Row위젯안에 더하기, 마이너스 아이콘을 배치해뒀다. 그 아래로 reset 기능을 호출할 버튼을 만들었다.
카운트 기능을 사용하는게 단순히 숫자만 올리고 내리는 것이 아니라 얼만큼을 증가시키고 감소시킬지를 선택할 수 있는 넘버 박스들을 왼쪽 상단에 수직으로 배치하여 구성하였다.
여기서는 간단한 상태 관리만 보여주는 정도의 UI여서 다른 글에서 각각의 상태 관리에 대해서 더 깊숙하고 복잡한 UI 구조를 만들어서 사용해 볼 예정이다.
아래 공유한 Git Repository를 방문하면 소스 코드를 오픈해 뒀습니다 !
Stack countScreenPublicUI({
  required BuildContext context,
  required int count,
  required int selectCount,
  required Function() onIncrement,
  required Function() onDecrement,
  required Function() onReset,
  required Function(int) onCount,
}) {
  return Stack(
    children: [
      Column(
        mainAxisAlignment: MainAxisAlignment.center,
        children: [
          SizedBox(
              width: MediaQuery.of(context).size.width,
              child: Center(
                child: Text(
                  "$count",
                  style: const TextStyle(
                      fontSize: 60, fontWeight: FontWeight.bold),
                ),
              )),
          const SizedBox(height: 24),
          Row(
            mainAxisAlignment: MainAxisAlignment.center,
            children: [
              GestureDetector(
                onTap: onIncrement,
                child: const Icon(
                  Icons.add_circle_outline,
                  size: 40,
                ),
              ),
              const SizedBox(width: 24),
              GestureDetector(
                onTap: onDecrement,
                child: const Icon(
                  Icons.remove_circle_outline,
                  size: 40,
                ),
              )
            ],
          ),
          const SizedBox(height: 24),
          GestureDetector(
            onTap: onReset,
            child: Container(
              width: MediaQuery.of(context).size.width / 3,
              height: 48,
              decoration: BoxDecoration(
                  color: const Color.fromRGBO(71, 71, 71, 1),
                  borderRadius: BorderRadius.circular(12)),
              child: const Center(
                child: Text(
                  'Reset',
                  style: TextStyle(fontSize: 16, fontWeight: FontWeight.bold),
                ),
              ),
            ),
          ),
          const SizedBox(height: 40),
        ],
      ),
      Positioned(
        top: 20,
        child: SizedBox(
          height: MediaQuery.of(context).size.height,
          child: Padding(
            padding: const EdgeInsets.only(left: 20),
            child: Column(
              children: [
                countAppSelectedCountBox(
                    onTap: onCount, selectNumber: selectCount, number: 1),
                countAppSelectedCountBox(
                    onTap: onCount, selectNumber: selectCount, number: 10),
                countAppSelectedCountBox(
                    onTap: onCount, selectNumber: selectCount, number: 20),
                countAppSelectedCountBox(
                    onTap: onCount, selectNumber: selectCount, number: 50),
                countAppSelectedCountBox(
                    onTap: onCount, selectNumber: selectCount, number: 100),
              ],
            ),
          ),
        ),
      ),
    ],
  );
}
GestureDetector countAppSelectedCountBox({
required Function(int) onTap,
required int number,
required int selectNumber,
}) {
return GestureDetector(
onTap: () => onTap(number),
child: Padding(
padding: const EdgeInsets.only(bottom: 12),
child: Container(
width: 48,
height: 48,
decoration: BoxDecoration(
color: selectNumber == number
? const Color.fromRGBO(91, 91, 91, 1)
: const Color.fromRGBO(61, 61, 61, 1),
borderRadius: BorderRadius.circular(12)),
child: Center(
child: Text(
'$number',
style: TextStyle(
fontWeight: FontWeight.bold,
color: selectNumber == number
? Colors.white
: const Color.fromRGBO(155, 155, 155, 1)),
)),
),
),
);
}UI 파일에 GetBuilder로 Scaffold를 감싸주면 builder 아래에 있는 위젯은 Controller의 상태 변경 알림을 수신 받을 수 있게 된다.
중요한 부분은 사용할 Controller를 메모리에 올려두는 과정이 필요한데, 여기서는 init에다 선언하여 최초 UI가 발드될 떄 초기화가 진행되도록 하였다.
다른 방법은 Get.put(Controller)을 사용하여도 된다.
 return  GetBuilder<CountAppGet>(
        init: CountAppGet(),
        builder: (controller) {
          return Scaffold(
            appBar: appBar(title: 'Count App With Get X(Simple)'),
            body: countScreenPublicUI(
              context: context,
              count: controller.count,
              selectCount: controller.selectCount,
              onIncrement: () {
                HapticFeedback.mediumImpact();
                controller.updated(true);
              },
              onDecrement: () {
                HapticFeedback.mediumImpact();
                controller.updated(false);
              },
              onReset: () {
                HapticFeedback.mediumImpact();
                controller.updated(null);
              },
              onCount: (int number) {
                HapticFeedback.mediumImpact();
                controller.selected(number);
              },
            ),
          );
        });
GetxController
GetxController를 확장하여 객체 형태로 Controller를 생성해 준다.
count와 selectCount 변수를 선언해 준다.
Controller 안에 보면 onInit을 사용할 수 있는데, 이 부분이 Controller가 최초 메모리에 등록을 할 때 가장 먼저 실행되는 부분이다. 사실 여기서는 onInit을 안써도 상관 없다.
이번엔 함수를 다르게 적용하였는데, isAdd라는 불리언 값을 통해서 isAdd가 null일 경우는 count 값을 0으로 만들어서 리셋 기능을 구현하였고, isAdd가 true인 경우에는 현재 count 값에 선택된 selectCount 값을 더해줬다.
이렇게 값을 변경해 줬으면 UI에도 값이 변했다는 것을 알려주어야 하는데, 이 때 update()를 실행시켜 주면 update()가 호출되는 시점에 UI가 변경된다.
아래 selected 함수에는 얼만큼을 증감 시킬지에 대한 값을 변경해 주는 기능으로 number 값을 받아와서 그대로 selectCount 변수에 대입해주었다.
만약에 UI에 상태 변경 알림이 필요 없이 내부적으로만 사용하는 변수에는 update()를 사용하지 않아도 된다.
class CountAppGet extends GetxController {
int count = 0;
int selectCount = 1;
void updated(bool? isAdd) {
if (isAdd != null) {
if (isAdd) {
count = count + selectCount;
update();
} else {
count = count - selectCount;
update();
}
} else {
count = 0;
update();
}
}
void selected(int number) {
selectCount = number;
update();
}
void onInit() {
count = 0;
selectCount = 1;
super.onInit();
}
}Result
Git
https://github.com/boglbbogl/flutter_velog_sample/tree/main/lib/count_app/get
마무리
Get Simple 방식으로 상태 관리하는 방법에 대해서 간략하게 알아보았는데, Get은 엄청 많은 기능을 가지고 있어서 자세한 내용은 다음에 시간이 될 때 더 자세히 다뤄봐야 할 것 같다.
여기서는 상태 관리 라이브러리들의 간단한 사용 방법만을 비교하기 위해 작성할 글로 봐주면 좋을 것 같다.
다음 글은 Get X의 Reactive 방법에 대해서 작성하도록 하겠다.