AnimatedSwitcher()
오늘은 다양한 animation 기능을 만들 수 있는 AnimatedSwitcher() 위젯에 대하여 알아보겠다
 const AnimatedSwitcher({
    Key? key,
    this.child,
    required this.duration,
    this.reverseDuration,
    this.switchInCurve = Curves.linear,
    this.switchOutCurve = Curves.linear,
    this.transitionBuilder = AnimatedSwitcher.defaultTransitionBuilder,
    this.layoutBuilder = AnimatedSwitcher.defaultLayoutBuilder,
  })
AnimatedSwitcher의 속성 값을 보면 transitionBuilder, layoutBuild에 대해서는 다음에 추가로 살펴볼 예정임
시간을 제어하는 duration과 효과를 제어하는 switch curve 속성만으로도 animation 효과를 만들 수 있다
사용 방법은 매우 간단하다
duration의 속성으로 seconds :1은 1초의 효과를 준다는 뜻이고 curve 속성에는 다양한 효과가 있기에
flutter Reference를 참고해 보는 것이 좋다
기능만을 설명할 것이기에 간단하게 StatefulWidget을 사용함
int index 값을 0으로 초기화해서 @override 위에 추가해준다
@override 아래에 값을 넣게 되면 overriding이 되지 않는다(override에 대해서는 다음에 더 자세히 설명하겠음)
body 안에 AnimatedSwitcher 위젯을 넣어주고 필수 인자인 duration 값을 넣어준다
curve의 default value는 Curves.linear
원하는 위젯을 child에 넣어서 animation 효과를 만들면 된다
여기서는 간단하게 rainbow color로 box를 사라지게 하는 animation 효과를 주었다
여기서 child의 조건문 람다식 표현은...
위 아래 코드 결과값은 같다
index==0 ? _widget1() : _widget2(),

if(index==0){
  return _widget1()
 }else{
 return _widget2()
 }
하지만 아마 아래의 조건문 형식을 위젯에서는 사용할 수 없을것이다
if(index==0) _widget1() else _widget2()이렇게 사용해야 할 것이다(widget에서 조건문 사용 시 람다식 표현만 써서 잘 기억이 안남)
int index = 0;
Widget build(BuildContext context) {
...
} AnimatedSwitcher(
duration: const Duration(seconds: 1),
switchInCurve: Curves.fastOutSlowIn,
switchOutCurve: Curves.fastLinearToSlowEaseIn,
child: index == 0
? _widget1()
: index == 1
? _widget2()
: index == 2
? _widget3()
: index == 3
? _widget4()
: index == 4
? _widget5()
: index == 5
? _widget6()
: index == 6
? _widget7()
: index == 7
? _widget8()
: _widget8(),
)위의 child 코드는 index 값이 1이면 _widget1()을 보여주고 2면 _widget2()를 ... 이렇게 해서 제일 마지막 부분의 _widget8()은 default value다
아래 코드는 위젯을 생성해주는 코드이고 widget의 형태가 container -> container로 넘기게 되면
curve 효과가 생기지 않는다
이 부분은 공부가 더 필요함
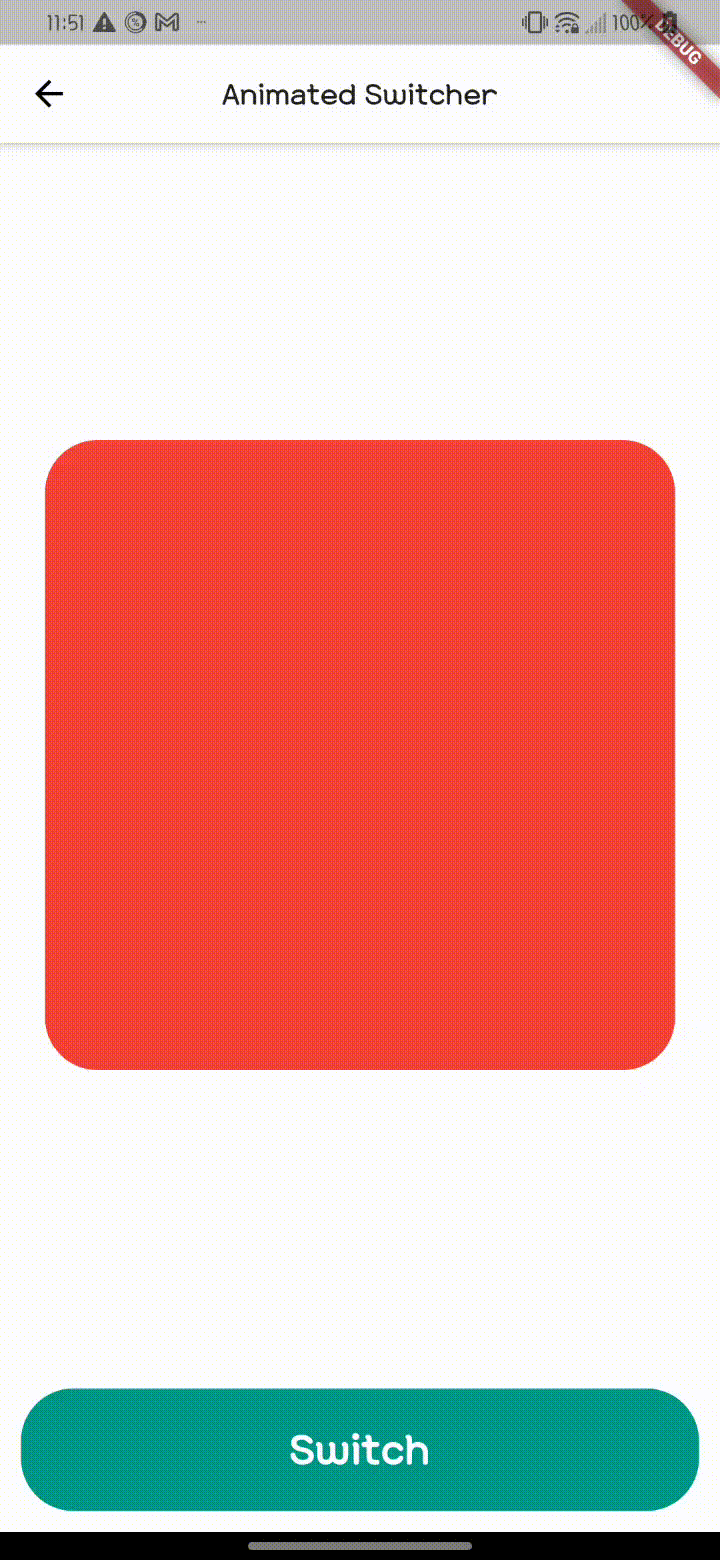
 Widget _widget1() {
    return Container(
      width: 360,
      height: 360,
      decoration: BoxDecoration(
          borderRadius: BorderRadius.circular(30), color: Colors.red),
    );
  }

  Widget _widget2() {
    return SizedBox(
      width: 330,
      height: 330,
      child: Container(
        decoration: BoxDecoration(
          borderRadius: BorderRadius.circular(30),
          color: Colors.orange,
        ),
      ),
    );
  }
  ...
탭 버튼은 scaffold()의 bottomNavigationBar의 위치를 활용해서 버튼을 생성해 주었다
setState안에 switch case 문으로 index 값의 이벤트의 변경을 state에 알릴 수 있다
bottomNavigationBar: InkWell(
        onTap: () {
          setState(() {
            switch (index) {
              case 0:
                index = 1;
                break;
              case 1:
                index = 2;
                break;
              case 2:
                index = 3;
                break;
              case 3:
                index = 4;
                break;
              case 4:
                index = 5;
                break;
              case 5:
                index = 6;
                break;
              case 6:
                index = 7;
                break;

              default:
                index = 0;
            }
          });
        },
        child: Padding(
          padding: const EdgeInsets.all(12.0),
          child: Container(
            height: MediaQuery.of(context).size.height * 0.08,
            decoration: BoxDecoration(
                borderRadius: BorderRadius.circular(30), color: Colors.teal),
            child: const Center(
              child: Text(
                'Switch',
                style: TextStyle(
                    color: Colors.white,
                    fontWeight: FontWeight.bold,
                    fontSize: 30),
              ),
            ),
          ),
        ),
      ),
기능만을 구성하기에 코드를 이렇게 만들었지만 실제 project에서는 이렇게 코드를 만들지는 않는다
StatefulWidget은 실제 project에서는 사용하지 않음
다음에 state, event에 대해서 자세히 작성하겠다
Example