기존 서버를 이용해 동작하던 기능들을 서버리스 환경에서 동작하도록 옮기는 작업을 하려 한다.
Firebase의 Cloud Functions와 Node.js에 대해 아무것도 모르기 때문에.. 구글에서 제공하는 소스코드로 정말 한줄씩 공부해보기로 했다.
(주석 처리가 매우 잘 되어있어서 Cloud Functions나 Node.js에 익숙하면 코드만 보고 공부는 따로 안 해도 이해 잘 할 거라고 생각합니다)
먼저, 썸네일을 만드는 함수를 살펴보기로 했다
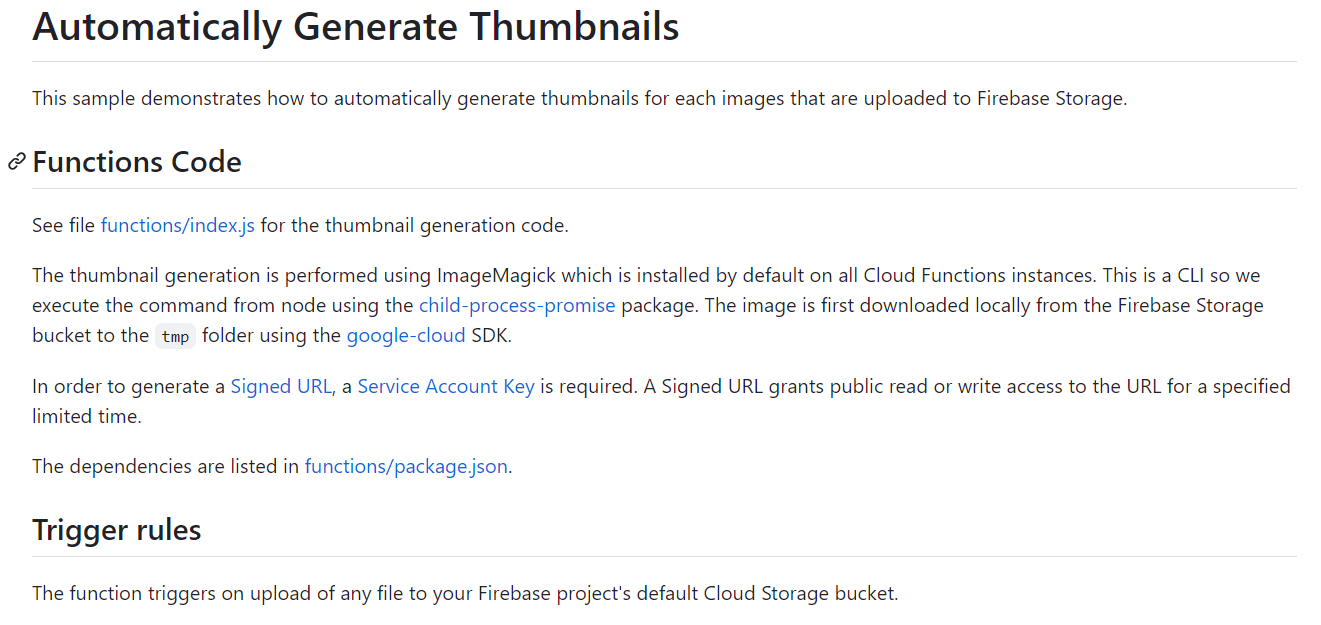
이 함수는 구글 클라우드 스토리지 버킷에 아무 파일이나 올라간다면 트리거되는 함수이다.
디폴트로 설치된 ImageMagick를 이용해 썸네일을 만들 건데 이건 CLI이기 때문에 child-process-promise 패키지도 함께 이용한다. 먼저 구글 클라우드 SDK를 이용해 이미지를 버킷 안의 tmp라는 폴더에 저장할 거다.
signed url을 생성해야 하기 때문에 service account key가 필요하다.
함수를 확인할 수 있는 index.js를 열어보자.
/**
 * Copyright 2016 Google Inc. All Rights Reserved.
 *
 * Licensed under the Apache License, Version 2.0 (the "License");
 * you may not use this file except in compliance with the License.
 * You may obtain a copy of the License at
 *
 *      http://www.apache.org/licenses/LICENSE-2.0
 *
 * Unless required by applicable law or agreed to in writing, software
 * distributed under the License is distributed on an "AS IS" BASIS,
 * WITHOUT WARRANTIES OR CONDITIONS OF ANY KIND, either express or implied.
 * See the License for t`he specific language governing permissions and
 * limitations under the License.
 */
'use strict';

const functions = require('firebase-functions');
const mkdirp = require('mkdirp-promise');
// Include a Service Account Key to use a Signed URL
const gcs = require('@google-cloud/storage')({keyFilename: 'service-account-credentials.json'});
const admin = require('firebase-admin');
admin.initializeApp();
const spawn = require('child-process-promise').spawn;
const path = require('path');
const os = require('os');
const fs = require('fs');

// Max height and width of the thumbnail in pixels.
const THUMB_MAX_HEIGHT = 200;
const THUMB_MAX_WIDTH = 200;
// Thumbnail prefix added to file names.
const THUMB_PREFIX = 'thumb_';

/**
 * When an image is uploaded in the Storage bucket We generate a thumbnail automatically using
 * ImageMagick.
 * After the thumbnail has been generated and uploaded to Cloud Storage,
 * we write the public URL to the Firebase Realtime Database.
 */
exports.generateThumbnail = functions.storage.object().onFinalize((object) => {
  // File and directory paths.
  const filePath = object.name;
  const contentType = object.contentType; // This is the image MIME type
  const fileDir = path.dirname(filePath);
  const fileName = path.basename(filePath);
  const thumbFilePath = path.normalize(path.join(fileDir, `${THUMB_PREFIX}${fileName}`));
  const tempLocalFile = path.join(os.tmpdir(), filePath);
  const tempLocalDir = path.dirname(tempLocalFile);
  const tempLocalThumbFile = path.join(os.tmpdir(), thumbFilePath);

  // Exit if this is triggered on a file that is not an image.
  if (!contentType.startsWith('image/')) {
    console.log('This is not an image.');
    return null;
  }

  // Exit if the image is already a thumbnail.
  if (fileName.startsWith(THUMB_PREFIX)) {
    console.log('Already a Thumbnail.');
    return null;
  }

  // Cloud Storage files.
  const bucket = gcs.bucket(object.bucket);
  const file = bucket.file(filePath);
  const thumbFile = bucket.file(thumbFilePath);
  const metadata = {
    contentType: contentType,
    // To enable Client-side caching you can set the Cache-Control headers here. Uncomment below.
    // 'Cache-Control': 'public,max-age=3600',
  };

  // Create the temp directory where the storage file will be downloaded.
  return mkdirp(tempLocalDir).then(() => {
    // Download file from bucket.
    return file.download({destination: tempLocalFile});
  }).then(() => {
    console.log('The file has been downloaded to', tempLocalFile);
    // Generate a thumbnail using ImageMagick.
    return spawn('convert', [tempLocalFile, '-thumbnail', `${THUMB_MAX_WIDTH}x${THUMB_MAX_HEIGHT}>`, tempLocalThumbFile], {capture: ['stdout', 'stderr']});
  }).then(() => {
    console.log('Thumbnail created at', tempLocalThumbFile);
    // Uploading the Thumbnail.
    return bucket.upload(tempLocalThumbFile, {destination: thumbFilePath, metadata: metadata});
  }).then(() => {
    console.log('Thumbnail uploaded to Storage at', thumbFilePath);
    // Once the image has been uploaded delete the local files to free up disk space.
    fs.unlinkSync(tempLocalFile);
    fs.unlinkSync(tempLocalThumbFile);
    // Get the Signed URLs for the thumbnail and original image.
    const config = {
      action: 'read',
      expires: '03-01-2500',
    };
    return Promise.all([
      thumbFile.getSignedUrl(config),
      file.getSignedUrl(config),
    ]);
  }).then((results) => {
    console.log('Got Signed URLs.');
    const thumbResult = results[0];
    const originalResult = results[1];
    const thumbFileUrl = thumbResult[0];
    const fileUrl = originalResult[0];
    // Add the URLs to the Database
    return admin.database().ref('images').push({path: fileUrl, thumbnail: thumbFileUrl});
  }).then(() => console.log('Thumbnail URLs saved to database.'));
});
전체 함수는 요런 식인데 정신이 없고요...?
부분부분 뜯어봅니다
part 1
'use strict';javascript에서 문법을 엄격하게 체크하는 모드를 켭니다.
part 2
const functions = require('firebase-functions');
const mkdirp = require('mkdirp-promise');
// Include a Service Account Key to use a Signed URL
const gcs = require('@google-cloud/storage')({keyFilename: 'service-account-credentials.json'});
const admin = require('firebase-admin');
admin.initializeApp();
const spawn = require('child-process-promise').spawn;
const path = require('path');
const os = require('os');
const fs = require('fs');
기본적으로 쓸 건 모두 호출해줘야겠죠?
모르는 패키지는 npm js 문서에서 확인 가능합니다
'mkdirp-promise'는 mkdir -p 작업처럼 작동한다
mkdir -p : 여러 덱스의 하위 디렉토리를 생성
'@google-cloud/storage'는 버킷 접근할 때 쓰임
const admin = require('firebase-admin');
admin.initializeApp();
요 부분은 한 셋트
나중에 데이터베이스에 이미지 경로와 썸네일 url을 푸시할 때 쓰이네요
'child-process-promise'는 썸네일 변환 명령어 CLI로 작동하도록 함
'fs'로는 나중에 fs.unlinkSync 함수로 업로드된 파일을 로컬에서 지우도록 함
part 3
// Max height and width of the thumbnail in pixels.
const THUMB_MAX_HEIGHT = 200;
const THUMB_MAX_WIDTH = 200;
// Thumbnail prefix added to file names.
const THUMB_PREFIX = 'thumb_';
썸네일 크기 지정해주고 썸네일 파일명 앞에 붙일 prefix 정해주기
part 4 : exports.generateThumbnail 정의 시작
exports.generateThumbnail = functions.storage.object().onFinalize((object) => {
  // File and directory paths.
  const filePath = object.name;
  const contentType = object.contentType; // This is the image MIME type
  const fileDir = path.dirname(filePath);
  const fileName = path.basename(filePath);
  const thumbFilePath = path.normalize(path.join(fileDir, `${THUMB_PREFIX}${fileName}`));
  const tempLocalFile = path.join(os.tmpdir(), filePath);
  const tempLocalDir = path.dirname(tempLocalFile);
  const tempLocalThumbFile = path.join(os.tmpdir(), thumbFilePath);
functions.storage를 이용하여 스토리지에 관련한 이벤트를 처리하는 함수를 만든다. functions.storage.object()를 이용하면 기본 스토리지 버킷의 객체 변경사항을 수신 대기한다.
onFinalize는 버킷에서 새 객체가 생겼을 때 트리거됨 (업로드 실패의 경우 이 이벤트를 트리거하지 않음)
그러고 object를 함수에서 쓸 수 있도록 넘겨준다.
먼저 필요한 상수값 정의해줘야겠죠
파일 경로, 객체의 타입, 파일 경로로 알아낸 파일의 디렉토리와 파일 이름, 썸네일을 만들 경로 (파일 디렉토리와 파일 이름, 그리고 아까 정의한 THUMB_PREFIX를 이용해 만듦)
로컬에 temp로 저장할 파일과 그 디렉토리, temp로 저장할 썸네일파일도 지정해준다.
part 5 : exports.generateThumbnail 계속 정의
  // Exit if this is triggered on a file that is not an image.
  if (!contentType.startsWith('image/')) {
    console.log('This is not an image.');
    return null;
  }

  // Exit if the image is already a thumbnail.
  if (fileName.startsWith(THUMB_PREFIX)) {
    console.log('Already a Thumbnail.');
    return null;
  }
콘텐츠 타입을 확인해서 이미지 파일이 아니면 null을 리턴
만약 썸네일을 제작할 때 트리거된 거면 역시 null을 리턴
part 6 : exports.generateThumbnail 계속 정의
  // Cloud Storage files.
  const bucket = gcs.bucket(object.bucket);
  const file = bucket.file(filePath);
  const thumbFile = bucket.file(thumbFilePath);
  const metadata = {
    contentType: contentType,
    // To enable Client-side caching you can set the Cache-Control headers here. Uncomment below.
    // 'Cache-Control': 'public,max-age=3600',
  };
구글 클라우드 스토리지 패키지를 이용해 객체의 버킷을 쓸 수 있도록 한다.
버킷 안에 넣을 파일 경로와, 썸네일 경로를 모두 정의해준다.
-> 각각 file, thumbFile이 됩니다
메타데이터로는 콘텐츠타입만 들어가도록 정의한다.
part 7 : 본격 exports.generateThumbnail 작업
  // Create the temp directory where the storage file will be downloaded.
  return mkdirp(tempLocalDir).then(() => {
    // Download file from bucket.
    return file.download({destination: tempLocalFile});
  }).then(() => {
    console.log('The file has been downloaded to', tempLocalFile);
    // Generate a thumbnail using ImageMagick.
    return spawn('convert', [tempLocalFile, '-thumbnail', `${THUMB_MAX_WIDTH}x${THUMB_MAX_HEIGHT}>`, tempLocalThumbFile], {capture: ['stdout', 'stderr']});
  }).then(() => {
    console.log('Thumbnail created at', tempLocalThumbFile);
    // Uploading the Thumbnail.
    return bucket.upload(tempLocalThumbFile, {destination: thumbFilePath, metadata: metadata});
  }).then(() => {
    console.log('Thumbnail uploaded to Storage at', thumbFilePath);
    // Once the image has been uploaded delete the local files to free up disk space.
    fs.unlinkSync(tempLocalFile);
    fs.unlinkSync(tempLocalThumbFile);
    // Get the Signed URLs for the thumbnail and original image.
    const config = {
      action: 'read',
      expires: '03-01-2500',
    };
    return Promise.all([
      thumbFile.getSignedUrl(config),
      file.getSignedUrl(config),
    ]);
  }).then((results) => {
    console.log('Got Signed URLs.');
    const thumbResult = results[0];
    const originalResult = results[1];
    const thumbFileUrl = thumbResult[0];
    const fileUrl = originalResult[0];
    // Add the URLs to the Database
    return admin.database().ref('images').push({path: fileUrl, thumbnail: thumbFileUrl});
  }).then(() => console.log('Thumbnail URLs saved to database.'));
});
코드를 어떻게 나눠야 할지 몰라서 그냥 다 떼려넣어버렸네..
(1) 스토리지 파일이 다운로드될 tempLocalDir부터 만들어줍니다 (mkdir -p 작업)
return 후에는 다 .then()) => 으로 다음 작업이 일어날 수 있도록 짜여 있다
(2) gcs.bucket.file.download({destination: tempLocalFile}) 작업으로 임시 디렉터리에 파일을 다운로드한다. 여기선 미리 정의된 file로 이 작업이 처리됨.
(3) 이 파일이 tempLocalFile에 다운로드 되었다는 로그를 날린다.
spawn 함수를 이용해 convert 명령어를 실행시킨다. tempLocalFile을 -thumbnail 옵션으로 썸네일을 만들도록 하며, 썸네일 크기도 함께 인수로 넘겨둔다. 명령 실행 중에 출력과 에러를 캡처하도록 한다.
(4) 로컬에 썸네일 파일이 만들어졌음을 알리는 로그를 보낸다.
이 썸네일을 버킷에 업로드해야한다. gcs.bucket.file.upload({destination: thumbFilePath, metadata: metadata}) 함수를 이용하여 업로드한다.
(5) 구글 스토리지에 썸네일 파일이 정상적으로 업로드 됐다는 로그를 보낸다.
썸네일 파일이 업로드되었으므로 로컬 파일들을 삭제해준다. (fs.unlinkSync 명령어 이용)
썸네일 이미지와 오리지널 이미지의 signed url을 생성하여 데이터베이스에 저장하는 작업을 한다. signed url의 config를 정의한다. 여기선 2500년까지 유효한 signed url을 만들었는데 이 방식으로 만들어도 최대 7일간 유효하다고 함. Promise.all은 두 프로미스 객체를 동시에 실행한다. 모든 프로미스가 왼료되면 결과를 배열로 반환한다. 여기서는 results로 반환되겠다
(6) signed url을 얻었다는 로그를 보낸다.
results[0][0]은 썸네일 url, results[1][0]은 파일 url이고 여기서 받은 url을 database에 푸시해준다.
근데 여기서 궁금한 건 signed url은 7일만 유효하다고 했는데 이걸 데이터베이스에 넣어두는 게 의미가 있는지..? 찾아봐야겠다
(7) 썸네일 url이 데이터베이스에 저장되었다는 로그를 보낸다.
확실히 한줄한줄 쓰니까 이해가 잘 되는 느낌이네엽,,
예제 하나 더 확인해봐야겠다!
