빌더 쓰는 이유
생성자를 여러개 만들기 귀찮아서
원래라면
- java-study / temp / BuilderTemp.java
package temp;

import lombok.Builder;

@Builder
class Human {
    private String name;
    private Integer age;

    public Human(String name, Integer age) {
        this.name = name;
        this.age = age;
    }

    public String getName() {
        return name;
    }

    public Integer getAge() {
        return age;
    }

    public void setName(String name) {
        this.name = name;
    }

    public void setAge(Integer age) {
        this.age = age;
    }

    @Override
    public String toString() {
        return "Human [name=" + name + ", age=" + age + "]";
    }

}

public class BuilderTemp {

    public static void main(String[] args) {

        Human human = Human.builder()
        .name("홍길동")
        .build();

        System.out.println(human);


    }

}
받아오는 매개변수별로 생성자를 만들어줘야하는데
매개변수가 많아질수록 생성자를 많이 만들어야 하는 일이 생긴다.
builder를 쓰면 생성자 하나만 만들어주면 된다.

화살표 함수
- 원래 함수 만드는 법
public 리턴타입 함수명(매개변수타입 매개변수이름){
return 리턴할 값
}
public String getName(){
return "홍길동";
}
public String getName(String 성){
return 성 + "길동";
}
- 화살표 함수
(매개변수이름) -> 리턴할 값
// 내용이 한 줄 이면 return을 안 적는다
() -> "홍길동";
(성) -> 성 + "길동";
// 내용이 두줄이면 {} 쓰고 return할게 있으면 return적어야한다
(성) -> {
return 성 + "길동";
}
ex) LoginUserDTO.java
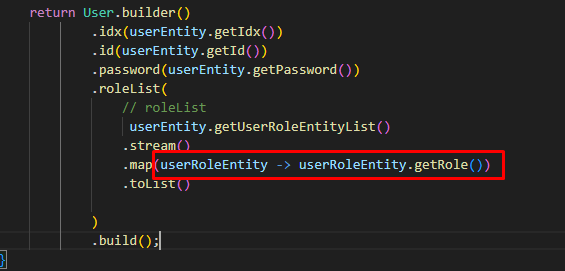
매개변수로 userRoleEntity
리턴할 값은 userRoleEntity.getRole() 이다.
forEach -> 그냥 반복문
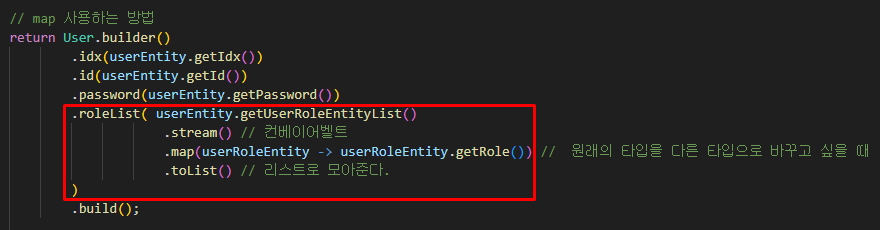
map -> 원래의 타입을 다른 타입으로 바꾸고 싶을 때
filter -> 원하는 조건의 값만 뽑아내기
왜 map을 쓰나?
ex)
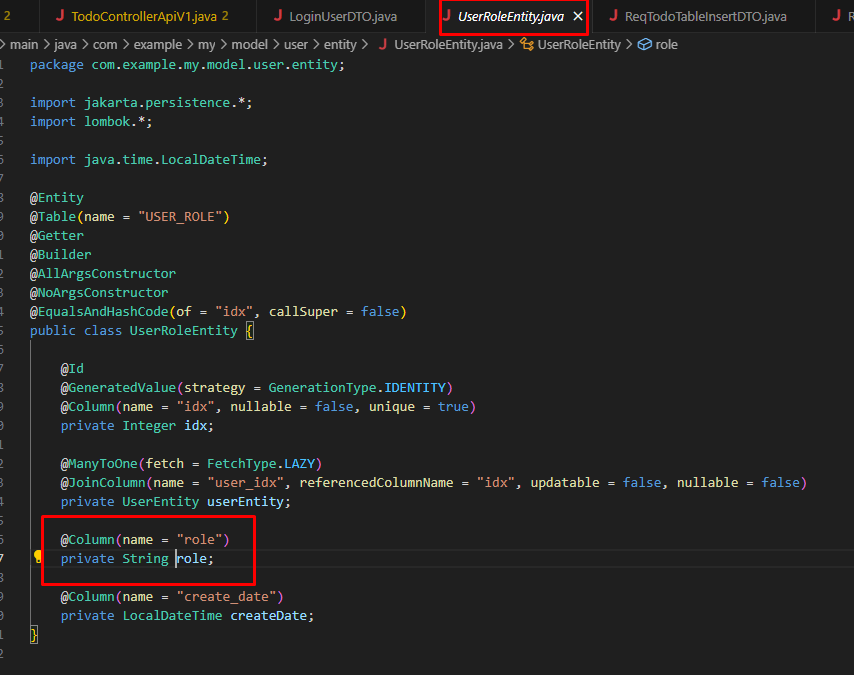
UserRoleEntity의 role 만 가져오고싶다.
- LoginUserDTO.java
UserRoleEntity의 role 은 String 타입인데 LoginUserDTO에서는 List< String > 타입의 roleList가 필요하다.
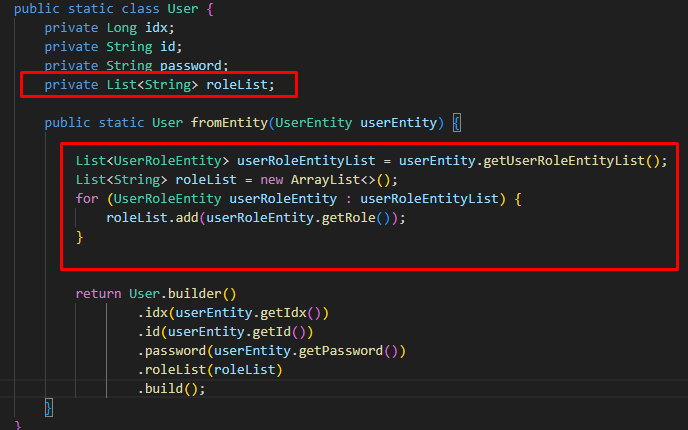
이럴때 map 을 쓰지 않으면 ,
List< String > 타입 의 새로운 roleList를 만들어서
for each문을 돌려 값을 넣어줘야한다.
- map 사용
복습
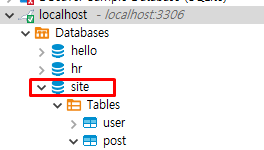
hr - site
post테이블 , user테이블 삭제하고 다시 시작

- 테이블 생성
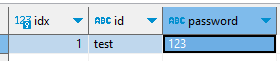
- user 테이블

user테이블을 만들고 컬럼을 추가한다.

idx는 기본키로 한다.

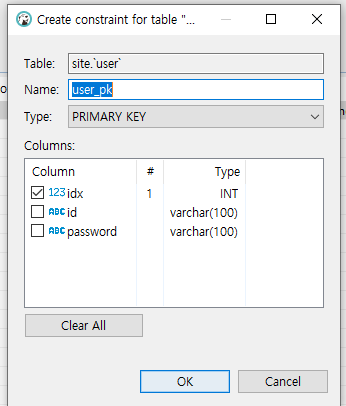
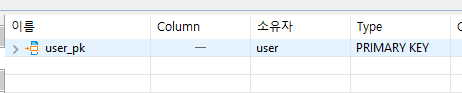
기본키를 안 만들면 테이블 생성이 안되더라..
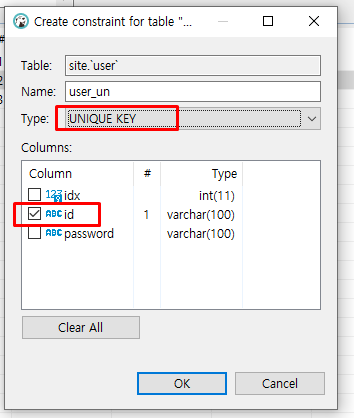
id는 유니크 키로한다.

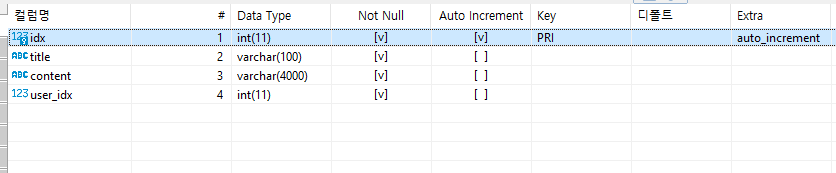
- post 테이블
- user 테이블에 로우추가
- post 테이블에 로우추가

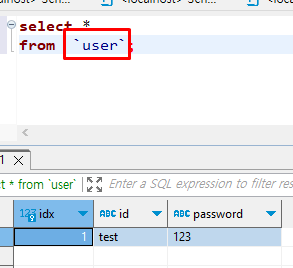
테이블 이름을 백틱으로 감싸줘야 오류가 안난다.
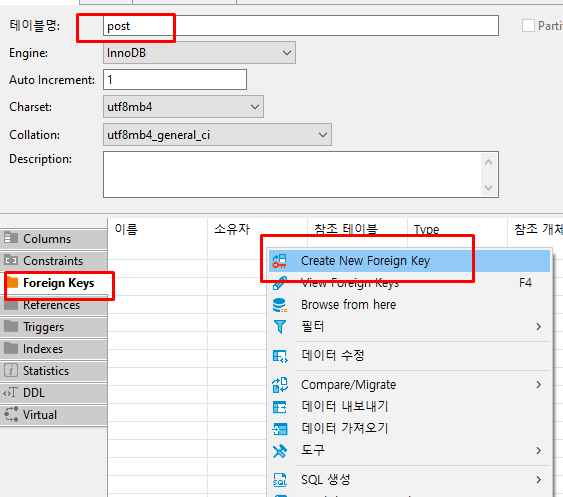
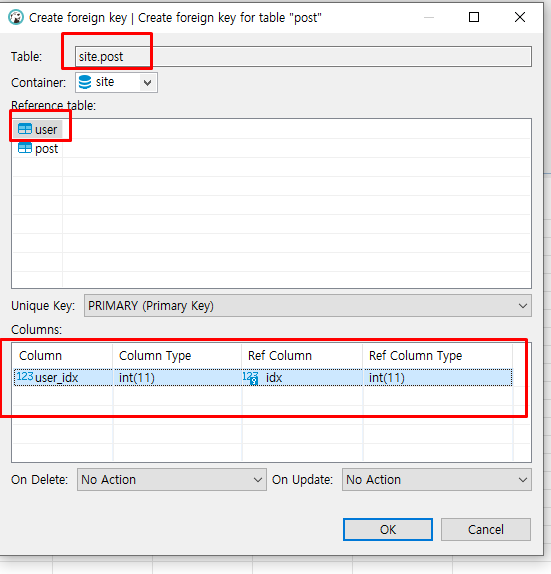
- post의 user_idx와 user의 idx 연관시키기

Spring Initializer
- spring boot 프로젝트 만들기
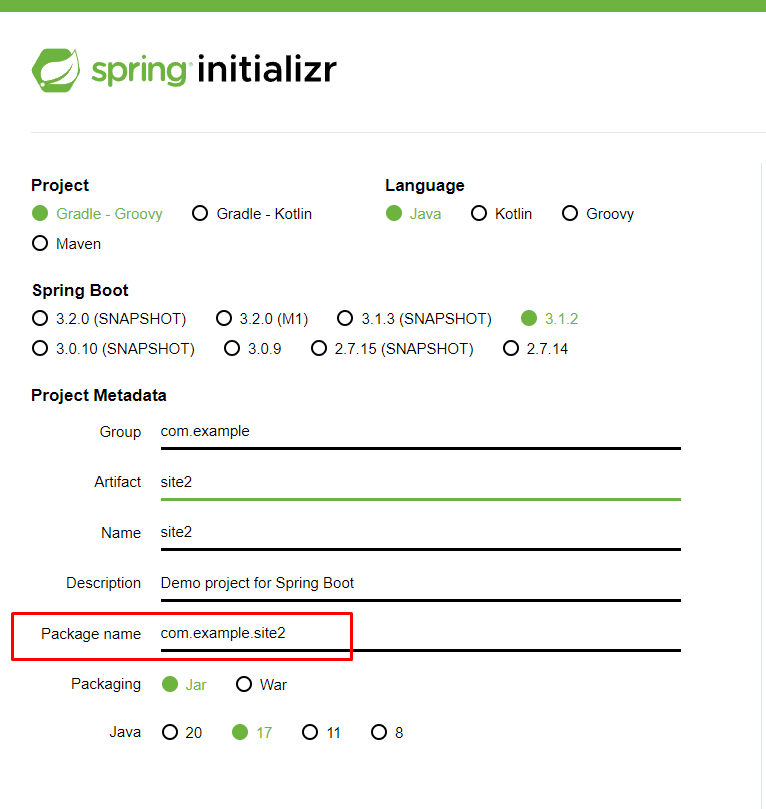
패키지는 거꾸로 넣어준다.
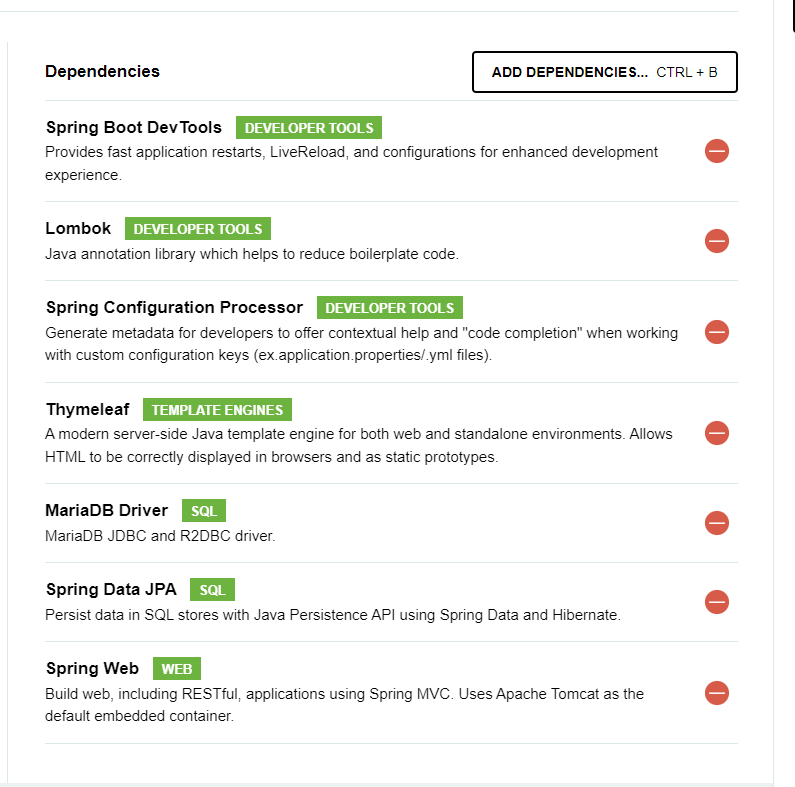
디펜던시 추가.
site2 연습
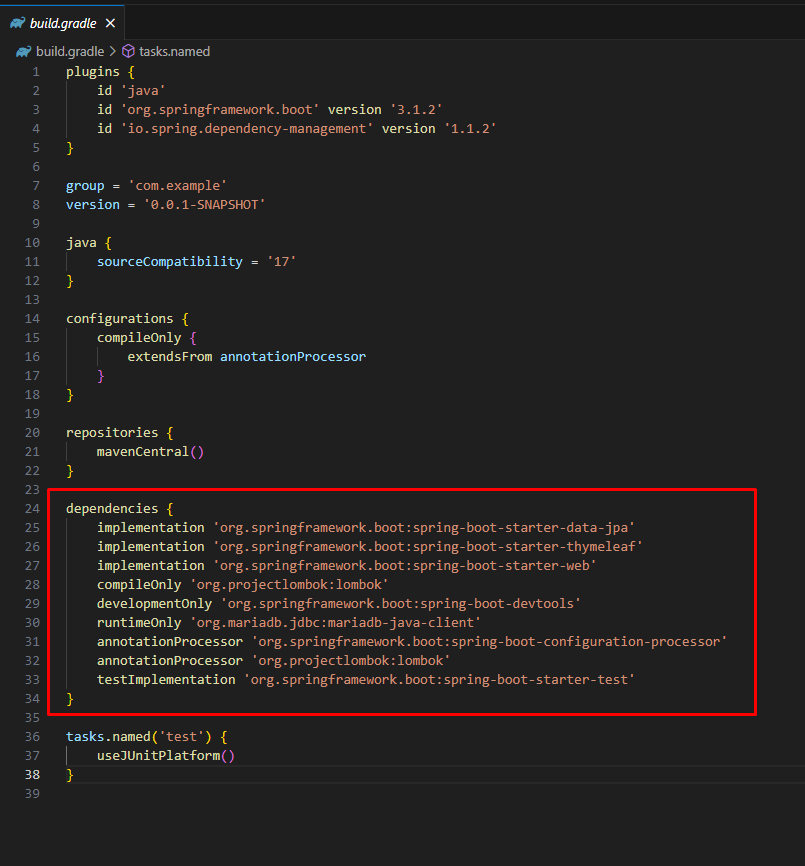
- build.gradle
원하는 라이브러리를 다 다운 받아준다.
스프링부트를 안 쓰면 직접 다 받고 세팅해야함.
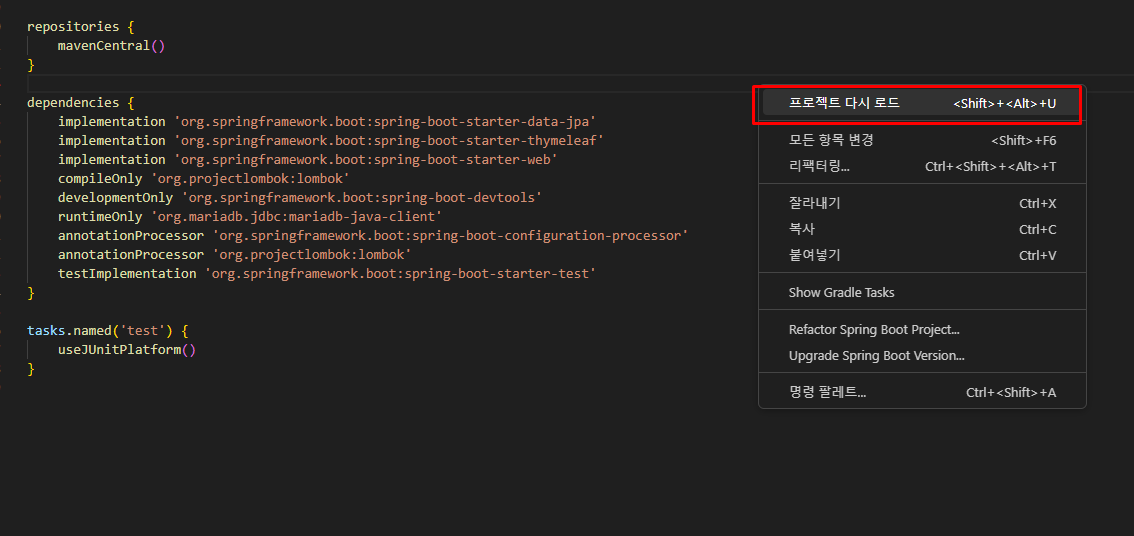
build.gradle 수정했으면 꼭 '프로젝트 다시로드' 해줘야 함.
- Site2Application 처음 실행
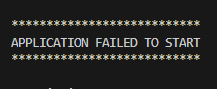
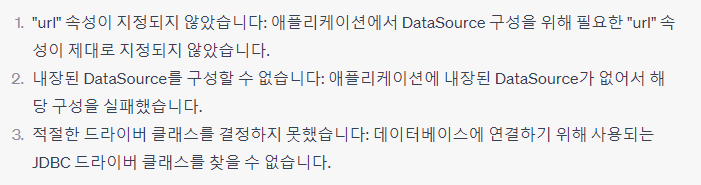
Failed to configure a DataSource: 'url' attribute is not specified and no embedded datasource could be configured.
Reason: Failed to determine a suitable driver class
오류메세지 뜬다.
chat gpt 물어봄.
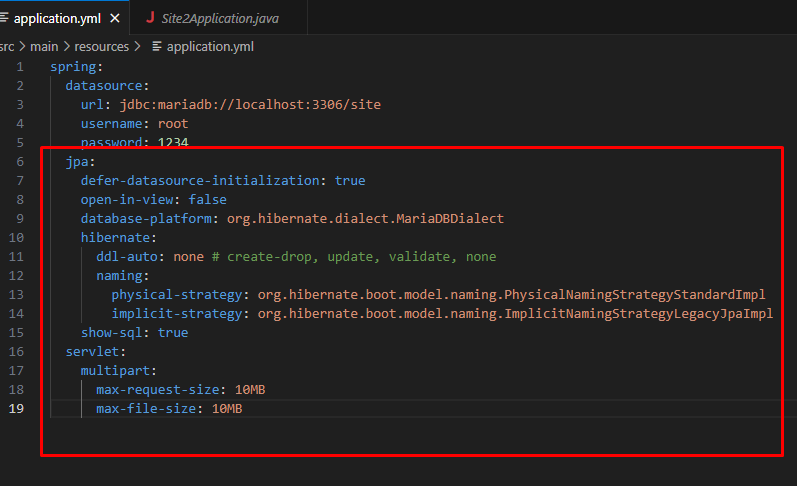
데이터베이스 연결하기
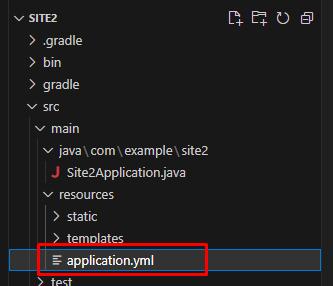
이름 yml로 바꿔주고
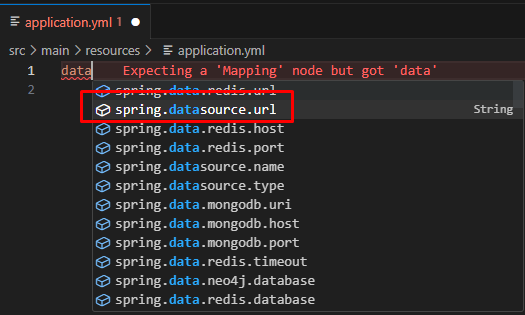
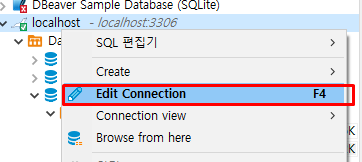
dbeaver 에 들어가서 주소를 본다.
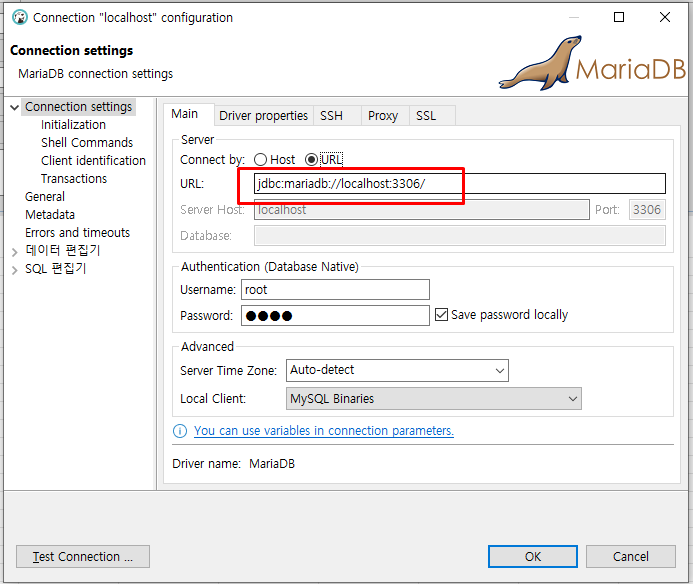
주소 복사해서
site 사용할거라서
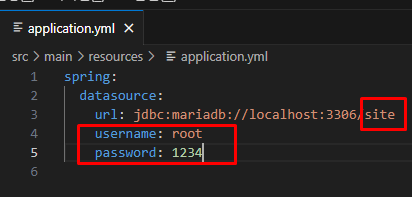
주소 붙여넣고 /site 적어준다
username과 password도 적어준다.
( 만약 비밀번호에 0011 이면 "0011" 이렇게 감싸줘야함. )
강사님이 주신 코드 복붙.
화면 띄우기
화면 만들고 컨트롤러로 연결
- Controller 만들기
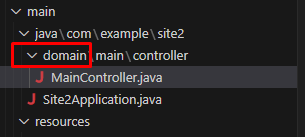
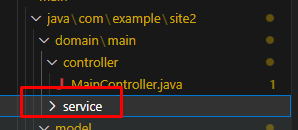
domain 폴더 만들기
domain - 해당 기능별 페이지
domain 폴더 안에 main폴더 만들고 main 폴더 안에 controller폴더 만든다.
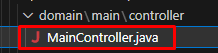
- MainController.java
package com.example.site2.domain.main.controller;

import org.springframework.stereotype.Controller;
import org.springframework.web.servlet.ModelAndView;

@Controller
public class MainController {
    public ModelAndView mainPage(){
        ModelAndView modelAndView = new ModelAndView();
        return modelAndView;
    }
}
- html 만들기
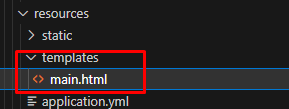
resources / templates / main.html
- main.html
타임리프 사용하기 위해 넣어준다.
- Controller와 html연결
- MainController.java
package com.example.site2.domain.main.controller;

import org.springframework.stereotype.Controller;
import org.springframework.web.bind.annotation.GetMapping;
import org.springframework.web.servlet.ModelAndView;

@Controller
public class MainController {

    @GetMapping("/") // 유저한테 받는주소
    public ModelAndView mainPage(){
        ModelAndView modelAndView = new ModelAndView();
        modelAndView.setViewName("main"); // 파일경로
        return modelAndView;
    }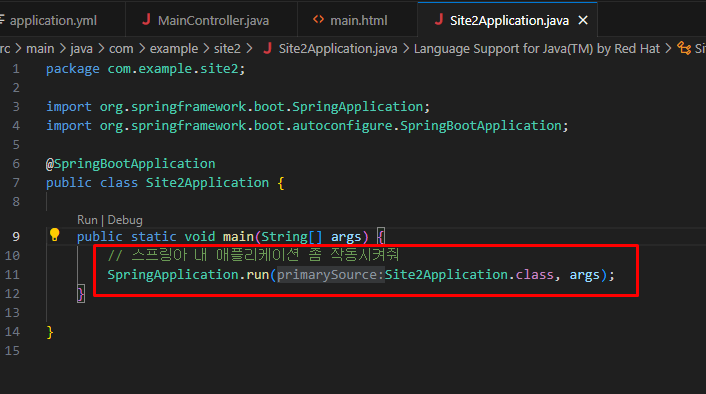
}- 실행 -> Site2Application.java
- 실행화면

DB에 있는 내용 불러온 거 아니다.
그냥 html에 임의로 내가 넣어준 값을 화면에 띄운것.
- Entitiy, Repository 만들기
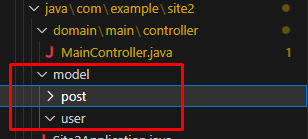
model 폴더 안에 post, user폴더 만든다.
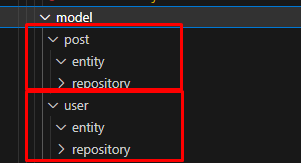
각각의 폴더 안에 entity 와 repository 폴더를 따로 만든다.
- entity
데이터베이스에 있는 테이블을 자바클래스로 만든것.
- UserEntity.java
데이터베이스는 띄어쓰기를 _ 언더바로 한다.
자바는 대문자로

@GeneratedValue를 사용하는 이유는 Auto increment 쓰기 위해서.
Auto increment : 데이터베이스 테이블에서 기본 키(primary key) 값을 자동으로 증가시키는 기능
@GeneratedValue(strategy = GenerationType.IDENTITY)시퀀스는 오라클
나머지는 아이덴티티
@Entity
@Table(name = "`user`")
public class UserEntity {

    @Id // 프라이머리키에 붙인다.
    @GeneratedValue(strategy = GenerationType.IDENTITY) // 오토인크리먼트 쓰기위해
    @Column(name="idx", nullable = false, unique = true)
    private Long idx;

    @Column(name = "id", nullable = false)
    private String id;

    @Column(name = "password", nullable = false)
    private String password;
}
- 수정
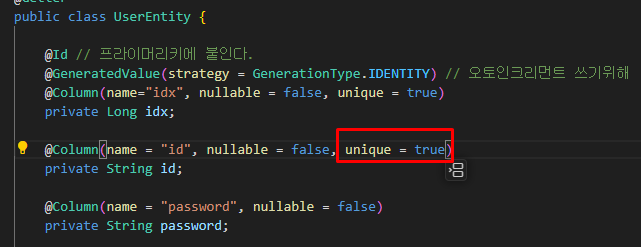
id 는 unique 해야하므로
@AllArgsConstructor
@AllArgsConstructor 는 자동으로 생성자를 만들어 준다.
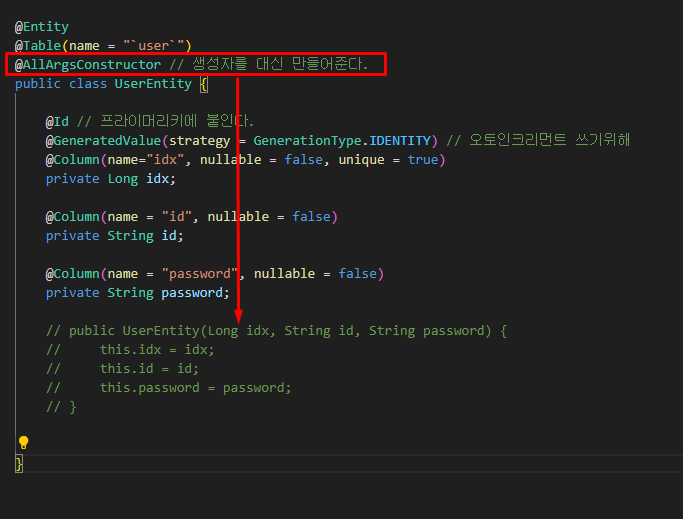
모든 필드를 갖는 생성자 생성
클래스의 모든 필드를 인자로 받는 생성자를 자동으로 생성해 줌.
JPA에서는 엔터티 클래스의 생성자가 필요하며, 모든 필드를 갖는 생성자는 주로 사용됨. 외부에서 엔터티를 생성할 때 필요한 모든 속성을 한 번에 설정할 수 있다.
@NoArgsConstructor
@NoArgsConstructor 매개변수를 하나도 안 받는 기본생성자를 만들어 준다.
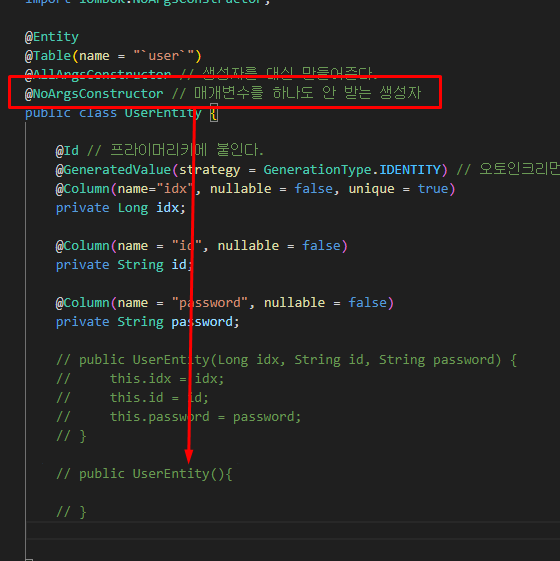
매개변수 없는 기본 생성자 생성
@NoArgsConstructor는 매개변수가 없는 기본 생성자를 자동으로 생성해 줌.
JPA에서는 엔터티 클래스가 매개변수가 없는 기본 생성자를 갖추어야 하는 경우가 있다. 예를 들어, JPA 프로바이더가 엔터티를 생성할 때 매개변수 없는 생성자를 사용하는 경우가 있다.
@Getter Getter 메서드를 자동으로 생성해준다.
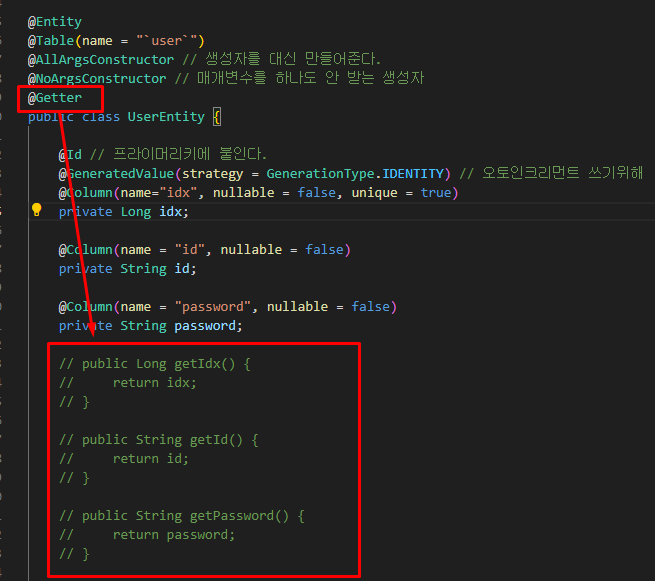
@Getter Getter 메서드를 자동으로 생성해준다.
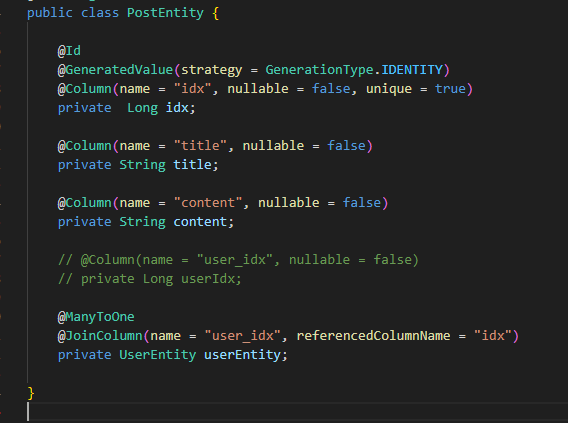
- PostEntity도 만들어준다.
이러한 애노테이션을 사용하면 코드의 양을 줄이고, 생성자 및 게터/세터 등을 간편하게 생성할 수 있다. Lombok을 사용하면 반복적이고 지루한 코드를 줄여주고, 개발자가 더 간결하고 가독성 높은 코드를 작성할 수 있도록 도와줌.
- Repository
데이터베이스에서 데이터 가져오는 : 리파지토리
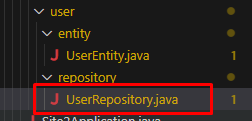
- UserRepository.java

JpaRepository를 상속받아 JPA를 사용하여 UserEntity 클래스를 조작하는데 필요한 메서드를 정의하는 인터페이스.
JPA에서 매핑되는 엔티티 클래스와 클래스의 기본 키(primary key)를 적어준다.
JpaRepository
: 스프링 데이터 JPA(Spring Data JPA) 프로젝트에서 제공하는 인터페이스.
JPA(Java Persistence API)를 기반으로 데이터베이스와 상호작용하는데 사용되는 기본적인 데이터 액세스 작업을 쉽게 수행할 수 있도록 도와주는 인터페이스
JpaRepository를 상속받았기 때문에 추가적인 코딩 없이도 데이터베이스에 대한 CRUD 작업을 쉽게 수행할 수 있다.
스프링 부트에서 JPA를 사용하지 않고 데이터베이스에 대한 CRUD(Create, Read, Update, Delete) 작업 하려면,
주로 JDBC(Java Database Connectivity)를 사용하여 직접 SQL 쿼리를 작성하고 실행해야 함.
ex) JDBC를 사용하여 데이터베이스에 연결
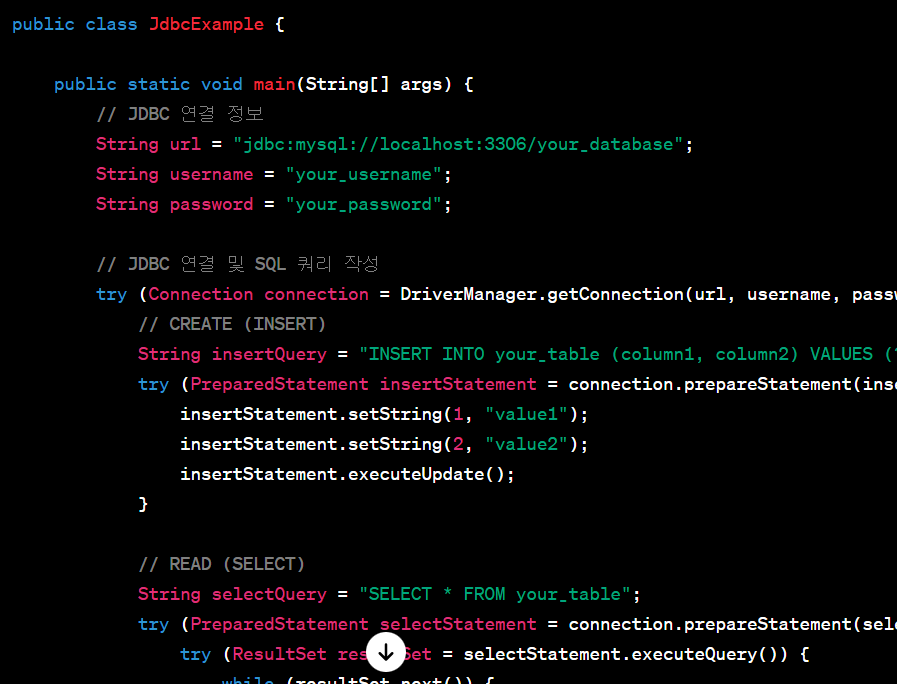
JPA를 사용하면, 객체와 데이터베이스 간의 매핑을 제공하므로 SQL 쿼리 작성이 줄어들고, 더 객체 지향적이고 간결한 코드를 작성할 수 있다.
- PostRepository.java

데이터베이스와 리파지토리와 엔티티 관계
<데이터베이스 테이블>
실제 데이터
나무에 달린 콩
<리파지토리>
농부 (콩을 가져오는 사람)
<자바 엔티티>
마트에 있는 콩
인터페이스는 객체로 만들 수 없다.
인터페이스 쓰는 이유 jparepository가 만들어준다.
jpa를 안쓰면 클래스 만들어서 직접 써줘야한다.
jpa가 클래스를 알아서 만들어준다.

- 연습
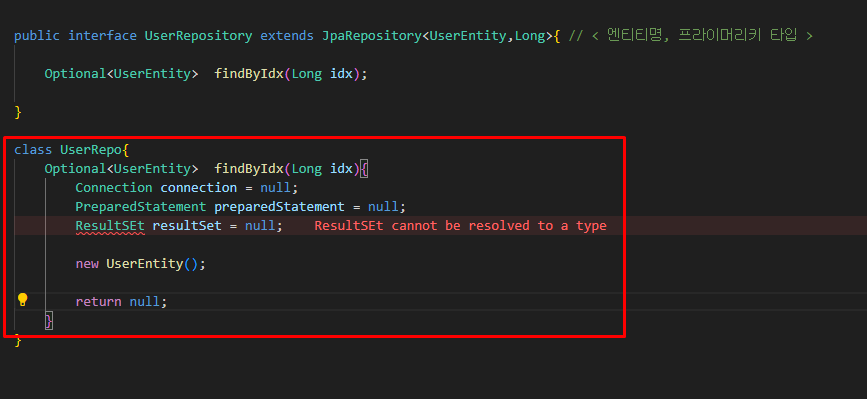
public interface UserRepository extends JpaRepository<UserEntity,Long>{ // < 엔티티명, 프라이머리키 타입 >
// select * from user where idx = ?
Optional<UserEntity> findByIdx(Long idx); // 함수명만 만들어 주면 쿼리를 만들어준다.
// select * from user where id = ?
Optional<UserEntity> findById(String id); // Optional : null체크를 하기위해
// select * from user where password = ?
List<UserEntity> findByPassword(String password);
// select *
// from user
// where idx = ?
// and id = ?
Optional<UserEntity> findByIdxAndId(Long idx, String id);
// select *
// from user
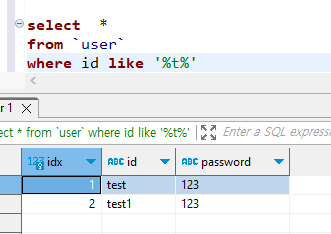
// where id like '%?%';
List<UserEntity> findByContaining(String id); // 여러개 들고 올 수 있어서 List
}
Optional을 사용하는 경우 null 값을 갖지 않게 되어 NullPointerException이 발생하지 않음.
- 조인할 때

@JoinColumn
외래 키(Foreign Key)를 지정하는데 사용. 외래 키는 관계를 가지고 있는 다른 엔티티의 기본 키(primary key)와 연결. @JoinColumn 을 사용하여 외래 키가 생성되는 컬럼의 이름과 참조하는 엔티티의 어떤 필드를 참조해야 하는지를 지정할 수 있다.
PostEntity 엔티티에서 UserEntity 엔티티와의 관계를 맺기 위해 외래 키를 사용
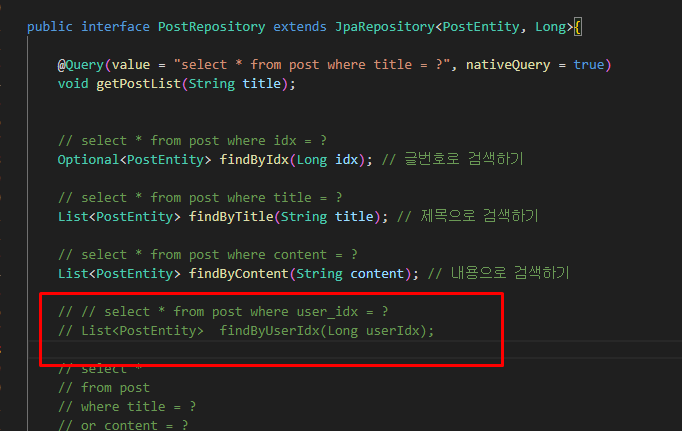
없애준다.
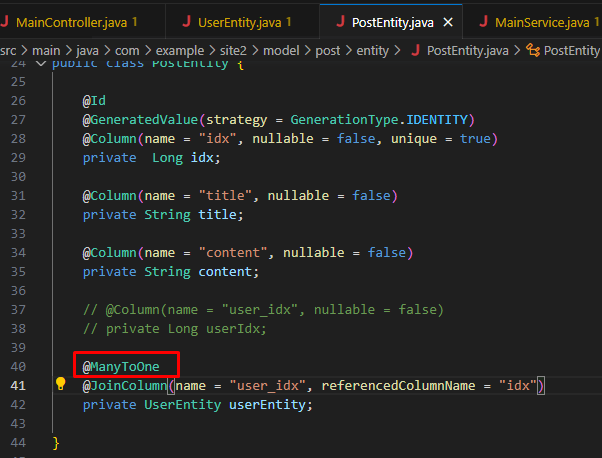
@ManyToOne
다대일(Many-to-One) 관계 표현.
PostEntity는 UserEntity와 다대일 관계를 맺고 있으며, 이 관계를 맺는 외래 키 컬럼은 "user_idx"이고, 이 컬럼은 UserEntity 엔티티의 기본 키 컬럼인 "idx"를 참조.
PostEntity를 조회할 때 연관된 UserEntity 정보를 함께 가져올 수 있다.
- Service
domain / main / service 폴더 만든다.
- MainService.java
@Service
@Transactional(readOnly = true)
public class MainService {

    @Autowired //  UserRepository 에 의존
    private UserRepository userRepository;

    public ResMainDTO getMainData(){
        // 원두가져오기
       List<UserEntity> userEntityList = userRepository.findAll();
       // 아메리카노 컵 준비하기
        List<MainUserDTO> mainUserDTOList = new ArrayList<>();

        for (UserEntity userEntity : userEntityList ) {
            // 원두를 아메리카노로 만들기
            MainUserDTO mainUserDTO = new MainUserDTO(userEntity.getIdx(),userEntity.getId());
            // 아메리카노를 컵에 담기
            mainUserDTOList.add(mainUserDTO);

        }
        // 캐리어에 아메리카노들 담고 컨트롤러한테 넘겨주기
        return new ResMainDTO(mainUserDTOList);

}
}- 실행

조인을 쓰지 않아도 jpa 사용하면 데이터 가져올 수 있다.
컨트롤러,서비스,리파지토리 관계
커피숍
손님 - 아메리카노 주세요
컨트롤러
(카운터 직원) - 커피타는 직원한테 의존적
손님 아메리카노 나왔습니다.
서비스
(커피타는 직원) - 커피재료 가져오는 직원한테 의존적
재료를 섞어서 아메리카노를 만듦
리파지토리
(커피재료 가져오는 직원)
원두 / 얼음 / 물 ...
- DTO
Data Transfer Object
데이터를 담고있는 객체, 데이터 전송 객체
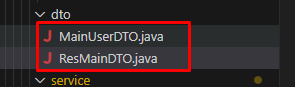
MainUserDTO - 커피들
ResMainDTO -커피들 담는거
- MainUserDTO.java
@AllArgsConstructor
@NoArgsConstructor
@Getter
public class MainUserDTO {
    private Long idx;
    private String id;
}
- ResMainDTO.java
@AllArgsConstructor
@NoArgsConstructor
@Getter
public class ResMainDTO {
    private List<MainUserDTO> mainUserDTOList;
}
MainUserDTO 객체들을 담을 수 있는 mainUserDTOList라는 이름의 멤버 변수를 선언.
이 변수는 해당 클래스 내부에서만 접근이 가능하고, MainUserDTO 클래스의 객체들을 담을 수 있는 리스트 역할을 한다.
Service와 Controller 연결, model에 데이터 담기
- MainController.java
String 방식
@Controller
public class MainController {

    @Autowired
    private MainService mainService;

    // String 방식
    @GetMapping("/") // 유저한테 받는주소
    public String mainPage1(Model model){
        ResMainDTO dto = mainService.getMainData();
        model.addAttribute("dto", dto);
      return "main";
    }
  }
ModelAndView 방식
@Controller
public class MainController {

    @Autowired
    private MainService mainService;

  // ModelAndView 방식
    @GetMapping("/") // 유저한테 받는주소
    public ModelAndView mainPage(){
        ModelAndView modelAndView = new ModelAndView();
        ResMainDTO dto = mainService.getMainData();
        modelAndView.addObject("dto", dto);
        modelAndView.setViewName("main"); // 파일경로
        return modelAndView;
    }
}
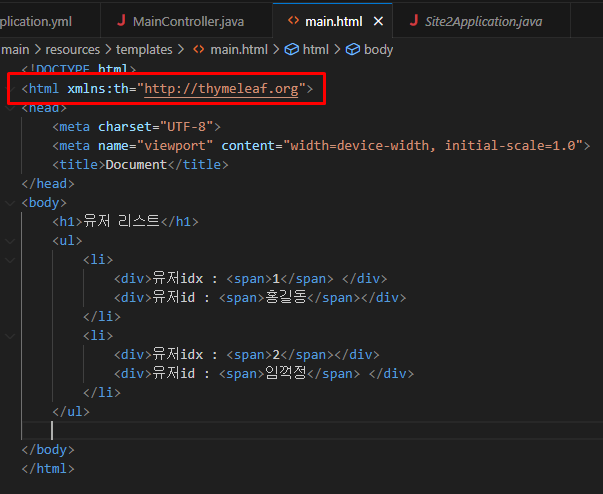
html화면에 데이터 뿌리기
- main.html
<!DOCTYPE html>
<html xmlns:th="http://thymeleaf.org">
<head>
    <meta charset="UTF-8">
    <meta name="viewport" content="width=device-width, initial-scale=1.0">
    <title>Document</title>
</head>
<body>
    <h1>유저 리스트</h1>
    <ul>
        <li th:each="user : ${dto.mainUserDTOList}" >
            <div>유저idx : <span th:text="${user.idx}">1</span> </div>
            <div>유저id : <span  th:text="${user.id}">홍길동</span></div>
        </li>

    </ul>

</body>
</html>
순서
html
컨트롤러 html연결
엔티티
리파지토리
서비스
dto
서비스랑 컨트롤러 연결
model에 데이터 담기
html화면에 데이터 뿌리기
