
React + Typescript + emotion 세팅
1. 개발 환경 세팅
- 사용할 패키지 설치
npx create-react-app ./ --template typescript
npm i react-router-dom
npm i @emotion/react
npm i axios
위의 명령어를 사용하면 내가 현재 있는 위치에 타입스크립트가 적용된 리액트를 설치할 수 있다.
순서대로 입력해서 react-router-dom, emotion, axios를 설치해주자.
- eslint와 prettier 설치와 설정
그 후 eslint와 prettier 세팅을 해줘야하는데 이미 자신에 맞게 세팅이 되어 있다면 이 부분은 무시해도 된다.
우선은 비쥬얼 스튜디오 코드 익스텐션에서 ESlint와 Prettier을 설치해주자

설치 후 루트 폴더에서 .eslintrc 와 .prettierrc 파일을 생성하고 아래의 코드를 입력해주자
// .eslintrc
{
  "parser": "@typescript-eslint/parser",
  "plugins": ["react", "@typescript-eslint"],
  "extends": [
    "eslint:recommended",
    "plugin:react/recommended",
    "plugin:prettier/recommended"
  ],
  "rules": {
    "@typescript-eslint/explicit-module-boundary-types": "off",
    "react/no-unknown-property": ["error", { "ignore": ["css"] }],
    "no-undef": "off"
  },
  "settings": {
    "react": {
      "version": "detect"
    }
  }
}
// .prettierrc
{
"printWidth": 80,
"singleQuote": true,
"trailingComma": "all",
"tabWidth": 2,
"useTabs": false,
"semi": true
}2. 디렉토리 구조 짜기
나는 공부하면서 게속 지금 만든 프로젝트를 리팩토링하면서 업그레이드 할 예정이기 때문에 디렉토리 구조를 짜기 전에 고민을 많이 했다.
여러가지 고수님들의 깃 레포지토리를 구경해보고 사이드 프로젝트를 진행 하면서도 동료분들이 어떻게 디렉토리 구조를 짜고 작업을 하는지 열심히 관찰했다.
내가 고려한 부분은 아래와 같다.
- 확장성
결국 지금 공부하면서 프로젝트를 만드는 거기 때문에 나중에 추가되는 것들을 생각하면서 폴더 구조를 짰다.- 일반화
사이드 프로젝트를 같이 진행하는 동료에게 들은 내용인데, url이나 api 부분 같은 경우에는 철자 하나로 휴먼 에러를 일으킬 수 있기 때문에 url이나 api는 상수화 해서 사용하는 것이 좋다고 한다.- 재활용성과 유지 보수
일단 components를 분리해서 나누는 것 자체가 내 생각에는 이미 재활용성을 생각하는 구조 인 것 같다. 하지만 거기서도 어떻게 분리하고 코드를 짜는거에 따라 재활용성이 높고 유지 보수도 쉬워질 것 같다고 생각한다.
먼저 완성된 디렉토리 구조를 보자면 아래와 같다.
├── README.md
├── package-lock.json
├── package.json
├── public
│   ├── favicon.ico
│   ├── index.html
│   ├── logo192.png
│   ├── logo512.png
│   ├── manifest.json
│   └── robots.txt
├── src
│   ├── App.css
│   ├── App.test.tsx
│   ├── App.tsx
│   ├── components
│   │   ├── Button
│   │   ├── Header
│   │   │   └── index.tsx
│   │   ├── Post
│   │   └── SideBar
│   │       └── index.tsx
│   ├── index.css
│   ├── index.tsx
│   ├── logo.svg
│   ├── pages
│   │   ├── Home
│   │   │   └── index.tsx
│   │   ├── PageA
│   │   │   └── index.tsx
│   │   ├── PageB
│   │   │   └── index.tsx
│   │   ├── PageC
│   │   │   └── index.tsx
│   │   ├── Post
│   │   └── PostDetail
│   │       └── index.tsx
│   ├── react-app-env.d.ts
│   ├── reportWebVitals.ts
│   ├── setupTests.ts
│   ├── styles
│   │   └── GlobalStyles.tsx
│   └── utils
│       ├── models
│       │   ├── Post
│       │   │   └── index.ts
│       │   └── SideBar
│       │       └── index.ts
│       └── routes
│           └── Path.ts
├── tsconfig.json
└── yarn.lock
위의 디렉토리 구조는 brew install tree를 통해 설치 후 터미널에서 뽑아낸 디렉토리 구조이다.
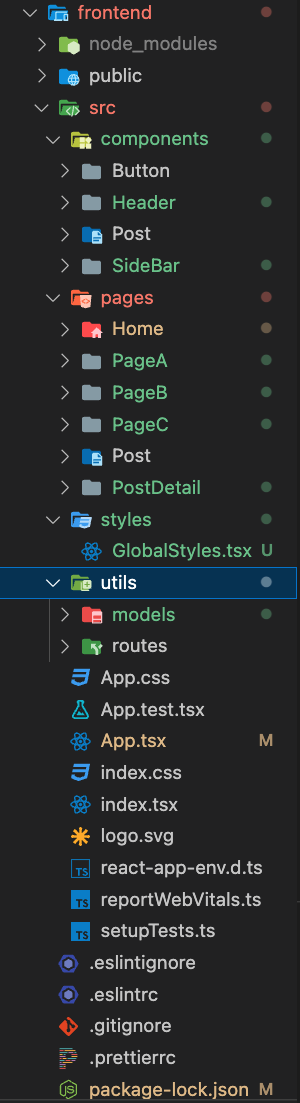
비쥬얼 스튜디오 코드로 보면 위와 같은 구조로 짰다.
React 제작
1. components 제작
시작하기 전에 emotion Global을 이용해서 css reset 소스를 만들어 주겠다.
- src/styles/GlobalStyles.tsx
/** @jsxImportSource @emotion/react */
import { Global } from '@emotion/react';
import { css } from '@emotion/react';
import React, { ComponentProps } from 'react';
export const GlobalStyles: React.FC<ComponentProps<any>> = () => (
<Global
styles={css`
/* Reset styles */
* {
box-sizing: border-box;
margin: 0;
padding: 0;
}
html,
body,
#root {
height: 100%;
}
body {
margin: 0;
padding: 0;
font-family: sans-serif;
}
ul {
margin: 0;
padding: 0;
list-style: none;
}
a {
color: #333;
text-decoration: none;
}
`}
/>
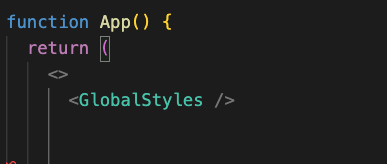
);위 처럼 만들고 난 후 아래와 같이 App.tsx 안에 저렇게 선언해주면 global css가 들어간다.
Header, SideBar를 컴포넌트로 제작
- components/Header/index.tsx
/** @jsxImportSource @emotion/react */

import React from 'react';
import { css } from '@emotion/react';

const headerStyle = css`
  position: fixed;
  left: 0;
  top: 0;
  width: 100%;
  height: 50px;
  background-color: #fff;
  border-bottom: 1px solid #ddd;
  display: flex;
  align-items: center;
  padding: 0 20px;
`;

const logoStyle = css`
  font-size: 32px;
  font-weight: bold;
`;

const Header: React.FC = () => {
  return (
    <header css={headerStyle}>
      <h1 css={logoStyle}>React - Django Blog</h1>
    </header>
  );
};

export default Header;
- components/SideBar/index.tsx
/** @jsxImportSource @emotion/react */

import React from 'react';
import { MenuListType } from '@/utils/models/SideBar';
import { css } from '@emotion/react';
import { Link, useLocation } from 'react-router-dom';

const sideBarStyle = css`
  flex-basis: 300px;
  flex-shrink: 0;
  height: 100%;
  background-color: #fff;
  font-size: 18px;
  border-right: 1px solid #ddd;

  ul {
    display: flex;
    flex-direction: column;

    li {
      border-bottom: 1px solid #ddd;

      &.active a {
        color: royalblue;
      }

      a {
        display: block;
        height: 100%;
        padding: 10px 20px;
        transition: 0.3s;

        &:hover {
          color: royalblue;
        }
      }
    }
  }
`;

const menuList: MenuListType[] = [
  {
    id: 1,
    title: 'Home',
    path: '/',
  },
  {
    id: 2,
    title: 'Page A',
    path: '/a',
  },
  {
    id: 3,
    title: 'Page B',
    path: '/b',
  },
  {
    id: 4,
    title: 'Page C',
    path: '/c',
  },
];

const SideBar: React.FC = () => {
  const location = useLocation();

  return (
    <article css={sideBarStyle}>
      <ul>
        {menuList.map((menu) => (
          <li
            key={menu.id}
            className={location.pathname === menu.path ? 'active' : ''}
          >
            <Link to={menu.path}>{menu.title}</Link>
          </li>
        ))}
      </ul>
    </article>
  );
};

export default SideBar;
위의 코드에서 최상단에 적혀 있는 /** @jsxImportSource @emotion/react */ 이 코드는 react에서 emotion을 사용할 때 필수로 적어줘야 에러 없이 정상적으로 emotion이 작동한다.
위의 코드는 결국 공부겸 포트폴리오로 사용하기 위해 굉장히 공을 들일 예정이기 때문에 메뉴도 하드 코딩으로 넣지 않고 map을 사용했다. 나중에는 카테고리 및 메뉴를 동적으로 추가하거나 삭제할 수 있게 확장해 볼 생각이다.
MenuListType[] 이라고 타입을 지정해 줬는데, 이 부분은 src/utils/models/SideBar/index.ts의 경로에서 선언해서 export 해준 인터페이스 이다.
export interface MenuListType {
  id: number;
  title: string;
  path: string;
}
2. pages 제작
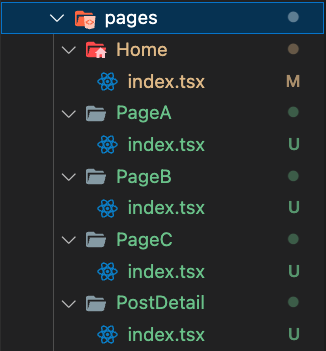
pages안의 page들은 위와 같이 분리 해준다.
import React from 'react';

const PageA = () => {
  return <div>PageA</div>;
};

export default PageA;
일단 각 폴더안의 index.tsx는 각 페이지를 반환할 수 있게만 작성해준다.
3. react-router-dom 세팅
- 루트 경로에 있는 index.tsx에서 아래와 같이
BrowserRouter로 감싸준다.

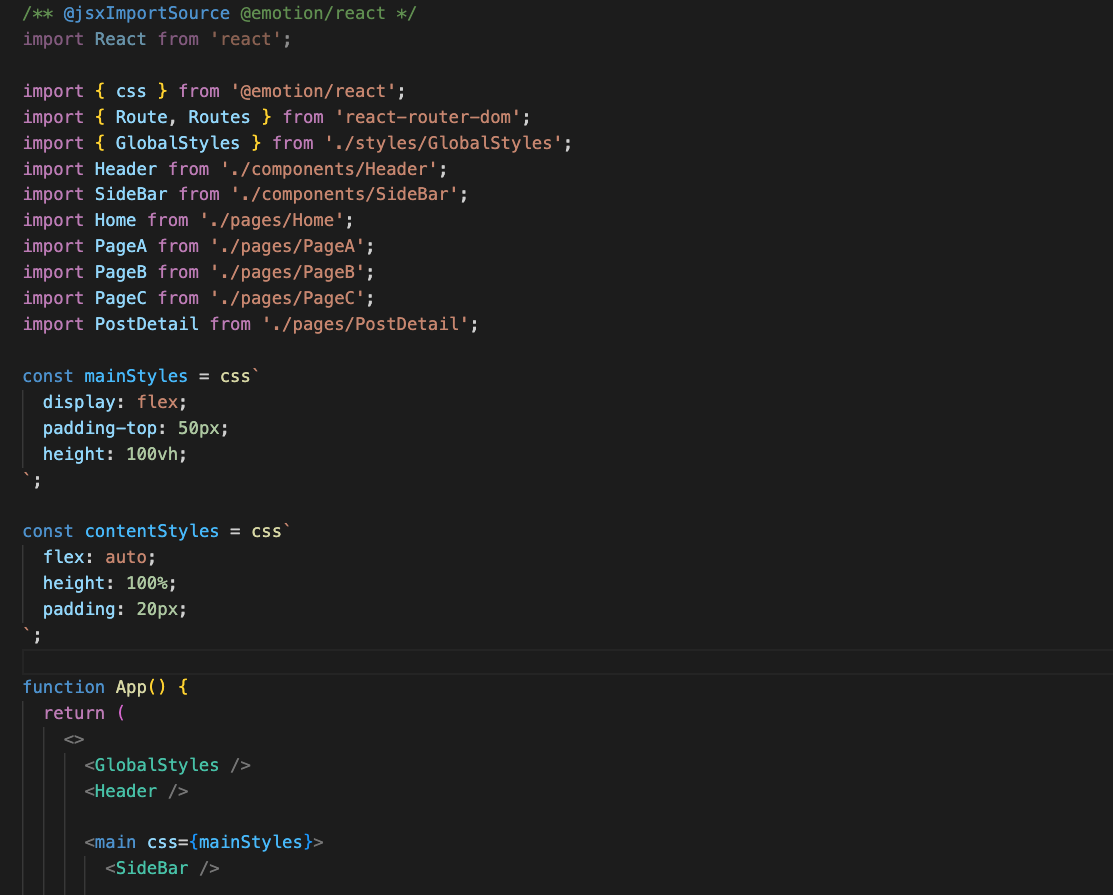
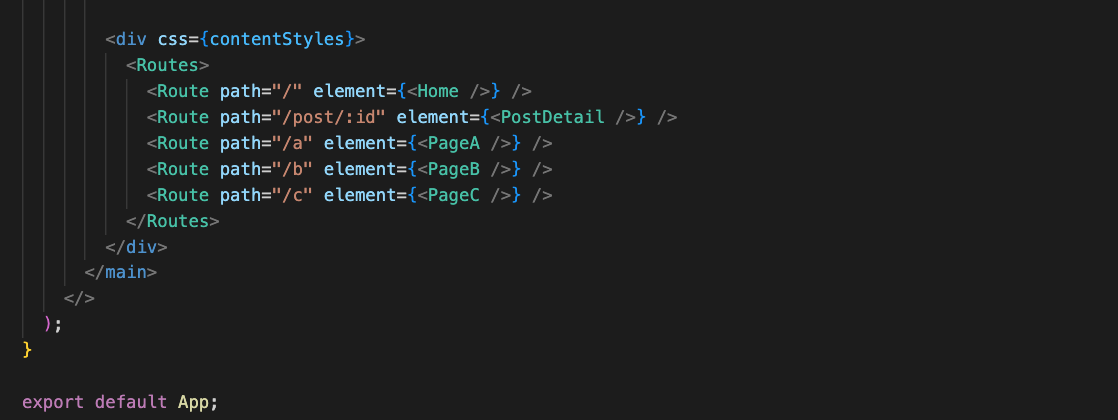
- App.tsx는 아래와 같이 전체적인 레이아웃을 잡아준 후
Routes와Route를 사용해서 컨텐츠가 변경될 부분에 배치해준다.
4. axios 활용해서 게시물 뿌려주기
나는 일단 pages/Home 에서 게시글을 보여주고 pages/PostDetail 에서 각 게시물 상세 정보 부분으로 이동을 해볼 생각이다.
- pages/Home/index.tsx
/** @jsxImportSource @emotion/react */
import { css } from '@emotion/react';
import React, { useEffect, useState } from 'react';
import axios from 'axios';
import { GetPostResponse } from '@/utils/models/Post';
import { useNavigate } from 'react-router-dom';

const postItemStyles = css`
  padding: 20px;
  border-top: 1px solid #ddd;
  cursor: pointer;
  transition: background-color 0.3s;

  &:hover {
    background-color: #eee;
  }

  h2 {
    padding-bottom: 10px;
  }

  p {
    overflow: hidden;
    display: -webkit-box;
    -webkit-box-orient: vertical;
    -webkit-line-clamp: 3;
  }
`;

const Home = () => {
  const navigate = useNavigate();

  const [postList, setPostList] = useState<GetPostResponse[]>([
    {
      id: 0,
      title: '',
      content: '',
      update_dttm: '',
    },
  ]);

  useEffect(() => {
    getPosts();
  }, []);

  const getPosts = () => {
    axios
      .get('http://localhost:8000/post', {
        headers: {
          'Content-Type': 'application/json',
        },
      })
      .then((res) => {
        setPostList(res.data);
        console.log(res.data);
      })
      .catch((error) => console.log(error));
  };

  return (
    <div>
      <h2
        css={css`
          margin-bottom: 30px;
        `}
      >
        Home
      </h2>

      <ul>
        {postList.map((post) => (
          <li
            key={post.id}
            css={postItemStyles}
            onClick={() => {
              navigate(`/post/${post.id}`);
            }}
          >
            <h2>{post.title}</h2>

            <p>{post.content}</p>
          </li>
        ))}
      </ul>
    </div>
  );
};

export default Home;
- pages/PostDetail/index.tsx
/** @jsxImportSource @emotion/react */
import { css } from '@emotion/react';
import React, { useEffect, useState } from 'react';
import axios from 'axios';
import { GetPostResponse } from '@/utils/models/Post';
import { useParams } from 'react-router-dom';

const postStyles = css`
  padding: 20px;
`;

const PostDetail = () => {
  const { id: postId } = useParams();

  const [postInfo, setPostInfo] = useState<GetPostResponse>({
    id: 0,
    title: '',
    content: '',
    create_dttm: '',
    update_dttm: '',
  });

  useEffect(() => {
    getPost();
  }, []);

  const getPost = () => {
    axios
      .get(`http://localhost:8000/post/${postId}`, {
        headers: {
          'Content-Type': 'application/json',
        },
      })
      .then((res) => {
        setPostInfo(res.data);
        console.log(res.data);
      })
      .catch((error) => console.log(error));
  };

  return (
    <div css={postStyles}>
      <h2>{postInfo.title}</h2>

      <p>{postInfo.content}</p>
    </div>
  );
};

export default PostDetail;
위에서 useState의 타입으로 사용된 GetPostResponse는 [] 배열 표시가 붙냐 안 붙냐만 다를 뿐 utils/models/Post/index.ts 안에서 미리 선언해둔 게시물 받아올 때의 인터페이스 값을 두 곳에서 사용해서 재활용성을 높혔다.
Django와 React 서버 켜기 및 확인
1. CORS 에러
python manage.py runserver 0:8000 // Django 서벼 켜기
npm start // React 서버 켜기
위의 코드로 django와 react 서버를 켜고 localhost:3000 으로 들어가보면 콘솔에서 아래와 같은 오류가 뜬다.

위의 오류는 SOP 정책을 위반해서 나타나는 CORS 에러이다 이 부분은 출처의 리소스가 서로 달라서 발생하게 되는데 지금 상황에서는 PORT 번호가 달라서 에러가 난다. 해결 방법은 아래와 같다.
2. CORS 해결
- django-cors-header를 설치
pip install django-cors-headers- settings.py 안의 아래의 내용 추가 및 수정
ALLOWED_HOSTS = ['*']

INSTALLED_APPS = [
	...,
    'corsheaders',
]

MIDDLEWARE = [
    'corsheaders.middleware.CorsMiddleware',
    ...,
]

CORS_ORIGIN_WHITELIST = ('http://127.0.0.1:3000', 'http://localhost:3000')
CORS_ALLOW_CREDENTIALS = True
3. 확인
데이터가 아주 잘 들어오고 있는게 보인다.
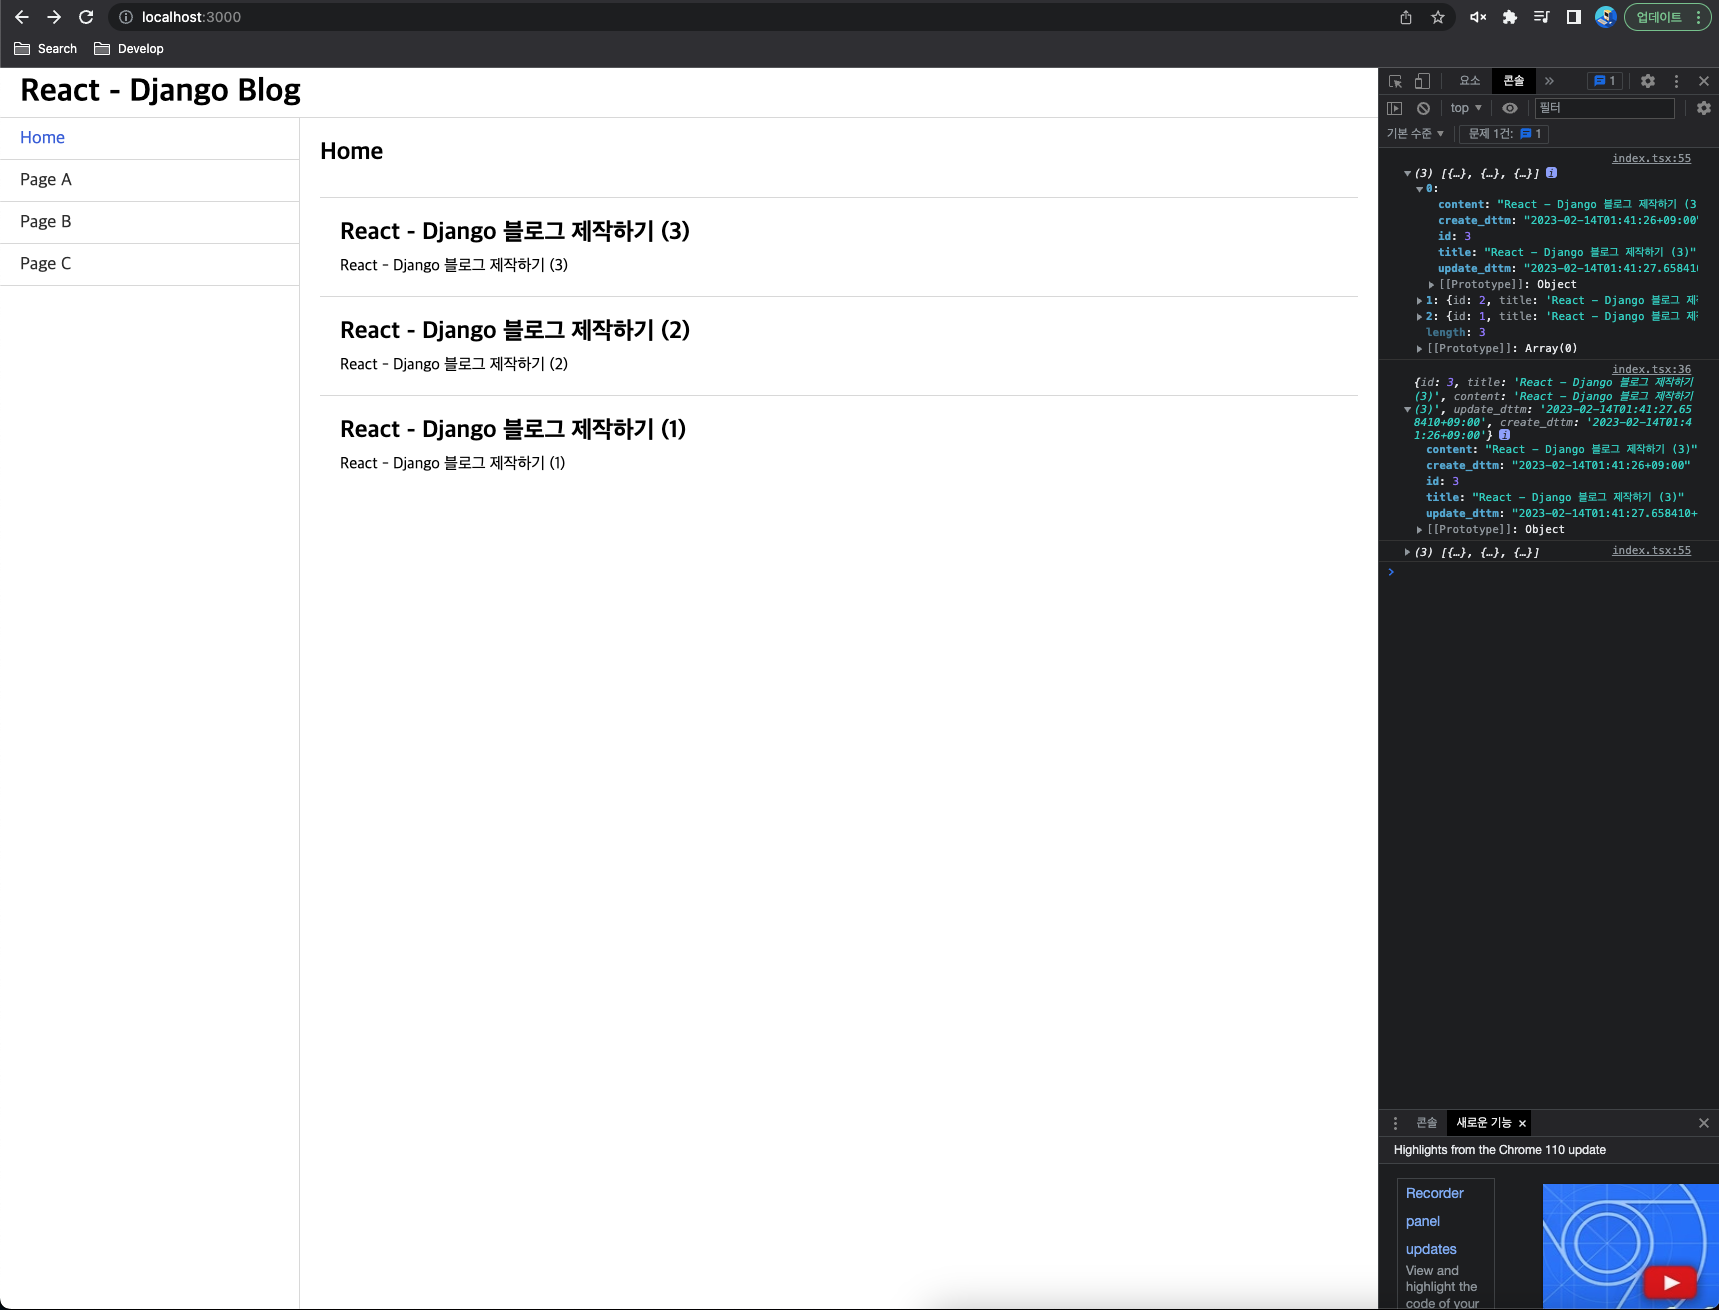
각 리스트를 클릭하면 각각의 디테일 페이지로도 잘 이동한다.

자세하게 쓰느라 생각 보다 글을 쓰는데 시간이 오래 걸렸다...
이 다음은 디자인도 figma로 하고 ERD 클라우드를 사용해서 Django models쪽도 전체적으로 손 볼 예정이다.
그 후 블로그 형태의 포트폴리오 사이트를 만들어 볼 예정이다.
위의 작업물은 Github에 그대로 올려둘테니 필요한 분은 가져다 쓰면 될 것 같다! 가져가실 때 star 눌러주면 매우 감사합니다.