App.js 1개로 여러개 띄우기
index.js에 따로 추가 안하고 select로 js파일 import 받아오는 법
기본값 및 useState 설정
기본값으로 1를 줬기 때문에 처음 설정하면 OneApp먼저 나옴
const [index,setIndex] = useState(1); //기본값으로 1를 줬기 때문에 처음 설정하면 OneApp먼저 나옴select 설정
select 고른 값에 따라 js 파일 띄우기 위해 값 설정
<select onChange={(e)=>{
        setIndex(Number(e.target.value));
      }}>
        <option value='1' selected>OneApp확인하기</option>
        <option value='2'>TwoApp확인하기</option>
        <option value='3'>ThreeApp확인하기</option>
        <option value='4'>FourApp확인하기</option>
        <option value='5'>FiveApp확인하기</option>
        <option value='6'>SixApp확인하기</option>
        <option value='7'>SevenApp확인하기</option>
      </select>
화면 출력 값
{index===1?<OneApp/>:index===2?<TwoApp/>:index===3?<ThreeApp/>:index===4?<FourApp/>:index===5?<FiveApp/>:index===6?<SixApp/>:<SevenApp/>}App.js
import logo from './logo.svg';
import './App.css';
import { useState } from 'react';
import OneApp from './components/OneApp';
import TwoApp from './components/TwoApp';
import ThreeApp from './components/ThreeApp';
import FourApp from './components/FourApp';
import FiveApp from './components/FiveApp';
import SixApp from './components/SixApp';
import SevenApp from './components/SevenApp';

function App() {

// index.js에 따로 추가 안하고 select로 js파일 import 받아오는 법

  const [index,setIndex] = useState(1); //기본값으로 1를 줬기 때문에 처음 설정하면 OneApp먼저 나옴

  return (
    <div className="App">
      <b style={{marginLeft:'100px',fontSize:'20px'}}>컴포넌트 선택하기: </b>

      <select onChange={(e)=>{
        setIndex(Number(e.target.value));
      }}>
        <option value='1' selected>OneApp확인하기</option>
        <option value='2'>TwoApp확인하기</option>
        <option value='3'>ThreeApp확인하기</option>
        <option value='4'>FourApp확인하기</option>
        <option value='5'>FiveApp확인하기</option>
        <option value='6'>SixApp확인하기</option>
        <option value='7'>SevenApp확인하기</option>
      </select>

      {index===1?<OneApp/>:index===2?<TwoApp/>:index===3?<ThreeApp/>:index===4?<FourApp/>:index===5?<FiveApp/>:index===6?<SixApp/>:<SevenApp/>}


    </div>
  );
}

export default App;
OneApp.js
숫자 증가 함수
useState
const [number,setNumber] = useState(0);증가 함수
		const numIncre=()=>{


        if(number===10)
        {
            alert("10까지만 증가합니다");
            return;
        }
        setNumber(number+1);
    }
감소 함수
    const numDecre=()=>{


        if(number===0)
        {
            alert("0까지만 감소합니다");
            return;
        }
        setNumber(number-1);
    }
버튼 및 화면 출력
    return (
        // 숫자 1씩 증가,감소시켜서 나오게 하는 법
        <div>
            <h3 className='alert alert-info'>OneApp입니다</h3>
            <div className='number'>
                {number}
            </div>
            <button type='button' className='btn btn-info'
            onClick={numIncre}>증가</button>
            <button type='button' className='btn btn-info'
            style={{marginLeft:'10px'}}
            onClick={numDecre}>감소</button>
        </div>
    );
OneApp.js
import React, { useState } from 'react';

function OneApp(props) {

    const [number,setNumber] = useState(0);

    const numIncre=()=>{


        if(number===10)
        {
            alert("10까지만 증가합니다");
            return;
        }
        setNumber(number+1);
    }

    const numDecre=()=>{


        if(number===0)
        {
            alert("0까지만 감소합니다");
            return;
        }
        setNumber(number-1);
    }

    return (
        // 숫자 1씩 증가,감소시켜서 나오게 하는 법
        <div>
            <h3 className='alert alert-info'>OneApp입니다</h3>
            <div className='number'>
                {number}
            </div>
            <button type='button' className='btn btn-info'
            onClick={numIncre}>증가</button>
            <button type='button' className='btn btn-info'
            style={{marginLeft:'10px'}}
            onClick={numDecre}>감소</button>
        </div>
    );
}

export default OneApp;
TwoApp.js
이미지 선택시 출력
useState
const [photo,setPhoto] = useState('../image2/15.jpeg');함수
    const changePhoto=(e)=>{

        setPhoto(e.target.value);
    }
출력
<img src={photo}/>TwoApp.js
import React, { useState } from 'react';
function OneApp(props) {
const [photo,setPhoto] = useState('../image2/15.jpeg');
const changePhoto=(e)=>{
setPhoto(e.target.value);
}
return (
<div>
<h3 className='alert alert-info'>TwoApp입니다_Radio버튼</h3>
<div>
<b>이미지선택: </b><br/>
<label>
<input type='radio' name='photo' value='../image2/12.jpeg' onClick={changePhoto}/>이미지1
</label>
<label>
<input type='radio' name='photo' value='../image2/15.jpeg' onClick={changePhoto}
defaultChecked/>이미지2
</label>
<label>
<input type='radio' name='photo' value='../image2/16.jpeg' onClick={changePhoto}/>이미지3
</label>
<label>
<input type='radio' name='photo' value='../image2/20.jpeg' onClick={changePhoto}/>이미지4
</label>
<label>
<input type='radio' name='photo' value='../image2/24.jpeg' onClick={changePhoto}/>이미지5
</label>
</div>
<img src={photo}/>
</div>
);
}
export default OneApp;종합 문제
문제
hp1 선택시 출력창 변경
hp2,hp3 입력시 출력창 바로 변경
사진 선택시 해당 사진으로 변경
풀이
hp1 select태그에 onChange 이벤트로 함수 부여
hp2,hp3 input 태그로에 onKeyDown,onKeyUP(onChange도 가능)이벤트로 함수 부여
사진 select태그로 선택가능하게 onChange함수에 함수 부여
출력창에 useState로 부여한 값들 넣어놓기
사진은 삼항연산자로 각 값들 선택시 import받은 사진 나오게 넣음
ThreeApp.js
import React, { useState } from 'react';
import img1 from '../image/1.jpeg'
import img2 from '../image/3.jpeg'
import img3 from '../image/4.jpeg'
import img4 from '../image/6.jpeg'
import img5 from '../image/10.jpeg'

function OneApp(props) {


    const [hp1,setHp1] = useState('02');
    const [hp2,setHp2] = useState('1111');
    const [hp3,setHp3] = useState('2222');
    const [photo,setPhoto] = useState(1);

    const changeHp1=(e)=>{
        setHp1(e.target.value);
    }
    const changeHp2=(e)=>{
        setHp2(e.target.value);
    }
    const changeHp3=(e)=>{
        setHp3(e.target.value);
    }
    const changePhoto=(e)=>{
        // value를 숫자로 주어서 출력창에서 삼항연산자에 ===을 사용하려면 Number(e.target.value)로 형식을 맞춰줘야한다
        setPhoto(Number(e.target.value));
    }


    return (
        <div>
            <h3 className='alert alert-info'>ThreeApp입니다_문제1</h3>
            <div className='d-inline-flex' style={{height:'35px'}}>
                <select style={{width:'100px'}} onChange={changeHp1}>
                    <option>02</option>
                    <option>010</option>
                    <option>031</option>
                    <option>017</option>
                    <option>052</option>
                </select>
                <b>-</b>
                <input type='text' maxLength='4' className='form-control' style={{width:'120px'}}
                defaultValue={hp2}
                onKeyDown={changeHp2}/>
                <b>-</b>
                <input type='text' maxLength='4' className='form-control' style={{width:'120px'}}
                defaultValue={hp3}
                onKeyUp={changeHp3}/>

                <b style={{marginLeft:'50px',width:'100px'}}>이미지 선택: </b>
                <select onChange={changePhoto}>
                    <option value='1' selected>이미지1</option>
                    <option value='2'>이미지2</option>
                    <option value='3'>이미지3</option>
                    <option value='4'>이미지4</option>
                    <option value='5'>이미지5</option>
                </select>
            </div>

            <br/><br/>
            <h1>{hp1}-{hp2}-{hp3}</h1>
            <img src={photo===1?img1:photo===2?img2:photo===3?img3:photo===4?img4:img5}/>
        </div>
    );
}

export default OneApp;
Node.js 배열 개념
일반 배열 연산 출력
//일반적인 출력
var numbers=[1,2,3,4,5];

//배열.map
var processd=numbers.map(function(num){
    return num*num;
});

console.log(processd); //1, 4, 9, 16, 25
map 배열 출력
var colors=['red','pink','gray','yellow','cyan']

//index값도 같이 뽑기
colors.map((color,index)=>{
    console.log(color,index);
})
-> colors.map((배열의 변수값,index값)=>{
console.log(배열의 변수값,index값);
})
출력창
red 0
pink 1
gray 2
yellow 3
cyan 4
day1208_ex10.js
//배열연습
//일반적인 출력
var numbers=[1,2,3,4,5];

//배열.map
var processd=numbers.map(function(num){
    return num*num;
});

console.log(processd); //1, 4, 9, 16, 25


var colors=['red','pink','gray','yellow','cyan']

//index값도 같이 뽑기
colors.map((color,index)=>{
    console.log(color,index);
})
FourApp.js
mui 설정
-
mui.com들어가서installation검색 -
Default installation react 작업 폴더 경로에서 터미널로 다운(npm,yarn 상관x/실행 안될 경우 앞에 sudo 부여)/(작업하는 폴더마다 다운 받아야함)

sudo npm install @mui/material @emotion/react @emotion/styled
sudo yarn add @mui/material @emotion/react @emotion/styled -
With styled-components react 작업 폴더 경로에서 터미널로 다운(npm,yarn 상관x/실행 안될 경우 앞에 sudo 부여)/(작업하는 폴더마다 다운 받아야함)
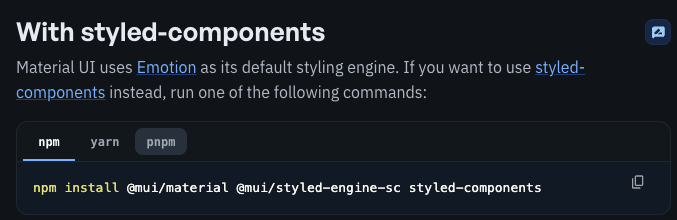
sudo npm install @mui/material @mui/styled-engine-sc styled-components
sudo yarn add @mui/material @mui/styled-engine-sc styled-components -
icon 사용시 react 작업 폴더 경로에서 터미널로 다운(npm,yarn 상관x/실행 안될 경우 앞에 sudo 부여)/(작업하는 폴더마다 다운 받아야함)
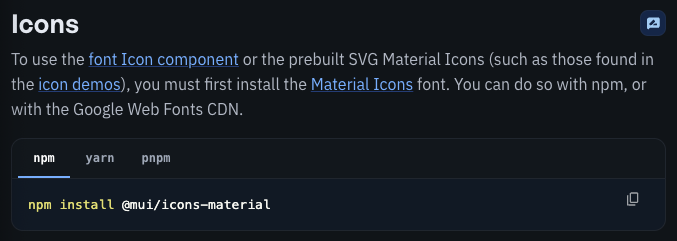
sudo npm install @mui/icons-material
sudo yarn add @mui/icons-material
mui Alert 및 icon 가져오기
- alert 검색 후 번개 모양 클릭시 import 와 코드 둘 다 가져 와야함
import Alert from '@mui/material/Alert';<Alert severity="error">배열연습 <AppleIcon/></Alert>- icon 검색 후 번개 모양 클릭시 import 가져 와야함
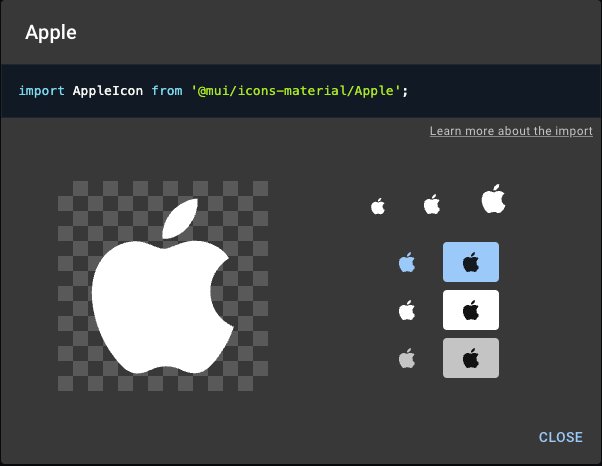
import AppleIcon from '@mui/icons-material/Apple';icon 사용법
- import 받아온 변수를 태그로 쓰면 된다
<AppleIcon/>배열
기본 배열 출력(map)
	//배열변수선언
const names=['영환','성경','호석','민규','성신','형준'];{/* 배열주려면 {}안에 줘야한다 배열이름.map((변수,index은 줘도되고 안줘도 된다)=>(<b style={{marginLeft:'10px'}}>{index}:{변수}</b>)) */}
<ol>
{
//반복문을 직접 리턴에 주기
names.map((name,index)=>(<b style={{marginLeft:'10px'}}>{index}:{name}</b>))
}
</ol>배열 변수화
반복문을 변수에 저장후 출력해도 된다
const nameList=배열명.map((변수)=>(결과값))
//반복문을 변수에 저장후 출력해도 된다
//const nameList=배열명.map((변수)=>(결과값))
const nameList=names.map((name)=>(<li>{name}</li>))출력
<ol>{nameList}</ol>종합 문제
색상 배열 만든후 div로 사각형 색상 배열로 뽑아내기
풀이
//색상을 5개 배열로 주시고...결과물을 div로 출력하세요(box 로 className주고 할 것)
const colors=['pink','cyan','black','gray','yellow'];
const box={
width:'100px',
height:'100px',
float:'left'
}출력
{colors.map((color)=>(<div style={{...box,backgroundColor:color}}></div>))}<br/>-> box를 ...(펼침연산자)로 쓴 이유는 변수로 만든 box안 요소들을 1개씩이라고 보기 때문에 3개의 요소를 펼쳐준다
다른 풀이
App.css style 만든 후 부여
.box2{
width: 100px;
height: 100px;
float: left;
}{colors.map((color)=>(<div className='box2' style={{backgroundColor:color}}></div>))}FourApp.js
import React from 'react';
import Alert from '@mui/material/Alert';
import AppleIcon from '@mui/icons-material/Apple';
function OneApp(props) {
//배열변수선언
const names=['영환','성경','호석','민규','성신','형준'];
//반복문을 변수에 저장후 출력해도 된다
//const nameList=배열명.map((변수)=>(결과값))
const nameList=names.map((name)=>(<li>{name}</li>))
//색상을 5개 배열로 주시고...결과물을 div로 출력하세요(box 로 className주고 할 것)
const colors=['pink','cyan','black','gray','yellow'];
const box={
width:'100px',
height:'100px',
float:'left'
}
return (
<div>
{/* mui install 받아서 사용해보기
터미널 프로젝트 있는 폴더들어가서 mui install 코드 가져와서 적용
npm/yarn 상관 없는데 파일 달라할때 이 install한 파일 빼고 보내야함(용량이 너무 큼)
style-components/icon 터미널에서 install 받기 */}
<h3 className='alert alert-info'>FourApp입니다</h3>
{/* mui alert 창 받아오기 번개모양 누르면 코드가 나옴/import도 꼭 받아야함
icon은 import만 가져와서 <AppleIcon/> import 변수로 적어주면 바로 적용 가능 */}
<Alert severity="error">배열연습 <AppleIcon/></Alert>
<div>
<h3>map연습</h3>
{/* 배열주려면 {}안에 줘야한다 배열이름.map((변수,index은 줘도되고 안줘도 된다)=>(<b style={{marginLeft:'10px'}}>{index}:{변수}</b>)) */}
<ol>
	{
    	//반복문을 직접 리턴에 주기
        names.map((name,index)=>(<b style={{marginLeft:'10px'}}>{index}:{name}</b>))
    }
</ol>
<ol>{nameList}</ol>
{colors.map((color)=>(<div style={{...box,backgroundColor:color}}></div>))}<br/>
{colors.map((color)=>(<div className='box2' style={{backgroundColor:color}}></div>))}
</div>
</div>
);
}
export default OneApp;FiveApp.js
사진 배열 출력
이미지를 배열변수(import)에 넣기(src)...public에 사진은 보통 안넣어놓고 src를 만들어서 사진 넣어두는게 보통
    //이미지를 배열변수에 넣기(src)...public에 사진은 보통 안넣어놓고 src를 만들어서 사진 넣어두는게 보통
    const imageArr=[img1,img2,img3,img4,img5];
출력
            <Alert severity="info">배열연습_#5<AcUnitIcon/></Alert>
            {
                imageArr.map((myimg)=>(<img src={myimg} style={{width:'50px'}}/>))
            }
public 배열
public에서 파일 이름만 넣어서 배열로 뽑아보기
    //public에서 파일 이름만 넣어서 배열로 뽑아보기
    const imageArr2=['12','15','16','20','24'];
출력
            <h4>public의 이미지를 배열로 넣어 반복하기</h4>
            {
                //예전방식
                imageArr2.map((photo)=>(<img src={'../image2/'+photo+'.jpeg'} className='photo'/>))
            }
public 배열(리터럴(``)방식) 출력
리터럴방식에서 값 불러오고 싶으면 ${}을 사용하면 된다
            {
                //리터럴방식
                //리터럴방식에서 값 불러오고 싶으면 ${}을 사용하면 된다
                imageArr2.map((photo)=>(<img src={`../image2/${photo}.jpeg`} className='photo'/>))
            }
FiveApp.js
import React from 'react';
import Alert from '@mui/material/Alert';
import AcUnitIcon from '@mui/icons-material/AcUnit';
import img1 from '../image/1.jpeg';
import img2 from '../image/3.jpeg';
import img3 from '../image/4.jpeg';
import img4 from '../image/6.jpeg';
import img5 from '../image/10.jpeg';

function OneApp(props) {

    //이미지를 배열변수에 넣기(src)...public에 사진은 보통 안넣어놓고 src를 만들어서 사진 넣어두는게 보통
    const imageArr=[img1,img2,img3,img4,img5];


    //public에서 파일 이름만 넣어서 배열로 뽑아보기
    const imageArr2=['12','15','16','20','24'];


    return (
        <div>
            <h3 className='alert alert-info'>FiveApp입니다</h3>
            <Alert severity="info">배열연습_#5<AcUnitIcon/></Alert>
            {
                imageArr.map((myimg)=>(<img src={myimg} style={{width:'50px'}}/>))
            }

            <h4>public의 이미지를 배열로 넣어 반복하기</h4>
            {
                //예전방식
                imageArr2.map((photo)=>(<img src={'../image2/'+photo+'.jpeg'} className='photo'/>))
            }
            <br/>
            {
                //리터럴방식
                //리터럴방식에서 값 불러오고 싶으면 ${}을 사용하면 된다
                imageArr2.map((photo)=>(<img src={`../image2/${photo}.jpeg`} className='photo'/>))
            }

        </div>
    );
}

export default OneApp;
Node.js day1211_ex11.js
splice
배열명.splice(삭제할 인덱스 번호,갯수);
const array=[1,2,3,4,5];  //3을 제거하고 싶다
//const delIndex=2;

//splice
// array.splice(삭제할 인덱스 번호,갯수);
array.splice(2,1); //삭제할 인덱스,1개만 삭제
console.log(array);
slice
slice는 원본 배열은 건드리지 않고 수정된 복사 배열을 return한다(교체는 안됨)
var array2=[1,2,3,4,5];
var a2=array2.slice(2,4);->시작 인덱스, 지정한 인덱스-1까지만 뽑아줌... index 2~index 3만 뽑아줌
var a3=array2.slice(1,4);->index 1~index 3만 뽑아줌
//slice
//slice는 원본 배열은 건드리지 않고 수정된 복사 배열을 return한다(교체는 안됨)
var array2=[1,2,3,4,5]; //3,4를 출력
var a2=array2.slice(2,4); //시작 인덱스, 지정한 인덱스-1까지만 뽑아줌... index 2~index 3만 뽑아줌
console.log(a2);

var a3=array2.slice(1,4); //index 1~index 3만 뽑아줌
console.log(a3);
concat
Arrays.concat(value);
concat메서드는 원하는 값을 원본 배열끝에 추가한 뒤 새로운 배열을 만든다
let con=[1,2,3].concat([4,5],[6,7]);배열 추가 후 또 추가할 수도 있다
//Arrays.concat(value);
//concat메서드는 원하는 값을 원본 배열끝에 추가한 뒤 새로운 배열을 만든다
let con=[1,2,3].concat([4,5],[6,7]); //배열 추가 후 또 추가할 수도 있다
console.log(con);
filter
arr=arr.filter(function(item,index){->filter 안에 인자로 함수를 받고, index만 필요하니까 명시
return index !== delInx;->배열을 돌면서 index 1이 아닌 나머지만 다시 소집한다
->delInx가 아닌 값만 return 받음
//filter
var arr=[1,2,3,4,5]; //2를 제거하고 싶다
var delInx=1; //2의 index 값

arr=arr.filter(function(item,index){ //filter 안에 인자로 함수를 받고, index만 필요하니까 명시

    return index !== delInx; // 배열을 돌면서 index 1이 아닌 나머지만 다시 소집한다 //delInx가 아닌 값만 return 받음
})

console.log(arr);
Node.js day1211_ex11.js
const array=[1,2,3,4,5];  //3을 제거하고 싶다
//const delIndex=2;

//splice
// array.splice(삭제할 인덱스 번호,갯수);
array.splice(2,1); //삭제할 인덱스,1개만 삭제
console.log(array);

//slice
//slice는 원본 배열은 건드리지 않고 수정된 복사 배열을 return한다(교체는 안됨)
var array2=[1,2,3,4,5]; //3,4를 출력
var a2=array2.slice(2,4); //시작 인덱스, 지정한 인덱스-1까지만 뽑아줌... index 2~index 3만 뽑아줌
console.log(a2);

var a3=array2.slice(1,4); //index 1~index 3만 뽑아줌
console.log(a3);


//Arrays.concat(value);
//concat메서드는 원하는 값을 원본 배열끝에 추가한 뒤 새로운 배열을 만든다
let con=[1,2,3].concat([4,5],[6,7]); //배열 추가 후 또 추가할 수도 있다
console.log(con);


//filter
var arr=[1,2,3,4,5]; //2를 제거하고 싶다
var delInx=1; //2의 index 값

arr=arr.filter(function(item,index){ //filter 안에 인자로 함수를 받고, index만 필요하니까 명시

    return index !== delInx; // 배열을 돌면서 index 1이 아닌 나머지만 다시 소집한다 //delInx가 아닌 값만 return 받음
})

console.log(arr);
SixApp.js
배열추가
    const [names,setNames]=useState(['진평','현규','영환','민규','성신']);
    const [irum,setIrum]=useState('') //추가시 새로운 변수가 있어야한다
추가버튼 이벤트
	//추가버튼 이벤트
    const btnInsert=()=>{
        setNames(names.concat(irum)); //배열데이터에 입력한 이름을 추가
        setIrum(''); //실행시 입력한 창 초기화
} <button type='button' className='btn btn-info' style={{marginLeft:'10px'}}
onClick={btnInsert}>추가</button>Enter 이벤트
//Enter이벤트
const txtEnter=(e)=>{
if(e.key==='Enter')
{
//btnInsert안에 값들을 가져옴
btnInsert();
}
} <input value={irum} onChange={txtInput} placeholder='이름입력'
onKeyUp={txtEnter}/>input 입력 이벤트
input태그에 value값을 주는 순간 입력이 안되기 때문에 입력 되도록 이벤트 주기
const txtInput=(e)=>{
setIrum(e.target.value);
}클릭 삭제 이벤트
- 방법1 slice
...names.slice(0,index), ...names.slice(index+1,names.length)->index번지만 빼고 잘라서 다시 넣음
//index가 클릭한 이름
const dataRemove=(index)=>{
console.log("remove: "+index);
//방법1...slice
setNames([
...names.slice(0,index),
...names.slice(index+1,names.length)
]); //index번지만 빼고 잘라서 다시 넣음
}- 방법2 filter
setNames(names.filter((item,i)=>i!==index))->선택한 인덱스만 지워줌
//index가 클릭한 이름
const dataRemove=(index)=>{
console.log("remove: "+index);
//방법2...filter
//랜더링...화면상에 변경(set)을 해준다 -> filter를 받을건데 선택한 index를 제외하고 다시 랜더링(복사)받는다
//i값은 기존에 넘겨주는 index와 겹치기 때문에 다른 변수로 주어준 것
setNames(names.filter((item,i)=>i!==index)) //선택한 인덱스만 지워줌
}이유는 모르지만 onClick을 onDoubleClick으로 하기만 하면 인터넷 끊김 -> onClick 사용으로 해결
{/* 이유는 모르지만 onClick을 onDoubleClick으로 하기만 하면 인터넷 끊김 */}
<h4>이름을 클릭하면 삭제됩니다 </h4>
<ul>
{
names.map((name,index)=>(<li className='data'
onClick={()=>dataRemove(index)}>{name}</li>))
}
</ul>SixApp.js
import React, { useState } from 'react';
import Alert from '@mui/material/Alert';
import AdsClickIcon from '@mui/icons-material/AdsClick';
function OneApp(props) {
const [names,setNames]=useState(['진평','현규','영환','민규','성신']);
const [irum,setIrum]=useState('') //추가시 새로운 변수가 있어야한다
//추가버튼 이벤트
const btnInsert=()=>{
setNames(names.concat(irum)); //배열데이터에 입력한 이름을 추가
setIrum(''); //실행시 입력한 창 초기화
}
//Enter이벤트
const txtEnter=(e)=>{
if(e.key==='Enter')
{
//btnInsert안에 값들을 가져옴
btnInsert();
}
}
//input창에 value값을 주는 순간 입력이 안되기 때문에 입력 되도록 이벤트 주기
const txtInput=(e)=>{
setIrum(e.target.value);
}
//클릭시 삭제
//index가 클릭한 이름
const dataRemove=(index)=>{
console.log("remove: "+index);
//방법1...slice
/*setNames([
...names.slice(0,index),
...names.slice(index+1,names.length)
]);*/ //index번지만 빼고 잘라서 다시 넣음
//방법2...filter
//랜더링...화면상에 변경(set)을 해준다 -> filter를 받을건데 선택한 index를 제외하고 다시 랜더링(복사)받는다
//i값은 기존에 넘겨주는 index와 겹치기 때문에 다른 변수로 주어준 것
setNames(names.filter((item,i)=>i!==index)) //선택한 인덱스만 지워줌
}
return (
<div>
<h3 className='alert alert-info'>SixApp입니다</h3>
<Alert severity="success">배열연습_#6<AdsClickIcon/></Alert>
{/* Enter이벤트/추가버튼 이벤트 둘 중 아무거나 해도 추가되도록 이벤트 주어줌 */}
<input value={irum} onChange={txtInput} placeholder='이름입력'
onKeyUp={txtEnter}/>
            <button type='button' className='btn btn-info' style={{marginLeft:'10px'}}
            onClick={btnInsert}>추가</button>
<br/>
{/* 이유는 모르지만 onClick을 onDoubleClick으로 하기만 하면 */}
<h4>이름을 클릭하면 삭제됩니다 </h4>
<ul>
{
names.map((name,index)=>(<li className='data'
onClick={()=>dataRemove(index)}>{name}</li>))
}
</ul>
</div>
);
}
export default OneApp;SevenApp.js
mui card
import와 아래 코드들 가져온다
function SevenApp(props){
}
export default SevenApp;
은 남겨두고 코드들 삽입
사진 바꾸기
const [photo,setPhoto]=useState('1');image 변수화(``리터럴 사용,${}사용)
                <CardMedia
                    component="img"
                    height="194"
                    image={`../image2/${photo}.jpg`}
                    alt="Paella dish"
                />
return 부분 div 추가
- 배열 선언과 동시에 값 부여
[...new Array(10)].map((a,index)=>(<option>{index+1}</option>)) - 1~10까지 반복해서 option제공
배열 생성과 동시에 바로 값 부여
...new Array(10) ... 1~10번까지
index를 주어야 1~10번의 번호(index+1)를 줄 수 있음
여기서 a는 안줘도 되는데 준 값
지금은 사진 이름이 1~10이 되기때문에 쓸 수 있는 방법...이렇지 않을경우 따로 배열 선언해서 사용해야함
            <div>
                <h3>좋아하는 음식을 선택하세요</h3>
                <select onChange={(e)=>{
                    setPhoto(e.target.value);
                }}>
                    {/* value값 따로 안주고 text에 해당 value로 주면 text를 읽어서 그대로 value값 으로 읽는다 */}
                    <option>1</option>
                    <option>2</option>
                    <option>3</option>
                    <option value='4'>Food4</option>
                    <option value='5'>Food5</option>
                    <option value='6'>Food6</option>
                    <option value='7'>Food7</option>
                    <option value='8'>Food8</option>
                    <option value='9'>Food9</option>
                    <option value='10'>Food10</option>
                </select>
            </div>

            <div>
                <h3>배열 생성 후 음식이미지 선택하기</h3>
                <select onChange={(e)=>{
                    setPhoto(e.target.value);
                }}>
                    {
                        //1~10까지 반복해서 option제공
                        // 배열 생성과 동시에 바로 값 부여
                        // ...new Array(10) ... 1~10번까지
                        // index를 주어야 1~10번의 번호(index+1)를 줄 수 있음
                        // 여기서 a는 안줘도 되는데 준 값
                        // 지금은 사진 이름이 1~10이 되기때문에 쓸 수 있는 방법...이렇지 않을경우 따로 배열 선언해서 사용해야함
                        [...new Array(10)].map((a,index)=>(<option>{index+1}</option>))
                    }
                </select>
            </div>
SevenApp.js
import React, { useState } from 'react';
import { styled } from '@mui/material/styles';
import Card from '@mui/material/Card';
import CardHeader from '@mui/material/CardHeader';
import CardMedia from '@mui/material/CardMedia';
import CardContent from '@mui/material/CardContent';
import CardActions from '@mui/material/CardActions';
import Collapse from '@mui/material/Collapse';
import Avatar from '@mui/material/Avatar';
import IconButton, { IconButtonProps } from '@mui/material/IconButton';
import Typography from '@mui/material/Typography';
import { red } from '@mui/material/colors';
import FavoriteIcon from '@mui/icons-material/Favorite';
import ShareIcon from '@mui/icons-material/Share';
import ExpandMoreIcon from '@mui/icons-material/ExpandMore';
import MoreVertIcon from '@mui/icons-material/MoreVert';
interface ExpandMoreProps extends IconButtonProps {
expand: boolean;
}
const ExpandMore = styled((props: ExpandMoreProps) => {
const { expand, ...other } = props;
return <IconButton {...other} />;
})(({ theme, expand }) => ({
transform: !expand ? 'rotate(0deg)' : 'rotate(180deg)',
marginLeft: 'auto',
transition: theme.transitions.create('transform', {
duration: theme.transitions.duration.shortest,
}),
}));
function SevenApp(props) {
const [expanded, setExpanded] = React.useState(false);
const handleExpandClick = () => {
setExpanded(!expanded);
};
//사진 바꾸기
const [photo,setPhoto]=useState('1');
return (
<div>
<h5 className='alert alert-info'>SevenApp_mui실습</h5>
<Card sx={{ maxWidth: 345 }}>
<CardHeader
avatar={
<Avatar sx={{ bgcolor: red[500] }} aria-label="recipe">
R
</Avatar>
}
action={
<IconButton aria-label="settings">
<MoreVertIcon />
</IconButton>
}
title="Shrimp and Chorizo Paella"
subheader="September 14, 2016"
/>
<CardMedia
component="img"
height="194"
image={`../image2/${photo}.jpg`}
alt="Paella dish"
/>
<CardContent>
<Typography variant="body2" color="text.secondary">
This impressive paella is a perfect party dish and a fun meal to cook
together with your guests. Add 1 cup of frozen peas along with the mussels,
if you like.
</Typography>
</CardContent>
<CardActions disableSpacing>
<IconButton aria-label="add to favorites">
<FavoriteIcon />
</IconButton>
<IconButton aria-label="share">
<ShareIcon />
</IconButton>
<ExpandMore
expand={expanded}
onClick={handleExpandClick}
aria-expanded={expanded}
aria-label="show more"
>
<ExpandMoreIcon />
</ExpandMore>
</CardActions>
<Collapse in={expanded} timeout="auto" unmountOnExit>
<CardContent>
<Typography paragraph>Method:</Typography>
<Typography paragraph>
Heat 1/2 cup of the broth in a pot until simmering, add saffron and set
aside for 10 minutes.
</Typography>
<Typography paragraph>
Heat oil in a (14- to 16-inch) paella pan or a large, deep skillet over
medium-high heat. Add chicken, shrimp and chorizo, and cook, stirring
occasionally until lightly browned, 6 to 8 minutes. Transfer shrimp to a
large plate and set aside, leaving chicken and chorizo in the pan. Add
pimentón, bay leaves, garlic, tomatoes, onion, salt and pepper, and cook,
stirring often until thickened and fragrant, about 10 minutes. Add
saffron broth and remaining 4 1/2 cups chicken broth; bring to a boil.
</Typography>
<Typography paragraph>
Add rice and stir very gently to distribute. Top with artichokes and
peppers, and cook without stirring, until most of the liquid is absorbed,
15 to 18 minutes. Reduce heat to medium-low, add reserved shrimp and
mussels, tucking them down into the rice, and cook again without
stirring, until mussels have opened and rice is just tender, 5 to 7
minutes more. (Discard any mussels that don't open.)
</Typography>
<Typography>
Set aside off of the heat to let rest for 10 minutes, and then serve.
</Typography>
</CardContent>
</Collapse>
</Card>
{/* 오늘의 과제 */}
<div>
<h3>좋아하는 음식을 선택하세요</h3>
<select onChange={(e)=>{
setPhoto(e.target.value);
}}>
{/* value값 따로 안주고 text에 해당 value로 주면 text를 읽어서 그대로 value값 으로 읽는다 */}
<option>1</option>
<option>2</option>
<option>3</option>
<option value='4'>Food4</option>
<option value='5'>Food5</option>
<option value='6'>Food6</option>
<option value='7'>Food7</option>
<option value='8'>Food8</option>
<option value='9'>Food9</option>
<option value='10'>Food10</option>
</select>
</div>
<div>
<h3>배열 생성 후 음식이미지 선택하기</h3>
<select onChange={(e)=>{
setPhoto(e.target.value);
}}>
{
//1~10까지 반복해서 option제공
// 배열 생성과 동시에 바로 값 부여
// ...new Array(10) ... 1~10번까지
// index를 주어야 1~10번의 번호(index+1)를 줄 수 있음
// 여기서 a는 안줘도 되는데 준 값
// 지금은 사진 이름이 1~10이 되기때문에 쓸 수 있는 방법...이렇지 않을경우 따로 배열 선언해서 사용해야함
[...new Array(10)].map((a,index)=>(<option>{index+1}</option>))
}
</select>
</div>
</div>
);
}
export default SevenApp;