사용하기전 준비
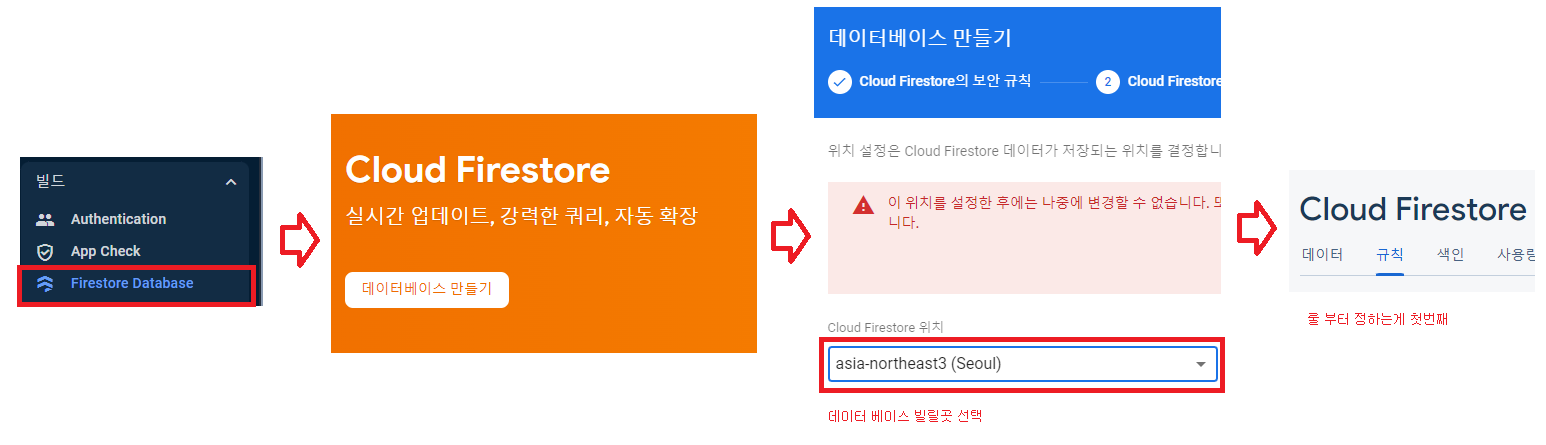
1.Firebase 설정 후 라이브러리 추가

https://firebase.google.com/docs/android/setup?authuser=0&hl=ko
2.사용 할 거 만들고 규칙 정하기
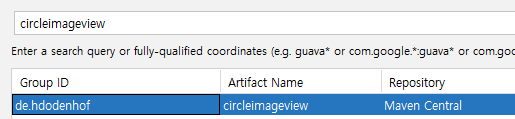
- circleimageview와 glide 추가
예제 작성
fifebase에 저장되는 모습

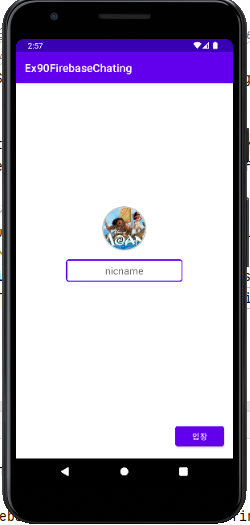
[1] 채팅 입장 화면
main.xml
<?xml version="1.0" encoding="utf-8"?>
<RelativeLayout xmlns:android="http://schemas.android.com/apk/res/android"
    xmlns:app="http://schemas.android.com/apk/res-auto"
    xmlns:tools="http://schemas.android.com/tools"
    android:layout_width="match_parent"
    android:layout_height="match_parent"
    tools:context=".MainActivity">


    <EditText
        android:id="@+id/et"
        android:layout_centerInParent="true"
        android:padding="8dp"
        android:background="@drawable/bg_edit"
        android:hint="nicname"
        android:gravity="center"
        android:ems="10"
        android:maxLength="10"
        android:layout_width="wrap_content"
        android:layout_height="wrap_content"/>

    <de.hdodenhof.circleimageview.CircleImageView
        android:id="@+id/civ"
        android:layout_marginBottom="16dp"
        android:layout_centerHorizontal="true"
        android:layout_above="@+id/et"
        app:civ_border_width="2dp"
        app:civ_border_color="#C6C6C6"
        android:src="@mipmap/ic_launcher"
        android:layout_width="80dp"
        android:layout_height="80dp"/>

    <Button
        android:id="@+id/btn"
        android:layout_margin="16dp"
        android:layout_alignParentBottom="true"
        android:layout_alignParentRight="true"
        android:text="입장"
        android:layout_width="wrap_content"
        android:layout_height="wrap_content"/>


</RelativeLayout>
G.java
- 프로필 이미지의 저장소 위치와 닉네임을 앱 전체에서 쓰기위해 Static 으로 만듦
package com.bsj0420.ex90firebasechating;

public class G {

    public static String nicname;
    public static String profileUrl; //사진 이미지 다운로드 주소

}
main.java
- 프로필 이미지의 저장소 위치와 닉네임을 앱 전체에서 쓰기위해 Static 으로 만듦
- 저장한 닉네임 & 사진 SharedPrefernces에 저장 후 매번 새로 입력하지 않도록 해주기
- 데이터 저장은 처음에만 하도록 처리
package com.bsj0420.ex90firebasechating;

import androidx.activity.result.ActivityResultLauncher;
import androidx.activity.result.contract.ActivityResultContracts;
import androidx.appcompat.app.AppCompatActivity;

import android.content.Intent;
import android.content.SharedPreferences;
import android.icu.text.SimpleDateFormat;
import android.net.Uri;
import android.os.Bundle;
import android.provider.MediaStore;
import android.widget.Toast;

import com.bsj0420.ex90firebasechating.databinding.ActivityMainBinding;
import com.bumptech.glide.Glide;
import com.google.android.gms.tasks.OnSuccessListener;
import com.google.firebase.firestore.CollectionReference;
import com.google.firebase.firestore.FirebaseFirestore;
import com.google.firebase.storage.FirebaseStorage;
import com.google.firebase.storage.StorageReference;
import com.google.firebase.storage.UploadTask;

import java.util.Date;
import java.util.HashMap;
import java.util.Map;
import java.util.Objects;

public class MainActivity extends AppCompatActivity {

    ActivityMainBinding binding;

    //프로필 이미지 Uri
    Uri profileUri = null;

    boolean isFirst = true;

    @Override
    protected void onCreate(Bundle savedInstanceState) {
        super.onCreate(savedInstanceState);

        binding = ActivityMainBinding.inflate(getLayoutInflater());
        setContentView(binding.getRoot());

        binding.civ.setOnClickListener(view -> clickImg());
        binding.btn.setOnClickListener(view -> clickBtn());

        //디바이스에 저장되어 있는 로그인 정보(profile)가 있는지 확인
        //SharedPrefernces에 저장되어 있는 닉네임, 프로필이미지 있다면 읽어오기
        loadData();

    }

    //SharedPrefernces에 저장된 값 읽어오기
    private void loadData() {

        SharedPreferences pref = getSharedPreferences("profile",MODE_PRIVATE);
        G.nicname = pref.getString("nicName",null);
        G.profileUrl = pref.getString("profileUrl",null);

        if(G.nicname != null){
            binding.et.setText(G.nicname);
            Glide.with(this).load(G.profileUrl).into(binding.civ);

            isFirst = false;
        }

    }

    private void clickImg() {

        Intent intent = new Intent(MediaStore.ACTION_PICK_IMAGES);
        resultLauncher.launch(intent);

    }

    ActivityResultLauncher<Intent> resultLauncher = registerForActivityResult(new ActivityResultContracts.StartActivityForResult(), result -> {
        if(result.getResultCode() == RESULT_CANCELED) return;

        //Uri 구해야하는데 전역변수로
        profileUri = result.getData().getData(); //인텐트한테 데이터 받기

        Glide.with(this).load(profileUri).into(binding.civ);

    });

    private void clickBtn() {

        //채팅화면 가기전에 프로필 이미지와 닉네임을 서버에 저장 단, 처음 로그인 할 때
        if (isFirst) saveData();
        else startActivity(new Intent(this, ChattingActivity.class));
    }

    private void saveData() {

        //이미지를 선택하지 않으면 채팅입장 불가
        if(profileUri == null) return;

        //닉네임 가져와서 static 변수에 저장 - 모든 화면에서 쓰기위해
        G.nicname = binding.et.getText().toString();

        //이미지 업로드가 오래걸리기 때문에 FireStorge에 먼저 업로드
        //1. 스토리지로 이동
        FirebaseStorage storage = FirebaseStorage.getInstance();

        //2. 참조 위치명이 중복되지않도록 날짜이용
        SimpleDateFormat sdf = new SimpleDateFormat("yyyyMMddHHmmss");
        StorageReference imgRef = storage.getReference("profileImg/IMG_"+sdf.format(new Date()));

        //3. 이미지 업로드
        imgRef.putFile(profileUri).addOnSuccessListener(new OnSuccessListener<UploadTask.TaskSnapshot>() {
            @Override
            public void onSuccess(UploadTask.TaskSnapshot taskSnapshot) {
                //Toast.makeText(MainActivity.this, "이미지 등록", Toast.LENGTH_SHORT).show();
                //업로드가 성공되었으니
                //업로드 된 파일의 다운로드[URL] 주소를 얻어오기
                imgRef.getDownloadUrl().addOnSuccessListener(new OnSuccessListener<Uri>() { //콜백의 콜백
                    @Override
                    public void onSuccess(Uri uri) {
                        //Uri 안에 업로드 된 파일의 다운로드[URL] 옴
                        G.profileUrl = uri.toString();

                        Toast.makeText(MainActivity.this, "이미지 주소값 저장 완료", Toast.LENGTH_SHORT).show();

                        //저장 2군데에 할것
                        //1. 서버의 firestore DB에 닉네임과 이미지 Url 저장
                        FirebaseFirestore firestore = FirebaseFirestore.getInstance();
                        //profiles 라는 이름의 컬렉션 참조 객체 소환
                        CollectionReference profileRef = firestore.collection("profiles");

                        //닉네임을 도큐먼트로 정하고 필드 값으로 이미지 경로 url 저장
                        Map<String, Object> profile = new HashMap<>();
                        profile.put("profileUrl", G.profileUrl);

                        profileRef.document(G.nicname).set(profile);

                        //2. 앱을 처음 시작할때만 닉네임과 사진을 입력하도록
                        //디바이스에 영구적으로 데이터 저장 [SharedPreference]
                        SharedPreferences preferences = getSharedPreferences("profile",MODE_PRIVATE);

                        SharedPreferences.Editor editor = preferences.edit();
                        editor.putString("nicName",G.nicname);
                        editor.putString("profileUrl",G.profileUrl);

                        editor.commit(); //내부적으로 트랜젝션 상태라 commit() 안해주면 안됨


                        //저장이 완료되었으니 채팅화면으로 이동
                        Intent intent = new Intent(MainActivity.this, ChattingActivity.class);
                        startActivity(intent);

                        finish();
                    }
                });
            }
        });

    }
}
[2]채팅 화면

1) 채팅 메인 화면
activity_chatting.xml

<?xml version="1.0" encoding="utf-8"?>
<RelativeLayout xmlns:android="http://schemas.android.com/apk/res/android"
    xmlns:app="http://schemas.android.com/apk/res-auto"
    xmlns:tools="http://schemas.android.com/tools"
    android:layout_width="match_parent"
    android:layout_height="match_parent"
    tools:context=".ChattingActivity">

    <androidx.recyclerview.widget.RecyclerView
        android:id="@+id/recycler"
        android:layout_above="@+id/layout"
        app:layoutManager="androidx.recyclerview.widget.LinearLayoutManager"
        android:orientation="vertical"
        android:layout_width="match_parent"
        android:layout_height="match_parent"
        app:stackFromEnd="true"/>

    <LinearLayout
        android:id="@+id/layout"
        android:layout_alignParentBottom="true"
        android:background="@color/purple_700"
        android:padding="4dp"
        android:orientation="horizontal"
        android:layout_width="match_parent"
        android:layout_height="wrap_content">

        <!--   maxLines : 최대 n줄까지만 커짐   -->

        <EditText
            android:id="@+id/et"
            android:maxLines="3"
            android:inputType="textMultiLine"
            android:hint="메세지 입력"
            android:padding="10dp"
            android:background="@drawable/bg_edit"
            android:layout_weight="1"
            android:layout_width="wrap_content"
            android:layout_height="wrap_content"/>

        <Button
            android:id="@+id/btn"
            android:text="전송"
            android:layout_marginLeft="8dp"
            android:layout_gravity="center"
            android:backgroundTint="@color/black"
            android:layout_width="wrap_content"
            android:layout_height="wrap_content"/>
    </LinearLayout>

</RelativeLayout>
CattingActivity.java
- addSnapshotListener() : chatRef의 데이터가 변경될때마다 스냅샷을 다시하는 반응 리스너 달아줘야함!
단, 데이터가 바뀔때마다 그냥 add하면 그 순간의 모든것을 찍어 가져오기 때문에 중복되어버림 따라서 변경된 Document만 찾아달라고 해야함
get()는 일회용임
package com.bsj0420.ex90firebasechating;

import androidx.annotation.Nullable;
import androidx.appcompat.app.AppCompatActivity;

import android.content.Context;
import android.os.Bundle;
import android.view.inputmethod.InputMethodManager;
import android.widget.Toast;

import com.bsj0420.ex90firebasechating.databinding.ActivityChattingBinding;
import com.google.firebase.firestore.CollectionReference;
import com.google.firebase.firestore.DocumentChange;
import com.google.firebase.firestore.DocumentSnapshot;
import com.google.firebase.firestore.EventListener;
import com.google.firebase.firestore.FirebaseFirestore;
import com.google.firebase.firestore.FirebaseFirestoreException;
import com.google.firebase.firestore.QuerySnapshot;

import java.util.ArrayList;
import java.util.Calendar;
import java.util.List;
import java.util.Map;
import java.util.Objects;

public class ChattingActivity extends AppCompatActivity {

    ActivityChattingBinding binding;

    //채팅방 시작하자마자 아이테 ㅁ하나 붙잡을 테니 전역변수로
    FirebaseFirestore firestore;
    CollectionReference chatRef;

    //채팅방 이름
    String chatName ="myChat";

    //리사이클러뷰에 넣어줄 아이템
    ArrayList<MessageItem> messageItems = new ArrayList<>();
    MessageAdapter messageAdapter;

    @Override
    protected void onCreate(Bundle savedInstanceState) {
        super.onCreate(savedInstanceState);

        binding = ActivityChattingBinding.inflate(getLayoutInflater());
        setContentView(binding.getRoot());

        //제목줄에 채팅방 이름 표시
        getSupportActionBar().setTitle(chatName);
        getSupportActionBar().setSubtitle("상대방 이름");

        //아답터 연결
        messageAdapter = new MessageAdapter(this,messageItems);
        binding.recycler.setAdapter(messageAdapter);


        //파리어베이스 파이어 스토어 관리객체 및 (채팅방 이름)참조 객체 소환
        //채팅기록 남기기 위한 DB 생성
        //collection = 채팅방명
        //도큐먼트 = 시간
        //필드 : 칭팅정보 (사진, 이름, 메세지 ,시간)
        firestore = FirebaseFirestore.getInstance();
        chatRef = firestore.collection(chatName);


        //채팅방이름으로 된 컬렉션에 저장되어 있는 데이터들 읽어오기
        //chatRef의 데이터가 변경될때마다 반응하는 리스너 달기 : get()은 일회용
        chatRef.addSnapshotListener(new EventListener<QuerySnapshot>() { //데이터가 바뀔떄마다 찍음
            @Override
            public void onEvent(@Nullable QuerySnapshot value, @Nullable FirebaseFirestoreException error) {
                //데이터가 바뀔때마다 그냥 add하면 그 순간의 모든것을 찍어 가져오기 때문에 중복되어버림
                //따라서 변경된 Document만 찾아달라고 해야함
                //1. 바뀐 애들 찾온다 - 왜 리스트인가? 처음 시작할 때 문제가 됨 그래서 여러개라고 생각함
                List<DocumentChange> documentChanges =value.getDocumentChanges();

                for(DocumentChange documentChange:documentChanges){
                    //2.변경된 문서내역의 데이터를 촬영한 DocumentSnapshot얻어오기
                    DocumentSnapshot snapshot = documentChange.getDocument();

                    //3.Document에 있는 필드값 가져오기
                    Map<String, Object> msg = snapshot.getData();
                    String name = msg.get("name").toString();
                    String message = msg.get("message").toString();
                    String profileUrl = msg.get("profileUrl").toString();
                    String time = msg.get("time").toString();

                    //4.읽어온 메세지를 리스트에 추가
                    messageItems.add(new MessageItem(name,message,profileUrl,time));

                    //5.아답터에게 데이터가 추가 되었다고 공지 -> 해야 화면 갱신됨
                    messageAdapter.notifyItemInserted(messageItems.size()-1);
                    // notifyDataSetChanged() : 여러개가 한번에 여러개 바뀌었을 때
                    //notifyItemRangeInserted() : 현재 for문 안에서 하나 바뀔때 마다 알려주면 됨
                    //notifyItemRangeInserted(바뀐위치)
                    //바뀐위치는 마지막 번호 = messageItems.size()-1

                    //리사이클러뷰의 스크롤위치 가장 아래로 이동
                    binding.recycler.scrollToPosition(messageItems.size()-1);

                }

                //Toast.makeText(ChattingActivity.this, ""+messageItems.size(), Toast.LENGTH_SHORT).show();

            }
        });


        binding.btn.setOnClickListener(v-> clickSend());

    }

    private void clickSend() {

        //파이어베이스 디비에 저장할 데이터들 준비 (사진, 이름 메세지 시간)
        String nickName = G.nicname;
        String message = binding.et.getText().toString();
        String profileUrl = G.profileUrl;
        //메세지를 작성 시간을 문자열 [시:분]
        Calendar calendar = Calendar.getInstance();
        String time = calendar.get(Calendar.HOUR_OF_DAY) + ":"+calendar.get(Calendar.MINUTE);

        //필드에 넣을 값을 MessageItem 객체로 만들어서 한방에 입력
        //필드값을 객체로 만들어 저장하자 : 리사이클러뷰에 넣기 위해
        MessageItem item = new MessageItem(nickName,message,profileUrl,time);

        //'채팅방이름' 컬렉션에 채팅 메세지들을 저장
        // 단 시간 순으로 정렬되도록 도큐먼트의 이름은 현재시간(밀리세컨드)로 지정
        chatRef.document("MSG_"+ System.currentTimeMillis()).set(item);

        //다음 메세지를 입력이 수월하도록 EditText에 있는 글씨 삭제
        binding.et.setText("");

        //키보드 내리기
        InputMethodManager imm = (InputMethodManager)getSystemService(Context.INPUT_METHOD_SERVICE);
        imm.hideSoftInputFromWindow(getCurrentFocus().getWindowToken(),0);
        //hideSoftInputFromWindow(포커스 받은 editText, 0 : 바로 종료 )

    }
}
MessageItem.java
- 파이어베어스에 값을 객체로 한번에 넣어주기 위해선 파이어베이스에서 건드릴 수 있도록 반드시 퍼블릭이어야한다
- 파이어베어스에선 무조건 빈 생성자 하나 모두 다 받는 거 하나 2개 만들어야한다!!!
package com.bsj0420.ex90firebasechating;

public class MessageItem {

    //파이어베이스에서 건드릴 수 있도록 반드시 퍼블릭이어야한다
    public String name;
    public String message;
    public String profileUrl;
    public String time;

    //파이어베어스에선 무조건 빈 생성자 하나 모두 다 받는 거 하나 2개 만들어야함
    public MessageItem() {
    }

    public MessageItem(String name, String message, String profileUrl, String time) {
        this.name = name;
        this.message = message;
        this.profileUrl = profileUrl;
        this.time = time;
    }
}
2) 리사이클러뷰
리사이클러뷰 레이아웃 다르게하기
- 아답터의 들어갈 두 item 뷰의 id가 같아야 함을 명시하자!!!!!
- 아이디가 같아야 adapter - 뷰 홀더에서 view를 타입별로 참조할 때 하나의 뷰 홀더로 각각의 아이템들을 찾아올 수 있기 때문이다
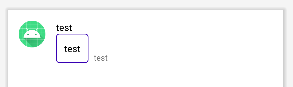
1. my_messagebox.xml
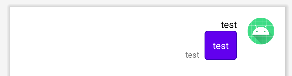
내가 쓴 말풍선 item 화면
<?xml version="1.0" encoding="utf-8"?>
<RelativeLayout xmlns:android="http://schemas.android.com/apk/res/android"
    android:layout_width="match_parent"
    android:layout_height="wrap_content"
    xmlns:tools="http://schemas.android.com/tools"
    android:padding="16dp"
    tools:viewBindingIgnore="true">
    <!--  viewBinding 안생기게 하는 속성  -->

    <de.hdodenhof.circleimageview.CircleImageView
        android:id="@+id/civ"
        android:layout_alignParentRight="true"
        android:src="@mipmap/ic_launcher"
        android:layout_width="40dp"
        android:layout_height="40dp"/>

    <TextView
        android:id="@+id/tv_name"
        android:layout_width="wrap_content"
        android:layout_height="wrap_content"
        android:text="test"
        android:textColor="@color/black"
        android:layout_toLeftOf="@+id/civ"
        android:layout_marginRight="16dp"/>

    <TextView
        android:id="@+id/tv_msg"
        android:layout_width="wrap_content"
        android:layout_height="wrap_content"
        android:text="test"
        android:textColor="@color/white"
        android:layout_alignRight="@+id/tv_name"
        android:layout_below="@+id/tv_name"
        android:background="@drawable/bg_mymsgbox"
        android:padding="12dp"
        android:maxWidth="250dp"/>

    <TextView
        android:id="@+id/tv_time"
        android:layout_width="wrap_content"
        android:layout_height="wrap_content"
        android:text="test"
        android:textSize="12sp"
        android:layout_toLeftOf="@+id/tv_msg"
        android:layout_alignBottom="@+id/tv_msg"
        android:layout_marginRight="8dp"/>

</RelativeLayout>
2. other_messagebox.xml
다른 사람이 쓴 말풍선 xml
<?xml version="1.0" encoding="utf-8"?>
<RelativeLayout xmlns:android="http://schemas.android.com/apk/res/android"
    android:layout_width="match_parent"
    android:layout_height="wrap_content"
    xmlns:tools="http://schemas.android.com/tools"
    android:padding="16dp"
    tools:viewBindingIgnore="true">

    <de.hdodenhof.circleimageview.CircleImageView
        android:id="@+id/civ"
        android:src="@mipmap/ic_launcher"
        android:layout_width="40dp"
        android:layout_height="40dp"/>

    <TextView
        android:id="@+id/tv_name"
        android:layout_width="wrap_content"
        android:layout_height="wrap_content"
        android:text="test"
        android:textColor="@color/black"
        android:layout_toRightOf="@+id/civ"
        android:layout_marginLeft="16dp"/>

    <TextView
        android:id="@+id/tv_msg"
        android:layout_width="wrap_content"
        android:layout_height="wrap_content"
        android:text="test"
        android:textColor="@color/black"
        android:layout_alignLeft="@+id/tv_name"
        android:layout_below="@+id/tv_name"
        android:background="@drawable/bg_othermsgbox"
        android:padding="12dp"
        android:maxWidth="250dp"/>

    <TextView
        android:id="@+id/tv_time"
        android:layout_width="wrap_content"
        android:layout_height="wrap_content"
        android:text="test"
        android:textSize="12sp"
        android:layout_toRightOf="@+id/tv_msg"
        android:layout_alignBottom="@+id/tv_msg"
        android:layout_marginLeft="8dp"/>

</RelativeLayout>
adapter.java
- 두개의 아이템 뷰를 하나의 뷰홀더로 참조할 수 있다! (그러려면 두 레이아웃의 id가 같아야함)
onCreateViewHolder() 메소드의 두번째 파라미터 int viewType 활용 방법!!!
💡 getItemViewType()
리사이클러뷰의 아이템뷰가 경우에 따라 다른 모양으로 보여야 할 때 사용하는 콜백 메소드
이 메소드에서 해당 position에 따른 식별값(ViewType 번호)를 정하여 리턴하면 그 값이 onCreateViewHolder() 메소드의 두번째 파라미터에 전달됨
🧨 onCreateViewHolder() 메소드 안에서 그 값에 따라 다른 xml 문서를 inflate 하면된다

package com.bsj0420.ex90firebasechating;

import android.content.Context;
import android.view.LayoutInflater;
import android.view.View;
import android.view.ViewGroup;
import android.widget.TextView;

import androidx.annotation.NonNull;
import androidx.recyclerview.widget.RecyclerView;

import com.bumptech.glide.Glide;

import java.util.ArrayList;

import de.hdodenhof.circleimageview.CircleImageView;

public class MessageAdapter extends RecyclerView.Adapter<MessageAdapter.VH> {

    Context context;
    ArrayList<MessageItem> messageItems;

    final int TYPE_MY=0;
    final int TYPE_OTHER=1;

    public MessageAdapter(Context context, ArrayList<MessageItem> messageItems) {
        this.context = context;
        this.messageItems = messageItems;
    }

    //리사이클러뷰의 아이템뷰가 경우에 따라 다른 모양으로 보여야 할 때 사용하는 콜백 메소드가 있다 : getItemViewType
    //이 메소드에서 해당 position에 따른 식별값(ViewType 번호)를 정하여 리턴하면
    //그 값이 onCreateViewHolder() 메소드의 두번째 파라미터에 전달됨
    //onCreateViewHolder() 메소드 안에서 그 값에 따라 다른 xml 문서를 inflate 하면된다
    @Override
    public int getItemViewType(int position) {
        if(messageItems.get(position).name.equals(G.nicname)) {
            //내가 쓴 글
            return TYPE_MY;
        } else {
            return TYPE_OTHER;
        }
    }

    @NonNull
    @Override
    public VH onCreateViewHolder(@NonNull ViewGroup parent, int viewType) {

        //두 레이아웃 중 뭘 넣어야할지 몰라 우선 null 참조
        //파이어베이스에 저장된 name이 내 static name에 있는 것과 같으면 내거 아님 상대방거임
        //두번째 파라미터 int viewType을 사용해서 분기처리 해보자
        //타입은 낸 맘대로 정할 수 있음
        View itemView = null;
        if(viewType == TYPE_MY) itemView = LayoutInflater.from(context).inflate(R.layout.my_messagebox,parent,false);
        else itemView = LayoutInflater.from(context).inflate(R.layout.other_messagebox,parent,false);

        //카톡 날짜 구분선도 이 타입으로 구분한것임

        return new VH(itemView);
    }

    @Override
    public void onBindViewHolder(@NonNull VH holder, int position) {
        MessageItem item = messageItems.get(position);

        holder.tvName.setText(item.name);
        holder.tvMsg.setText(item.message);
        holder.tvTime.setText(item.time);
        Glide.with(context).load(item.profileUrl).into(holder.civ);
    }

    @Override
    public int getItemCount() {
        return messageItems.size();
    }

    class VH extends RecyclerView.ViewHolder {

        //메세지 타입에 따라 뷰가 다름 바인딩 클래스를 고정 할 수 없다 (뷰가 두개라 누굴 써야할지 모르것다,,)
        //MyMessageboxBinding binding;
        //OtherMessageboxBinding binding2;

        //ViewHolder를 2개 만들어 사용하기도함 [MyVH, OtherVH]
        //홀더를 두개 만들면 onBinding할때도 분기 처리해야해서 이번에는 뷰 바인드 안쓰고 제작
        CircleImageView civ;
        TextView tvName;
        TextView tvMsg;
        TextView tvTime;

        public VH(@NonNull View itemView) {
            super(itemView);
            //xml 의 id가 같아야 함
            civ = itemView.findViewById(R.id.civ);
            tvName = itemView.findViewById(R.id.tv_name);
            tvMsg = itemView.findViewById(R.id.tv_msg);
            tvTime = itemView.findViewById(R.id.tv_time);

        }
    }
}
💡 채팅방 글 쓸때 키보드가 올라오면 화면 재조정
-
매니패스트에 configChanges 속성을 줘야함
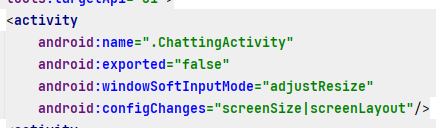
-
키보드로 인해 사이즈 재조정이 필요한 view에 app:stackFromEnd="true" 속성 붙여주기


보조기억장치