MVVM
역할을 분리하여 유지보수에 용이하게 한다.
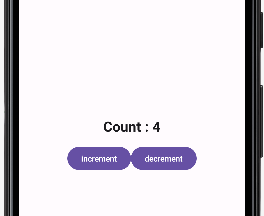
화면이 다시 그려져도 변수의 상태 유지를 해준다
- Model:로직 처리 담당
- view : 사용자 인터페이스, UI
- viewModel : 뷰가 모델의 현재 상태를 나타낼 수 있도록 하는 중간다리
1. mvvm 패턴 적용 전
package com.lullulalal.mymvvmtest

import android.os.Bundle
import androidx.activity.ComponentActivity
import androidx.activity.compose.setContent
import androidx.compose.foundation.layout.Arrangement
import androidx.compose.foundation.layout.Column
import androidx.compose.foundation.layout.Row
import androidx.compose.foundation.layout.Spacer
import androidx.compose.foundation.layout.fillMaxSize
import androidx.compose.foundation.layout.height
import androidx.compose.material3.Button
import androidx.compose.material3.MaterialTheme
import androidx.compose.material3.Surface
import androidx.compose.material3.Text
import androidx.compose.runtime.Composable
import androidx.compose.runtime.mutableStateOf
import androidx.compose.runtime.remember
import androidx.compose.ui.Alignment
import androidx.compose.ui.Modifier
import androidx.compose.ui.text.font.FontWeight
import androidx.compose.ui.tooling.preview.Preview
import androidx.compose.ui.unit.dp
import androidx.compose.ui.unit.sp
import com.lullulalal.mymvvmtest.ui.theme.MyMVVMTestTheme

class MainActivity : ComponentActivity() {
    override fun onCreate(savedInstanceState: Bundle?) {
        super.onCreate(savedInstanceState)
        setContent {
            MyMVVMTestTheme {
                // A surface container using the 'background' color from the theme
                Surface(
                    modifier = Modifier.fillMaxSize(),
                    color = MaterialTheme.colorScheme.background
                ) {
                    TheCounterApp()
                }
            }
        }
    }

    @Composable
    fun TheCounterApp() {
        val count = remember {
            mutableStateOf(0)
        }

        fun increment() {
            count.value++
        }

        fun decrement() {
            count.value--
        }

        Column(modifier = Modifier.fillMaxSize(),
            verticalArrangement = Arrangement.Center,
            horizontalAlignment = Alignment.CenterHorizontally) {

            Text(text = "Count : ${count.value}",
                fontSize = 24.sp,
                fontWeight = FontWeight.Bold
                )
            Spacer(modifier = Modifier.height(16.dp))
            Row() {
                Button(onClick = { increment() }) {
                    Text(text = "increment")
                }
                Button(onClick = { decrement() }) {
                    Text(text = "decrement")
                }
            }
        }
    }
}
2. viewModel을 상속받은 클래스를 만들어 일차 분리
- 화면을 다시 그려도 변수정보 유지하도록 분리
1) main.kt
viewModel() 사용하기 위해선
bulid.gradle에 viewModel-lifecycle dependency 해야됨
implementation 'androidx.lifecycle:lifecycle-viewmodel-compose:2.4.0'
package com.lullulalal.mymvvmtest

import android.os.Bundle
import androidx.activity.ComponentActivity
import androidx.activity.compose.setContent
import androidx.activity.viewModels
import androidx.compose.foundation.layout.Arrangement
import androidx.compose.foundation.layout.Column
import androidx.compose.foundation.layout.Row
import androidx.compose.foundation.layout.Spacer
import androidx.compose.foundation.layout.fillMaxSize
import androidx.compose.foundation.layout.height
import androidx.compose.material3.Button
import androidx.compose.material3.MaterialTheme
import androidx.compose.material3.Surface
import androidx.compose.material3.Text
import androidx.compose.runtime.Composable
import androidx.compose.ui.Alignment
import androidx.compose.ui.Modifier
import androidx.compose.ui.text.font.FontWeight
import androidx.compose.ui.unit.dp
import androidx.compose.ui.unit.sp
import androidx.lifecycle.viewmodel.compose.viewModel
import com.lullulalal.mymvvmtest.ui.theme.MyMVVMTestTheme

class MainActivity : ComponentActivity() {
    override fun onCreate(savedInstanceState: Bundle?) {
        super.onCreate(savedInstanceState)
        setContent {

            //viewModel() 사용하기 위해선
            //implementation 'androidx.lifecycle:lifecycle-viewmodel-compose:2.8.3' 되어 있어야함
            val viewModel : CounterViewModel = viewModel()

            MyMVVMTestTheme {
                // A surface container using the 'background' color from the theme
                Surface(
                    modifier = Modifier.fillMaxSize(),
                    color = MaterialTheme.colorScheme.background
                ) {
                    TheCounterApp(viewModel)
//                    TheCounterApp()
                }
            }
        }
    }

    @Composable
    fun TheCounterApp(viewModel: CounterViewModel) {//viewModel전달
//        val count = remember {
//            mutableStateOf(0)
//        }

//        fun increment() {
//            count.value++
//        }
//
//        fun decrement() {
//            count.value--
//        }

        Column(modifier = Modifier.fillMaxSize(),
            verticalArrangement = Arrangement.Center,
            horizontalAlignment = Alignment.CenterHorizontally) {

            Text(text = "Count : ${viewModel.count.value}", //viewModel에 작성함 count변수에 접근
                fontSize = 24.sp,
                fontWeight = FontWeight.Bold
                )
            Spacer(modifier = Modifier.height(16.dp))
            Row() {
                Button(onClick = { viewModel.increment() }) {
                    Text(text = "increment")
                }
                Button(onClick = { viewModel.decrement() }) {
                    Text(text = "decrement")
                }
            }
        }
    }
}
2) CounterViewModel.kt
package com.lullulalal.mymvvmtest

import androidx.compose.runtime.MutableState
import androidx.compose.runtime.mutableStateOf
import androidx.lifecycle.ViewModel

class CounterViewModel():ViewModel() {

    //remember - mutableStateOf 키워드 없이 mutableStateOf한 변수 만들기
    private val _count = mutableStateOf(0) //private 변수 앞엔 _붙이는게 관습이다

    //외부에서 _count에 접근하기 위해선
    //count 변수를 immutable한 상태로 노출시켜야함
    val count : MutableState<Int> = _count

    //_count를 변경하도록 해야함 변경 값은 count에 저장됨
    //_count변수 자체를 노출x 그 값만 노출될 수 있도록함
    fun increment() {
        _count.value++
    }

    fun decrement() {
        _count.value--
    }

}
3. Model을 만들어 3차 분리
- 데이터 클래스
- 로직 담당
- repository는 클린 API처럼 동작하는 디자인 패턴
- API는 애플리케이션의 데이터에 접근하기 위한 어플리케이션 프로그래밍 인터페이스라는 뜻
CounterModel.kt
data class CounterModel(var count : Int)

class CounterRepository {
    private var _counter = CounterModel(0)

    fun getCounter() = _counter
    fun incrementCounter() {
        _counter.count++
    }

    fun decrementCounter() {
        _counter.count--
    }
}
CounterViewModel.kt
데이터 클래스 담당 CounterModel 작성에 따른 코드 변경
CounterModel에 설정한 CounterRepository자료형인 repository를 이용해 통신함
class CounterViewModel():ViewModel() {

    private val _repository: CounterRepository = CounterRepository()

    //remember - mutableStateOf 키워드 없이 mutableStateOf한 변수 만들기
    private val _count = mutableStateOf(_repository.getCounter().count) //모델 변수에 접근

    //외부에서 _count에 접근하기 위해선
    //count 변수를 immutable한 상태로 노출시켜야함
    val count : MutableState<Int> = _count

    //_count를 변경하도록 해야함 변경 값은 count에 저장됨
    //_count변수 자체를 노출x 그 값만 노출될 수 있도록함
    fun increment() {
        _repository.incrementCounter()
        _count.value = _repository.getCounter().count
    }

    fun decrement() {
        _repository.decrementCounter()
        _count.value = _repository.getCounter().count
    }

}
MVVM을 사용하는 이유
1. 고려 사항 분리
MVVM은 사용자 인터페이스와 비즈니스 로직 그리고 데이터를 깔끔하게 분리하여 각 컴포넌트가 다른 일을 하게 해서 유지보수에 용이함
2. 테스트가 용이함
이 분리 덕분에 각 컴포넌트를 개별적으로 테스트 할 수 있다
3. 재사용성
뷰 모델이 뷰로부터 분리되어 이 뷰 모델을 다른 뷰 심지어 다른 플랫폼에서도 사용 가능
4. 유지보수
규모가 커지면 구분된 계층을 갖는 것이 관리하는데 도움이 된다
뷰가 변경되어도 로직엔 영향을 주지않기 떄문
cf) 저장소
저장소란? 나머지 앱 데이터가 접근하는 클린 api처럼 행동하는 디자인 패턴
- Remote API와 같은 데이터 소스와 로컬 데이터베이스 그리고 인메모리 캐시간의 중재자
- 저장소의 이점 : 미가공 데이터 소스에 높은 수준의 추상화를 제공하고 앱의 다른 부분을 바꾸지 않고도 데이터 소스를 변경할 수 있다
ex) 데이터를 얻을때 모든 데이터는 저장소에 집중되어 지속성을 보장하고 중복을 방지한다 - 코드와 연관된 데이터를 저장소에 격리시켜 테스트를 위해 데이터를 쉽게 변경할 수 있고 데이터 저장 매커니즘을 바꾸거나 앱의 다른 부분에 영향을 주지 않고 캐싱 계층을 추가할 수 있다
- 유연성, 미래에 데이터를 가져오는 방법이나 저장방법을 변경, 데이터베이스를 변경, 클라우드 기반 백업을 추가한다면 뷰나 뷰모델을 만지지않고 저장소만 변경하면 됨
앱 개발에서는 저장소가 데이터 소스의 복잡성을 다루고 뷰 모델과 뷰는 각자 역할에 집중할 수 잇게 한다

보조기억장치