collect.py 파일 공부용
config/hooks/tk-multi-publish2/maya/collector.py
{config} 토큰을 확인합니다. 이제 경로가 프로젝트 구성에서 hooks 폴더로 해석됩니다. 새 컬렉터 사본이 앱 자체에서 정의되는 컬렉터에서 상속됩니다.
이제 원하는 IDE 또는 텍스트 편집기에서 컬렉터 사본을 연 다음 process_current_session 방식을 찾습니다. 이 방식은 현재 DCC 세션에서 모든 게시 항목 수집을 담당합니다. 새 게시 유형을 수집하게 되므로 이 방식의 하단으로 이동하여 다음 줄을 추가합니다.
self._collect_meshes(item)
이 줄은 현재 세션에 있는 모든 메쉬를 수집하기 위해 추가할 새 방식입니다. 이 방식은 나중에 만들 예정인 셰이더 게시 플러그인이 작동할 수 있는 메쉬 항목을 만듭니다. 전달되는 항목은 메쉬 항목의 상위가 될 세션 항목입니다.
    def _collect_meshes(self, parent_item):
       """
       Collect mesh definitions and create publish items for them.

       :param parent_item: The maya session parent item
       """

       # build a path for the icon to use for each item. the disk
       # location refers to the path of this hook file. this means that
       # the icon should live one level above the hook in an "icons"
       # folder.
       icon_path = os.path.join(
           self.disk_location,
           os.pardir,
           "icons",
           "mesh.png"
       )

       # iterate over all top-level transforms and create mesh items
       # for any mesh.
       for object in cmds.ls(assemblies=True):

           if not cmds.ls(object, dag=True, type="mesh"):
               # ignore non-meshes
               continue

           # create a new item parented to the supplied session item. We
           # define an item type (maya.session.mesh) that will be
           # used by an associated shader publish plugin as it searches for
           # items to act upon. We also give the item a display type and
           # display name (the group name). In the future, other publish
           # plugins might attach to these mesh items to publish other things
           mesh_item = parent_item.create_item(
               "maya.session.mesh",
               "Mesh",
               object
           )

           # set the icon for the item
           mesh_item.set_icon_from_path(icon_path)

           # finally, add information to the mesh item that can be used
           # by the publish plugin to identify and export it properly
           mesh_item.properties["object"] = object
camera collect
    def _collect_cameras(self, parent_item):
       """
       Creates items for each camera in the session.

       :param parent_item: The maya session parent item
       """

       # build a path for the icon to use for each item. the disk
       # location refers to the path of this hook file. this means that
       # the icon should live one level above the hook in an "icons"
       # folder.
       icon_path = os.path.join(
           self.disk_location,
           os.pardir,
           "icons",
           "camera.png"
       )

       # iterate over each camera and create an item for it
       for camera_shape in cmds.ls(cameras=True):

           # try to determine the camera display name
           try:
               camera_name = cmds.listRelatives(camera_shape, parent=True)[0]
           except Exception:
               # could not determine the name, just use the shape
               camera_name = camera_shape

           # create a new item parented to the supplied session item. We
           # define an item type (maya.session.camera) that will be
           # used by an associated camera publish plugin as it searches for
           # items to act upon. We also give the item a display type and
           # display name. In the future, other publish plugins might attach to
           # these camera items to perform other actions
           cam_item = parent_item.create_item(
               "maya.session.camera",
               "Camera",
               camera_name
           )

           # set the icon for the item
           cam_item.set_icon_from_path(icon_path)

           # store the camera name so that any attached plugin knows which
           # camera this item represents!
           cam_item.properties["camera_name"] = camera_name
           cam_item.properties["camera_shape"] = camera_shape
create_item( type_spec , type_display , name )
새 항목을 생성하기 위한 팩토리 메서드입니다.
type_spec : a string that represents the type of the item.
이것은 모든 문자열이 될 수 있지만 일반적으로 스튜디오 규칙에 의해 정의됩니다. 이 값은 게시 플러그인에서 작동할 항목을 식별하는 데 사용됩니다.
예를 들어 기본 Shotgun 통합은 file.image, file.image.sequence, file.movie및 maya.session과 같은 계층적 점 표기법을 사용합니다
제공되는 통합 내에서 사용되는 현재 규칙은 디스크에 있는 파일을 file.{type}(예를 들어 file.image또는 file.video) 분류하는 것입니다. 이 분류는 기본 수집기의 mimetype에서 결정됩니다. 또한 시퀀스 기반 항목은 file.{type}.sequence( file.image.sequence예를 들어)로 분류됩니다.
게시하기 전에 저장하거나 내보내야 하는 DCC 세션 내에 정의된 item의 경우 제공되는 통합 {dcc}.{type} 은 기본 세션 항목 및 {dcc}.{type}.{subtype}세션 내의 항목에 대한 양식을 사용합니다.
예를 들어 Maya에서 기본 세션 항목은 유형 maya.session이고 세션의 모든 지오메트리를 나타내는 항목은 입니다 maya.session.geometry.
이는 제공된 통합에 사용된 규칙일 뿐이며 스튜디오 요구 사항을 충족하도록 변경할 수 있습니다. 게시자와 함께 제공되고 각 툴킷 엔진에 포함된 각 게시 플러그인을 살펴보고 기본적으로 지원되는 항목 유형을 확인하는 것이 좋습니다.
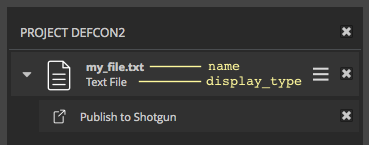
name : item instance의 표시 이름입니다.
이것은 파일 이름이나 Nuke나 Houdini의 item 이름 또는 둘의 조합일 수 있습니다. 이 값은 사용자에게 표시되며 사용자가 현재 세션이나 디스크의 파일과 관련하여 항목이 나타내는 것을 쉽게 식별할 수 있도록 해야 합니다.
type_display : item type에 해당하지만 표시(display) 목적으로만 사용됩니다.
Examples include: Image File, Movie File, Maya Scene
Parameters:
type_spec ( str ) – 일반적으로 계층적 점 표기법을 따르는 항목 유형입니다.
type_display ( str ) – 유형과 동일하지만 표시용입니다.
name ( str ) – UI에서 항목을 나타내는 이름입니다. 이것은 DCC의 항목 이름 또는 파일 이름일 수 있습니다.
#####################################################
코드가 주석 처리되어 있으며 수행할 작업에 대한 정보를 제공합니다. 요점은 이제 현재 세션에서 최상위 수준 메쉬에 대한 메쉬 항목을 수집하는 로직을 추가한 것입니다. 그러나 이때 게시자를 실행하면 항목 트리에서 어떤 메쉬 항목도 볼 수 없습니다. 왜냐하면 작동하도록 정의된 게시 플러그인이 없기 때문입니다. 다음으로, 메쉬 항목을 연결하고 다운스트림을 사용하기 위해 해당 항목 게시를 처리할 새 셰이더 게시 플러그인을 작성합니다.
참고 : 위 코드에는 메쉬 항목에 대한 아이콘을 설정하는 호출이 있습니다. 이 작업을 위해 다음과 같이 지정된 경로로 구성에 아이콘을 추가해야 합니다.
config/hooks/tk-multi-publish2/icons/mesh.png
셰이더 게시 플러그인 만들기
다음 단계에서는 메쉬의 셰이더를 디스크로 내보내 게시할 수 있는 게시 플러그인에 새로 수집한 메쉬 항목을 연결합니다. 이렇게 하려면 새 게시 플러그인을 만들어야 합니다. 이 후크의 소스 코드에 대한 이 링크를 따라 이동하고 이를 hooks/tk-multi-publish2/maya 폴더에 저장하고 이름을 publish_shader_network.py로 지정합니다.
참고 : 이 플러그인은 툴킷 플랫폼 및 게시 코드를 처음 사용하는 경우 사용할 코드 집합입니다. 지금은 걱정할 필요가 없습니다. 이 튜토리얼을 진행하면서 진행되는 상황을 이해하고 게시자 기능을 사용하게 됩니다. 지금은 파일을 생성하고 그 용도가 셰이더 네트워크를 디스크에 기록하는 것이라는 점만 알아 두시면 됩니다.
셰이더를 게시하기 전의 마지막 단계는 새 셰이더 게시 플러그인에서 정의한 템플릿 및 구성을 추가하는 것입니다. settings 속성에서 플러그인에 의해 정의된 설정을 다음과 같이 볼 수 있습니다.
    @property
    def settings(self):
       "”” … "””

       # inherit the settings from the base publish plugin
       plugin_settings = super(MayaShaderPublishPlugin, self).settings or {}

       # settings specific to this class
       shader_publish_settings = {
           "Publish Template": {
               "type": "template",
               "default": None,
               "description": "Template path for published shader networks. "
                              "Should correspond to a template defined in "
                              "templates.yml.",
           }
       }

       # update the base settings
       plugin_settings.update(shader_publish_settings)

       return plugin_settings```