React.js
Today I Learned ... react.js
🙋♂️ Reference Book
🙋 My Dev Blog
CH 23. JWT를 통한 회원 인증 시스템 구현
- posts API에 회원인증 시스템 구현
- username, tag로 포스트 필터링
posts API - 회원인증 시스템 구현
- 새 포스트를 작성하려면 로그인 해야 작성 가능
- 삭제/수정은 작성자만 할 수 있음
-> 미들웨어를 만들어서 관리할 예정.
스키마 수정
- 각 포스트의 작성자를 알아야 하므로, 기존의 Post 스키마를 수정해야 함.
models/post.js
import mongoose from 'mongoose';

const { Schema } = mongoose;

// 스키마 생성
const PostSchema = new Schema({
  title: String,
  body: String,
  tags: [String],
  publishedDate: {
    type: Date,
    default: Date.now,
  },

  // 🔻 user 필드 추가해줌. (id와 username)
  user: {
    _id: mongoose.Types.ObjectId,
    username: String,
  },
});

// 모델 생성
const Post = mongoose.model('Post', PostSchema);

export default Post;
posts 컬렉션 비우기
-
이제 post 데이터에는 사용자 정보가 필요함.
-
이전에 생성했던 가짜 데이터들은 유효하지 않으므로 모두 삭제해줌.
-
mongoDB compass를 열어 posts 컬렉션을 삭제해줌.
로그인 상태에서만 API 사용 가능하게 설정
- 로그인 상태인지 확인하고, API를 사용할 수 있게 구현.
- 미들웨어를 사용하여 구현함.
- src/lib 디렉터리에
checkLoggedIn.js파일 생성
const checkLoggedIn = (ctx, next) => {
  if (!ctx.state.user) {
    ctx.status = 401;
    return;
  }
  return next();
};

export default checkLoggedIn;
-> 로그인 상태라면 ctx.state에 user 필드가 존재할 것임.
jwtMiddleware 에 의해 토큰 확인 후 jwt.verify한 값을 ctx.state.user 필드에 저장해줬음.
const jwtMiddleware = async (ctx, next) => {
  const token = ctx.cookies.get('access_token');
  if (!token) return next(); // 토큰이 없을 때
  try {
    const decoded = jwt.verify(token, process.env.JWT_SECRET);
    ctx.state.user = {
      _id: decoded._id,
      username: decoded.username,
    };
  ...
posts 라우터에 미들웨어 등록
api/posts/index.js 수정
import Router from 'koa-router';
import { list, write, read, remove, update, checkObjectId } from './posts.ctrl';
import checkLoggedIn from '../../lib/checkLoggedIn';

const posts = new Router();

posts.get('/', list);
// 🔻 write, remove, update API에서는 checkLoggedIn 추가.
posts.post('/', checkLoggedIn, write);
posts.get('/:id', checkObjectId, read);
posts.delete('/:id', checkLoggedIn, checkObjectId, remove);
posts.patch('/:id', checkLoggedIn, checkObjectId, update);

export default posts;
포스트 작성시 사용자 정보 넣기
posts.ctrl.js 수정
-> write API
  const schema = Joi.object().keys({
    title: Joi.string().required(),
    body: Joi.string().required(),
    tags: Joi.array().items(Joi.string()).required(),
  });
  const result = schema.validate(ctx.request.body);
  if (result.error) {
    ctx.status = 400;
    ctx.body = result.error;
    return;
  }

  const { title, body, tags } = ctx.request.body;
  const post = new Post({ title, body, tags, user: ctx.state.user });

  try {
    await post.save();
    ctx.body = post;
  } catch (e) {
    ctx.throw(500, e);
  }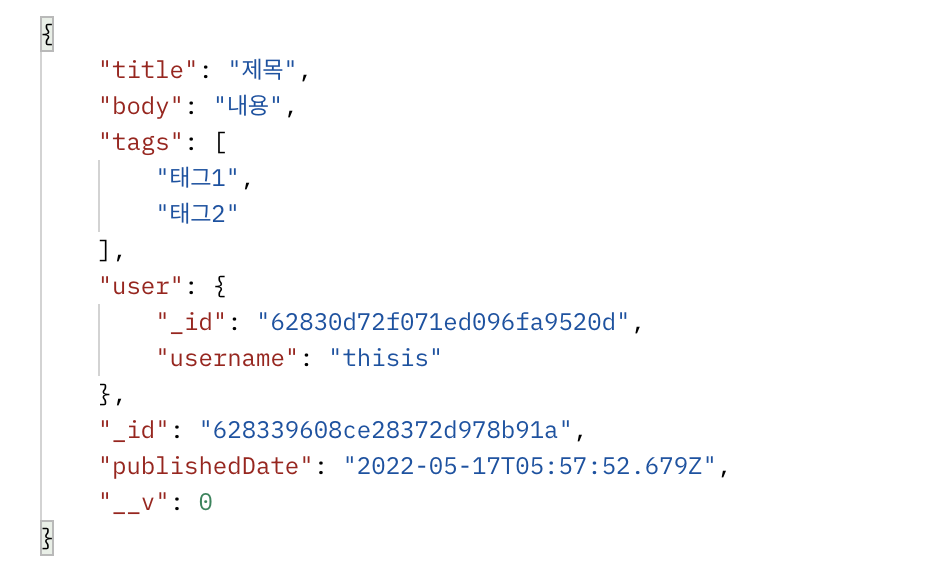
};- postman에서 POST 요청을 해본다.
-> 아래와 같이 "user" 필드가 생성된다.
-> 누가 작성했는지 확인 가능해짐.

포스트 수정,삭제시 권한 확인
1. getPostById 미들웨어
- 이 작업을 미들웨어로 하려면? 👉 id로 포스트를 조회하는 작업도 미들웨어로 해줘야 함.
- 기존에 만들었던
checkObjectId를getPostById로 바꿔준 후, 코드를 수정.
🔻 기존 코드
posts.ctrl.js -> getPostById
export const checkObjectId = (ctx, next) => {
  const { id } = ctx.params;
  if (!ObjectId.isValid(id)) {
    ctx.status = 400; // Bad Request
    return;
  }
  return next();
};
🔻 수정 후
export const getPostById = async (ctx, next) => {
  const { id } = ctx.params;
  if (!ObjectId.isValid(id)) {
    ctx.status = 400; // Bad Request
    return;
  }
  try {
    const post = await Post.findById(id);
    if (!post) {
      ctx.status = 404;
      return;
    }
    ctx.state.post = post;
    return next();
  } catch (e) {
    ctx.throw(500, e);
  }
};
2. posts/index.js 수정
getPostById로 전부 바꿔줌.
import Router from 'koa-router';
import { list, write, read, remove, update, getPostById } from './posts.ctrl';
import checkLoggedIn from '../../lib/checkLoggedIn';

const posts = new Router();

posts.get('/', list);
posts.post('/', checkLoggedIn, write);
posts.get('/:id', getPostById, read);
posts.delete('/:id', checkLoggedIn, getPostById, remove);
posts.patch('/:id', checkLoggedIn, getPostById, update);

export default posts;
3. read API 수정
export const read = (ctx) => {
  ctx.body = ctx.state.post;
};
-> 특정 id로 포스트를 찾는 기능을 하는 read API의 코드를 간소화 할 수 있음.
4. checkOwnPost 미들웨어
posts.ctrl.js 수정
export const checkOwnPost = (ctx, next) => {
  const { user, post } = ctx.state;
  if (post.user._id.toString() !== user._id) {
    ctx.status = 403;
    return;
  }
  return next();
}- post의 구조를 살펴보면 아래와 같이
post.user._id가 있고,
- user의 구조를 살펴보면 아래와 같이
user._id가 있음.

-> 위 두개의_id는 일치함. 즉 같은 유저임.
이와 같이 id값이 일치하는지 확인하여
❗️ 주의 - mongoDB에서 조회한 데이터의 id 값을 문자열과 비교할때는 반드시
.toString()을 해줌.
5. 미들웨어 등록
posts 라우터에 checkOwnPost 미들웨어를 불러줌.
import Router from 'koa-router';
import {
  list,
  write,
  read,
  remove,
  update,
  getPostById,
  checkOwnPost,
} from './posts.ctrl';
import checkLoggedIn from '../../lib/checkLoggedIn';

const posts = new Router();

posts.get('/', list);
posts.post('/', checkLoggedIn, write);
posts.get('/:id', getPostById, read);
posts.delete('/:id', checkLoggedIn, getPostById, checkOwnPost, remove);
posts.patch('/:id', checkLoggedIn, getPostById, checkOwnPost, update);

export default posts;
Test
글을 작성한 계정과 다른 새로운 계정을 만든 후, 그 글을 삭제하려 하면 403 에러가 발생한다.

포스트 필터링
- 특정 사용자가 작성한 포스트만 조회 =
username으로 필터링 - 특정 태그가 있는 포스트만 조회 =
tags로 필터링
posts.ctrl.js 수정
-> list API
export const list = async (ctx) => {
  const page = parseInt(ctx.query.page || '1');

  if (page < 1) {
    ctx.status = 400;
    return;
  }
  // 🔻 ctx.query (주소의 쿼리스트링) -> 예) ?username=yjin
  const { tag, username } = ctx.query;
  // 🔻 tag, username이 있으면 객체 않에 넣고 아니면 빈 객체로
  const query = {
    ...(username ? { 'user.username': username } : {}),
    ...(tag ? { tags: tag } : {}),
  };

  try {
    // 🔻 find() 의 인자로 query를 넣어줌.
    const posts = await Post.find(query)
      .sort({ _id: -1 })
      .limit(10)**텍스트**
      .skip((page - 1) * 10)
      .exec();

    const postCount = await Post.countDocuments(query).exec(); // 문서 수 몇개인지 가져옴
    ctx.set('Last-page', Math.ceil(postCount / 10)); // 페이지 수 카운트

    ctx.body = posts
      .map((post) => post.toJSON())
      .map((post) => ({
        ...post,
        body:
          post.body.length < 200 ? post.body : `${post.body.slice(0, 200)}...`,
      }));
  } catch (e) {
    ctx.throw(500, e);
  }
};
Test
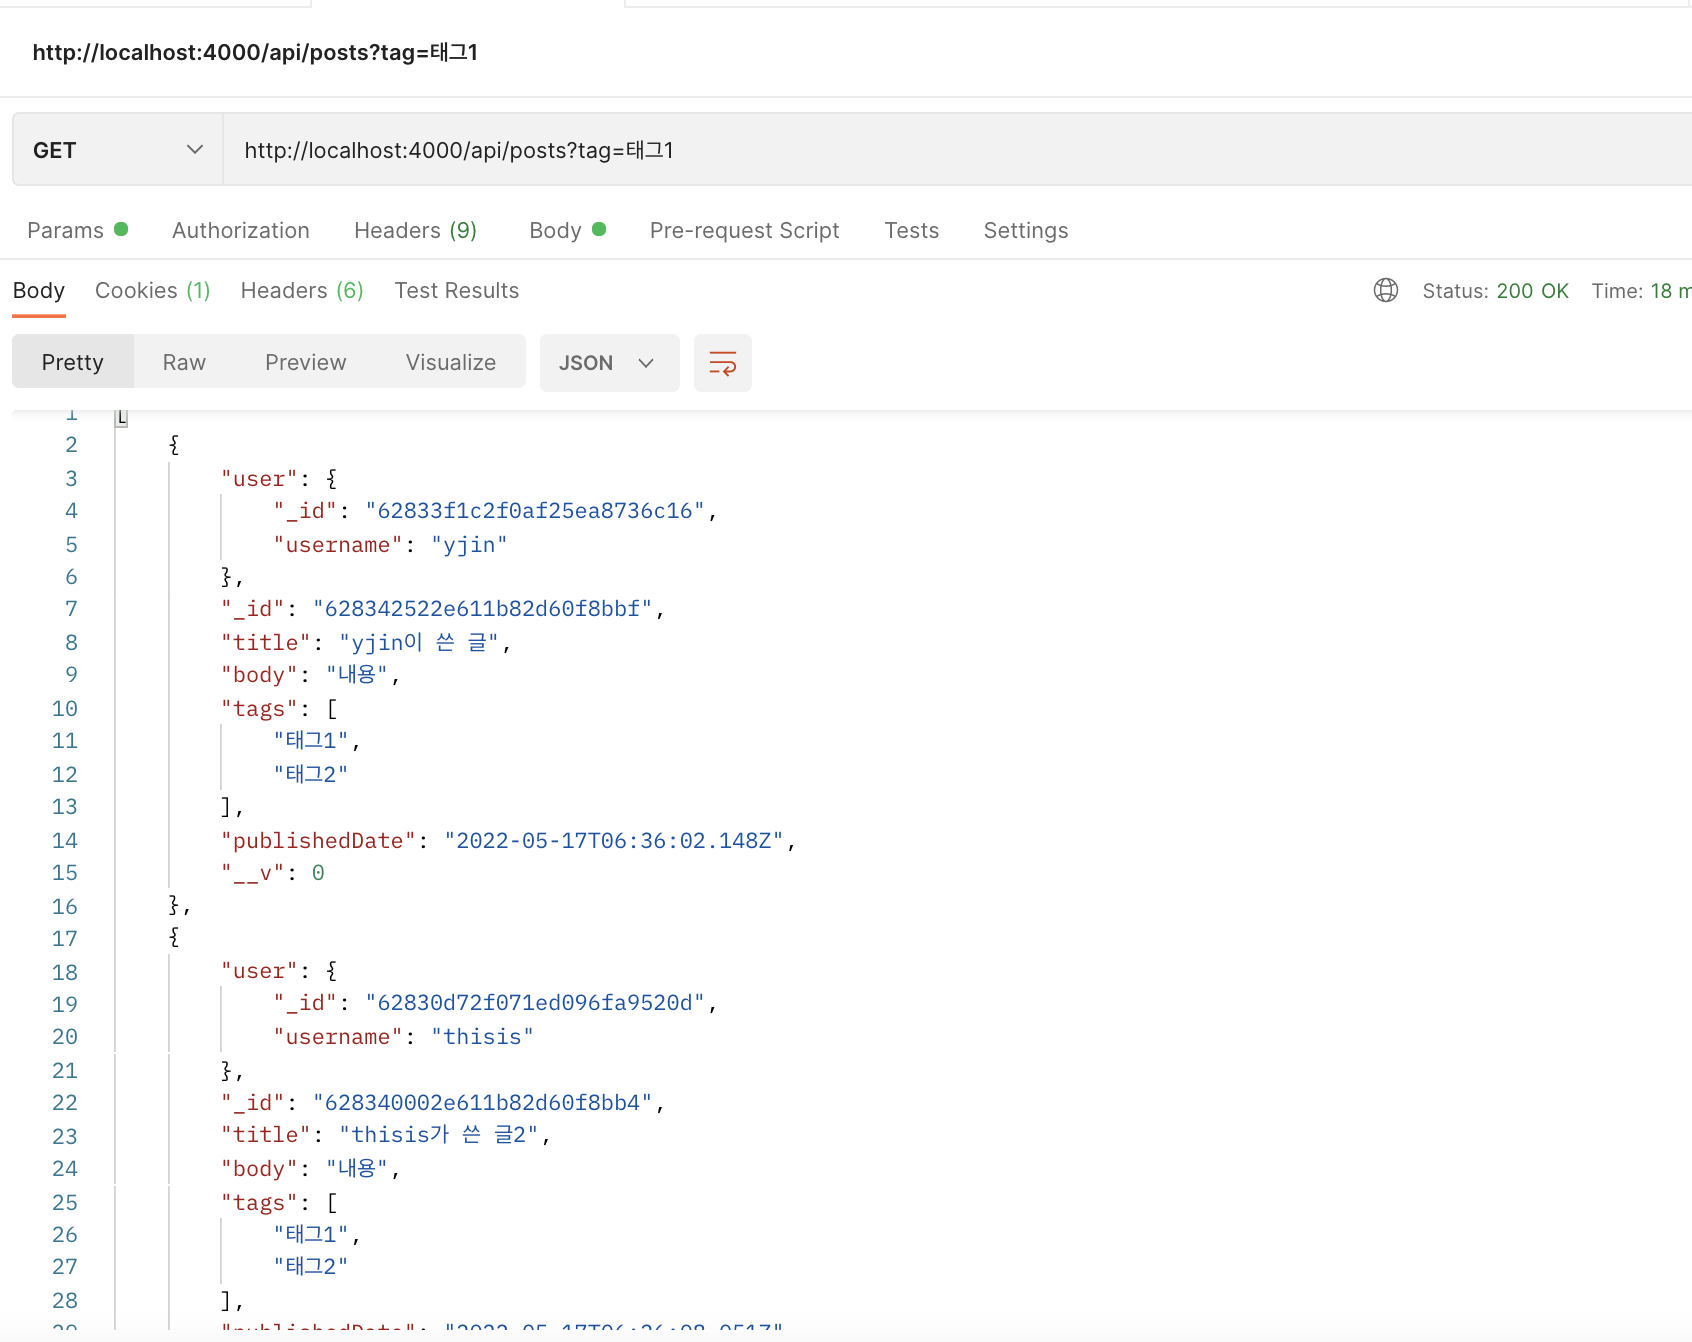
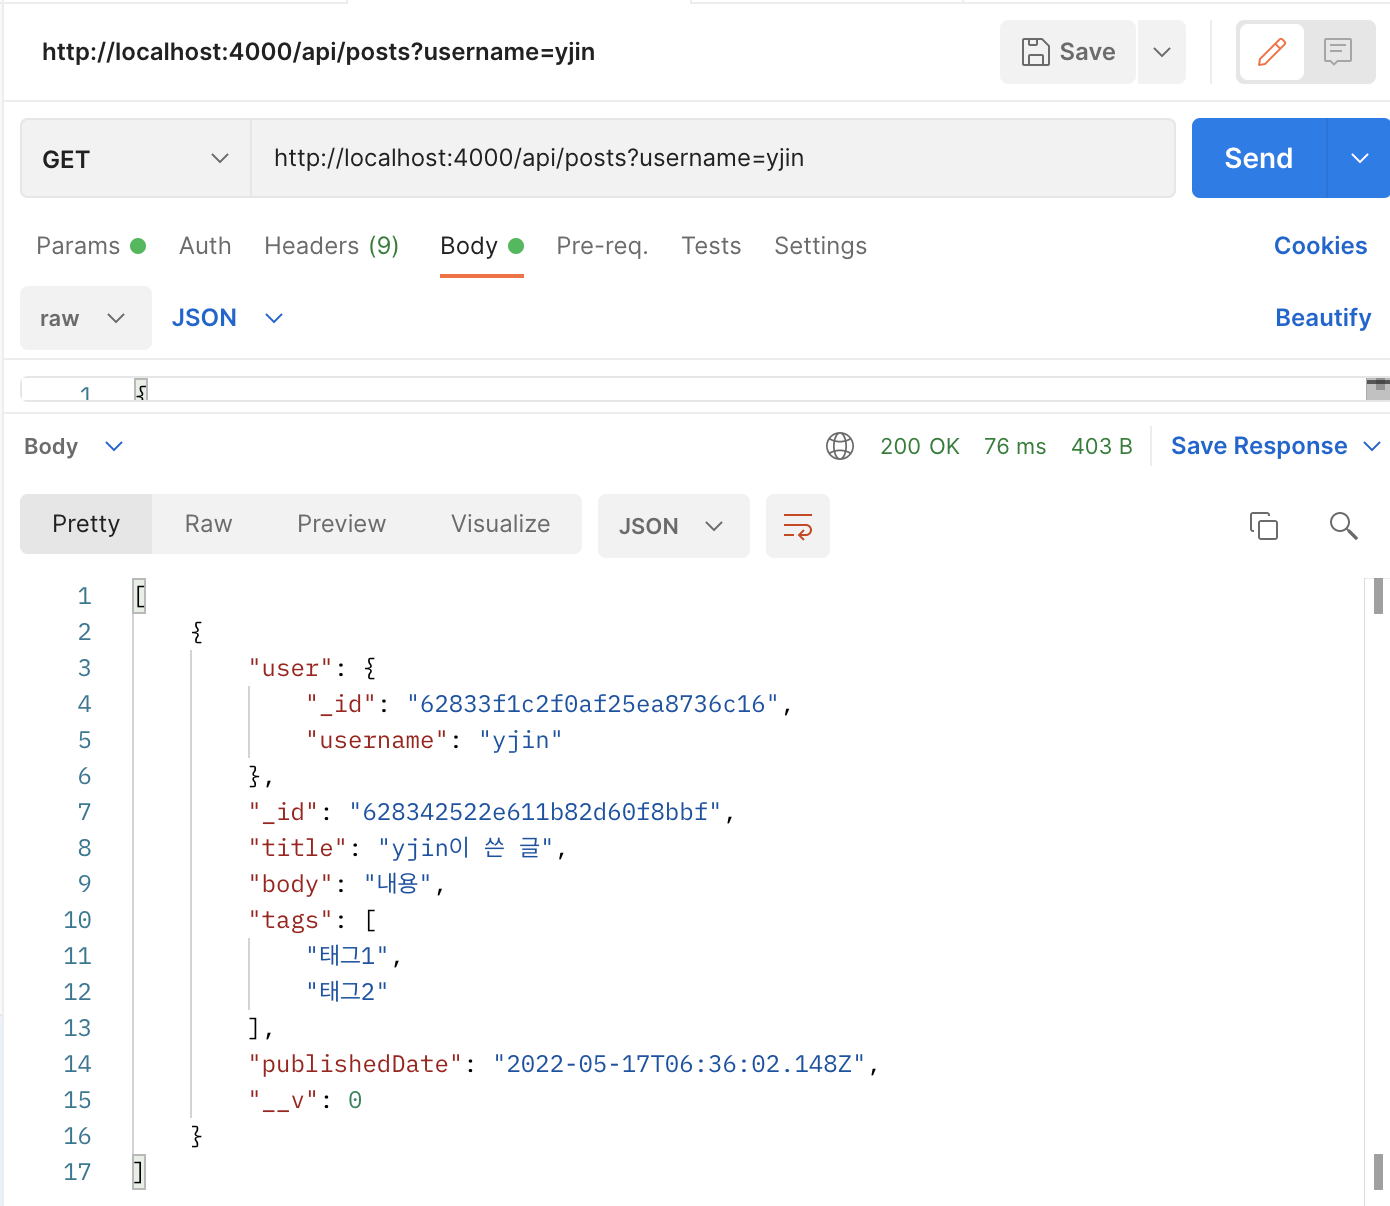
1) username으로 검색
GET 요청 - api/posts?username=yjin
2) tags 로 검색
GET 요청 - api/posts?tag=태그1