React.js
- Firebase
- React Project
Firebase란?
- Google 로그인 구현 가능
- 데이터베이스
- 스토리지
- 푸시 알림
- 배포 등
앱을 만들 때 필요한 여러가지 기능을 편리하게 구현 가눙.
Firebase 하나로 백엔드 부분을 대체 가능.
Firebase와 어플리케이션 연결
- Firebase 사이트로 이동
https://firebase.google.com/?hl=ko
- 로그인 후, Go to console 클릭.
- 프로젝트 생성
- 생성 후, '웹' 클릭
- Add Firebase
- App nickname 등록
- firebase SDK 넣기 (npm 또는 script 태그)
$ npm install firebase- /src/firebase.js 파일 생성 후 아래 코드 붙여넣기
// Import the functions you need from the SDKs you need
import { initializeApp } from "firebase/app";
// TODO: Add SDKs for Firebase products that you want to use
// https://firebase.google.com/docs/web/setup#available-libraries

// Your web app's Firebase configuration
const firebaseConfig = {
  apiKey: "AIzaSyC63UwfU5W3xQfqOR9CVObrdwtNQNe4Gak",
  authDomain: "react-firebase-30fd5.firebaseapp.com",
  projectId: "react-firebase-30fd5",
  storageBucket: "react-firebase-30fd5.appspot.com",
  messagingSenderId: "1055997579956",
  appId: "1:1055997579956:web:fece8bcb3636855b037de1"
};

// Initialize Firebase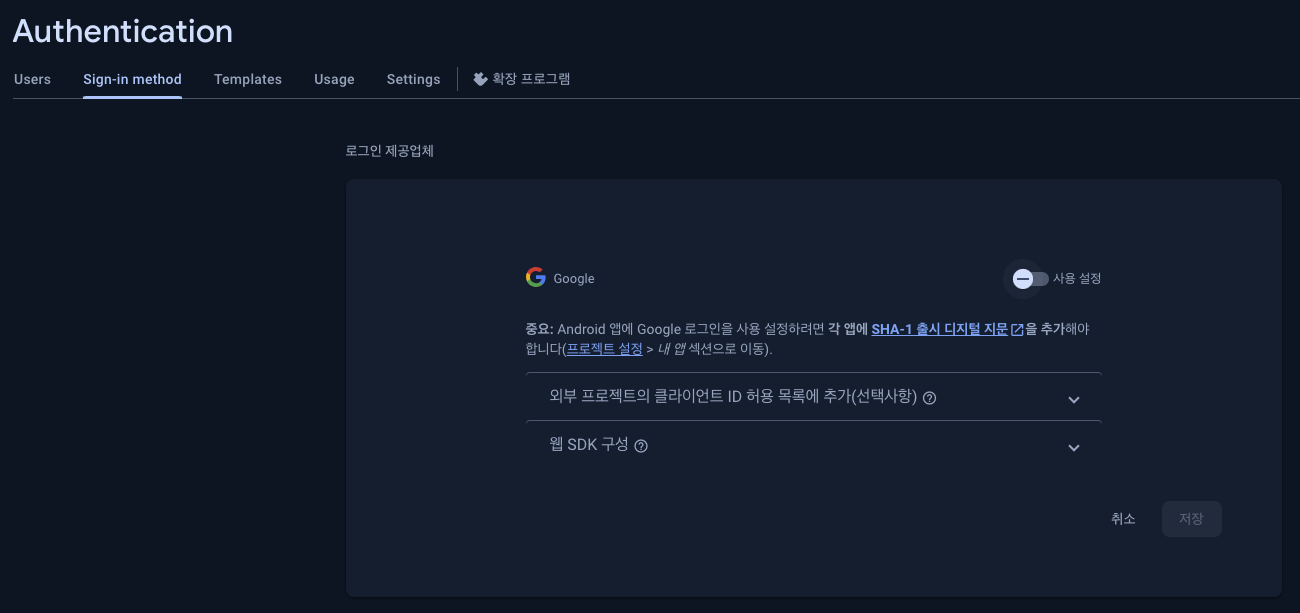
const app = initializeApp(firebaseConfig);- Authentication에서 Google Sign in 메서드 허용
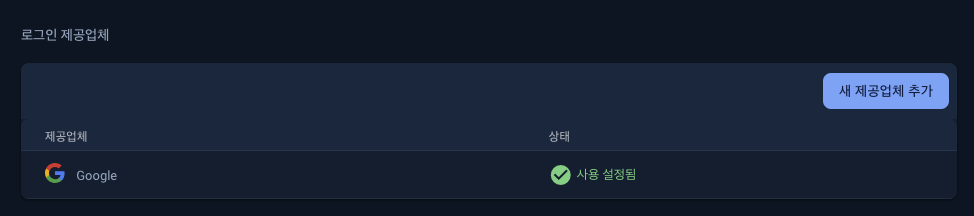
- Authentication > Sign-in method 에서 Google 항목을 Enabled로 변경
로그인 페이지 생성
- 네비게이션 바 생성 (공통 부분)
- Outlet 사용 (React-Router-Dom 중첩 라우팅)
<Route path="/" element={<Layout />}>
	<Route index element={<MainPage />} />
    <Route path="/login" element={<LoginPage />} />
</Route>
const Layout = () => {
return (
<>
<div></div>
<Outlet />
</>
)
}예> localhost:3000/login 에서는
Layout이 보이고, LoginPage가 보임.
Styled-Component
- CSS in JS
- 리액트의 컴포넌트 맞춤 스타일링을 위한 방식
- 스타일링 시 컴포넌트를 생성하고,
props를 사용할 수 있음
const Button = styled.button`
color: ${(props => props.primary ? "red" : "white"};
`;- 부모 스타일을 확장 가능 (
styled())
const Button = styled.button`
  // styling
`;

const BlueButton = styled(Button)`
  color: blue;
`;
스크롤 시 색상 변화되는 상단 네비게이션 구현
- scroll 이벤트 리스너 이용
const [show, setShow] = useState(false);

const listener = () => {
    if (window.scrollY > 50) {
      setShow(true);
    } else {
      setShow(false);
    }
}
useEffect(() => {
  window.addEventListener('scroll', listner);
  return () => {
    window.removeEventListener('scroll', listner);
  }
}, []);
Firebase를 이용한 로그인 구현
- 로그인 버튼은 path가
/login일 때만 보이도록 설정
const { pathname } = useLocation(); // '/login'


...
// return
{pathname === '/login' ? (<LoginButton />) : null}- signinwithpopup 이용
https://firebase.google.com/docs/auth/web/google-signin?hl=ko
import { getAuth, signInWithPopup, GoogleAuthProvider } from 'firebase/auth';- getAuth(app)
- 여기서 app은 firebase.js 생성할 때 initializeApp 으로 생성해준 앱 인스턴스임.
import app from '../firebase';

const auth = getAuth(app);- Provider 인스턴스 생성
const provider = new GoogleAuthProvider();- SignInWithPopup 호출
signInWithPopup(auth, provider);- 로그인 버튼 클릭 시 함수 생성
const handleAuth = () => {
  signInWithPopup(auth, provider)
    .then(result => {
      console.log(result);
    })
    .catch(error => {
      console.error(error);
    })
}
로그인 상태 체크
'firebase/auth'의 onAuthStateChanged 메서드 사용
- 유저의 상태가 변경될 때 호출된다.
import { getAuth, onAuthStateChanged } from "firebase/auth";

const auth = getAuth(app); // auth 인스턴스

onAuthStateChanged(auth, (user) => {
  if (user) {
    // User Signed in
    const uid = user.uid;
  } else {
    // User Signed out
  }
});- 이를 이용해서 로그인 상태를 체크하고, 리다리엑트 가능함.
import { useNavigate } from 'react-router-dom';

const navigate = useNavigate();

useEffect(() => {
  const unsubscribe = onAuthStateChanged(auth, (user) => {
    if (!user) {
      navigate('/login');
    } else if (user && pathname === '/login') {
      // 로그인 상태인데 로그인 페이지로 가려고 할 경우
      navigate('/');
    }
  });

  // return으로 정리해줘야함
  return () => {
    unsubscribe();
  }
}, []);
로그아웃 기능 구현
- 유저 정보 저장
const [userData, setUserData] = useState({})

const handleAuth = () => {
  signInWithPopup(auth, provider)
  .then(result => {
    setUserData(result.user);
  })
  .catch(error => {
    console.error(error)
  });
}
userData.photoURL을 이용하여 유저 프로필 이미지 보여주기 가능.
- 로그아웃 메서드 (signOut)
import { signOut } from 'firebase/auth';

const handleLogout = () => {
  signOut(auth).then(() => {
    setUserData({});
  })
  .catch(error => {
    console.error(error);
  });
}
데이터 유지하기
- 리프레시 했을 때 userData가 날아가지 않도록 해야 함
- 리프레시 -> state가 초기화 됨 -> 데이터 날아감
- localStorage 이용하여 유저 데이터를 저장
result.user은 객체이기 때문에, localStorage에 저장할 때는
JSON.stringify()를 통해 스트링화- 다시 값을 불러올 때에는
JSON.parse()를 이용
Firebase로 앱 배포
- Git 원격 브랜치에 Push하기
- firebase CLI 로그인
- firebase-tools 설치 (전역)
$ npm install -g firebase-tools- firebase CLI를 이용하여 로그인
$ firebase login- 앱 빌드
$ npm run build- Firebase 시작
$ firebase init-
hosting 기능 선택 후 스페이스바 + 엔터 후
Existing Project 선택 후 엔터 -
퍼블릭 디렉토리 선택
- CRA의 경우, /build 폴더
- vite의 경우, /dist 폴더
-> dist 입력 후 엔터
- SPA 여부 -> y
- github -> y
- overwrite -> n
- Authorize Firebase 버튼 클릭 (github 레파지토리 접근)
- set up repository -> username/repository 형식으로 작성
- 배포 전 항상 build? -> y
- 빌드 시 어떤 script? -> npm install && npm run build
- 어떤 브랜치 -> main
위와 같은 과정을 통해 배포 완료.
다시 한 번 소스코드를 git에 push.
github > Actions 탭 확인해보면
build_and_deploy진행 과정 볼 수 있음.
- 배포 확인
firebase console에서 Deployed 상태 클릭 -> 도메인 클릭하면 끝.

기억은 한계가 있지만, 기록은 한계가 없다.