
📌 본 글은 테스트같은 작업이다. Django를 제대로 활용하기 위한 세팅을 원하는 이는 Djnago Setting 게시물을 (1)~(3)까지 참고할 것
- VSCode에서 로컬은 닫고 원격창만 열기
- 로컬은 파이참을 이용해서 작업할 것이다.
(VSCode로 Django를 할 줄 알면 로컬도 VSCode로 해도 무관)
1. Django 라이브러리 설치
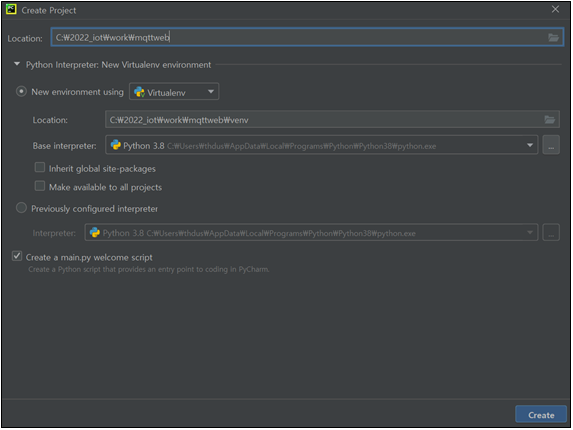
1) 새 프로젝트 생성
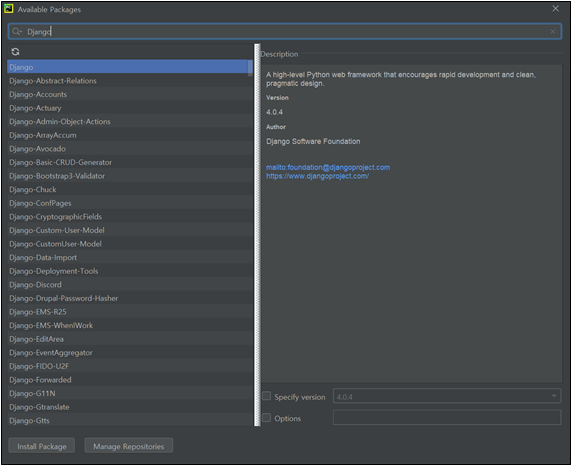
2) Django 라이브러리 설치
2. 서버 실행
💻 파이참 터미널 열어서 명령어 입력
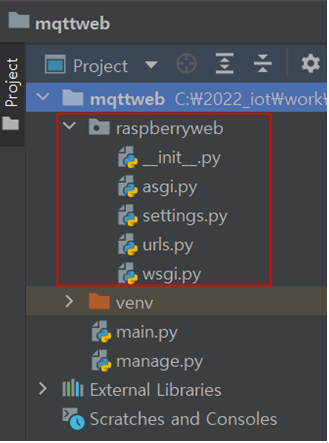
Django-admin startproject raspberryweb .    / config로 쓰지 않았을 뿐 raspberryweb = config임
                          ------------
                          (이름은 아무거나 해도 괜찮다.)
raspberryweb(=config) 패키지가 생성된 것을 확인 가능
💻 입력
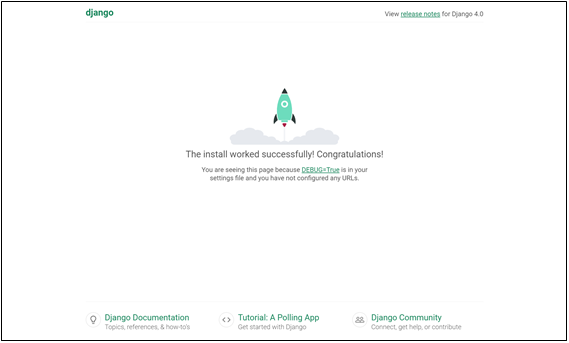
python manage.py runserver 인터넷 열어서 127.0.0.1:8000 입력
확인했으면, 파이참의 터미널에서 Ctrl + C 해서 서버 끄기
3. App 작성하기
1) 파이참 터미널에 명령어 입력
python manage.py startapp rasberrypiraspberrypi 패키지가 생성된 것을 확인 가능
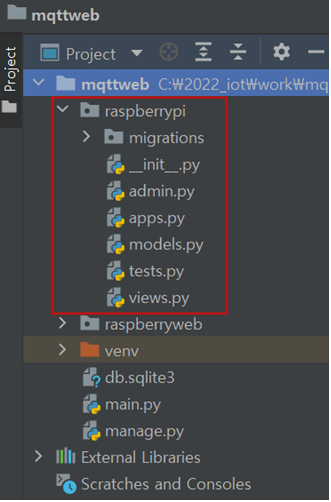
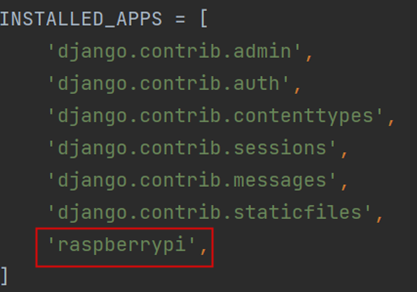
2) App 이름 추가
html을 활용하기 위한 templates 폴더를 인식시키기 위해 settings의 INSTALLED_APPS에 앱 이름 입력하는 작업이 필요
👉 raspberrypi > settings.py
3) Views 추가하기
👉 raspberrypi > views.py
from django.shortcuts import render
from django.http import  HttpResponse

def index(request):
    return HttpResponse("hello raspberryPI")

def mqttTest(request):
    return render(request,'mqtt.html')
3) urls 추가하기
👉 raspberryweb > urls.py
from django.contrib import admin
from django.urls import path
from raspberrypi import views
urlpatterns = [
path('admin/', admin.site.urls),
path('',views.index,name="index"),
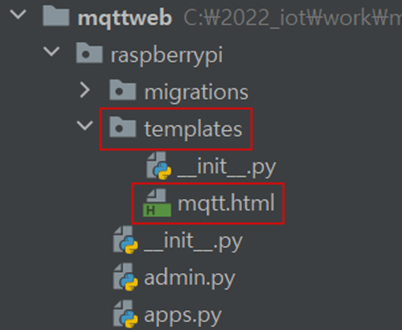
path('mqtt/',views.mqttTest,name="mqtt"),4. HTML파일 생성
1) app 패키지(=raspberrypi)에 templates 패키지 생성
2) templates 패키지에 HTML 파일 생성

👩💻 기록 및 복습을 위함