개요
Three.js에는 다양한 Material이 존재하는데 이를 정리하고자 한다.
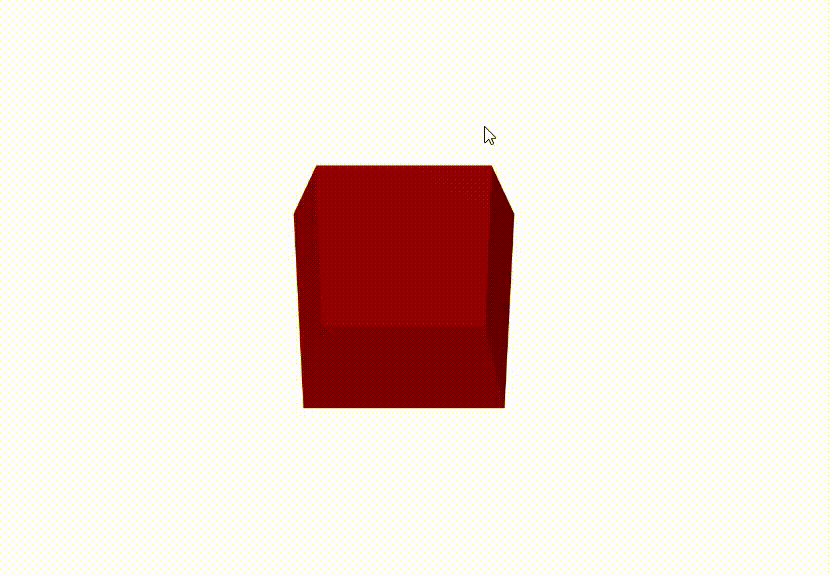
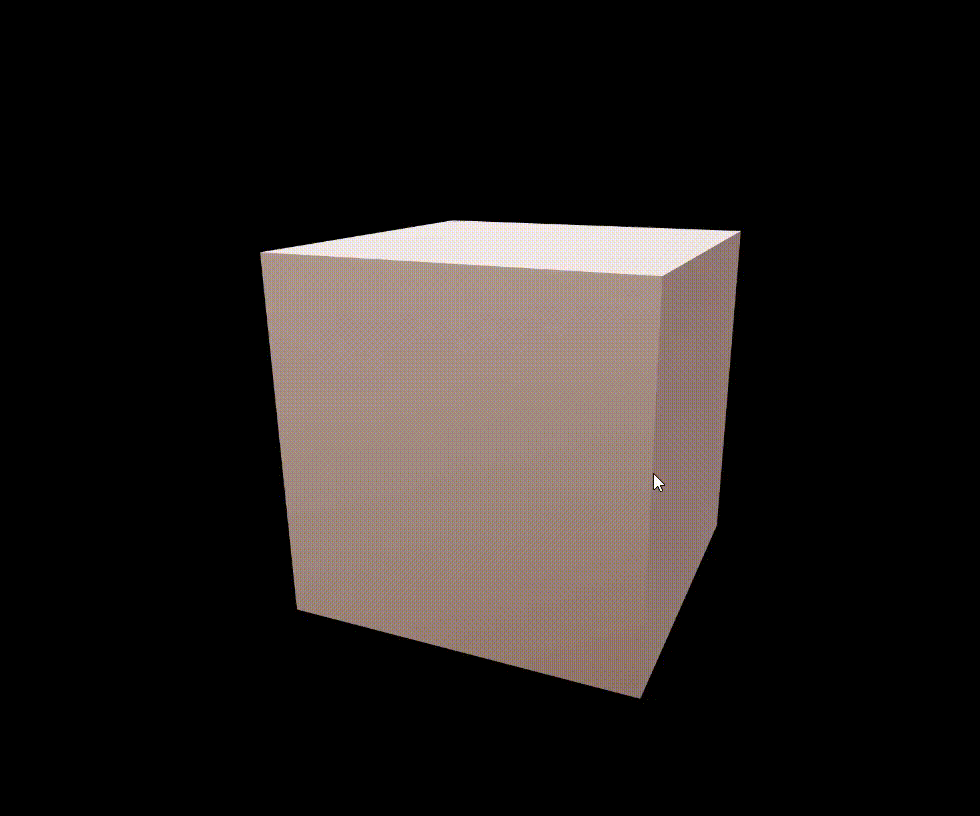
MeshBasicMaterial
입체감이 없는 재질로 빛이나 그림자의 영향을 받지 않음 따라서 조명이 필요가 없기 때문에 성능이 가장 빠름
  const geometry = new THREE.BoxGeometry(1, 1, 1);
  const material = new THREE.MeshBasicMaterial({
    color: "seagreen",
  });
  const mesh = new THREE.Mesh(geometry, material);
  scene.add(mesh);
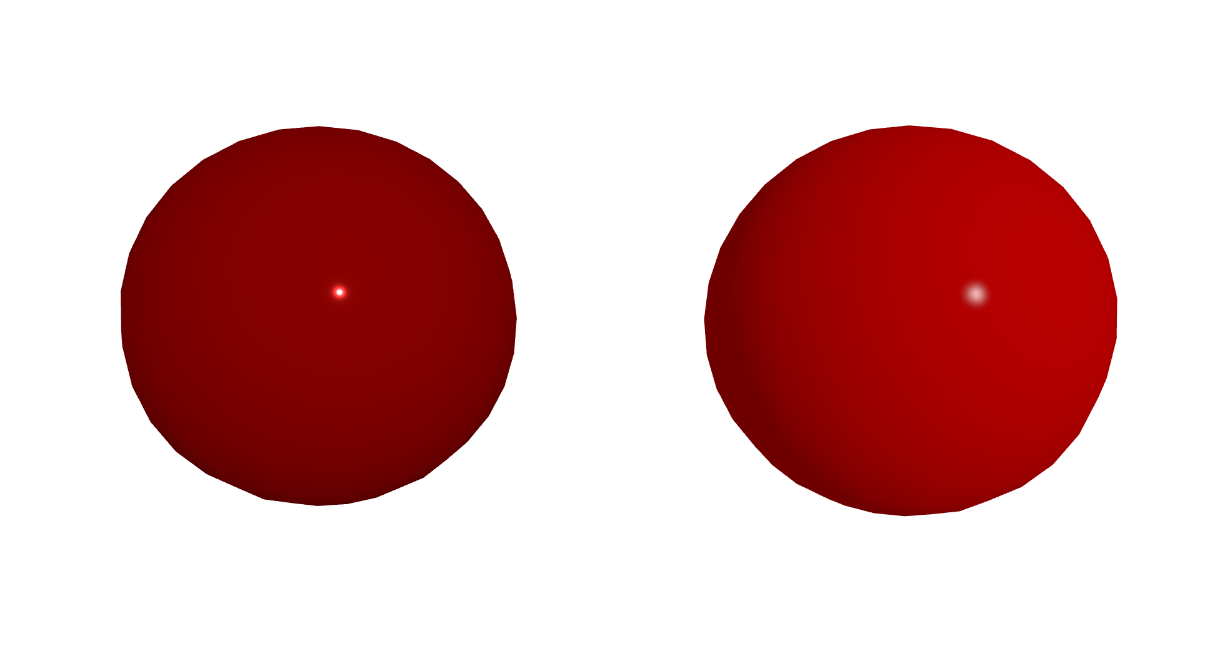
MeshLambertMaterial과 MeshPhongMaterial
두 재질은 동일하지만 하이라이트와 반사광에서 차이가 있다.
MeshLambertMaterial는 하이라이트, 반사광 없는 재질이고 MeshPhongMaterial는 하이라이트, 반사광이 있는 재질이다.
  // Mesh
  const geometry = new THREE.SphereGeometry(1, 16, 16);
  const material = new THREE.MeshLambertMaterial({
    color: "seagreen",
  });
  const material2 = new THREE.MeshPhongMaterial({
    color: "red",
  });
  const mesh = new THREE.Mesh(geometry, material);
  const mesh2 = new THREE.Mesh(geometry, material2);
  mesh.position.x = -1.5;
  mesh2.position.x = 1.5;
  scene.add(mesh, mesh2);
왼쪽이 MeshLambertMaterial이고 오른쪽이 MeshPhongMaterial이다.

MeshStandardMaterial
MeshStandardMaterial은 금속성과 거침정도를 표시할 수 있는데 오른쪽의MeshPhongMaterial과 비교했을때 차이는 아래와 같다. 성능면에서는 두개가 큰 차이가 없지만MeshPhongMaterial이 더 우수하다고 한다.
  // Mesh
  const geometry = new THREE.SphereGeometry(1, 16, 16);
  const material = new THREE.MeshStandardMaterial({
    color: "red",
    roughness: 0,
    metalness: 0.5,
  });
  const material2 = new THREE.MeshPhongMaterial({
    color: "red",
    shininess: 2000,
  });
  const mesh = new THREE.Mesh(geometry, material);
  const mesh2 = new THREE.Mesh(geometry, material2);
  mesh.position.x = -1.5;
  mesh2.position.x = 1.5;
  scene.add(mesh, mesh2);
  scene.background = new THREE.Color("white");
왼쪽이 MeshStandardMaterial 오른쪽이 MeshPhongMaterial이다.
효과주기(2024-09-25추가)
2D 이미지에 효과를 주어서 입체 느낌을 주는 방법을 소개한다.
각 이미지는 다음과 같다.
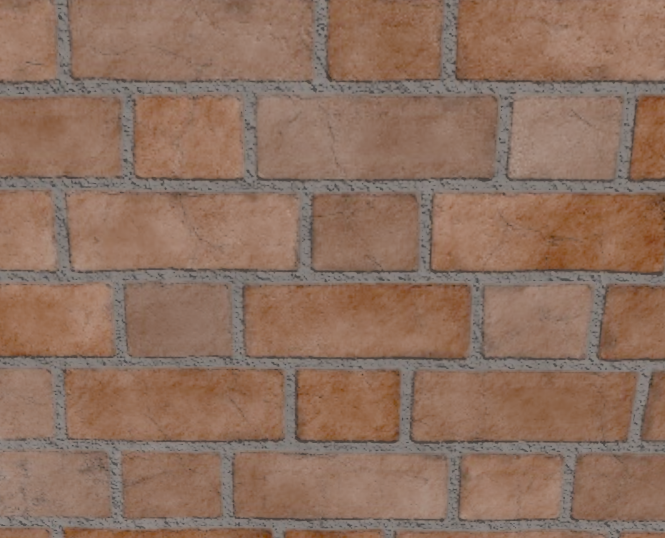
| basecolor | ambientOcclusion | normal | roughness |
|---|---|---|---|
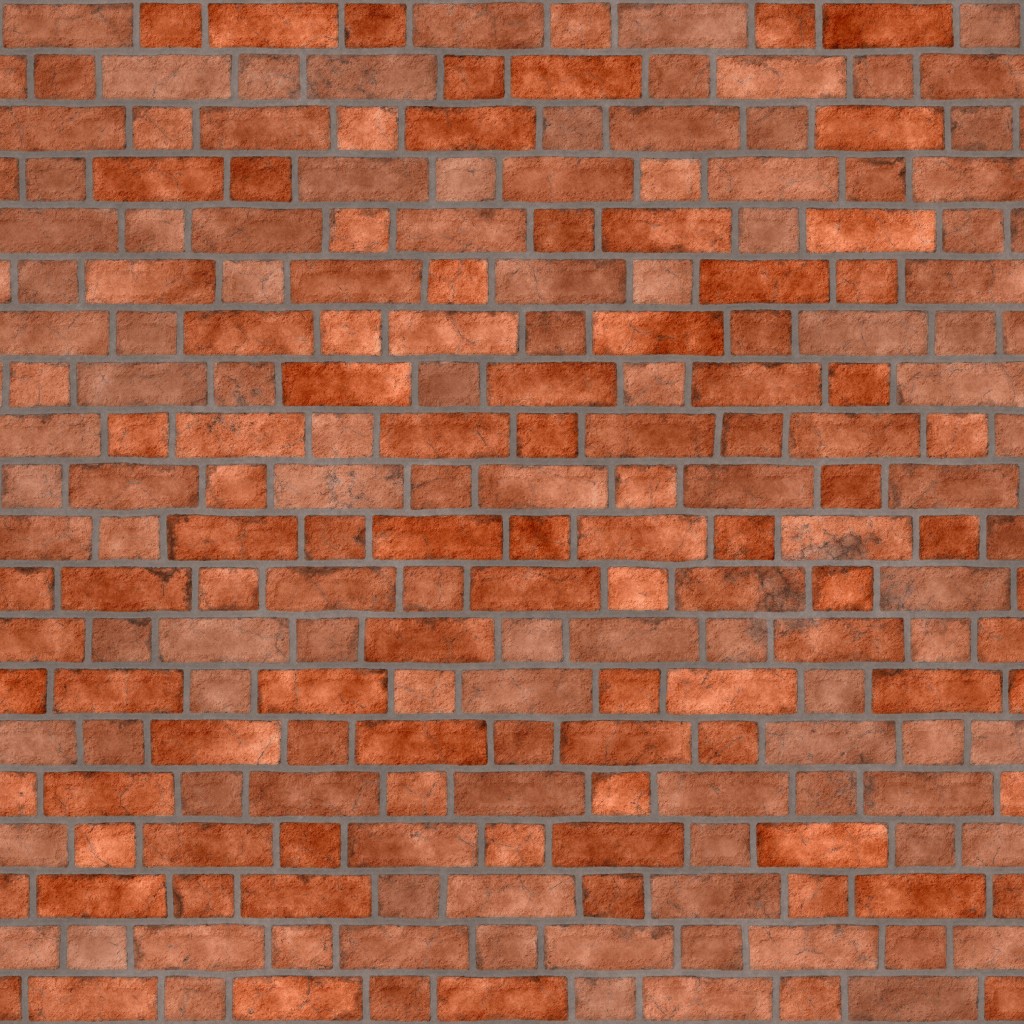 | 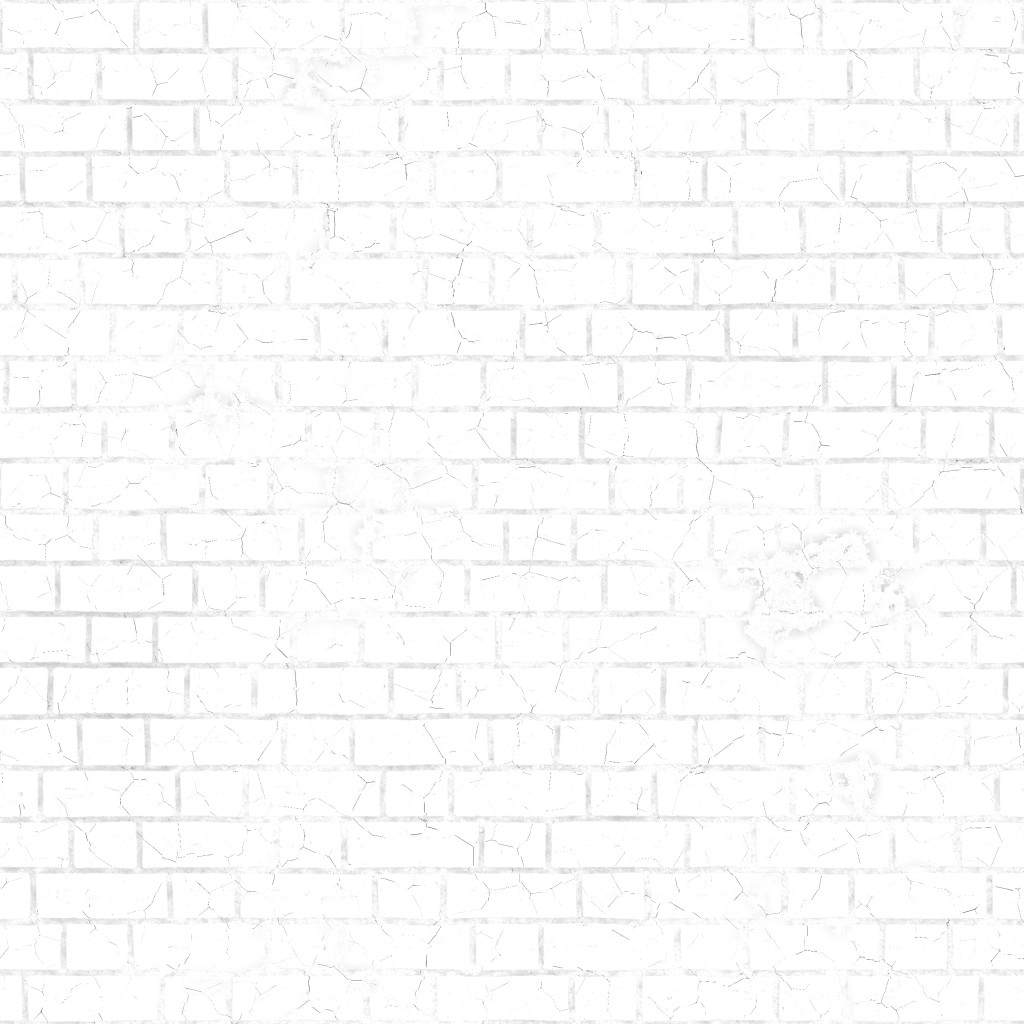 | 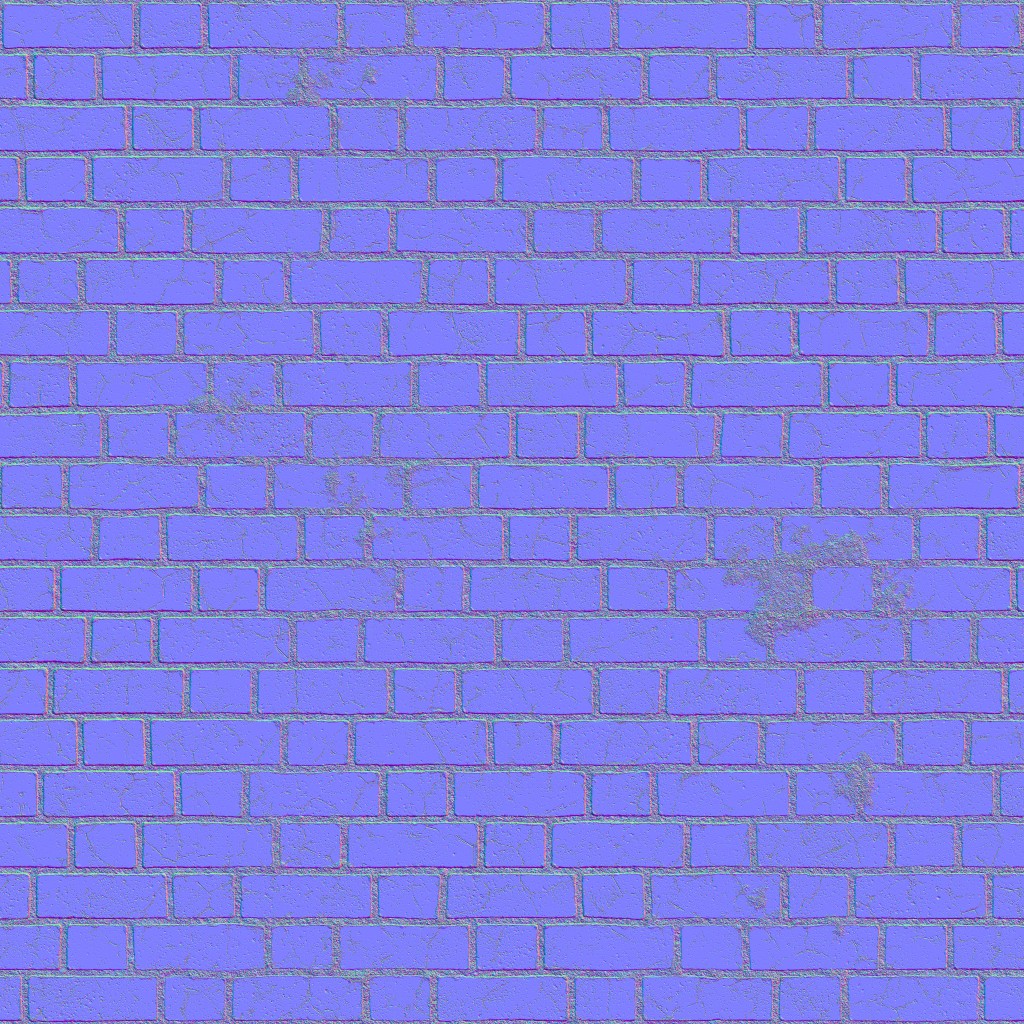 | 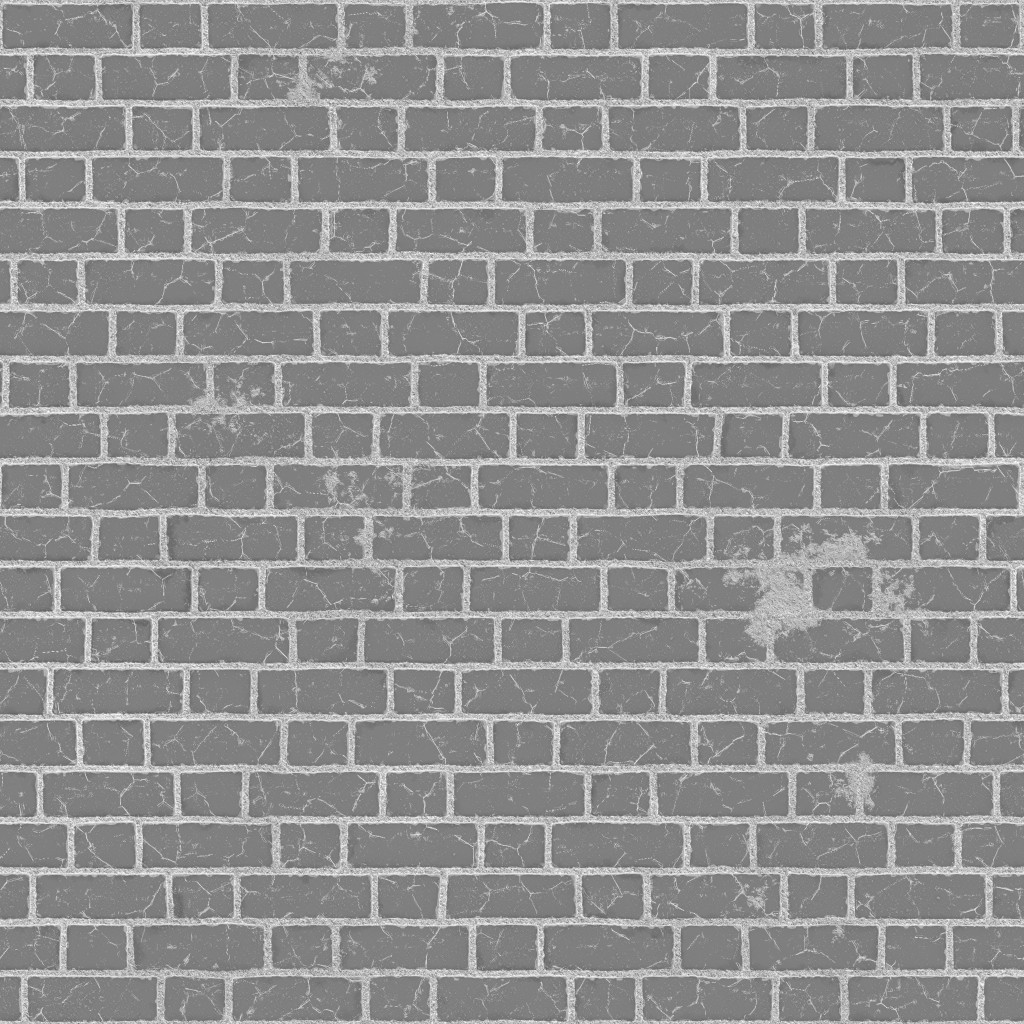 |
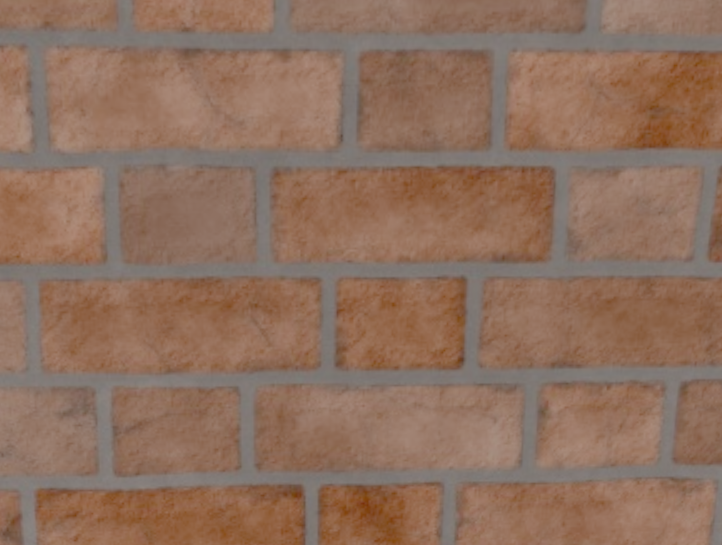
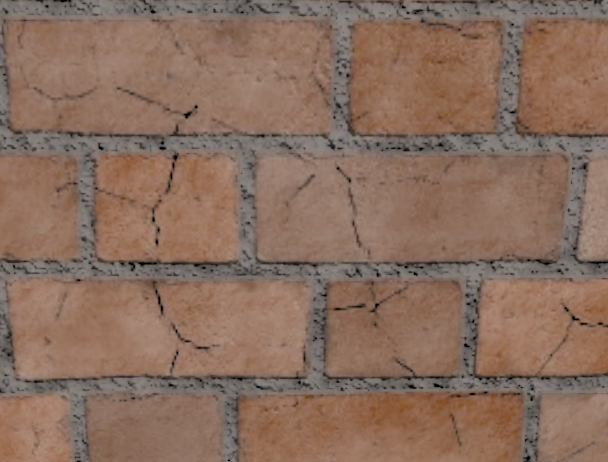
normal 이미지 적용
base이미지에 normal이미지를 적용하면 2D느낌의 벽돌이 입체감이 생긴다.
  const textureLoader = new THREE.TextureLoader(loadingManager);
  const baseColorTex = textureLoader.load(
    "/textures/brick/Brick_Wall_019_basecolor.jpg"
  );
  const ambientTex = textureLoader.load(
    "/textures/brick/Brick_Wall_019_ambientOcclusion.jpg"
  );
  const normalTex = textureLoader.load(
    "/textures/brick/Brick_Wall_019_normal.jpg"
  );
  const roughnessTex = textureLoader.load(
    "/textures/brick/Brick_Wall_019_roughness.jpg"
  );

  const material = new THREE.MeshStandardMaterial({
    map: baseColorTex,
    normalMap: normalTex,
});| 적용 전 | 적용 후 |
|---|---|
 | 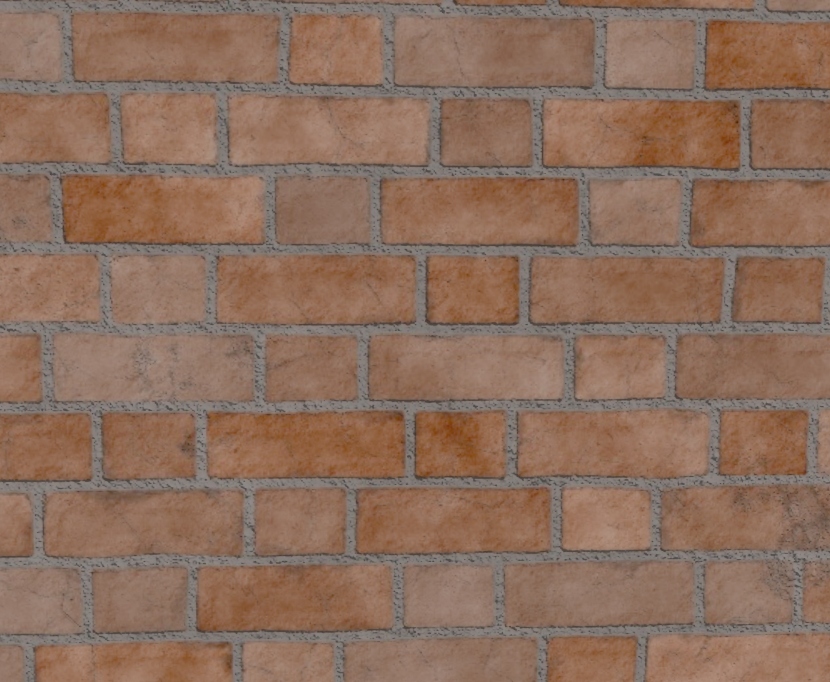 |
roughness 이미지 적용
거친 표면의 느낌을 강조해준다.
const material = new THREE.MeshStandardMaterial({
    map: baseColorTex,
    roughness: 0.3,
    metalness: 0.3,
    roughnessMap: roughnessTex,
});| 적용 전 | 적용 후 |
|---|---|
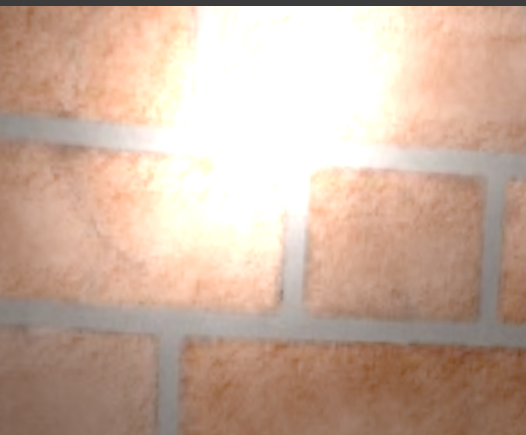 | 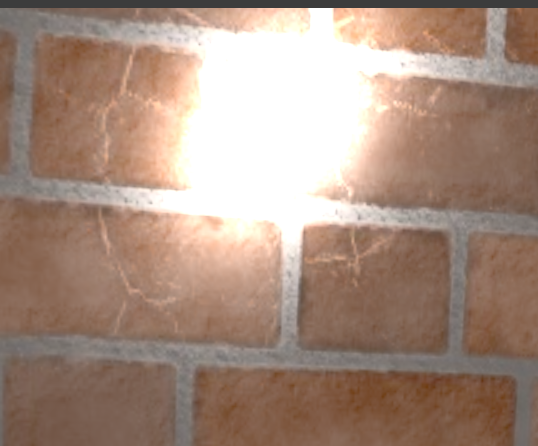 |
ambientOcclusion 적용
어두운 부분을 진하게 처리해준다.
  const geometry = new THREE.BoxGeometry(1, 1, 1);
  const material = new THREE.MeshStandardMaterial({
    map: baseColorTex,
    normalMap: normalTex,
    roughnessMap: roughnessTex,
    aoMap: ambientTex,
    aoMapIntensity: 10,
});| 적용 전 | 적용 후 |
|---|---|
 |  |
모두적용
  const material = new THREE.MeshStandardMaterial({
    map: baseColorTex,
    roughness: 0.3,
    metalness: 0.3,
    normalMap: normalTex,
    roughnessMap: roughnessTex,
    aoMap: ambientTex,
    aoMapIntensity: 10,
  });
각진 재질 표시(폴리곤)
모든 Material에 각진효과를 부여할 수 있는데 flatShading옵션을 true로 주면 된다.
  const material2 = new THREE.MeshPhongMaterial({
    color: "red",
    shininess: 2000,
    flatShading: true,
  });
Mesh의 앞 뒷면
Mesh의 안쪽면을 보기위해서는 side속성을 변경해주면 된다. 기본값은 FrontSide이다.
  const material = new THREE.MeshStandardMaterial({
    color: "red",
    roughness: 0.2,
    metalness: 0.3,
    side: THREE.DoubleSide, // THREE.BackSide
  });
FrontSide
BackSide
DoubleSide

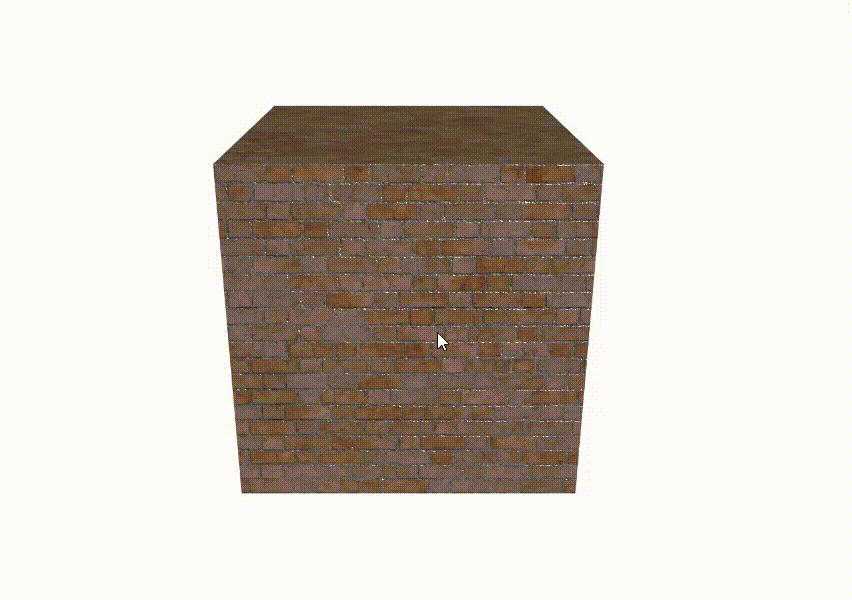
텍스쳐 이미지 로드하기
외부이미지 텍스쳐 이미지를 가져와서 Mesh에 적용할 수 있는데 3d texture에서 다양한 텍스쳐를 확인할 수 있다.
  // 텍스쳐 이미지 로드
  const textureLoader = new THREE.TextureLoader();
  const texture = textureLoader.load(
    "/textures/brick/Brick_Wall_019_basecolor.jpg"
  );

  const material = new THREE.MeshBasicMaterial({
    map: texture,
  });
  const material2 = new THREE.MeshStandardMaterial({
    map: texture,
  });

  const mesh = new THREE.Mesh(geometry, material);
  const mesh1 = new THREE.Mesh(geometry, material2);
  scene.add(mesh, mesh1);
  mesh.position.x = -1;
  mesh1.position.x = 1;
  scene.background = new THREE.Color("white");
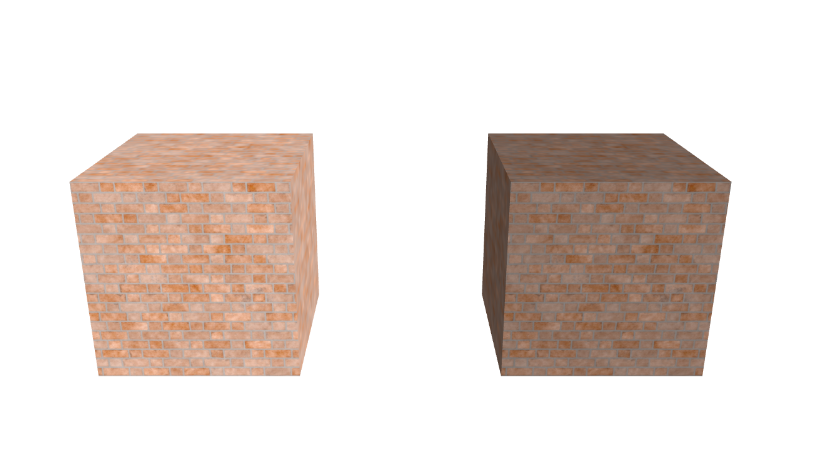
외부이미지를 적용해도 Material의 속성은 그대로 유지됨을 확인할 수 있다. 왼쪽이 MeshBasicMaterial 오른쪽이 MeshStandardMaterial이다.
로딩 매니저(여러개의 텍스쳐 이미지 로드)
LoadingManager를 사용하면 유용한 함수들이 존재하는데 이를 사용하면 여러개의 텍스쳐 이미지를 로드할때 편하게 처리할 수 이다.
LoadingManager를 굳이 사용하지 않고 TextureLoader를 이용해서 일일히 처리해주어도 된다.
const loadingManager = new THREE.LoadingManager();
loadingManager.onStart = () => {
    // 로드시작
    console.log("로드 시작");
  };
  loadingManager.onProgress = (img) => {
    // 각 이미지 로드 되었을때 실행
    console.log(img);
  };
  loadingManager.onLoad = () => {
    // 로드완료
    console.log("로드완료");
  };
  loadingManager.onError = () => {
    // 에러
    console.log("에러");
  };
  const textureLoader = new THREE.TextureLoader(loadingManager);
    const baseColorTex = textureLoader.load(
    "/textures/brick/Brick_Wall_019_basecolor.jpg"
  );
  const ambientTex = textureLoader.load(
    "/textures/brick/Brick_Wall_019_ambientOcclusion.jpg"
  );
텍스쳐 변환
텍스쳐 변환이라 함은 텍스쳐 이미지를 이동, 회전 등을 의미한다.
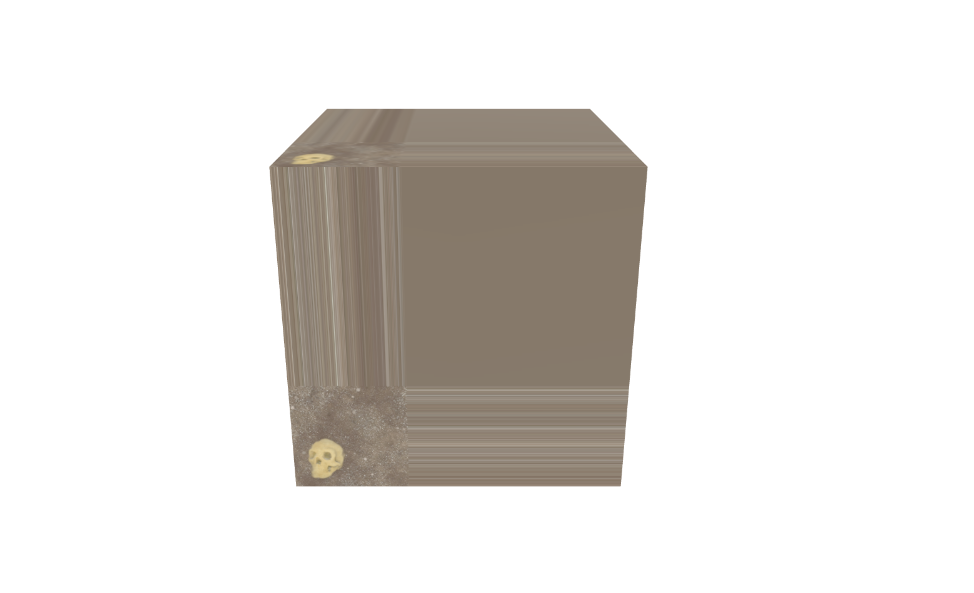
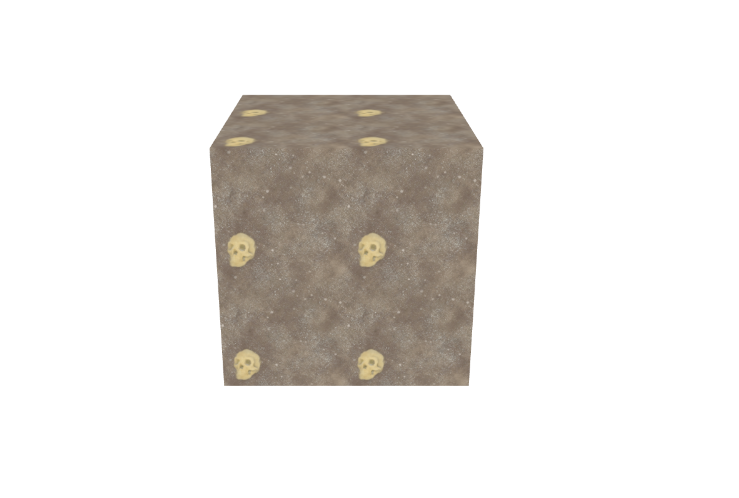
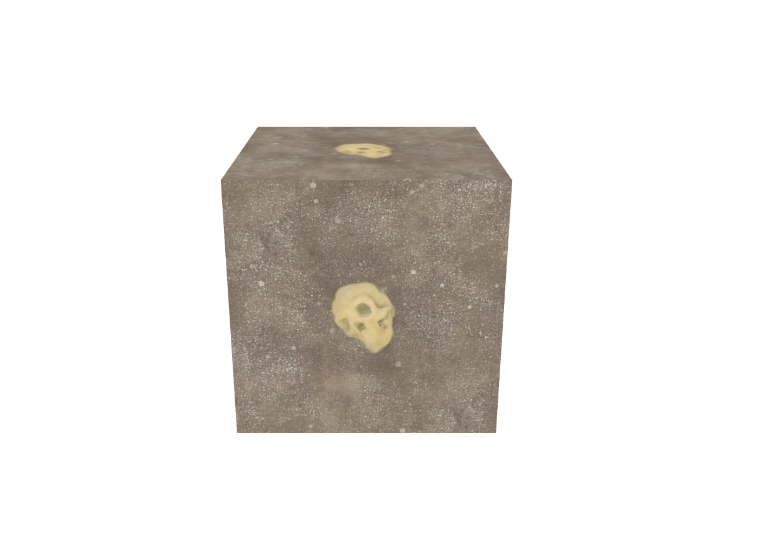
이동
텍스쳐 이미지를 이동하면 픽셀이 늘어나는 것처럼 보이는데 이를 해결하려면 가로는 wrapS, 세로는 wrapT의 값에 THREE.RepeatWrapping을 적용해주면 된다.
  const texture = textureLoader.load(
    "/textures/skull/Ground Skull_basecolor.jpg"
  );
  texture.offset.x = 0.3;
  texture.offset.y = 0.3;
  texture.wrapS = THREE.RepeatWrapping;
  texture.wrapT = THREE.RepeatWrapping;
THREE.RepeatWrapping 적용 전
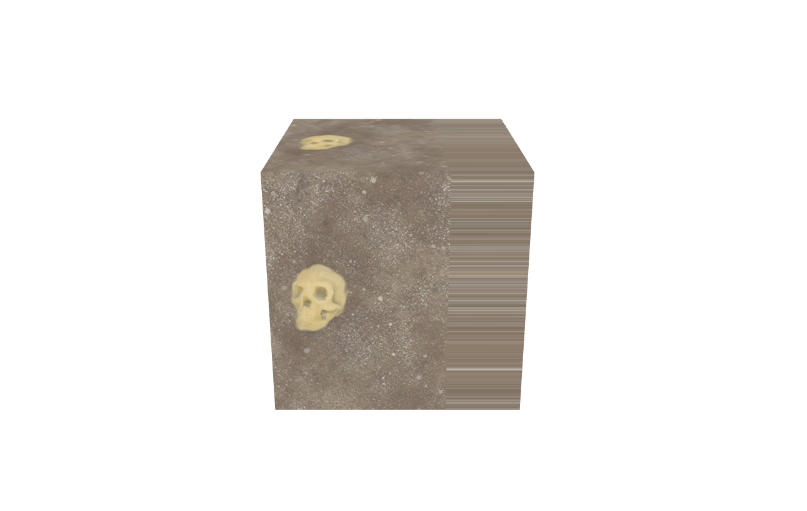
THREE.RepeatWrapping 적용 후

텍스쳐의 repeat속성을 추가해주면 반복도 처리할 수 있는데 이때 wrapS과 wrapT 속성에 THREE.RepeatWrapping를 넣어주지 않으면 아래와 같이 처리가된다.
THREE.RepeatWrapping 적용 전
THREE.RepeatWrapping 적용 후
따라서 웬만하면 변환을 할때는 wrapS,wrapT에 THREE.RepeatWrapping를 넣어주는게 좋다.
회전
centure속성을 이용해서 기준점을 잡아준 뒤 회전을 하면 된다.
  texture.rotation = THREE.MathUtils.degToRad(45);
  texture.center.x = 0.5;
  texture.center.y = 0.5;
여러개의 이미지를 텍스쳐에 적용
복수의 텍스쳐 이미지를 면에 적용방법
const textureLoader = new THREE.TextureLoader();
  const rightTex = textureLoader.load("/texture//mcstyle/right.png");
  const leftTex = textureLoader.load("/texture//mcstyle/left.png");
  const topTex = textureLoader.load("/texture//mcstyle/top.png");
  const bottomTex = textureLoader.load("/texture//mcstyle/bottom.png");
  const frontTex = textureLoader.load("/texture//mcstyle/front.png");
  const backTex = textureLoader.load("/texture//mcstyle/back.png");

  const materials = [
    new THREE.MeshBasicMaterial({
      map: rightTex,
    }),
    new THREE.MeshBasicMaterial({
      map: leftTex,
    }),
    new THREE.MeshBasicMaterial({
      map: topTex,
    }),
    new THREE.MeshBasicMaterial({
      map: bottomTex,
    }),
    new THREE.MeshBasicMaterial({
      map: frontTex,
    }),
    new THREE.MeshBasicMaterial({
      map: backTex,
    }),
  ];

    // Mesh
  const geometry = new THREE.BoxGeometry(2, 2, 2);

  const mesh = new THREE.Mesh(geometry, materials);
  scene.add(mesh);
  scene.background = new THREE.Color("white");
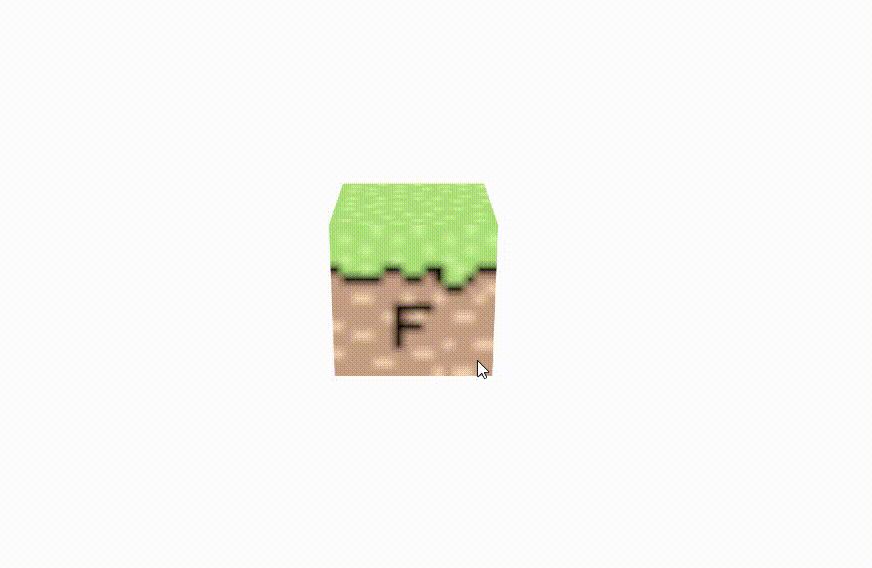
마인크래프트처럼 픽셀이 살아있는 느낌을 주기 위해서는 텍스쳐의 magFilter에 THREE.nearestFilter를 넣어주면 된다.
  rightTex.magFilter = THREE.NearestFilter;
  leftTex.magFilter = THREE.NearestFilter;
  topTex.magFilter = THREE.NearestFilter;
  bottomTex.magFilter = THREE.NearestFilter;
  frontTex.magFilter = THREE.NearestFilter;
  backTex.magFilter = THREE.NearestFilter;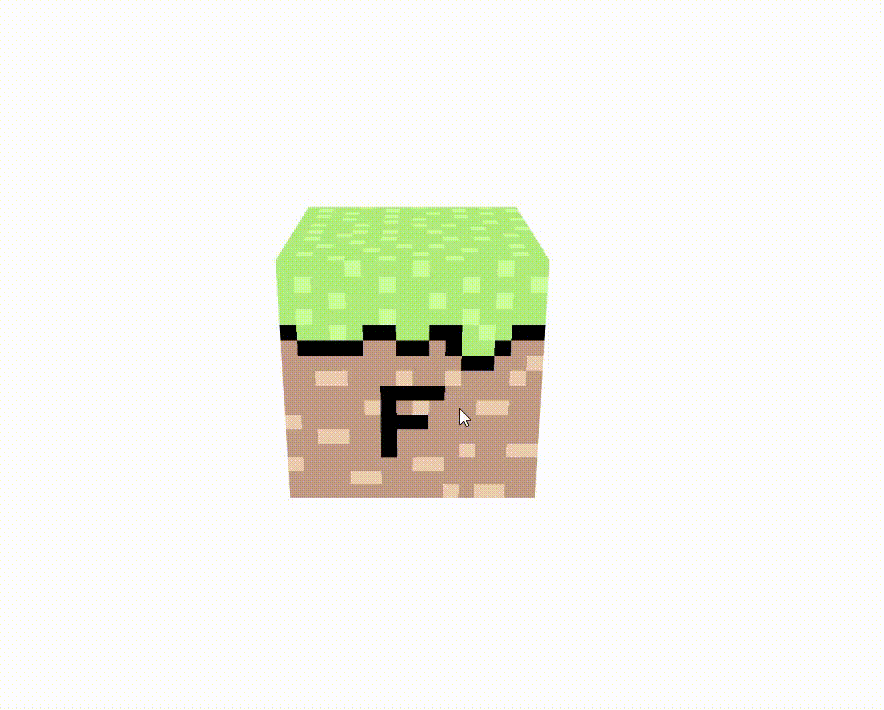
MeshToonMaterial(만화 느낌)
기본적으로 투톤으로 적용이 되는 느낌을 주는 Material을 적용하고 톤을 조절하는 방법
아래 이미지와 같은 3픽셀로 이루어진 이미지를 적용해주면 톤이 조절이된다.사실 만화느낌인지 잘모르겠다
  const textureLoader = new THREE.TextureLoader();
  const gradientTex = textureLoader.load("/textures/gradient.png");
  gradientTex.magFilter = THREE.NearestFilter;


  // Mesh
  const geometry = new THREE.ConeGeometry(1, 2, 32);
  const material = new THREE.MeshToonMaterial({
    color: "plum",
    gradientMap: gradientTex,
  });
MeshNormalMaterial
여기서의 Normal은 법선을 의미하며 법선에 관련된 Material을 의미한다.
방향에 달라서 색상이 변화됨을 의미한다.이 느낌이 좋을때 사용한다고함
const material = new THREE.MeshNormalMaterial();
구는 법선의 각도가 동일하기 때문에 변화가 없다.
법선이란 표준타원체 평면상의 곡성 위에 있는 임의의 점의 접선에 수직되는 직선이라고 한다. 자세한 내용은 법선을 확인하자.
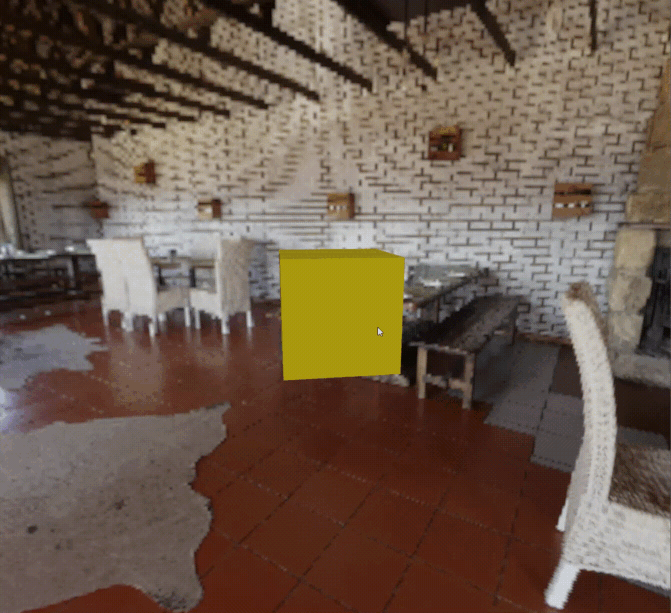
MeshMatcapMaterial
동그란 이미지에 입체감이 있도록 처리해주는 Material이다.
필자는 deviantart에서 텍스쳐를 다운로드 받았다.
  const matcapTex = textureLoader.load("/textures/matcap/material3.jpg");

  // Mesh
  const geometry = new THREE.BoxGeometry(2, 2, 2);
  const material = new THREE.MeshMatcapMaterial({
    matcap: matcapTex,
  });
EnvironmentMap
주변에 무엇인가가 있는것처럼 매쉬에 비쳐지게 하는것으로 별도의 텍스쳐 파일이 필요하다.
필자는 아래 이미지를 사용했고 Poly Haven에서 hdr파일을 다운로드 받았다.
hdr파일을 6개의 파일로 쪼개주어야하는데 이는 HDRI-to-CubeMap에서 진행했다.
6개 이미지로 나누어진 파일을 다운로드하여 nx, ny, nz, px, py, pz 파일을 다운로드한다.
여기서 n은 negative를 의미하고 p는 positive를 의미한다.
6개의 이미지로 나누어진 텍스쳐를 로드하기 위해 CubeTextureLoader메서드를 사용한다. 이미지를 로드할때 순서가 정해져있는데 +, -가 1순위고 2순위가 x, y, z순이다.
  const cubeTextureLoader = new THREE.CubeTextureLoader();
  const envTex = cubeTextureLoader.setPath("/textures/cutemap").load([
    // + - 순서
    // x,y,z
    "px.png",
    "nx.png",
    "py.png",
    "ny.png",
    "pz.png",
    "nz.png",
  ]);

  const material = new THREE.MeshBasicMaterial({
    envMap: envTex,
  });
SkyBox
SkyBox는 매쉬를 둘러싸고있는 배경의 벽을 도배해준다고 생각하면 된다. 방안의 벽지를 도배한다는 느낌으로 씬에 cubeTexturLoader를 적용해주면 된다.
  const scene = new THREE.Scene();
  scene.background = cubeTextureLoader.setPath("/textures/cubemap/").load([
    // + - 순서
    // x,y,z
    "px.png",
    "nx.png",
    "py.png",
    "ny.png",
    "pz.png",
    "nz.png",
  ]);
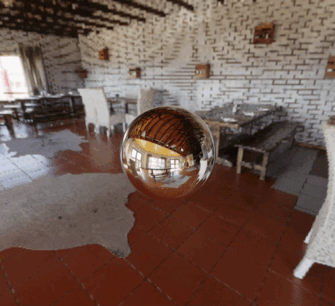
EnvironmentMap + SkyBox
EnvironmentMap과 SkyBox를 합치면 매쉬에 배경이 비춰지는 효과를 낼 수 있다.
  const envTet = cubeTextureLoader.setPath("/textures/cubemap/").load([
    // + - 순서
    // x,y,z
    "px.png",
    "nx.png",
    "py.png",
    "ny.png",
    "pz.png",
    "nz.png",
  ]);

  // Scene
  const scene = new THREE.Scene();
  scene.background = envTet;

  // Mesh
  const geometry = new THREE.SphereGeometry(1, 64, 64);
  const material = new THREE.MeshBasicMaterial({
    envMap: envTet,
  });
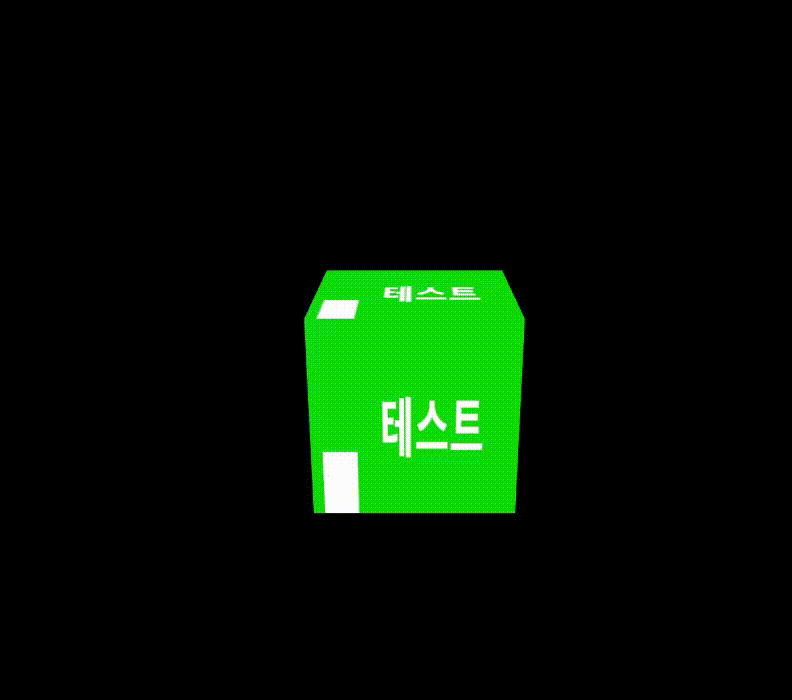
Material에 Canvas 적용
사용자가 캔버스를 이용해서 그린 Material를 텍스쳐에 적용하는 방법
CanvasTexture메서드를 사용한다.
// CanvasTexture
  const textCanvas = document.createElement("canvas");
  const textContext = textCanvas.getContext("2d");
  textContext.width = 500;
  textContext.height = 500;
  const canvasTexture = new THREE.CanvasTexture(textCanvas);

  const material = new THREE.MeshBasicMaterial({
    map: canvasTexture,
  });
캔버스는 draw메서드를 이용해 계속 그려주어야한다.
  function draw() {
    const time = clock.getElapsedTime();

    material.map.needsUpdate = true;
    textContext.fillStyle = "green";
    textContext.fillRect(0, 0, 500, 500);
    textContext.fillStyle = "white";
    textContext.fillRect(time * 50, 100, 50, 50);
    textContext.font = "bold 50px sans-serif";
    textContext.fillText("테스트", 100, 100);

    renderer.render(scene, camera);
    renderer.setAnimationLoop(draw);
  }