IAC (인프라 스트럭쳐 as 코드)
구성관리 도구와 서버 프로비전 도구가 유명하다.
ansible 과 Terraform를 같이 쓰는 편이다.
우리는 ansible만 하겠다.
CI/CD 지속적인 개발 지속적인 개선.
Iac의 장점
ansible 구성관리 도구다.
대단한 건 아니라, 그냥 ssh 프로토콜을 이용해서 원격 접속해서 명령어 실행하는 것이다.
K8S 쓰면서 Node를 재설정하는데 주로 사용한다고 한다.
-
Ansible
Ansible은 스토리지, 서버 및 네트워킹을 자동화하는 구성 관리 플랫폼
Ansible을 사용하여 이러한 구성 요소를 구성하면 어려운 수동 반복 작업을 자동화 가능1) 앤서블 구성요소
(1) Ansible Control Node
앤서블을 실행하는 노드입니다. /usr/bin/ansible이나 /usr/bin/ansible-playbook 명령을 이용하여 제어 노드에서 관리 노드들을 관리
앤서블이 설치 되어 있으면 노트북이나, 서버급 컴퓨터를 제어 노드로 이용(2) Managed Node
앤서블로 관리되는 서버를 매니지드 노드라고 한다.
매니지드 노드에는 앤서블이 설치 되지 않는다.(3) Inventory (host file)
매니지드 노드 목록을 인벤토리라고 한다.
인벤토리는 각 매니지드 노드에 대한 IP 주소, 호스트 정보, 변수와 같은 정보를 지정할 수 있다.(4) Module
앤서블이 실행하는 코드 단위
각 모듈은 데이터베이스 처리, 사용자 관리, 네트워크 장치 관리 등 다양한 용도로 사용
단일 모듈을 호출하거나 플레이북에서 여러 모듈을 호출 할 수도 있다.(5) Playbook
순서가 지정된 작업 목록이 저장되어 지정된 작업을 해당 순서로 반복적으로 작업을 실행할 수 있다.
2) 앤서블 설치
이건 ansible 내용이 아니라 ssh 내용이다.
자동으로 원격 접속을 하도록 만들기 위해서 키를 생성한다.
(1) Managed Node(192.168.100.10)
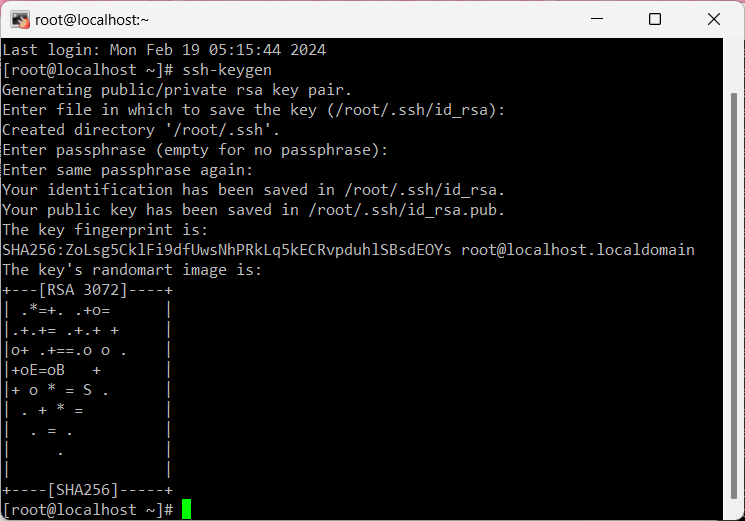
[1] Control Node에서 키 생성
ssh-keygen
엔터 3번결과 화면
ssh-copy-id   root@매니지드노드IP
패스워드
결과 화면
키를 저장한 위치를 알 수 있다.
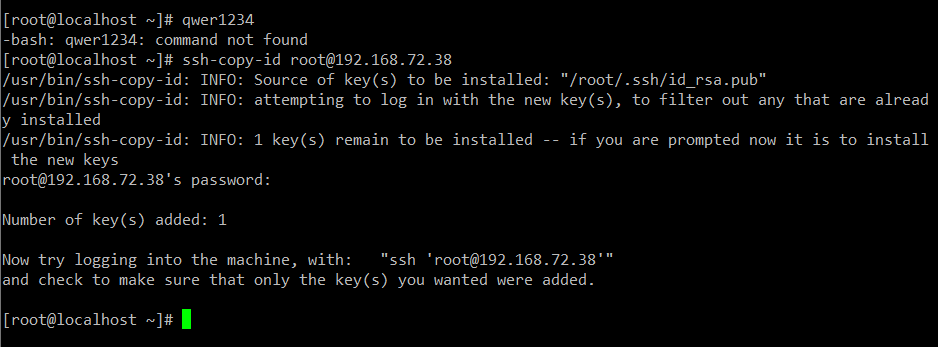
ssh root@매니지드노드IP 위 명령어를 실행했을 때 패스워드 없이 접속 가능해진다.
(2) Control Node
ansible 다운로드
dnf -y install centos-release-ansible-29sed -i -e "s/enabled=1/enabled=0/g" /etc/yum.repos.d/CentOS-SIG-ansible-29.repodnf --enablerepo=centos-ansible-29 -y install ansible설치 확인 방법
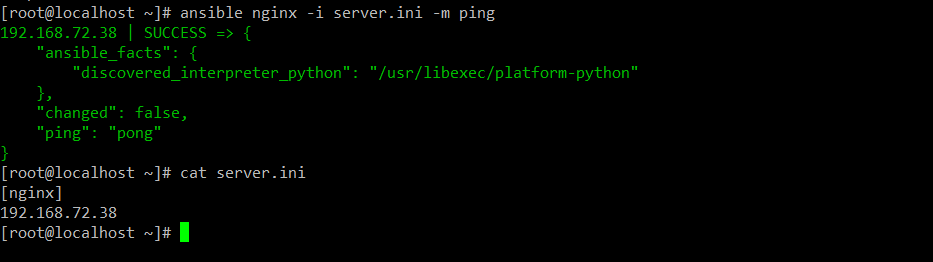
server.ini 파일을 만들어서 아래 사진의 명령어를 실행시켜본다.
3) 인벤토리
(1) 기본 인벤토리
/etc/ansible/hosts
(2) 커스텀 인벤토리
앤서블 명령어를 실행할 때 -i 옵션으로 파일 지정 가능
(3) yml 파일 형식
all:
  hosts: # 모든 node 등록
    192.168.72.10:
    192.168.72.20:
    192.168.72.30:
  children:
    webservers: # 그룹명 원하는 이름 마음대로 작성
      hosts:
        192.168.72.10:
        192.168.72.20:
    dbservers:
      hosts:
        192.168.72.30:
4) 플레이북
(0) 실행 명령어
ansible-playbook -i [인벤토리파일경로][플레이북파일경로]
(1) 리눅스 명령어 실행-
name: 이름
shell: |
명령어
become: yes(2) 파일 복사
-
name: "copy file"
copy:
src: 원본 파일
dest: 매니지드노드의파일경로4) 없는 모듈 설치
ansible-galaxy collection install community.mysql
ansible-galaxy는 도커 허브 같은 공유 사이트이다.
cpoy말고도 다양한 ansible task가 있다 공식문서에서 찾아보자.
톰캣 설치플레이북 내용
-
hosts: ["192.168.72.20"] # 실행할 노드
tasks: # 실행할 내용-
name: "Insatll wget" # 주석 같은 거
shell: | #리눅스 명령어를 실행한다.
yum update -y # 실행할 명령어 내용
yum install -y wget # yum 은 보통 ansible task도 처리한다.
become: yes #관리자 권한으로 실행한다. -
name: "Insatll java"
shell: |
yum -y install java-1.8.0-openjdk-devel.x86_64
become: yes -
name: "Download Tomcat"
shell: |
wget -O /tmp/apache-tomcat-9.0.85.tar.gz https://dlcdn.apache.org/tomcat/tomcat-9/v9.0.85/bin/apache-tomcat-9.0.85.tar.gz
become: yes -
name: "Unarchive Tomcat"
unarchive:
src: "/tmp/apache-tomcat-9.0.85.tar.gz"
dest: "/tmp"
remote_src: True
become: yes -
name: "Move Tomcat"
shell: |
mv /tmp/apache-tomcat-9.0.85 /usr/local/tomcat9
become: yes
-
톰캣 설정-
hosts: ["192.168.100.20"]
tasks:-
name: "Delete original config file"
shell: |
rm -rf /usr/local/tomcat9/conf/server.xml
become: yes -
name: "Copy config file"
copy:
src: template/server.xml
dest: /usr/local/tomcat9/conf/server.xml
become: yes -
name: "Create Context Dir"
shell: |
mkdir /usr/local/tomcat9/webapps/sjb
become: yes -
name: "Copy jsp file"
copy:
src: template/test.jsp
dest: /usr/local/tomcat9/webapps/sjb/test.jsp
become: yes -
name: "Download mysql-connector"
shell: |
wget -O /tmp/mysql-connector-java-8.0.19.tar.gz https://dev.mysql.com/get/Downloads/Connector-J/mysql-connector-java-8.0.19.tar.gz
become: yes -
name: "Unarchive mysql-connector"
unarchive:
src: "/tmp/mysql-connector-java-8.0.19.tar.gz"
dest: "/tmp"
remote_src: True
become: yes -
name: "Copy mysql-connector"
shell: |
cp /tmp/mysql-connector-java-8.0.19/*.jar /usr/local/tomcat9/lib/
become: yes
-
톰캣 실행- hosts: ["192.168.100.20"]
tasks:- name: "Start Tomcat"
shell: |
/usr/local/tomcat9/bin/shutdown.sh
sleep 5
nohup /usr/local/tomcat9/bin/startup.sh &
become: yes
- name: "Start Tomcat"
아파치 설치-
hosts: ["192.168.100.10"]
tasks:-
name: "Insatll httpd server"
shell: |
yum update -y
yum install -y httpd httpd-devel gcc gcc-c++ wget make redhat-rpm-config
become: yes -
name: "Insatll httpd server"
shell: |
wget -O /tmp/tomcat-connectors-1.2.48-src.tar.gz https://dlcdn.apache.org/tomcat/tomcat-connectors/jk/tomcat-connectors-1.2.48-src.tar.gz
become: yes -
name: "Unarchive tomcat connector"
unarchive:
src: /tmp/tomcat-connectors-1.2.48-src.tar.gz
dest: /tmp/
remote_src: True
become: yes -
name: "Insatll tomcat connector"
shell: |
cd /tmp/tomcat-connectors-1.2.48-src/native
./configure --with-apxs=/usr/bin/apxs
make
cp /tmp/tomcat-connectors-1.2.48-src/native/apache-2.0/mod_jk.so /usr/lib64/httpd/modules/mod_jk.so
chmod 755 /usr/lib64/httpd/modules/mod_jk.so
become: yes
-
아파치 설정-
hosts: ["192.168.100.10"]
tasks:-
name: "Delete original conf file"
shell: |
rm -rf /etc/httpd/conf/httpd.conf
become: yes -
name: "Copy conf file"
copy:
src: template/httpd.conf
dest: /etc/httpd/conf/httpd.conf
become: yes -
name: "Copy workers.properties file"
copy:
src: template/workers.properties
dest: /etc/httpd/conf/workers.properties
become: yes
-
아파치 실행- hosts: ["192.168.100.10"]
tasks:- name: "Start Httpd"
shell: |
systemctl restart httpd
become: yes
- name: "Start Httpd"
DB 설치-
hosts: ["192.168.100.30"]
tasks:-
name: "Install mysql server"
shell: |
yum update -y
yum install -y mysql-server
become: yes -
name: "Start mysql Server"
shell: |
systemctl restart mysqld
become: yes -
name: "Install Python3"
shell: |
yum install -y python3 python3-pip
become: yes -
name: "Install pymysql"
pip:
name: pymysql -
name: "mysql config"
mysql_user:
user: root
password: "qwer1234"
host: "%"
login_unix_socket: /var/lib/mysql/mysql.sock
-
DB 쿼리 실행-
hosts: ["192.168.100.30"]
tasks:-
name: Create user with name 'sjb'
community.mysql.mysql_user:
name: sjb
password: qwer1234
host: '%'
priv: '.:ALL'
state: present -
name: Create a new database with name 'sjb_db'
community.mysql.mysql_db:
login_user: root
login_password: ''
name: sjb_db
state: present -
name: Create new Table
community.mysql.mysql_query:
login_user: root
login_password: ''
login_db: sjb_db
query: CREATE TABLE student (sname VARCHAR(10), sage INT) -
name: Run several insert queries against db test_db in single transaction
community.mysql.mysql_query:
login_user: root
login_password: ''
login_db: sjb_db
query:- INSERT INTO student VALUES('kim',10);
- INSERT INTO student VALUES('lee',20);
- INSERT INTO student VALUES('park',30);
single_transaction: yes
-
5) 변수
(1) 변수 타입
vars:
string_var: "A"
number_var: 1
boolean_var: "yes"
list_var:
- A
- B
- C
dict_var:
key_a: "val_a"
key_b: "val_b"
key_c: "val_c"
(2) 변수 만드는 법
- name: test var
  vars_files:
    - vars/main.yml
  vars:
    key1: value1


(3) 변수 사용하는 법 (jinja2 문법)
변수는 {{ }} 쌍중괄호사이에
{{}} 사용할때는 쌍따옴표 또는 홑 따옴표로 감싸줘야함
6) 반복문
모듈에 with_items: 선언
with_items:
  - apple
  - banana
  - kiwi

사용할 때는 {{ item }} 으로 사용
7) 조건문
모듈에 when: 선언
vars:
switch: "on"
tasks:
- debug:
msg: "hello switch on"
when: switch == "on"
- debug:
msg: "hello switch off"
when: switch == "off"
8) 동적 인벤토리'
깃허브에 올리면 배포서버에 다운되도록 하기.
git action으로 젠킨스에 알림 전송
젠킨스에 파이프라인 실행
github애서 코드 다운로드
maven 빌드
docker image 생성
docker hub에 이미지 푸시
action 작성

1. checkout으로 git hub repo에 있는 파일을 가져올 수 있다.
2. ansible 파일을 실행시켜서 EC2를 세팅한다.
3. github action으로 EC2에서 git clone 하도록 만든다.
4. 클론된 파일들을 배치시킨다.