
본 글에서는 편의상 spring data JPA와 Lombok을 사용한다. 기본적인 구조는 이론편 참고
Spring Security 적용
우선 프로젝트에 Dependency를 추가 해야 한다. Maven의 경우 pom.xml에, Gradle의 경우 build.gradle에 입력한다.
- Maven
<dependency>
  <groupId>org.springframework.boot</groupId>
  <artifactId>spring-boot-starter-security</artifactId>
</dependency>- Gradle
dependencies {
	implementation 'org.springframework.boot:spring-boot-starter-security'
}
Spring Security Config 작성
Spring Security 관련 설정을 해야 한다. WebSecurityConfigureAdapter를 상속받은 WebSecurityConfig 클래스를 만든다. @Bean 어노테이션을 통해 Spring Security에서 사용할 Bean을 등록한다.
@Configuration
@EnableWebSecurity
@RequiredArgsConstructor
public class WebSecurityConfig extends WebSecurityConfigurerAdapter {
    private final MemberService memberService;

    @Bean
    public PasswordEncoder passwordEncoder(){
        return new BCryptPasswordEncoder();
    }

    @Override
    public void configure(WebSecurity web) throws Exception {
        web.ignoring().antMatchers("/templates/**", "/static/**");
    }

    @Override
    protected void configure(HttpSecurity http) throws Exception {
        http
                .csrf()
                .disable()
                .formLogin()
                .defaultSuccessUrl("/success")
                .and()
                .authorizeRequests()
                .antMatchers("/success").hasAnyRole(Role.USER.name(), Role.ADMIN.name())
                .antMatchers("/admin").hasRole(Role.ADMIN.name())
                .anyRequest().permitAll();
    }

    @Override
    protected void configure(AuthenticationManagerBuilder auth) throws Exception {
        auth.userDetailsService(memberService).passwordEncoder(passwordEncoder());
    }
}-
@Configuration
스프링 설정 클래스임을 명시한다.
-
@EnableWebSecurity
Spring Security를 활성화한다. SecurityFilterChain이 자동으로 포함된다.
-
configure(WebSecurity web)이 메서드를 override해서 인증을 무시할 경로를 설정할 수 있다.
-
configure(HttpSecurity http)http 관련 인증 설정을 할 수 있다. 메서드 체이닝을 통해 여러 설정을 계속 이어나갈 수 있다. 연결하다 보면 HttpSecurity가 아닌 것이 리턴될 수 있는데,
and()를 통해 HttpSecurity를 리턴받아 다시 이어 나갈 수 있다.-
csrf().disable(): csrf 비활성화 -
formlogin(): form 기반 로그인 관련 설정이다.loginPage()로 로그인 페이지 URL을 설정할 수 있다.(기본은/login이다.)defaultSuccessUrl()로 로그인 성공 시 연결되는 URL을 설정할 수 있다. -
authorizeRequests():antMatchers()를 통해 접근 URL에 대한 권한을 설정할 수 있다.메서드 기능 permitAll() 누구나 접근 가능 denyAll() 접근 불가 authenticated() 인증된 사용자만 접근 가능 hasRole() 특정 role 유저만 접근 가능 hasAnyRole() 특정 role 유저만 접근 가능 (여러 role이 들어갈 수 있다) -
logout(): 로그아웃 관련 설정이다.logoutUrl()로 로그아웃 URL을 설정하고,logoutSuccessUrl()로 로그아웃 성공시 연결되는 URL을 설정할 수 있다.invalidateHttpSession()으로 로그아웃 이후 세션 전체 삭제 여부를 설정한다.
-
-
configure(AuthenticationManagerBuilder auth)이 메서드를 override해서 AuthenticationManager에 대한 설정을 할 수 있다.
userDetailsService(): 인증 과정에서 사용할 UserDetailsService를 설정할 수 있다.passwordEncoder(): 인증 과정에서 사용할 passwordEncoder를 설정할 수 있다.
Entity, Repository, Service 구현
유저에 대한 Entity, Repository, Service를 구현한다.
-
Entity
UserDetails 인터페이스를 구현한 Entity 클래스와 권한 정보를 나타내는 Role을 작성한다.
@Getter
@Setter
@NoArgsConstructor
@AllArgsConstructor
@Entity
@Table(name = "members")
public class Member implements UserDetails {
    @Id
    @GeneratedValue(strategy = GenerationType.IDENTITY)
    @Column(name = "seq")
    private Long seq;

    @Column(name = "username")
    private String username;

    @Column(name = "token")
    private String password;

    @Column(name = "auth")
    private Role role;

    @Override
    public Collection<? extends GrantedAuthority> getAuthorities() {
        return Collections.singletonList(new SimpleGrantedAuthority(role.value()));
    }

    @Override
    public boolean isAccountNonExpired() {
        return true;
    }

    @Override
    public boolean isAccountNonLocked() {
        return true;
    }

    @Override
    public boolean isCredentialsNonExpired() {
        return true;
    }

    @Override
    public boolean isEnabled() {
        return true;
    }
}
public enum Role { USER("ROLE_USER"), ADMIN("ROLE_ADMIN"); private final String value; Role(String value){ this.value = value; } public String value(){ return value; } }UserDetails를 구현하기 위해서 5개의 메서드를 override해야 한다.
메서드 기능 getAuthorities() 사용자가 가지고 있는 권한을 Collection 형태로 리턴 isAccountNonExpired() 계정이 만료되었는지 여부 (true : 만료되지 않음) isAccountNonLocked() 계정이 잠금 상태인지 여부 (true : 잠금 상태가 아님) isCredentialsNonExpired() 사용자 비밀번호가 만료되었는지 여부 (true : 만료되지 않음) isEnabled() 사용자가 활성화 상태인지 여부 (true : 활성화 상태) 이 Entity를 테이블로 나타내면 다음과 같다.
create table members( seq bigint not null auto_increment, username varchar(20) not null unique, token varchar(80) not null, auth enum('USER', 'ADMIN') not null, primary key (seq) ); -
Repository
db에서 유저 정보를 가져오기 위한 Repository를 작성한다.
@Repository public interface MemberRepository extends JpaRepository<Member, Long> { Optional<Member> findByUsername(String username); } -
Service
UserDetailsService를 구현한 Service 클래스를 작성한다.
@Service
@RequiredArgsConstructor
public class MemberService implements UserDetailsService {
    private final MemberRepository memberRepository;

    @Override
    public UserDetails loadUserByUsername(String username) throws UsernameNotFoundException {
        return memberRepository.findByUsername(username)
                .orElseThrow(() -> new UsernameNotFoundException("user not found."));
    }
}
UserDetailsService를 구현하려면
loadUserByUsername()을 override해야 한다. 이 메서드에서 앞서 작성한 Repository를 통해 DB에서 유저 데이터를 꺼내 리턴해 준다.
WebMvcConfig, 테스트용 페이지 만들기
-
WebMvcConfig
@Configuration
public class WebMvcConfig implements WebMvcConfigurer {
    @Override
    public void addViewControllers(ViewControllerRegistry registry) {
        registry.addViewController("/success").setViewName("success");
        registry.addViewController("/admin").setViewName("admin");
    }
}
WebMvcConfigurer 인터페이스를 구현한 WebMvcConfig 클래스를 만든다.
addViewControllers()를 통해 URL에 대한 view 이름을 연결해 준다. -
테스트 페이지
테스트를 위해 로그인 성공 페이지와 관리자 페이지를 만든다.
-
success.html
<!DOCTYPE html> <html lang="en"> <head> <meta charset="UTF-8"> <title>Home</title> </head> <body> 로그인 성공 <form action="/logout" method="post"> <input type="submit" value="logout"> </form> </body> </html> -
admin.html
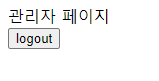
<!DOCTYPE html>
<html lang="en">
<head>
    <meta charset="UTF-8">
    <title>Admin Home</title>
</head>
<body>
    관리자 페이지
    <form action="/logout" method="post">
        <input type="submit" value="logout">
    </form>
</body>
</html>
-
테스트
-
로그인 하지 않은 상태로
/success,/admin에 접근하면 로그인 페이지로 이동한다.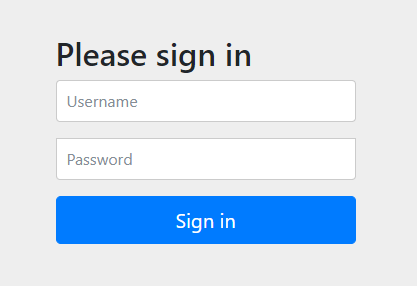
-
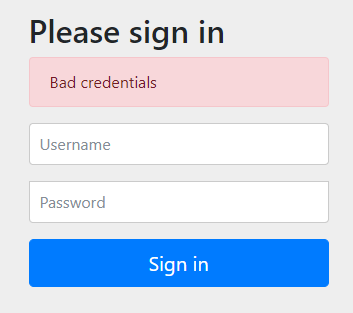
id, password가 틀린 경우
-
로그인 성공한 경우
/success로 이동한다. 여기서 로그아웃 버튼을 누르면 다시 로그인 화면으로 돌아간다.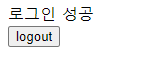
-
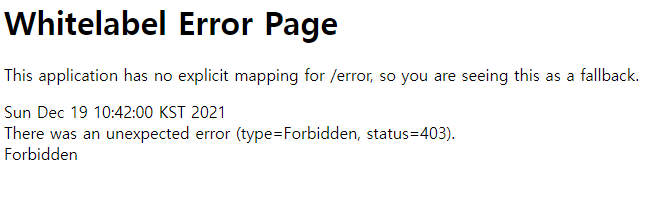
user 권한으로
/admin에 접근하면 에러가 발생하고, admin 권한으로 접근하면 페이지 내용을 볼 수 있다.-
user
-
admin
-
전체 코드
https://github.com/susemeeee/blog-example-spring/tree/master/example-spring-security