Overview
spring REST Docs는 Swagger와 양대산맥을 이루는 API 문서화 도구입니다.
Swagger는 본래 코드 위에 어노테이션 기반으로 문서화를 하기 때문에 명세를 위한 코드들이 많이 붙게되어 전체적으로 가독성이 떨어지고 테스트코드 기반이 아니기 때문에 신뢰할 수 없다는 단점이 있습니다.
spring REST Docs는 테스트코드를 기반으로 문서화를 진행하기 때문에 본래 코드를 수정할 필요가 없고 테스트가 무조건 통과되어야만 문서화가 이루어진다는 특징을 가지고 있습니다.
1. 의존성 및 플러그인 추가하기
REST Docs를 위한 의존성을 추가합니다.
build.gradle
plugins { // add
	id "org.asciidoctor.jvm.convert" version "3.3.2"

}

ext { // add
	snippetsDir = file('build/generated-snippets')
}

asciidoctor { // add
	dependsOn test
	attributes 'snippets': snippetsDir
	inputs.dir snippetsDir
}

asciidoctor.doFirst { // add
    println("---------------- delete present asciidoctor.")
    delete file('src/main/resources/static/docs')
}

bootJar { // add
    dependsOn asciidoctor
    copy {
        from "${asciidoctor.outputDir}"
        into 'src/main/resources/static/docs'
    }
}

test { // 필수
    outputs.dir snippetsDir
    useJUnitPlatform()
}

dependencies {
	testImplementation 'org.springframework.restdocs:spring-restdocs-mockmvc'
}
2. 스프링 시큐리티 경로 예외 설정
// spring rest docs 경로
                .and()
                .authorizeRequests()
                .antMatchers("/docs/*").permitAll()
스프링 시큐리티를 사용한다면 문서 접근에 사용되는 경로를 예외설정하거나 특정 권한 소유자만 접근 가능하게끔 설정할 수 있습니다.
저는 일단 인증 인가 예외 설정 하겠습니다 특정 권한만 접근 가능하게끔 하고싶다면 hasRole("ADMIN") 같은 형태로 설정해주시면 됩니다.
3. 테스트코드 작성
먼저 API를 다 구현하셨다고 가정합니다. 저는 유저 등록 API를 테스트하며 문서화해보겠습니다.
@SpringBootTest
@AutoConfigureMockMvc
@AutoConfigureRestDocs
public class UserControllerSuccessTests {
    @Autowired
    private MockMvc mockMvc;
    @Autowired
    private ObjectMapper objectMapper;

    @Test
    @DisplayName("유저 회원가입 테스트")
    void registerUserTest() throws Exception{
        Map<String, String> input = new HashMap<>();
        input.put("username", "member1");
        input.put("password", "member1");
        input.put("nickname", "member1_nickname");

        mockMvc.perform(RestDocumentationRequestBuilders.post("/api/user/signup")
                        .contentType(MediaType.APPLICATION_JSON)
                        .content(objectMapper.writeValueAsString(input))
                )
                .andExpect(status().isOk())
                .andDo(print())
                // rest docs 문서화
                .andDo(document("user-register",
                        requestFields(
                                fieldWithPath("username").description("회원가입 하고자 하는 username (USER_ROLE)"),
                                fieldWithPath("password").description("회원가입 하고자 하는 password"),
                                fieldWithPath("nickname").description("회원가입 하고자 하는 nickname")
                        ),
                        responseFields(
                                fieldWithPath("id").description("logging을 위한 api response 고유 ID"),
                                fieldWithPath("dateTime").description("response time"),
                                fieldWithPath("success").description("정상 응답 여부"),
                                fieldWithPath("response.username").description("회원가입 성공한 username"),
                                fieldWithPath("response.password").description("회원가입 성공한 password"),
                                fieldWithPath("response.nickname").description("회원가입 성공한 nickname"),
                                fieldWithPath("response.tokenWeight").description("초기 가중치"),
                                fieldWithPath("response.authoritySet").description("해당 사용자가 가진 권한"),
                                fieldWithPath("error").description("error 발생 시 에러 정보")
                        )
                ))
                .andExpect(jsonPath("$.response.username", is(notNullValue())))
                .andExpect(jsonPath("$.response.password", is(notNullValue())))
                .andExpect(jsonPath("$.response.nickname", is(notNullValue())))
                .andExpect(jsonPath("$.response.tokenWeight", is(notNullValue())))
                .andExpect(jsonPath("$.response.authoritySet", is(notNullValue())));
    }
}
테스트코드를 돌린 후 user-register 이름을 가진 문서를 작성할 예정입니다. 이름을 맞춰주셔야합니다!
실제 테스트를 돌려보면 target/generated-snippets/ 디렉토리 안에 무언가 파일이 생성된 것을 알 수 있습니다.
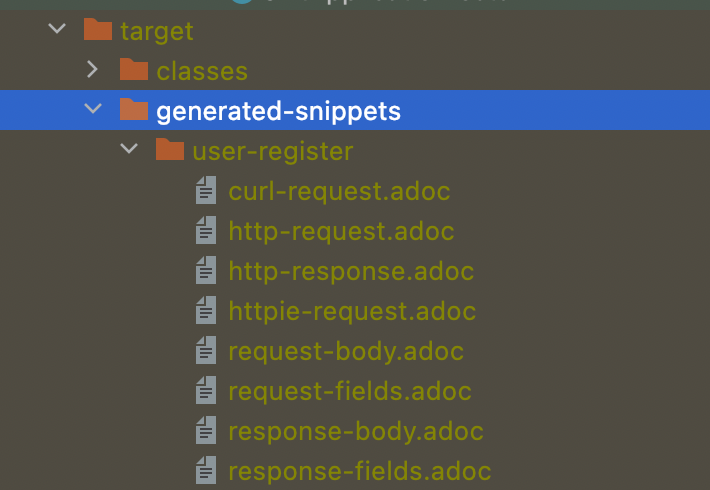
테스트코드를 돌리고 그 결과를 각각의 형태에 나누어 담은 파일이라고 이해하시면 됩니다. 이 파일을 활용하여 문서화를 진행합니다.
4. 문서화하기
gradle이라면 src/docs/asciidoc 디렉토리를 생성한 후 해당 디렉토리 안에 user-register.adoc 파일을 생성하여 위에서 만들어진 adoc 파일을 이용해 조합하여 문서를 생성합니다.
이 파일을 기반으로 빌드 시 html파일을 생성합니다.
[[api-user-register]]
== 유저 사용자 등록(User Register API)
ROLE_USER 권한을 가지는 사용자를 생성합니다.

====== 요청 형식
include::{snippets}/user-register/http-request.adoc[]
include::{snippets}/user-register/request-fields.adoc[]
====== Request Body
include::{snippets}/user-register/request-body.adoc[]
====== 응답 형식
include::{snippets}/user-register/http-response.adoc[]
include::{snippets}/user-register/response-fields.adoc[]
====== Response Body
include::{snippets}/user-register/response-body.adoc[]
====== Try with curl
include::{snippets}/user-register/curl-request.adoc[]
5. REST Docs index.html 작성
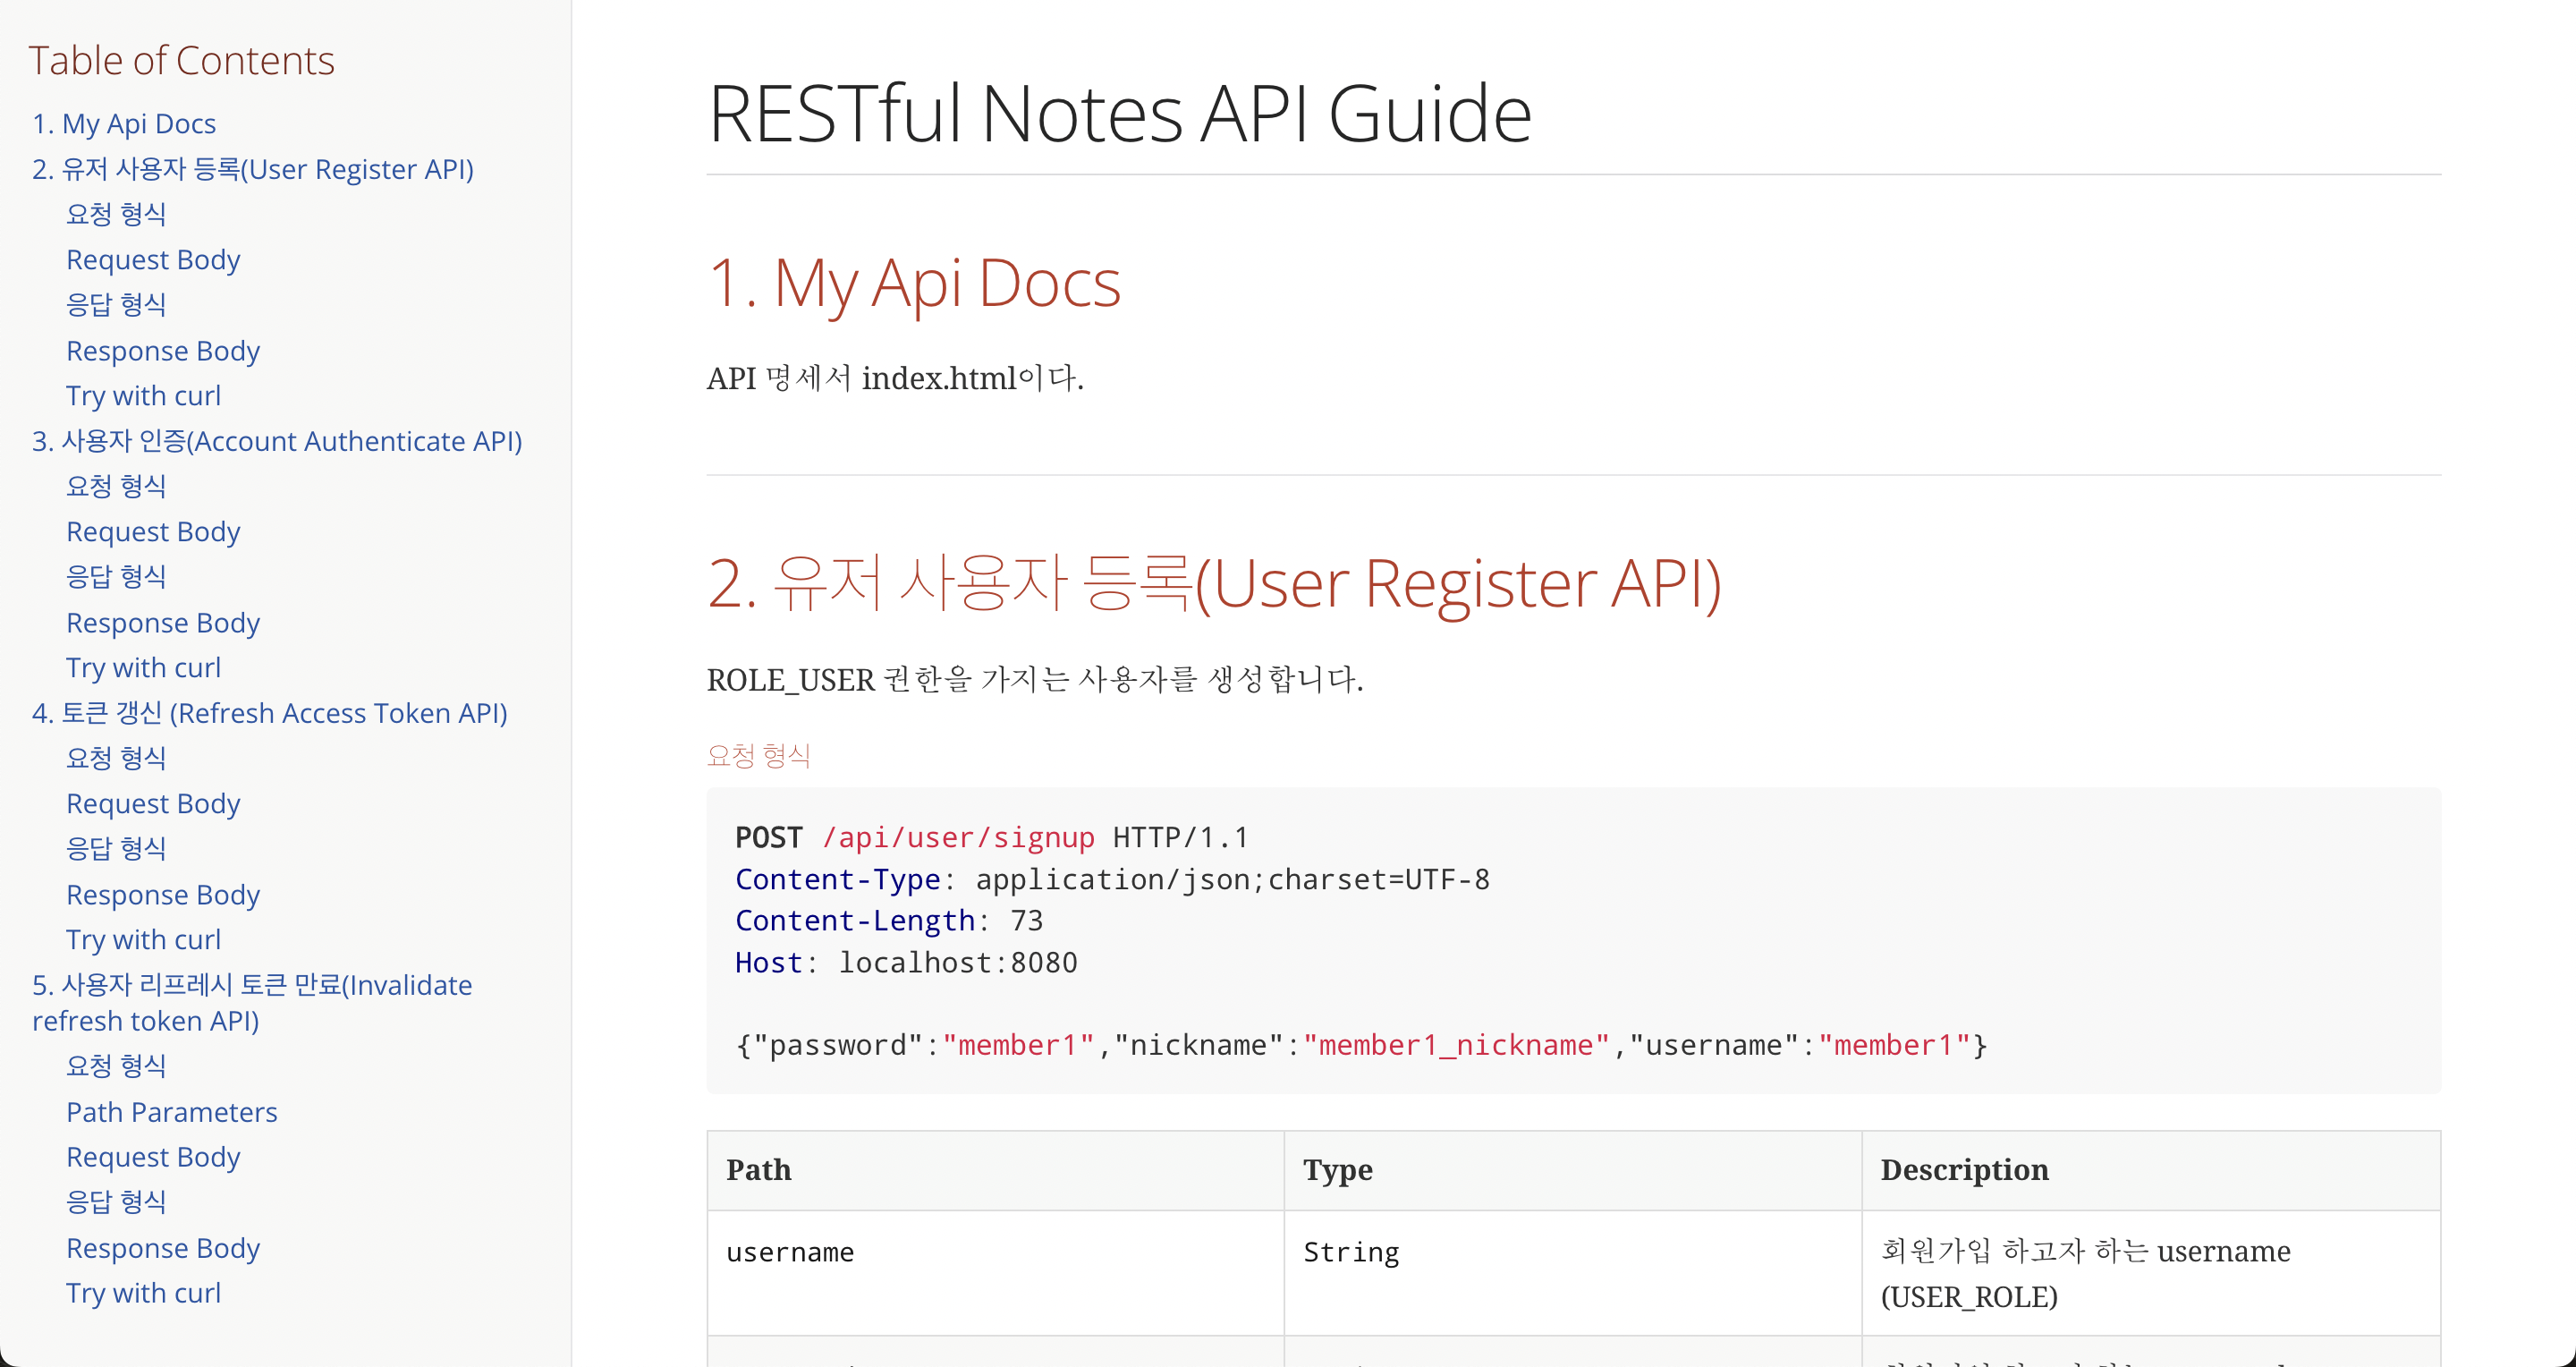
gradle이라면 src/docs/asciidoc 안에 index.adoc 파일을 작성합니다.
= RESTful Notes API Guide
:doctype: book
:icons: font
:source-highlighter: highlightjs
:toc: left
:toclevels: 4
:sectnums:
:sectlinks:
:sectanchors:

== My Api Docs
API 명세서 index.html이다. gradle예제
include::src/docs/asciidoc/user-register.adoc[]
include::를 통해 user-register 문서를 인클루드하여 포함시킵니다.
나중에 제작한 API 문서들도 include 해줍시다.
6. 문서 확인하기
빌드를 돌리면 테스트코드가 동작하며 문서화가 이루어져 html파일이 생성될 것입니다.
./gradlew bootJarGET /docs/index.htmlindex.html에 접근해보면 우리가 문서화한 결과를 볼 수 있습니다.