시작하며
Next.js의 static export 옵션을 활성화하면, <Image> 컴포넌트의 이미지 최적화 기능을 제대로 활용할 수 없습니다.
이는 Next.js가 기본적으로 on-demand 형식으로 서버에서 이미지 최적화를 수행하기 때문입니다.
이 글에서는 static export옵션 활성화시 이미지 최적화 기능을 어떻게 적용할지에 대해 다루고자 합니다.
static export시 이미지 최적화 방법
Next.js SSG에서 이미지 최적화는 꽤 오래전부터 많은 논의가 있었습니다.
아래 두가지 방법에 대한 내용입니다.
1. 빌드 타임시 이미지 최적화
2. 이미지 관리 및 최적화 서비스를 해주는 클라우드 서비스를 이용
1번의 경우엔 아직까지는 Next.js에서 공식적으로 제공할 생각이 없어 보였습니다.
(빌드 타임시 이미지 최적화는 next-image-export-optimizer와 같은 라이브러리를 이용하거나 직접 구현해야 합니다.)
2번은 Next.js의 공식문서에서 이미지 최적화에 Cloudinary를 권장하고 있기 때문에 2번 방법으로 최적화를 하고자 합니다.
(물론 2번 방법을 Cloudinary로만 구현이 가능한건 아닙니다. CloudFront 및 AWS Lambda를 이용한 방법도 있습니다.)
Cloudinary란?
Cloudinary는 이미지 및 비디오 관리 및 최적화 서비스를 제공하는 클라우드 기반 플랫폼입니다.
이 서비스를 통해 사용자는 웹 페이지의 이미지 및 비디오 관리를 간편하게 할 수 있으며, 성능 최적화와 빠른 로딩을 실현할 수 있습니다.
Cloudinary는 이미지 변환, 크롭, 리사이즈, 효과 및 다운로드 및 전송 관리 등 다양한 이미지 관리 작업을 지원합니다.
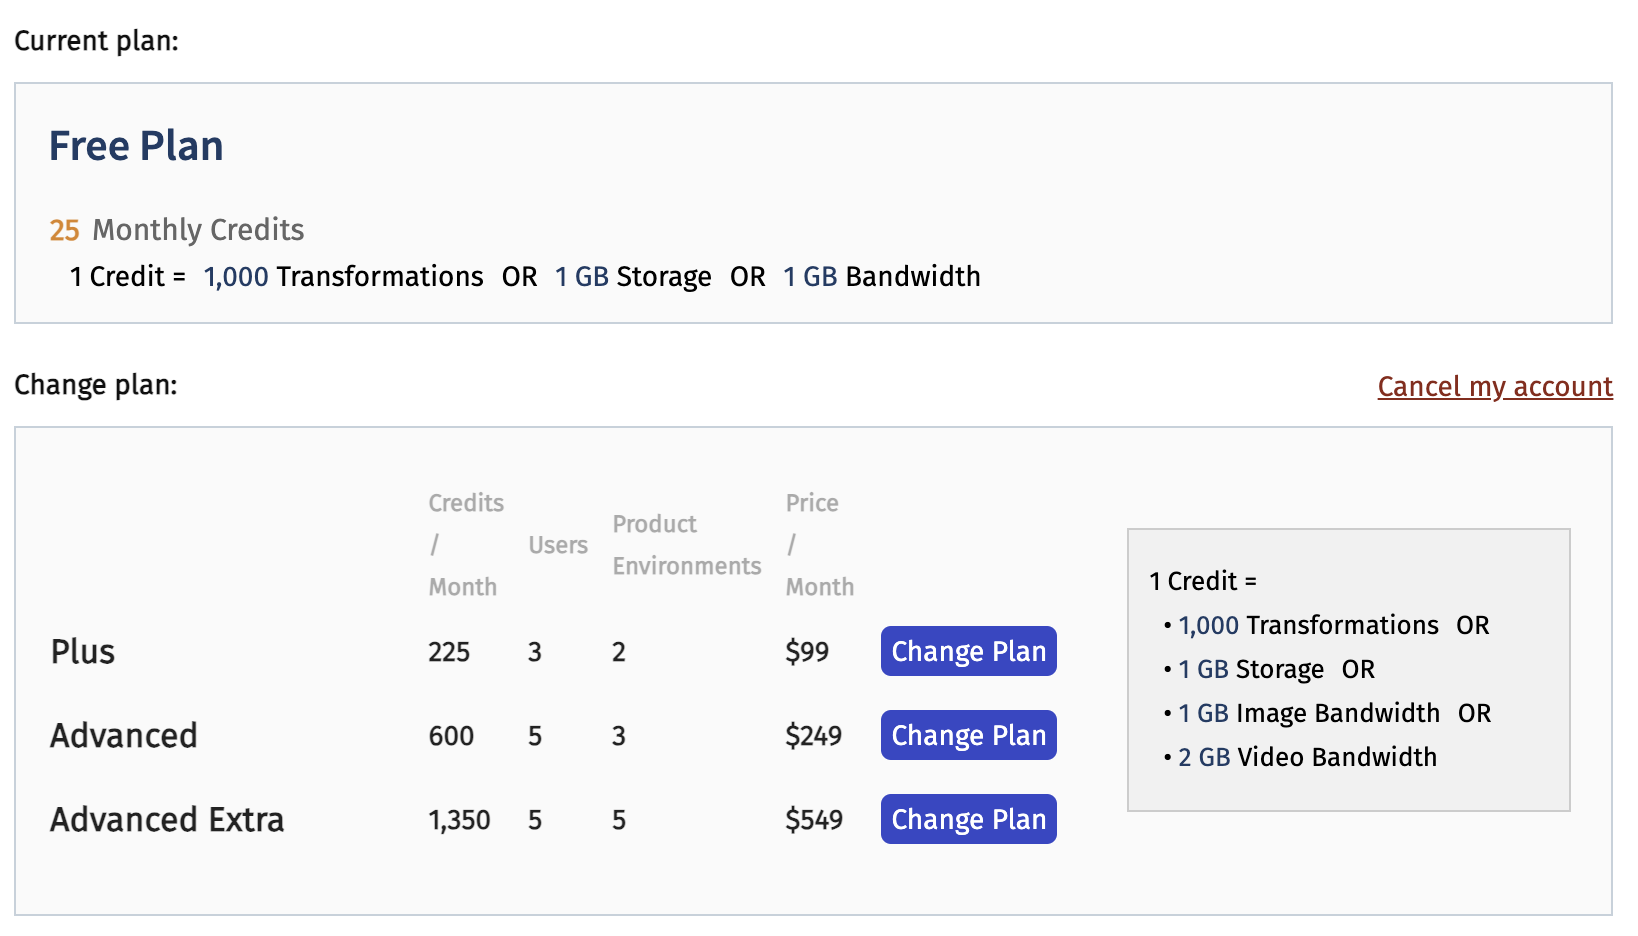
그리고 제일 중요한(?) 요금제 정책을 살펴보겠습니다.
무료플랜 기준으로 한 달에 25 크레딧을 제공해준다고 합니다. (1크레딧 = 1000번의 파일변환, 1GB의 저장용량, 1GB의 대역폭)
개인 블로그와 같은 SSG사이트를 운영할때는 무료플랜으로 해도 문제가 없어 보입니다.
Cloudinary 사용법
우선 Cloudinary 에 로그인을 해줘야 합니다.
그 후 Cloudinary에 사진을 업로드하고 사진의 url을 프로젝트에서 이용하면 끝입니다.
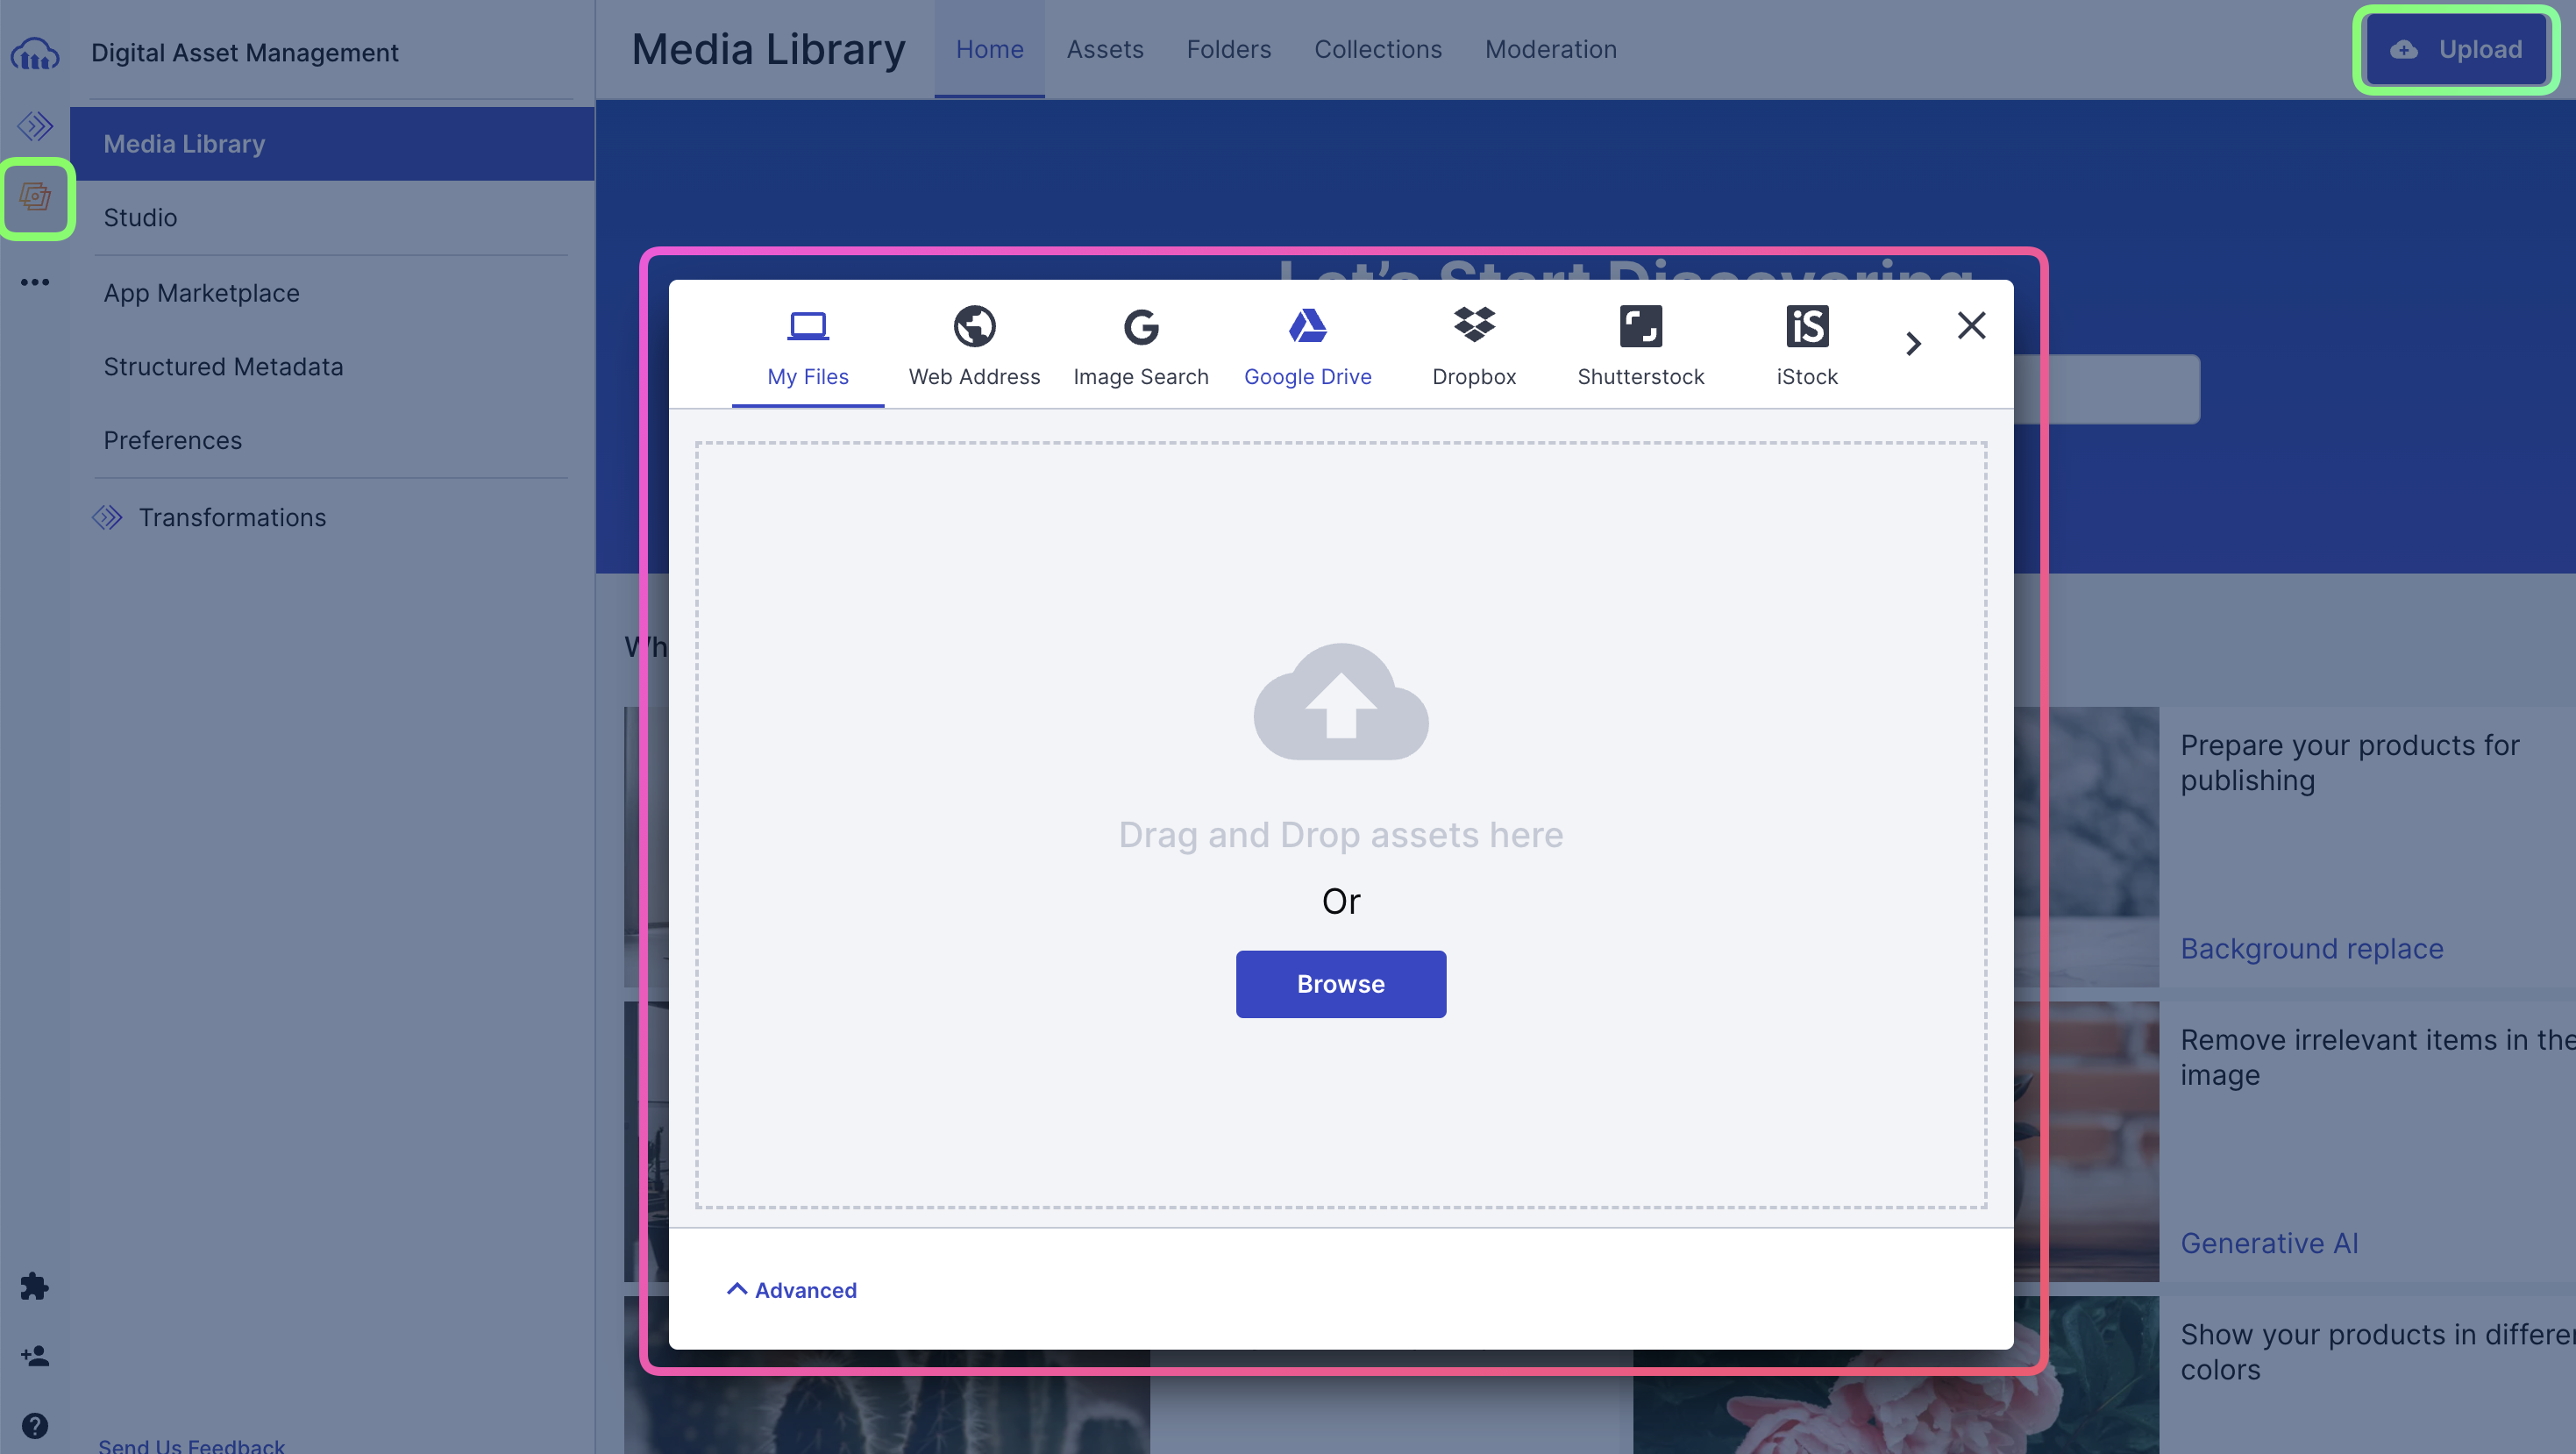
업로드를 하는 방법은 매우 간단합니다.
1. Digital Asset Management 탭으로 이동
2. 우측 상단의 Upload버튼을 누르고 원하는 이미지를 업로드
위 과정을 마쳤다면, Next.js 프로젝트의 config에 loader 설정을 해줘야 합니다.
(static export 옵션이 있다면, unoptimized나 loader 둘 중에 하나를 무조건 설정해줘야 합니다.)
// next.config.js

/** @type {import('next').NextConfig} */
const nextConfig = {
  output: 'export',
  images: {
    loader: 'custom',
    loaderFile: './my-loader.ts',
  },
}

module.exports = nextConfig
이 로더는 원격 소스에서 이미지를 가져오는 방법을 정의합니다. Cloudinary에 대한 URL을 구성해줍니다.
export default function cloudinaryLoader({
  src,
  width,
  quality,
}: {
  src: string
  width: number
  quality?: number
}) {
  const params = ['f_auto', 'c_limit', `w_${width}`, `q_${quality || 'auto'}`]
  return `https://res.cloudinary.com/demo/image/upload/${params.join(
    ','
  )}${src}`
}
loader 설정까지 완료가 됐다면, Next.js Image 컴포넌트를 다음과 같이 구성을 했을 때
<Image src='/demo' width={50} height={50}/>image src가 cloudinaryLoader 의 return 값으로 바뀌게 됩니다.
loader덕분에 기존 SSG프로젝트의 소스코드를 건드리지 않고 설정만 바꿔서 적용이 가능합니다.
Cloudinary 업로드 자동화 하기
SSG 프로젝트를 만들면서 필요한 이미지들을 일일이 Cloudinary에 업로드 시키는건 상상만해도 생산성이 많이 떨어지는 작업입니다.
따라서 Cloudinary Node.js SDK를 이용하여 이미지 업로드를 자동화를 하고자 합니다.
이루고자 하는 기능은 다음과 같습니다.
1.public폴더 아래의 이미지들을 전부 Cloudinary에 업로드
2. 기존에 Next.js에서 정적 assets 들을 불러오는 방식에 영향을 주어선 안된다. (예를들면,public/my-profile.png파일을 불러올때/my-profile.png로 파일 참조)
3. script를 한 번 실행시켜서 이미지 업로드가 동작
cloudinary 설정 확인
Cloudinary로그인시 보이는 화면입니다.
Node.js에서 어떤식으로 설정을 해야하는지 예시가 나옵니다.
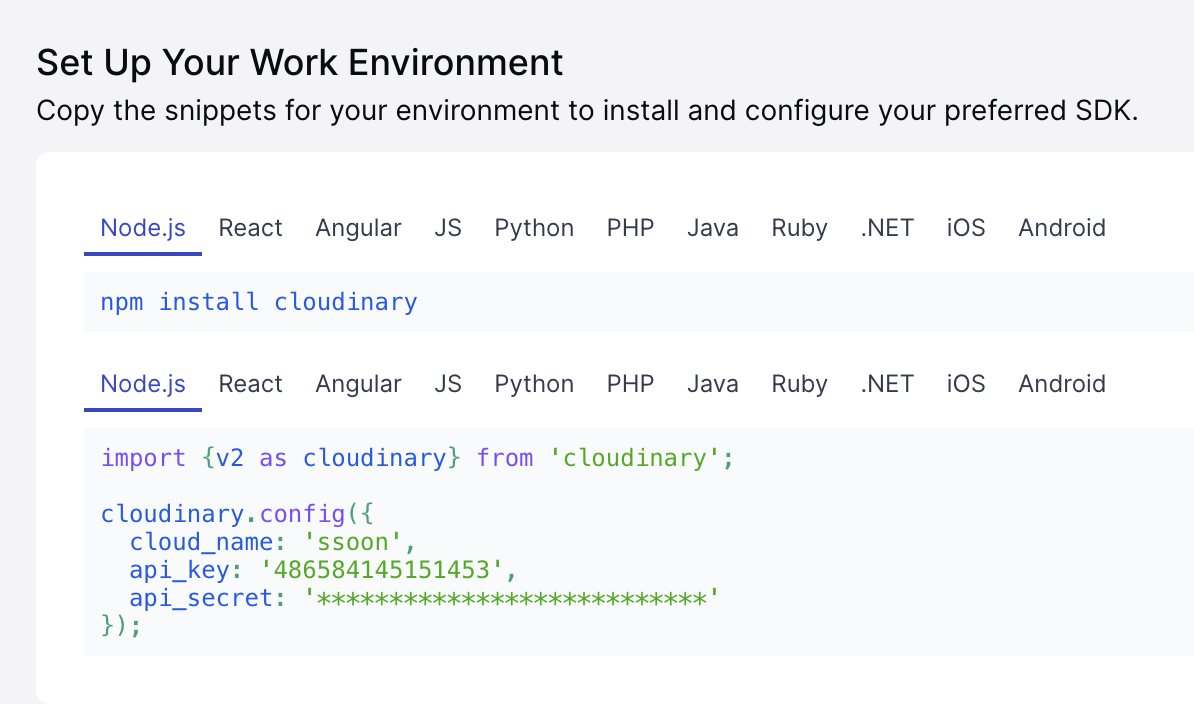
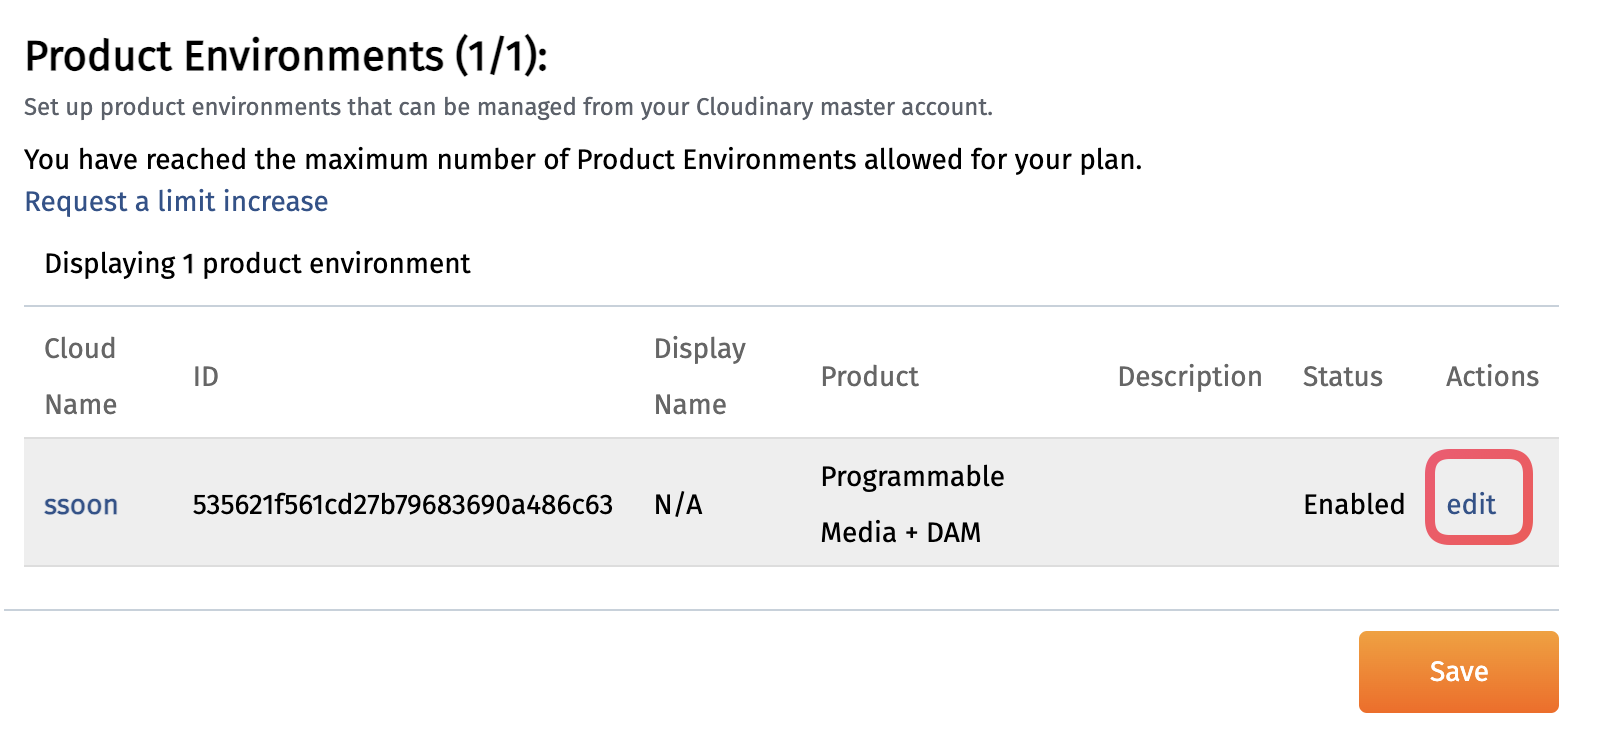
만약 cloud_name을 바꾸고 싶다면 setting -> account 에 들어간 후 edit을 눌러서 수정을 해주면 됩니다.
script 환경 세팅
cloudinary와 glob을 이용해줍니다.
glob 라이브러리를 사용하면 패턴 매칭을 통해 파일 및 디렉토리를 검색할 수 있습니다.
$ yarn add -D cloudinary
$ yarn add -D glob
저는 api_key와 api_secret의 값을 env로 관리할 예정이므로 dotenv도 추가로 받아줬습니다.
scripts폴더 아래에 upload-cloudinary.ts 파일을 생성해서 cloudinary 설정 관련 코드를 작성해줬습니다.
// scripts/upload-cloudinary.ts
import { v2 as cloudinary } from 'cloudinary';
import { glob } from 'glob';
import dotenv from 'dotenv';

dotenv.config();

cloudinary.config({
  cloud_name: 'ssoon',
  api_key: process.env.CLOUDINARY_API_KEY,
  api_secret: process.env.CLOUDINARY_API_SECRET,
  secure: true, // Return "https" URLs by setting secure: true
});

// Log the configuration
console.log(cloudinary.config());
upload-cloudinary.ts 스크립트를 실행시키기 위해 package.json의 scripts에 작성을 해줍니다.
(ts파일로 작성을 해서 ts-node 로 실행을 시켰습니다. js파일로 작성하고 node ./scripts/upload-cloudinary.js로 실행시켜도 무관합니다. )
 "scripts": {
    "upload-cloudinary": "ts-node --project tsconfig.node.json ./scripts/upload-cloudinary.ts"
  },
upload-cloudinary 스크립트를 실행 시킨후에 위에서 설정한 config가 제대로 로그에 다음과 같이 찍히는지 확인을 해줍니다.
{
  cloud_name: 'ssoon',
  api_key: '*********',
  api_secret: '*********',
  secure: true
}
설정을 완료 했으므로 이미지 업로드 관련 로직을 작성해줍니다.
업로드 관련 문서를 확인해 보면 cloudinary.uploader.upload 메서드를 사용하는걸 확인할 수 있습니다.
upload에 필요한 각 옵션을 알아보겠습니다.
use_filename: 업로드된 파일의 원래 이름을 공개 ID로 사용하도록 해줍니다. 만약true로 설정하지 않는다면,8jsb1xofxdqamu2rzwt9q와 같은 무작위 ID가 생성이 되므로 무조건true로 설정을 해야 합니다.unique_filename: 옵션은 공개 ID에 임의의 문자를 적용해줍니다.false로 설정해야 임의의 문자를 적용하지 않습니다.overwrite: 업로드 시 동일한 공개 ID를 가진 이미지를 덮어씁니다.
upload문서 예시에는 없지만 저는 추가적으로 folder 옵션도 추가를 해줬습니다.
folder옵션이 없다면, 내가 원하는 뎁스에 이미지를 저장하지 못합니다.
Next.js프로젝트에서public/logo/site-og-image.png의 이미지 파일을folder옵션 없이 Cloudinary에 업로드를 한다면 무조건 root경로에 업로드가 됩니다. (https://res.cloudinary.com/{cloud_name}/image/upload/site-og-image.png경로에 업로드가 됩니다.)
Cloudinary를 적용하기전 프로젝트에선<Image src='logo/site-og-image.png'/>와 같은 방식으로 호출을 하고 있었을텐데 만약~~~/upload/site-og-image.png경로에 업로드가 됐다면 기존 소스코드를<Image src='/site-og-image.png'/>로 바꿔줘야 합니다. (cloudinaryLoader를 설정 했으므로~~~/upload/부분은 적어줄 필요가 없습니다.)folder옵션에 "logo" 를 적어주게 된다면~~~/upload/logo/site-og-image.png경로에 이미지가 업로드가 됩니다.
아래와 같이 옵션을 구성해서 uploadImage 함수를 작성해 줍니다.
// scripts/upload-cloudinary.ts
const uploadImage = async ({
  imagePath,
  folder,
}: {
  imagePath: string;
  folder: string;
}) => {
  const options = {
    use_filename: true, // Use the uploaded file's name as the asset's public ID and
    unique_filename: false,
    overwrite: true, // allow overwriting the asset with new versions
    folder,
  };

  // Upload the image
  const result = await cloudinary.uploader.upload(imagePath, options);
  return result.public_id;
};
glob으로 public 폴더 아래의 .jpg, .jpeg, .png, .gif 등의 확장자가 있는 경로를 패턴매칭으로 검색하고 일치하는 파일 경로를 반환 받습니다.
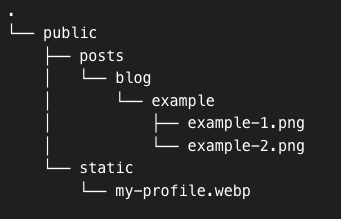
예를 들어 폴더구조가 위와 같이 구성되어 있으면
['public/posts/blog/example/example-1.png','public/posts/blog/example/example-2.png','public/static/my-profile.webp']
위 목록을 반환받을 수 있게 패턴을 작성해줍니다.
glob을 이용해서 반환받은 파일 경로는 uploadImage 함수의 imagepath 파라미터에 그대로 넣어줍니다.
그리고 folder 의 경로를 public을 제외하고 넣어줄 수 있게 로직을 작성해줍니다.
(public을 제외하는 이유는 위에서 계속 설명을 했듯이 Next.js 프로젝트 내부에서 이미지를 사용할때 public을 붙이고 가져오지 않기 때문입니다.)
// scripts/upload-cloudinary.ts
(async () => {
  const blogImgPaths = await glob(['public/**/*.{jpg,jpeg,png,gif,webp,svg}']);

  if (blogImgPaths.length) {
    const uploadPromises = blogImgPaths.map(async (imgPath) => {
      const folder = imgPath
        .replace('public/', '')
        .replace(/\/[^/]+\.(jpg|jpeg|png|gif|webp|svg)$/, '');
      return uploadImage({
        imagePath: imgPath,
        folder,
      });
    });
    try {
      const result = await Promise.all(uploadPromises);
      console.log('result', result);
    } catch (e: any) {
      throw new Error(e);
    }
  }
})();
최종 코드의 모습입니다.
// scripts/upload-cloudinary.ts
import { v2 as cloudinary } from 'cloudinary';
import { glob } from 'glob';
import dotenv from 'dotenv';

dotenv.config();

cloudinary.config({
  cloud_name: 'ssoon',
  api_key: process.env.CLOUDINARY_API_KEY,
  api_secret: process.env.CLOUDINARY_API_SECRET,
  secure: true, // Return "https" URLs by setting secure: true
});

// Log the configuration
console.log(cloudinary.config());
/////////////////////////
// Uploads an image file
/////////////////////////
const uploadImage = async ({
  imagePath,
  folder,
}: {
  imagePath: string;
  folder: string;
}) => {
  const options = {
    use_filename: true, // Use the uploaded file's name as the asset's public ID and
    unique_filename: false,
    overwrite: true, // allow overwriting the asset with new versions
    folder,
  };

  // Upload the image
  const result = await cloudinary.uploader.upload(imagePath, options);
  return result.public_id;
};

(async () => {
  const blogImgPaths = await glob(['public/**/*.{jpg,jpeg,png,gif,webp,svg}']);
  if (blogImgPaths.length) {
    const uploadPromises = blogImgPaths.map(async (imgPath) => {
      const folder = imgPath
        .replace('public/', '')
        .replace(/\/[^/]+\.(jpg|jpeg|png|gif|webp|svg)$/, '');
      return uploadImage({
        imagePath: imgPath,
        folder,
      });
    });
    try {
      const result = await Promise.all(uploadPromises);
      console.log('result', result);
    } catch (e: any) {
      throw new Error(e);
    }
  }
})();
public폴더에 이미지를 막 넣고 yarn upoad-cloudinary 스크립트를 실행 시킨 결과입니다.
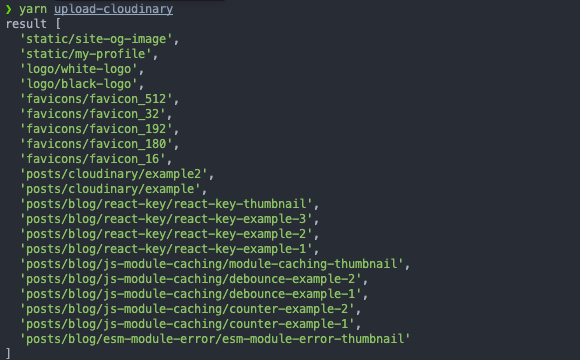
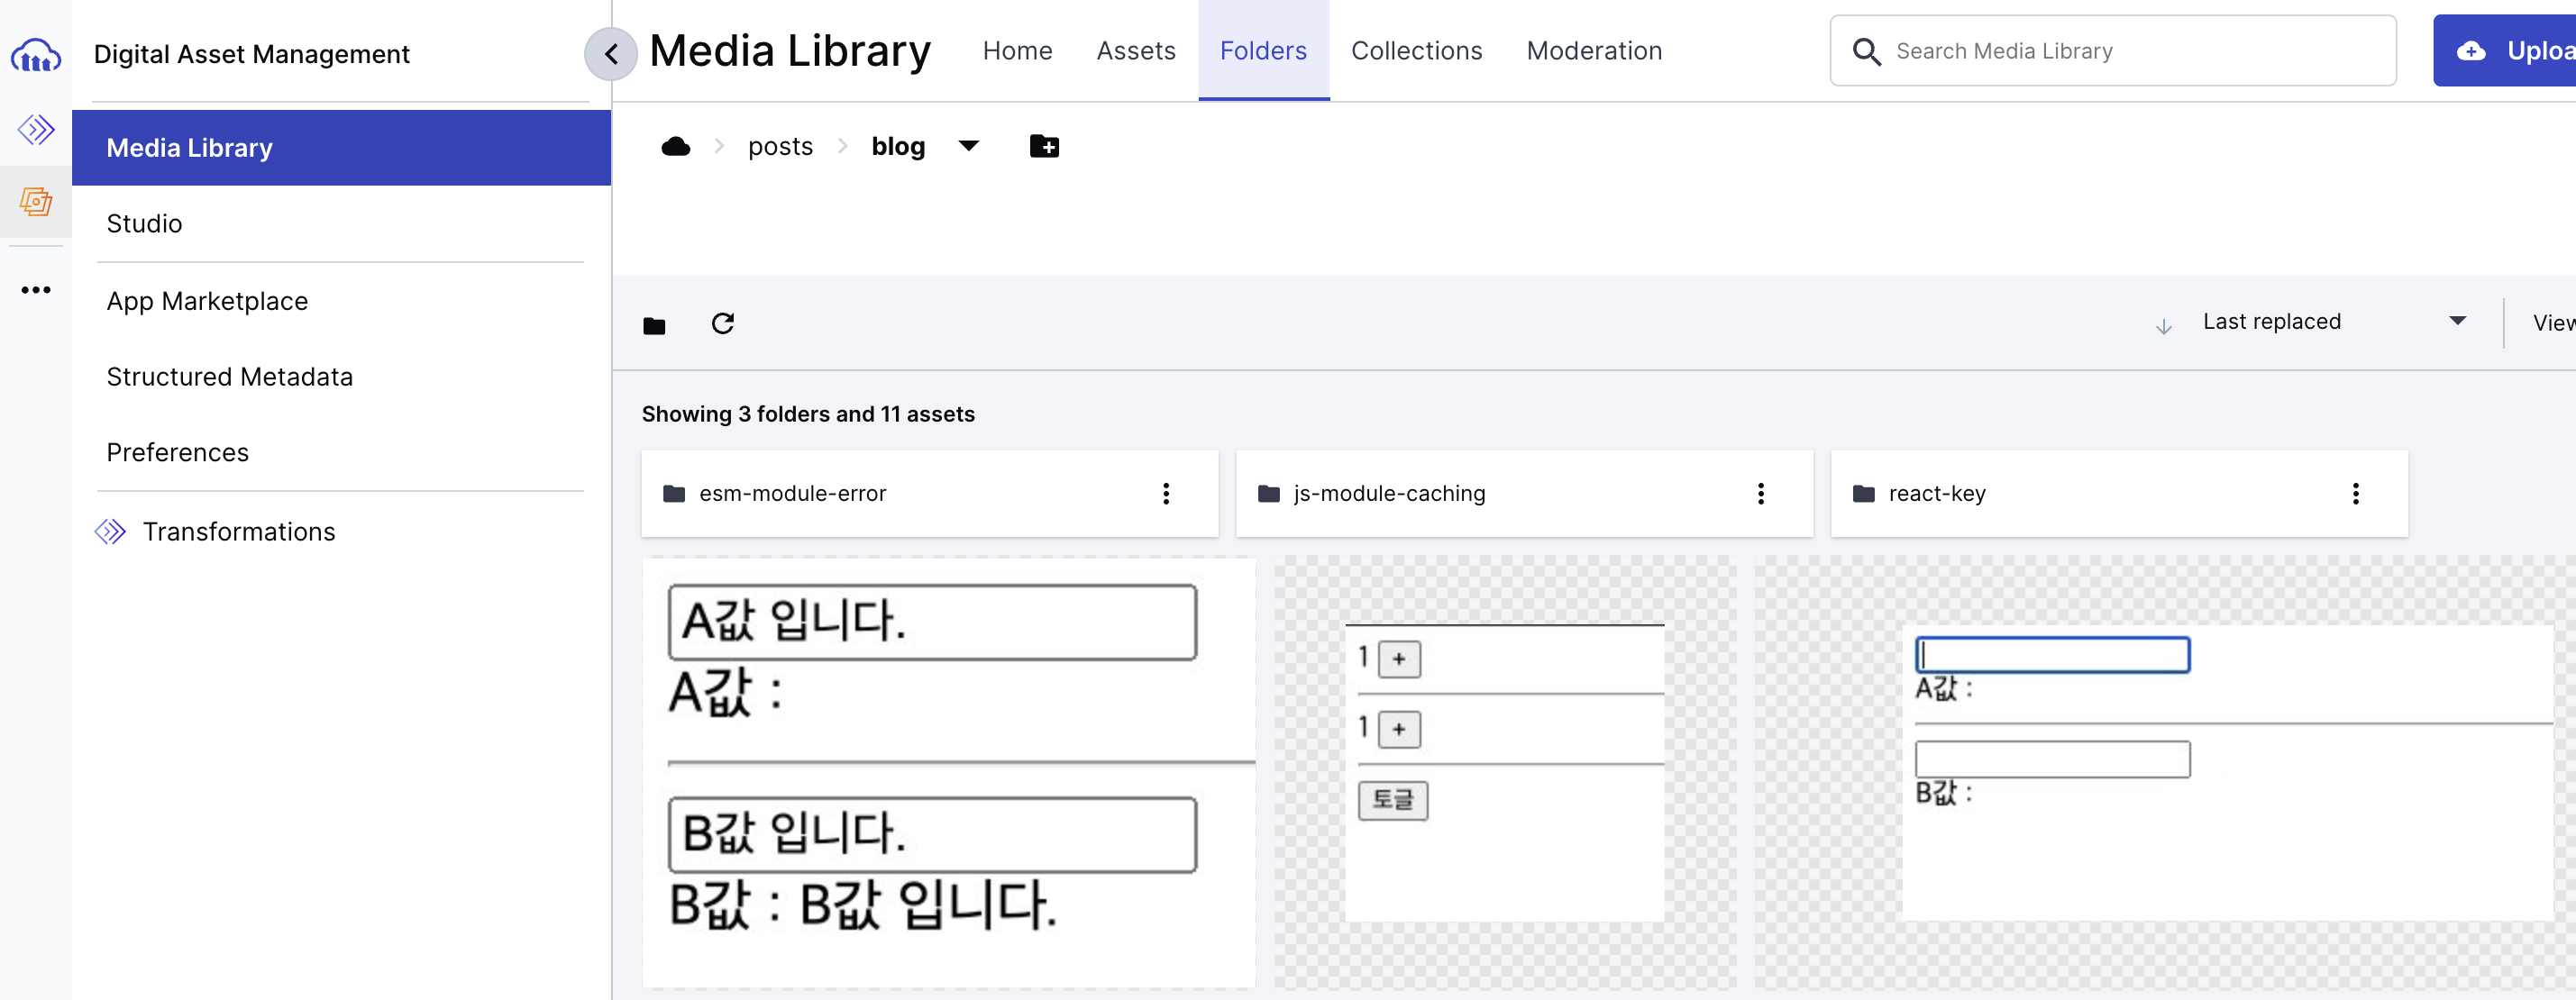
cloudinary에 자동으로 업로드가 되는 모습을 볼 수 있습니다.
(아래 사진은 posts/blog 아래에 업로드된 이미지들만 본 결과입니다. )
이제 프로젝트에서 이미지를 사용할 때 static assets경로를 적어주면 기존 코드 수정 없이 cloudinaryLoader 통해 Cloudinary에 업로드된 이미지를 사용할 수 있습니다.
<Image
  src="/logo/white-logo.png"
  width={80}
  height={40}
  priority
  alt="site logo"
/>
마치며
Next.js에서 자체적으로 빌드타임때 이미지 최적화를 해준다면 이런 번거로운 작업은 안 해도 될 거 같은데 살짝 아쉬운거 같습니다.
Next.js를 SSG로 마케팅하는 것은 올바르지 않다는 의견도 보이네요 😅
(그래도 Next.js SSG로 개인 블로그를 만들때 이미지 최적화 작업을 제외하면 좋은 경험이였습니다..)
