AWS EKS에서 EFS 사용하기
AWS EKS에서 여러 Pod들이 하나의 스토리지를 사용하도록 할 수 있습니다.
가장 접근하기 쉬운 EBS 볼륨을 사용할 경우, EBS의 특성상 다른 AZ에서는 접근할 수 없다는 단점이 있어 여러 가용 영역에 Worker Node가 배포되어 있을 경우, EBS가 위치하지 않은 AZ에 있는 Worker Node에는 해당 EBS를 스토리지로 사용하는 Pod들이 배포되지 않습니다.
이를 해결하기 위해 다른 AZ에서도 사용이 가능한 EFS를 활용할 수 있습니다.
AWS EKS에서 EFS를 사용하기 위해서는 몇가지 설정이 필요합니다.
EKS에 EFS를 사용할 수 있는 드라이버가 설치되어있어야 하며,
Worker Node들이 EFS를 사용할 수 있는 AmazonElasticFileSystemFullAccess 권한을 소유하고 있어야 합니다.
그럼 실습을 통해 AWS EKS에서 EFS를 사용해 보겠습니다.
1. EFS CSI 드라이버 설치
먼저 EKS가 EFS를 사용할 수 있도록 efs-csi-driver를 설치해주어야 합니다.
csi란 Container Storage Interface의 약자로 Container 환경에서 스토리지를 편리하게 활용하기 위한 드라이버입니다.
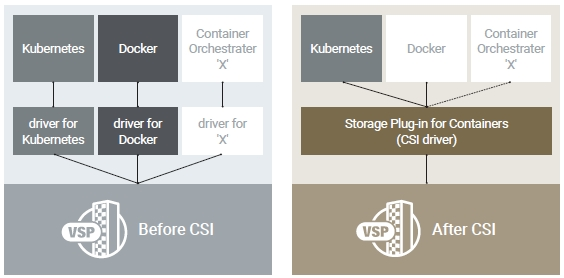
위의 그림과 같이 csi 도입 이전에는 각 플랫폼별로 별도의 드라이버를 필요로 했지만, csi를 통해 하나의 드라이버로 모든 플랫폼에서 편리하게 스토리지를 제어할 수 있게 되었습니다.
Kubernetes 패키지 매니저인 helm을 활용하여 aws-efs-csi-driver를 설치하겠습니다.
# helm 설치
$ curl https://raw.githubusercontent.com/helm/helm/master/scripts/get-helm-3 > get_helm.sh
$ chmod 700 get_helm.sh
$ ./get_helm.sh

# 아래 에러 발생시 vi get_helm.sh을 입력한 후
# 편집기에서 HELM_INSTALL_DIR을 $PATH와 일치하도록 변경
helm not found. Is /usr/local/bin on your $PATH?
Failed to install helm
        For support, go to https://github.com/helm/helm.


# helm에 aws-efs-csi-driver repository 추가
$ helm repo add aws-efs-csi-driver https://kubernetes-sigs.github.io/aws-efs-csi-driver/

# repository 업데이트
$ helm repo update

# 드라이버 설치
# https://docs.aws.amazon.com/ko_kr/eks/latest/userguide/add-ons-images.html
$ helm upgrade -i aws-efs-csi-driver aws-efs-csi-driver/aws-efs-csi-driver \
    --namespace kube-system \
    --set image.repository={위의 링크에서 리전별 값 확인}/eks/aws-efs-csi-driver \
    --set controller.serviceAccount.create=false \
    --set controller.serviceAccount.name=efs-csi-controller-sa
2. EFS 생성
다음으로는 EFS를 생성하고 Security Group과 Mount Target을 생성해주겠습니다.
해당 과정은 백서를 참고하여 CLI로 진행하였습니다.
# 1. EKS 클러스터의 vpc_id 값 조회
$ vpc_id=$(aws eks describe-cluster \
    --name {EKS 클러스터 명} \
    --query "cluster.resourcesVpcConfig.vpcId" \
    --output text)

# 2. EKS 클러스터가 속한 vpc의 network cidr 조회
$ cidr_range=$(aws ec2 describe-vpcs \
    --vpc-ids $vpc_id \
    --query "Vpcs[].CidrBlock" \
    --output text)

# 3. EFS의 보안그룹 생성
$ security_group_id=$(aws ec2 create-security-group \
    --group-name {보안그룹 명} \
    --description "{보안그룹 설명}" \
    --vpc-id $vpc_id \
    --output text)

# 4. 보안그룹에 인바운드 정책 추가
$ aws ec2 authorize-security-group-ingress \
    --group-id $security_group_id \
    --protocol tcp \
    --port 2049 \
    --cidr $cidr_range

# 5. EFS 생성
$ file_system_id=$(aws efs create-file-system \
    --region {region-code} \
    --performance-mode generalPurpose \
    --tag Key=Name,Value={EFS 이름} \
    --query 'FileSystemId' \
    --output text)
위의 과정은 EFS를 생성하는 과정입니다.
콘솔을 통해서도 동일하게 EFS를 생성할 수 있습니다.
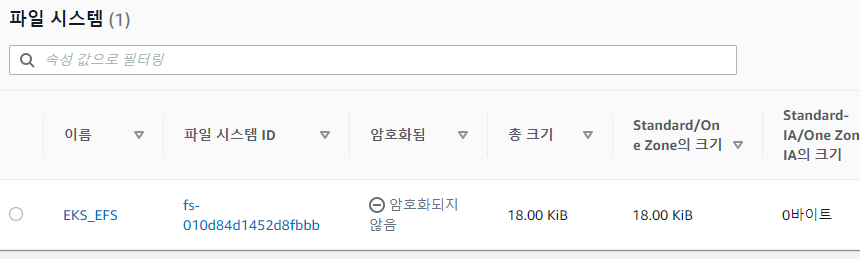
저는 위의 과정을 통해 EKS_EFS라는 EFS 스토리지를 생성하였습니다.
이제 해당 EFS를 사용할 수 있는 Subnet을 정하고, 그 Subnet에 Mount Target을 생성하겠습니다.
Mount Target을 생성하면 Subnet에 EFS에 접근할 수 있는 NFS Endpoint가 생성됩니다.
# 1. Subnet 목록 조회
$ aws ec2 describe-subnets \
    --filters "Name=vpc-id,Values=$vpc_id" \
    --query 'Subnets[*].{SubnetId: SubnetId,AvailabilityZone: AvailabilityZone,CidrBlock: CidrBlock}' \
    --output table

-----------------------------------------------------------------
|                        DescribeSubnets                        |
+-------------------+--------------+----------------------------+
| AvailabilityZone  |  CidrBlock   |         SubnetId           |
+-------------------+--------------+----------------------------+
|  us-east-1a       |  10.0.1.0/24 |  subnet-02b3471f1a9b0771b  |
|  us-east-1a       |  10.0.0.0/24 |  subnet-07513133bbf7ad433  |
|  us-east-1c       |  10.0.3.0/24 |  subnet-07fe6be8024f699c8  | << EKS가 Worker Node를 배포한 Subnet
|  us-east-1a       |  10.0.2.0/24 |  subnet-07d431c1b7c0e9ce1  | << EKS가 Worker Node를 배포한 Subnet
+-------------------+--------------+----------------------------+

# 2. 두 서브넷에 Mount Target을 생성하고 보안그룹 적용
$ aws efs create-mount-target \
    --file-system-id $file_system_id \
    --subnet-id subnet-07fe6be8024f699c8 \
    --security-groups $security_group_id

$ aws efs create-mount-target \
    --file-system-id $file_system_id \
    --subnet-id subnet-07d431c1b7c0e9ce1 \
    --security-groups $security_group_id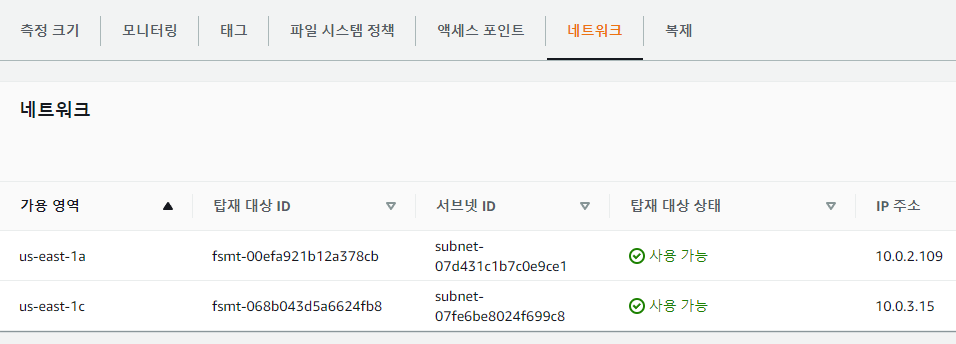
위의 과정을 완료하면 EFS의 네트워크 탭에서 Mount Target을 확인할 수 있습니다.
3. EKS 오브젝트 배포 및 테스트
그럼 이제 실제로 EKS가 EFS를 정상적으로 사용할 수 있는지 확인하겠습니다.
테스트는 AWS에서 제공해주는 샘플 yaml파일을 이용해 진행하겠습니다.
# 1. 샘플 repository remote 환경에 복사
$ git clone https://github.com/kubernetes-sigs/aws-efs-csi-driver.git

# 2. 경로 이동
$ cd aws-efs-csi-driver/examples/kubernetes/multiple_pods/

# 3. EFS id 검색
$ aws efs describe-file-systems --query "FileSystems[*].FileSystemId" --output text

fs-010d84d1452d8fbbb << EFS id값 복사

# 4. PV yaml 파일 수정
$ vi /specs/pv.yaml

apiVersion: v1
kind: PersistentVolume
metadata:
  name: efs-pv
spec:
  capacity:
    storage: 5Gi
  volumeMode: Filesystem
  accessModes:
    - ReadWriteMany
  persistentVolumeReclaimPolicy: Retain
  storageClassName: efs-sc
  csi:
    driver: efs.csi.aws.com
    volumeHandle: fs-010d84d1452d8fbbb << EFS id값 붙여넣기

# 5. storageclass, pv, pvc 배포
$ kubectl apply -f specs/pv.yaml
$ kubectl apply -f specs/claim.yaml
$ kubectl apply -f specs/storageclass.yaml

# 6. pod 배포
$ kubectl apply -f pod1.yaml
$ kubectl apply -f pod2.yaml

# 7. pod들이 EFS를 정상적으로 사용하고 있는지 pod에 마운트된 경로에서 확인
$ kubectl exec -ti app1 -- tail /data/out1.txt
$ kubectl exec -ti app2 -- tail /data/out1.txt
위의 과정을 통해 PV, PVC, Pod를 생성하고 실제로 EFS가 잘 활용되고 있는지 확인할 수 있습니다.
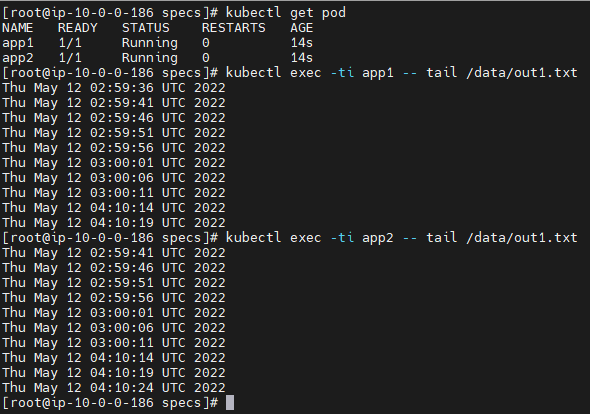
두개의 Pod에서 data를 조회했을 때 값이 일치하는 것을 확인할 수 있습니다.