오늘은 화면 내에 간단한 버튼을 구성해보는 과제를 기록하려고 한다.
앱 화면 내에 행과 열을 나누고, 그 안에 버튼으로 레이아웃을 구성할것이다.
내가 만들고자 했던 결과는!
👏
매우 간단해보이지만, 첫 코드 작성이엇기에
아예 처음 세팅되어 있는 카운터 예제 구조도 이해 못한 나로서는 살짝 어려웠다..
🌎 위젯으로 화면 그리기
우선, 행렬을 나누는 레이아웃 버튼을 구성하기 위해서는
아주 많은 방법들이 있지만.
body를 column으로 나누어 준 후, 해당 column에서 row를 구성해주는 방법을 사용했다.
플러터 문서에서 소개하는 가장 기본적인 위젯 목록은 다음과 같다.
- Container
- Column, Row
- Image
- Text
- Icon
- RaisedButton
- Scaffold
- AppBar
Scaffold는 flutter의 도화지(?) 와 같은 가장 베이스로 깔리는 화면이라고 한다.
이 위젯들 중에서, Scaffold내에 AppBar, Column, Row를 사용할 것이다.
📍Column : TextButton Children 구성하기
우선 4개의 column을 만들고, 6개의 버튼과 ads 버튼을 위한 하나의 넓고 얇은 버튼을 만들려고 한다.
그러기 위해서는 우선 4개의 column을 만들어야겠지?
Widget build(BuildContext context) {
return Scaffold(
appBar: AppBar(),
body: Column(children: [
Expanded(child: child),
Expanded(child: child),
Expanded(child: child),
Expanded(child: child)
],
)
);
}가득 찬 row를 만들고 싶어서 우선 expended 위젯을 추가해주었다.
이후 expended 내의 child로 TextButton을 넣어준다.
Widget build(BuildContext context) {
return Scaffold(
appBar: AppBar(),
body: Column(children: [
Expanded(child: Expanded(
child: TextButton(
onPressed: () {},
child: const Center(child: Text("button1"))))),
Expanded(child: Expanded(
child: TextButton(
onPressed: () {},
child: const Center(child: Text("button1"))))),
Expanded(child: Expanded(
child: TextButton(
onPressed: () {},
child: const Center(child: Text("button1"))))),
Expanded(child: Expanded(
child: TextButton(
onPressed: () {},
child: const Center(child: Text("button1")))))
],
)
);
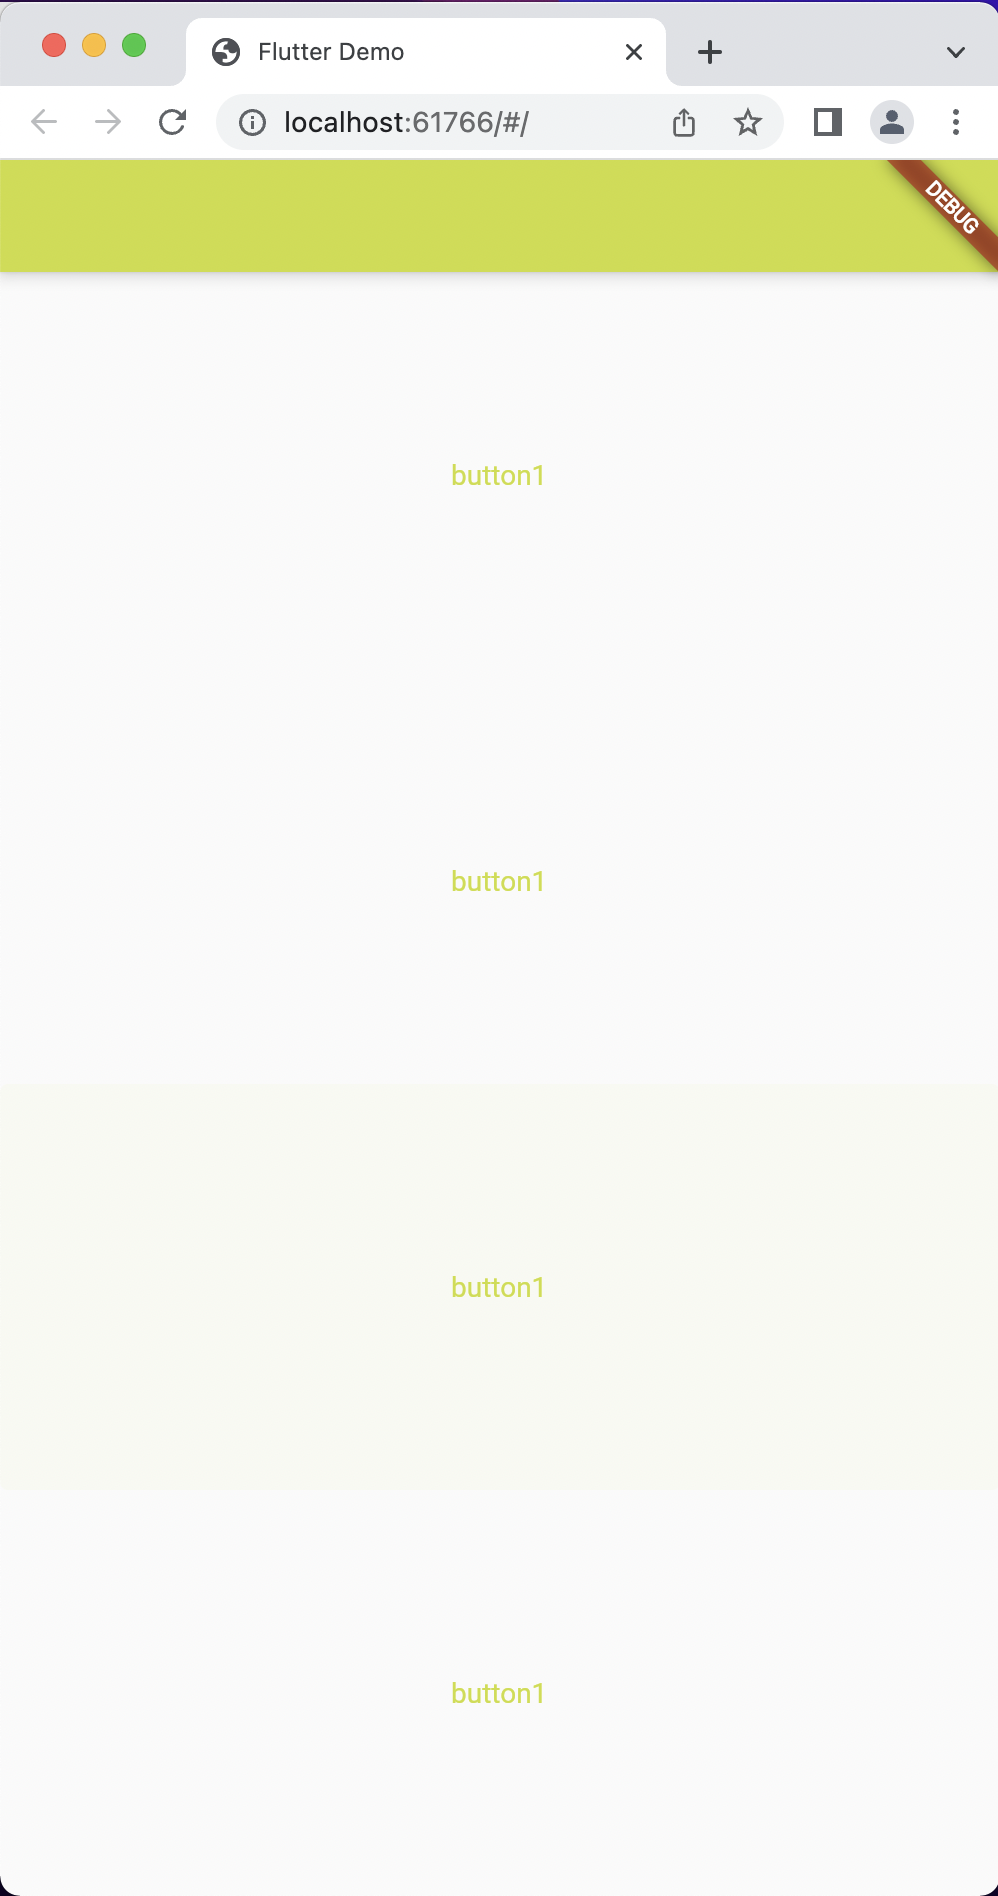
}이까지 하고, Run 시켜주면 다음과 같이 같은 너비의 column 4개가 그려진다.!
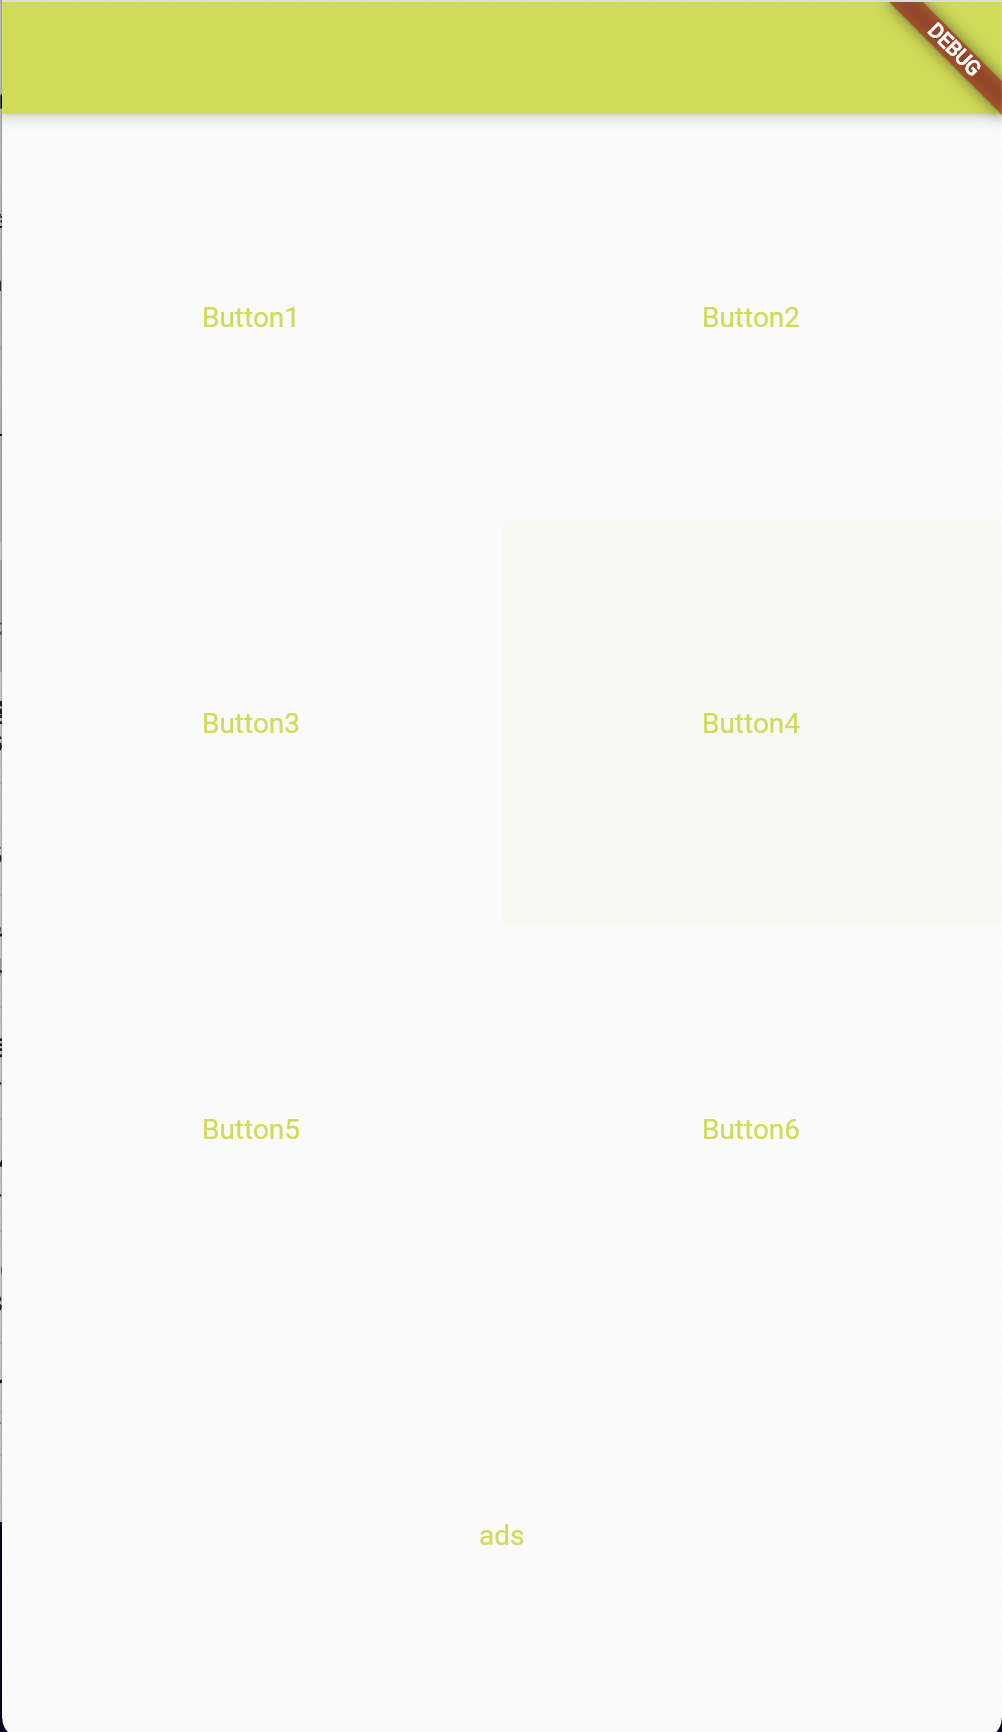
📍Row 위젯 삽입하기
Widget build(BuildContext context) {
return Scaffold(
appBar: AppBar(),
body: Column(children: [
Expanded(child: Row(children: [
Expanded(child: TextButton(
onPressed: () {},
child: const Center(child: Text("Button1")))),
Expanded(child: TextButton(
onPressed: () {},
child: const Center(child: Text("Button2"))))]
)),
Expanded(child: Row(children: [
Expanded(child: TextButton(
onPressed: () {},
child: const Center(child: Text("Button3")))),
Expanded(child: TextButton(
onPressed: () {},
child: const Center(child: Text("Button4"))))]
)),
Expanded(child: Row(children: [
Expanded(child: TextButton(
onPressed: () {},
child: const Center(child: Text("Button5")))),
Expanded(child: TextButton(
onPressed: () {},
child: const Center(child: Text("Button6"))))]
)),
Expanded(child: Expanded(child: TextButton(
onPressed: () {},
child: const Center(child: Text("ads"))
)))]
)
);
}
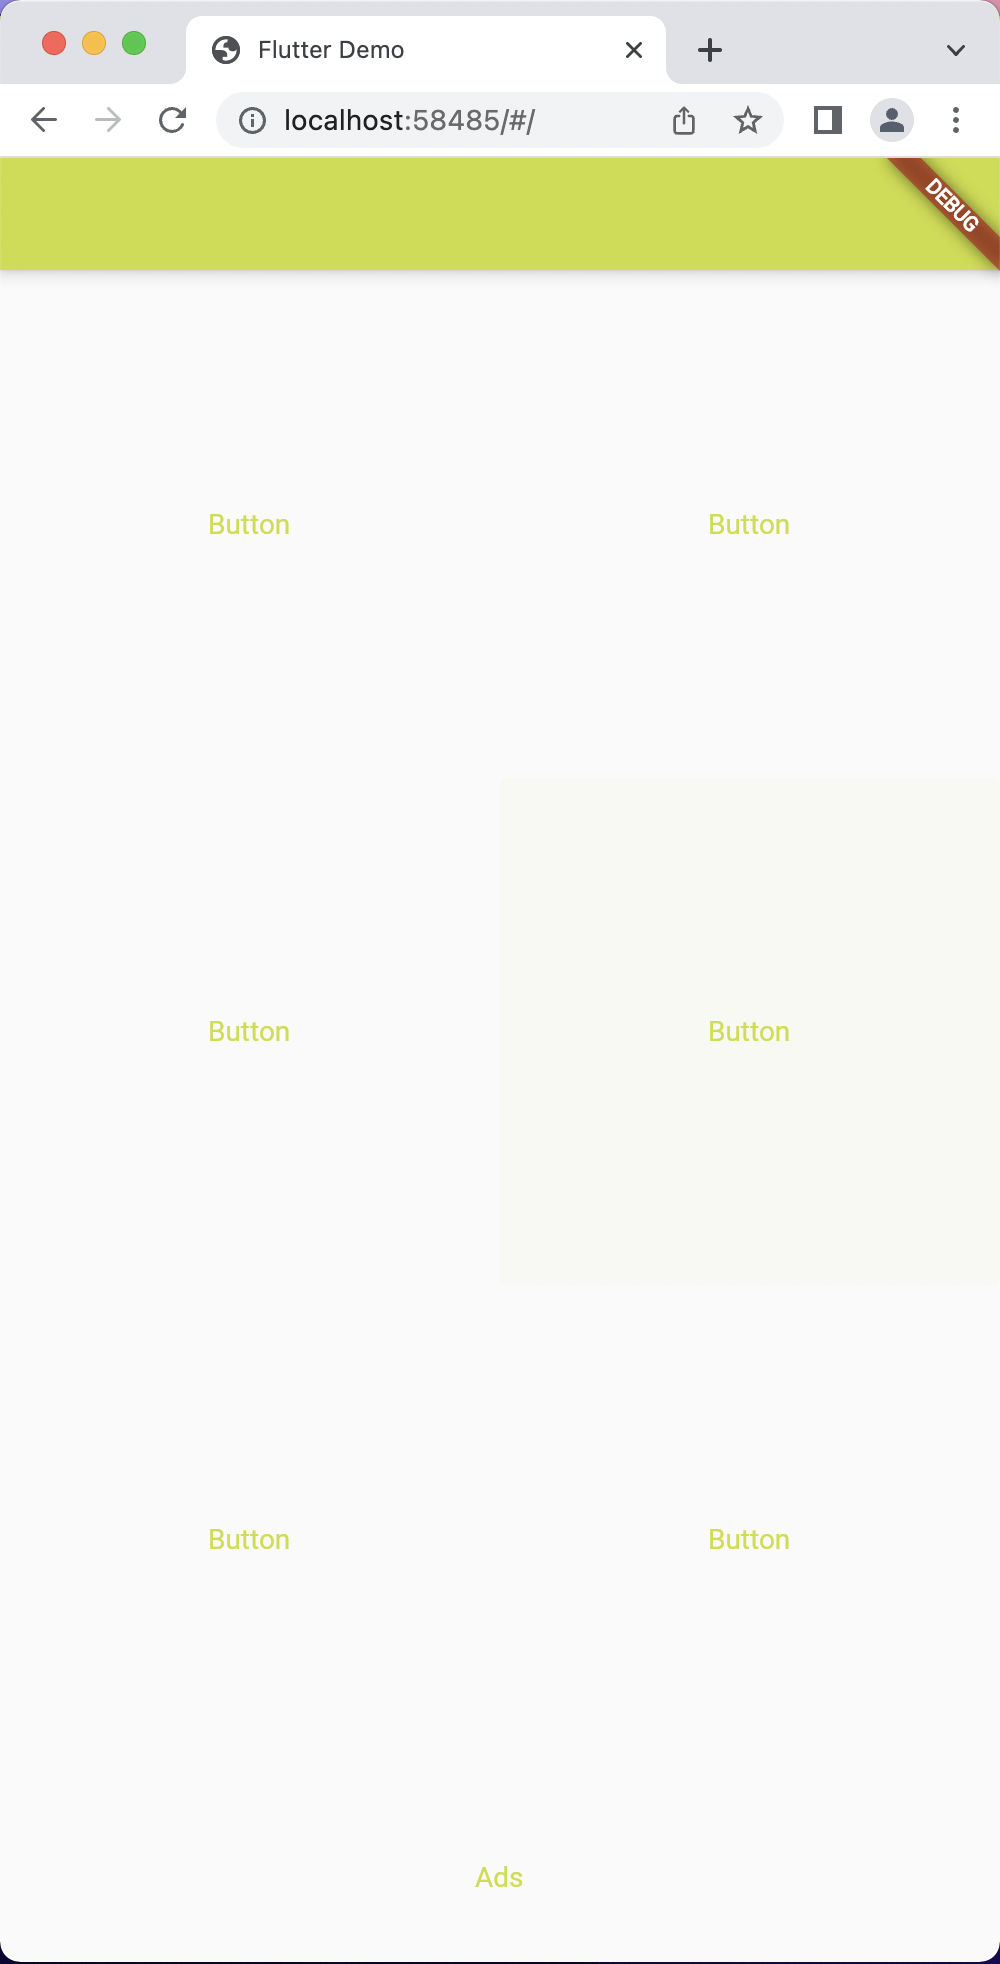
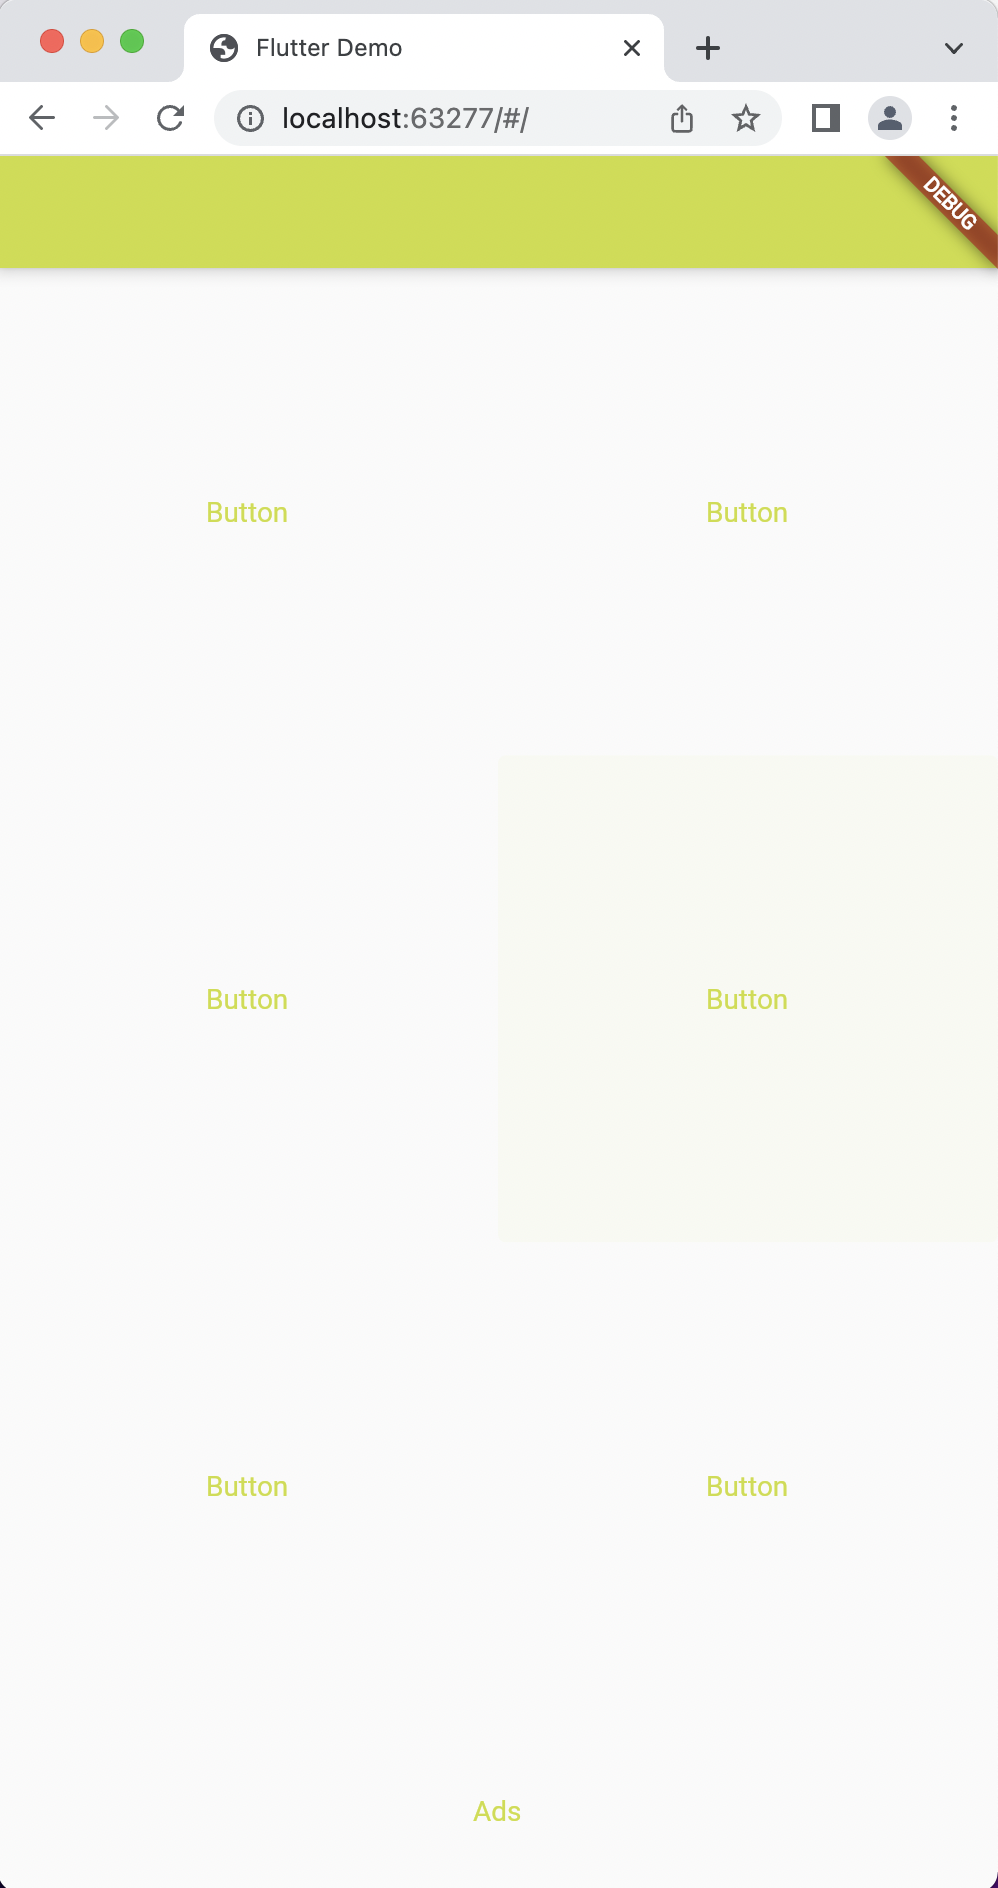
📍Column button 너비/비율 지정하기
마지막 column의 textbutton은 얇게 ad 자리로 설정하고 싶으니까,
3:3:3:1의 비율로 설정하기 위해 flex를 사용하여 column expended 안에 다음과 같이 설정해준다.
Widget build(BuildContext context) {
return Scaffold(
appBar: AppBar(),
body: Column(
children: [
Expanded(
child: Row(children: [
Expanded(child: TextButton(
onPressed: () {},
child: const Center(
child: Text("Button")))),
Expanded(child: TextButton(
onPressed: (){},
child: const Center(
child: Text("Button"))))
]),
flex: 3,
),
Expanded(
child: Row(children: [
Expanded(child: TextButton(
onPressed: () {},
child: const Center(
child: Text("Button")))),
Expanded(child: TextButton(
onPressed: (){},
child: const Center(
child: Text("Button"))))
]),
flex: 3,
),
Expanded(
child: Row(children: [
Expanded(child: TextButton(
onPressed: () {},
child: const Center(
child: Text("Button")))),
Expanded(child: TextButton(
onPressed: (){},
child: const Center(
child: Text("Button"))))
]),
flex: 3,
),
Expanded(
child: TextButton(
onPressed: () {},
child: const Center(
child: Text("Ads"))),
flex: 1,
)
],
)
);
}
이상 완성 ~~~
막상 해보니까 레이아웃 구성하는게, 재밌기도 했다. 근데 이제 동작 구현하고.. 함수가 들어가게 되면 얼마나 어려워질까 ..? ㅎㅎ
그리고, 백번 책보고 이론 확인하고 dart 문법 보고 하는 것 보다
이런식으로 한번 그림을 그려보는게 확실히 이해에 도움이 된다는 걸 알게 되었다..!
멘땅에 해딩 짱..! ⚽️