✅ AS and Attrs (태그 변경)
- 컴포넌트의 태그를 바꾸고 싶은데 스타일은 바꾸고 싶지 않을 떄 (컴포넌트를 확장하고 싶지 않고 그냥 뭔가를 추가할 계획이 없는..)
const Btn = styled.button`
color: white;
background-color: tomato;
border: 0
border-radius: 15px;
`
function App() {
return (
<Father>
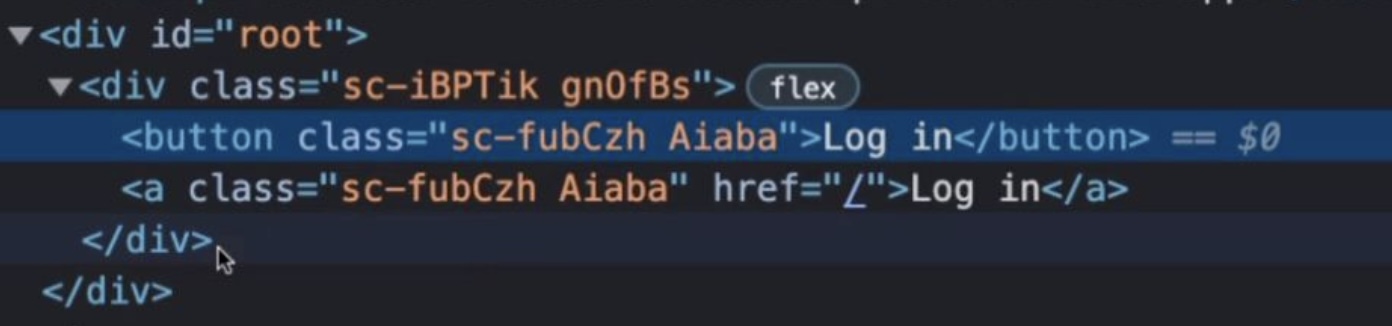
<Btn>Log in </Btn>
🚀 <Btn as="a" href="/">Log in</Btn> // 아래 캡쳐본을 보면 태그가 바뀐걸 알 수 있다.
</Father>
)
}
-
또한 원한다면 🚀 (위코드) 부분에서 HTML 태그의 속성을 설정할 수 있다는 것이다.
- 아래 캡쳐 부분의 속성(required)을 styled-components로 나타내 보자.
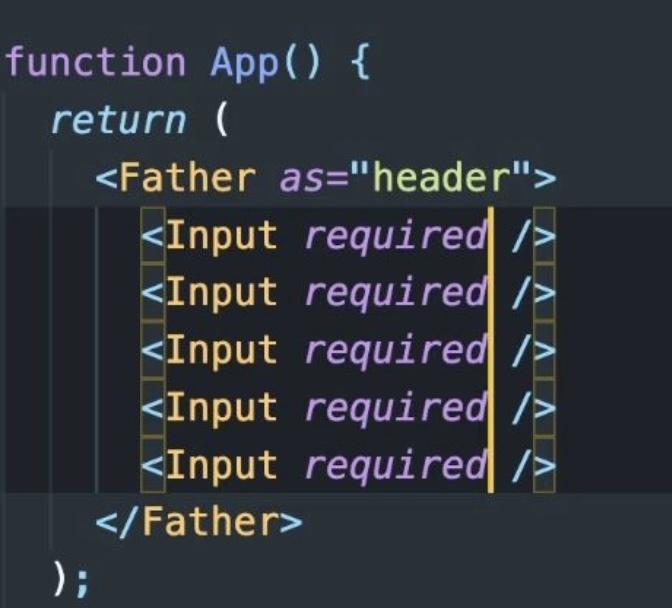
const input = styled.input.attrs({})`` -> {} 여기에 input으로 전달될 모든 속성을 가진 오브젝트를 담을 수 있다. const input = styled.input.attrs({ required: true, minLength: 10 })`` function App() { return ( <Father as="header"> <Input /> <Input /> <Input /> <Input /> ) } - 아래 캡쳐 부분의 속성(required)을 styled-components로 나타내 보자.

이제 콘솔을 열고 확인해보면 위의 캡쳐본 처럼 모든 input에 required가 할당된것을 알 수 있다.


의미없는 삽질은 없다1