아파치 및 php 버전 확인하기
아파치와 php가 이미 설치되어 있다면, 각각의 버전은 다음과 같은 명령어로 확인할 수 있다
$ apachectl -v
$ php -v
아파치 실행 및 그 외
$ sudo apachectl start
$ sudo apachectl stop
$ sudo apachectl restart
아파치 실행 확인
브라우저에 http://localhost 혹은 http://127.0.0.1 입력
It works!
이는 브라우저가 기본(default) index 페이지를 열었기 때문이다. 기본 index 페이지는 /Library/WebServer/Documents폴더에 index.html.en 파일이 존재하는데,
이는 default로 해당 폴더가 DocumentRoot로 지정되어 있기 때문이다
아파치 웹 서버 환경 설정
DocumentRoot 폴더 변경하기
앞에서 index.html.en 파일은 /Library/WebServer/Documents/ 폴더에 있다고 했는데, 이 폴더는 기본으로 DocumentRoot로 지정되어 있다
기본으로 지정된 DocumentRoot의 위치를 변경하려면 httpd.conf 파일을 열고
DocumentRoot 부분과 바로 밑 줄에 있는 Directory 부분을 변경하면 된다
DocumentRoot "/Library/WebServer/Documents"
<Directory "/Library/WebServer/Documents">
참고로 httpd.conf 파일을 수정하려면 파일을 관리자 권한으로 열어야 한다
다만, DocumentRoot를 변경하는 것은 그다지 추천할 만한 방법이 아니다
따라서 DocumentRoot를 바꾸기 보다는 userdir을 활성화하는 것이 바람직하다
userdir 활성화
httpd-userdir.conf 파일 수정하기
userdir를 활성화한다는 것은 이름에서 알 수 있듯이 브라우저에서
localhost/~username/ 처럼 자신의 계정으로 된 URL을 사용할 수 있게 한다는 의미이다
userdir을 활성화하려면,
/etc/apache2/extra/ 폴더에 있는 httpd-userdir.conf 파일을 수정해야 한다
우선 해당 폴더로 가서 아래와 같은 명령으로 파일을 편집한다
$ sudo vi httpd-userdir.conf
$ sudo vim httpd-userdir.conf
관리자 권한으로만 파일을 편집 가능
파일의 내용은 아래와 같다
...생략...

#
# Control access to UserDir directories.  The following is an example
# for a site where these directories are restricted to read-only.
#
Include /private/etc/apache2/users/*.conf
<IfModule bonjour_module>
      RegisterUserSite customized-users
</IfModule>
일단 이 파일에서 Include /private/etc/apache2/users/*.conf 문장의 주석(#)을 제거하고 저장한다.
httpd.conf 파일 수정하기
/etc/apache2/extra/httpd-userdir.conf에 주석으로
mod_authz_core, mod_authz_host, mod_userdir 이렇게 3개의 모듈이 필요하다하는 내용이 아래와 같이 있다
# Settings for user home directories
#
# Required module: mod_authz_core, mod_authz_host, mod_userdir
이는 httpd.conf 파일에서 LoadModule하는 설정의 주석을 제거해주면 된다
- LoadModule authz_host_module libexec/apache2/mod_authz_host.so
- LoadModule authz_core_module libexec/apache2/mod_authz_core.so
- LoadModule userdir_module libexec/apache2/mod_userdir.so
vim 명령어 중
/를 이용하여 해당 문구를 검색 해서 찾는다
httpd-userdir.conf 파일도 Include 해주기 위해 아래와 같이 주석을 제거한다
Include /private/etc/apache2/extra/httpd-userdir.conf
내 맥북에는 Include /private/etc/apache2/extra/httpd-userdir.conf이부분이 없어서 써주었었는데 적용이 되질 않았다, 되려 이부분을 다시 삭제 해주었더니 잘 작동 되었다
{username}.conf 파일 생성하기
Sites 디렉토리에 대한 접근 방식을 지정하기 위해 /private/etc/apache2/users 폴더에 {username}.conf 파일을 만든다
{username}는 사용자 계정이기에 본인 계정을 넣으면 된다.
<Directory "/Users/{username}/Sites/">
  Options Indexes MultiViews
  AllowOverride None
  Require all granted
</Directory>
권한 설정 부분은 아파치 서버 버전에 맞도록 작성해 준다, 위에는 2.4 버전에 맞게 설정되어있다
홈 디렉토리에 Sites 폴더 만들기
마지막으로 홈 디렉토리로 가서 Sites 폴더를 만든다
$ cd ~
$ mkdir Sites
맥의 파인더로 확인하면 자동으로 웹 사이트 폴더로 인식됨을 확인 할 수 있다.
이 폴더에 자신만의 index.html 파일을 만들면 첫 화면으로 나타나게 된다
index.html이 없으면 아파치에서 기본 제공되는 파일 index가 열린다
아파치 재시작하기
아파치의 설정을 변경했다면 아파치를 재시작해야 한다
$ sudo apachectl restart
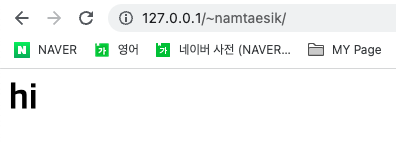
이제 localhost/~{username}으로 접속하면 Sites 폴더에 있는 index.html이 나타나는 것을 볼 수 있다.
PHP 웹 서버 환경 설정하기
아래 아파치 웹서버의 환경설정 파일(/etc/apache2/httpd.conf)에서 php5 모듈에 대한 주석(#)을 풀어주고, apache2를 기동하면 된다. (혹시 기동이 되어 있는 상태라면 재기동한다.)
169 LoadModule php5_module libexec/apache2/libphp5.so
이로써 php5 모듈을 로드하게 된다.
