[어? 이게 되네?? 팀] 일일회고
어려운 점
<MUI 커스터마이징>
- swith 버튼에 글자를 넣고 싶은데, mui 컴포넌트에 접근하는 법이 어렵다..
내가 생각한 방법
- 버튼 background-image에 글자 png를 넣어버리는 방법
- mui 안쓰고 직접 만들기..🥲
switch 버튼 코드
const RegisterBtn = ({ handleOpen, setOpen }) => {
  const IOSSwitch = styled((props) => (
    <Switch
      focusVisibleClassName=".Mui-focusVisible"
      disableRipple
      {...props}
    />
  ))(({ theme }) => ({
    width: 340,
    height: 60,
    padding: 0,
    "& .MuiSwitch-switchBase": {
      padding: 0,
      margin: 5,
      transitionDuration: "300ms",
      "&.Mui-checked": {
        transform: "translateX(200px)",
        color: "#fff",
        "& + .MuiSwitch-track": {
          backgroundColor:
            theme.palette.mode === "dark" ? "#2ECA45" : "#A98E64",
          opacity: 1,
          border: 0,
        },
        "&.Mui-disabled + .MuiSwitch-track": {
          opacity: 0.5,
        },
      },
      "&.Mui-focusVisible .MuiSwitch-thumb": {
        color: "#33cf4d",
        border: "6px solid #fff",
      },
      "&.Mui-disabled .MuiSwitch-thumb": {
        color:
          theme.palette.mode === "light"
            ? theme.palette.grey[100]
            : theme.palette.grey[600],
      },
      "&.Mui-disabled + .MuiSwitch-track": {
        opacity: theme.palette.mode === "light" ? 0.7 : 0.3,
      },
    },
    "& .MuiSwitch-thumb": {
      boxSizing: "border-box",
      width: 130,
      height: 50,
      borderRadius: 30 / 1,
    },
    "& .MuiSwitch-track": {
      borderRadius: 20 / 1,
      backgroundColor: theme.palette.mode === "light" ? "#E9E9EA" : "#39393D",
      opacity: 1,
      transition: theme.transitions.create(["background-color"], {
        duration: 500,
      }),
    },
  }));
  return (
    <FormControlLabel
      control={<IOSSwitch sx={{ m: 1 }} defaultChecked onChange={handleOpen} />}
    />
  );
};
해결책
- ::before를 사용해서 content에 글자를 넣어보자!
<refresh token 프론트 ver.>
front 코드
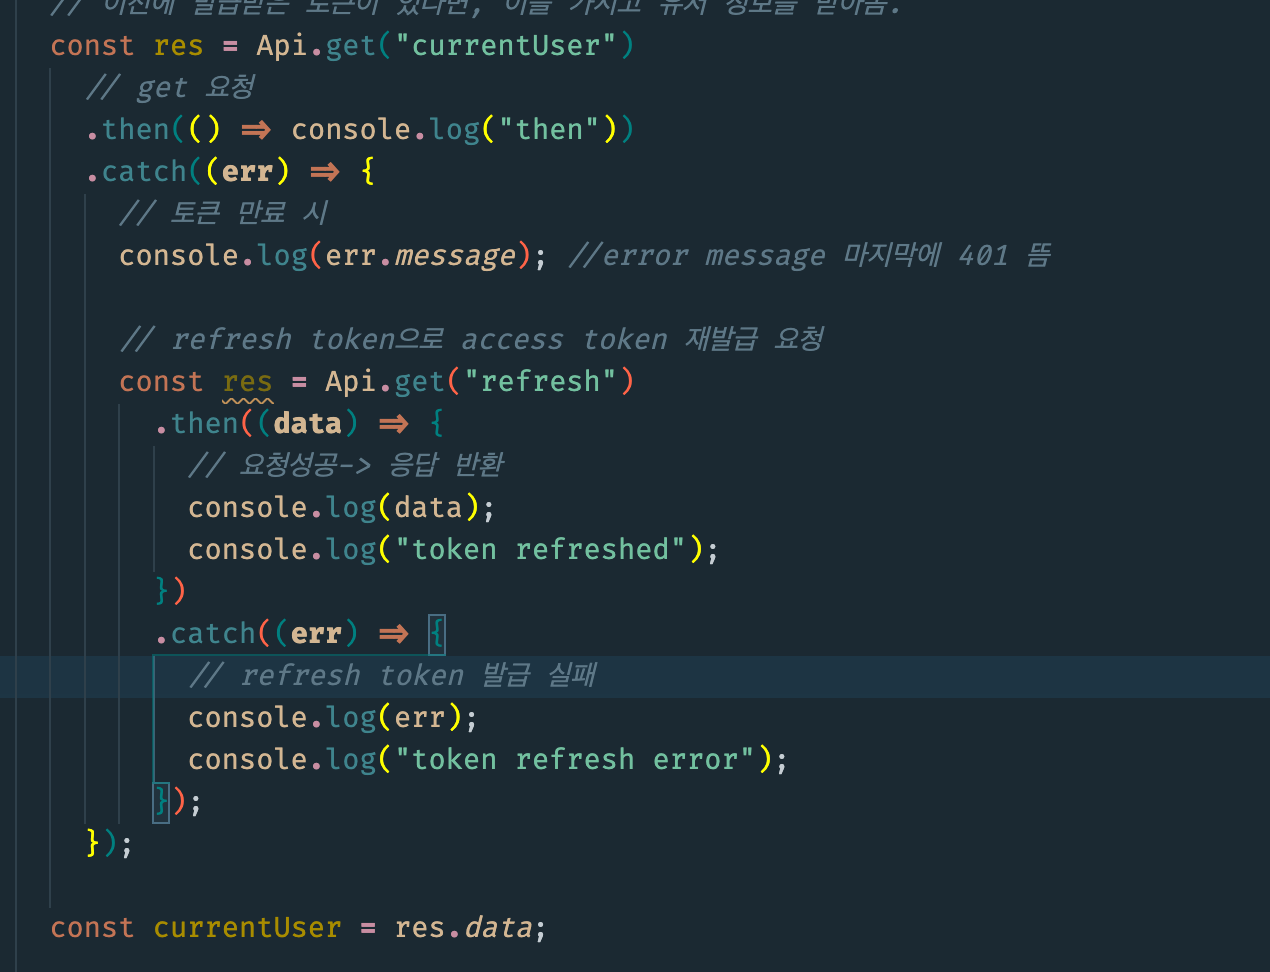
then 요청으로 에러 핸들링을 해줬다.
해결책
- interceptors 사용하기!
interceptors란?
axios interceptors는 then이나 catch로 처리되기 전에 요청(request)나 응답(response)을 가로채 어떠한 작업을 수행할 수 있게 한다.
즉,
axios
🔽
interceptor.req
🔽
back
🔽
interceptor.res
🔽
then
와 같은 순서로 이해하면 된다.
axios interceptors를 사용해서 리팩토링을 할 생각이다..
해야할 일
- home UI 구현하기..
- interceptors로 리팩토링
- mui 컴포넌트 수정

Connecting the dots