[12.28] 내일배움캠프[Spring] TIL-41
1.Spring Test
기본개념들
단위 테스트: 프로그램 작은 단위로 쪼개고, 쪼갠 부분 테스트하면서 뭐가 문제인지 찾아내는 것TDD ( Test-Driven-Development ):설계 -> 개발 -> 테스트에서설계 -> 테스트 -> 개발 순!Given - When - Then: Test코드를 작성하는 대표적인 방법론
Given - 준비
When - 실행
Then - 검증JUit: 자바 언어용 단위 테스트 프레임워크
- JUnit 설정
dependencies {
    testImplementation 'org.springframework.boot:spring-boot-starter-test'
}

test {
    useJUnitPlatform()
}
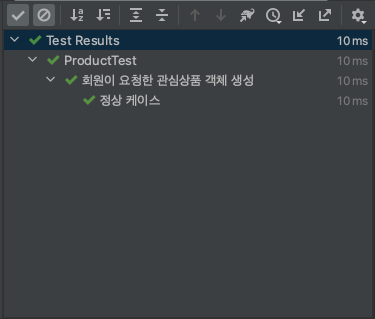
- SelectShop -> (Entity) Product Test Code 정상케이스
class ProductTest {

    @Nested // Test코드 잘 작성했을 때 확인해볼 것 약간 들여쓰기처럼 어디 안에 무슨 케이스가 있는지 볼 수 있게 해주는 것 같음
    @DisplayName("회원이 요청한 관심상품 객체 생성")
    class CreateUserProduct {

        private Long userId;
        private String title;
        private String image;
        private String link;
        private int lprice;

        @BeforeEach // 테스트할 때 필요한 부분을 미리 준다라고 생각
        void setup() {
            userId = 100L;
            title = "오리온 꼬북칩 초코츄러스맛 160g";
            image = "https://shopping-phinf.pstatic.net/main_2416122/24161228524.20200915151118.jpg";
            link = "https://search.shopping.naver.com/gate.nhn?id=24161228524";
            lprice = 2350;
        }

        @Test
        @DisplayName("정상 케이스")
        void createProduct_Normal() {
            // given
            ProductRequestDto requestDto = new ProductRequestDto(
                    title,
                    image,
                    link,
                    lprice
            );

            // when
            Product product = new Product(requestDto, userId);

            // then
            assertNull(product.getId());
            assertEquals(userId, product.getUserId());
            assertEquals(title, product.getTitle());
            assertEquals(image, product.getImage());
            assertEquals(link, product.getLink());
            assertEquals(lprice, product.getLprice());
            assertEquals(0, product.getMyprice());
        }
- SelectShop -> (Entity) Product Test Code 예외 케이스
(UserId = Null)
 @Nested
 @DisplayName("실패 케이스")
        class FailCases {

            @Nested
            @DisplayName("회원 Id")
            class userId {
                @Test
                @DisplayName("null")
                void fail1() {
                    // given
                    userId = null;

                    ProductRequestDto requestDto = new ProductRequestDto(
                            title,
                            image,
                            link,
                            lprice
                    );

                    // when
                    Exception exception = assertThrows(IllegalArgumentException.class, () -> {
                        new Product(requestDto, userId);
                    });

                    // then
                    assertEquals("회원 Id 가 유효하지 않습니다.", exception.getMessage());
                }
- Exception을 맞추기 위해서 ProductEntity에도 맞춰서 추가해줘야함
- Product
 public Product(ProductRequestDto requestDto, Long userId) {
        // 입력값 Validation
        if (userId == null || userId <= 0) {
            throw new IllegalArgumentException("회원 Id 가 유효하지 않습니다.");
        }

        if (requestDto.getTitle() == null || requestDto.getTitle().isEmpty()) {
            throw new IllegalArgumentException("저장할 수 있는 상품명이 없습니다.");
        }

        if (!isValidUrl(requestDto.getImage())) {
            throw new IllegalArgumentException("상품 이미지 URL 포맷이 맞지 않습니다.");
        }


        if (!isValidUrl(requestDto.getLink())) {
            throw new IllegalArgumentException("상품 최저가 페이지 URL 포맷이 맞지 않습니다.");
        }

        if (requestDto.getLprice() <= 0) {
            throw new IllegalArgumentException("상품 최저가가 0 이하입니다.");
        }

        // 관심상품을 등록한 회원 Id 저장
        this.userId = userId;
        this.title = requestDto.getTitle();
        this.image = requestDto.getImage();
        this.link = requestDto.getLink();
        this.lprice = requestDto.getLprice();
        this.myprice = 0;
    }
- 위에서 우리가 Test 해본 것은 우리가 만들어준 Product객체가 잘 만들어지냐를 테스트 하는 것
- 실제로 테스트할 때 Product만 해도 테스트 할 것을 나눠 보자면
1) UserId 가 Null이라면?
2) UserId 가 마이너스라면?
3) title이 Null이라면?
4) title이 빈 문자열이라면?
5) link가 Null이라면?
6) link가 URL형식이 아니라면?
7) lprice가 마이너스라면?
8) lprice가 정해진 최소값보다 작다면?- 등등.. 아주 많은 TestCase가 존재한다.
Test 진행 시 누구의 오류인지 파악할 수 없는 Case
- 만약 Servcie로직을 Test한다고 가정하자.
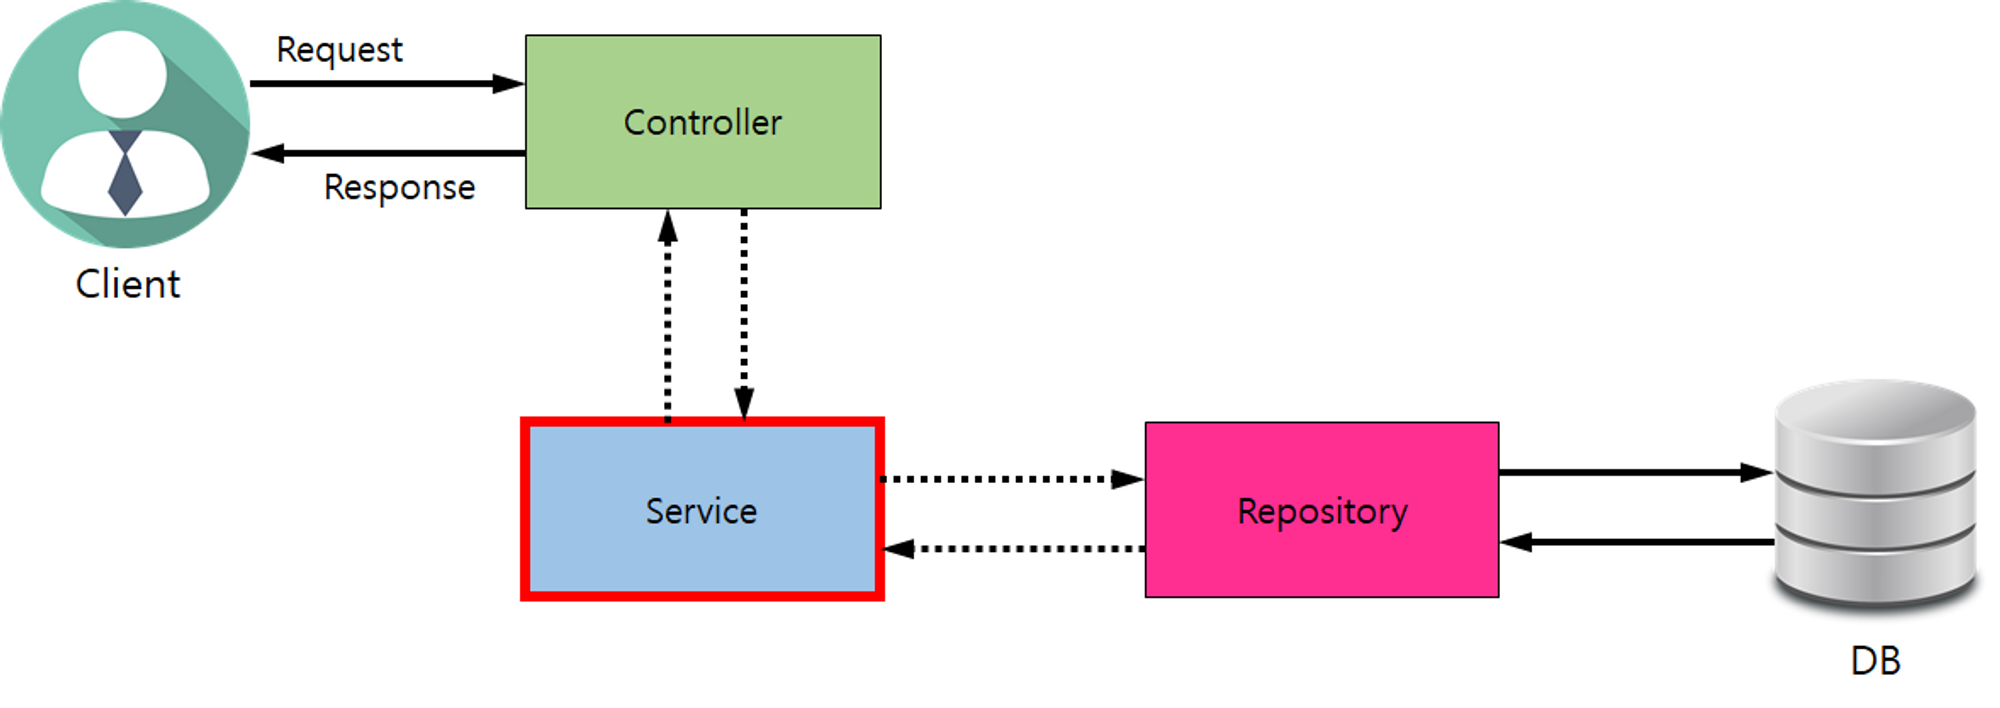
Service는 보통Controller와Repository에 의존하므로 만약Service Test Code의 오류 발생시Controller의 문제인지Service의 문제인지,Repository의 문제인지 파악하기 어렵다...- 만약
가격이 최소가 이상이 되어야한다!로직을 Test한다고 했을 때, 실직적인 로직은Service에 있지만 그럼 누구를 Test코드로 작성해야 하는건가..?
Mock
- 이러한 문제를 해결하기 위해 등장한 가짜 객체
- 실제 DB작업은 하지 않는다.
- 클레스명과 함수명은 동일하다.
Mockito

- Mock 객체를 생성하고 관리하기 편한 것
- 의존성 추가 :
testImplementation 'org.mockito:mockito-core:4.8.0'
testImplementation 'org.mockito:mockito-junit-jupiter:4.8.0'
Mockito사용하여 Mock객체 Respository, User 생성하고 Test하기
package com.sparta.myselectshop.service;


import com.sparta.myselectshop.dto.ProductMypriceRequestDto;
import com.sparta.myselectshop.dto.ProductRequestDto;
import com.sparta.myselectshop.entity.Product;
import com.sparta.myselectshop.entity.User;
import com.sparta.myselectshop.repository.ProductRepository;
import org.junit.jupiter.api.DisplayName;
import org.junit.jupiter.api.Test;
import org.junit.jupiter.api.extension.ExtendWith;
import org.mockito.InjectMocks;
import org.mockito.Mock;
import org.mockito.junit.jupiter.MockitoExtension;

import java.util.Optional;


import static com.sparta.myselectshop.service.ProductService.MIN_MY_PRICE;
import static org.junit.jupiter.api.Assertions.*;
import static org.mockito.Mockito.when;

@ExtendWith(MockitoExtension.class)
class ProductServiceTest {
    @Mock //  (1)
    ProductRepository productRepository;

    @InjectMocks //  (2) // Mock 객체를 InjectMocks에 주입시킨다.
    ProductService productService;

    @Mock
    User user;


    @Test
    @DisplayName("관심 상품 희망가 - 최저가 이상으로 변경")
    void updateProduct_Success() {
        // given
        Long productId = 100L;
        int myprice = MIN_MY_PRICE + 100;
        Long userId = 777L;

        ProductMypriceRequestDto requestMyPriceDto = new ProductMypriceRequestDto(
                myprice
        );


        ProductRequestDto requestProductDto = new ProductRequestDto(
                "오리온 꼬북칩 초코츄러스맛 160g",
                "https://shopping-phinf.pstatic.net/main_2416122/24161228524.20200915151118.jpg",
                "https://search.shopping.naver.com/gate.nhn?id=24161228524",
                2350
        );

        Product product = new Product(requestProductDto, userId);

        //  (3)
        when(user.getId())
                .thenReturn(userId);
        when(productRepository.findByIdAndUserId(productId, userId))
                .thenReturn(Optional.of(product));


        // when, then
        assertDoesNotThrow( () -> {
            productService.updateProduct(productId, requestMyPriceDto, user);
        });
    }

    @Test
    @DisplayName("관심 상품 희망가 - 최저가 미만으로 변경")
    void updateProduct_Failed() {
        // given
        Long productId = 100L;
        int myprice = MIN_MY_PRICE - 50;

        ProductMypriceRequestDto requestMyPriceDto = new ProductMypriceRequestDto(
                myprice
        );

        // when
        Exception exception = assertThrows(IllegalArgumentException.class, () -> {
            Long result = productService.updateProduct(productId, requestMyPriceDto, user);
        });

        // then
        assertEquals(
                "유효하지 않은 관심 가격입니다. 최소 " + MIN_MY_PRICE + " 원 이상으로 설정해 주세요.",
                exception.getMessage()
        );
    }
}
2. AOP(Aspect Oriented Programming)
- 우리가 프로젝트 때 생성 날짜와 시간, 수정 날짜와 시간을 자동으로 생성해주던 TimeStamp
@Getter
@MappedSuperclass
@EntityListeners(AuditingEntityListener.class)
public class Timestamped {

    @CreatedDate
    @Column(updatable = false)
    private LocalDateTime createdAt;

    @LastModifiedDate
    @Column
    private LocalDateTime modifiedAt;
}
- 만약
createdAt,modifiedAt을 500개의entity에 넣어줘야 한다고 했을 때, 끔찍...!
AOP개념
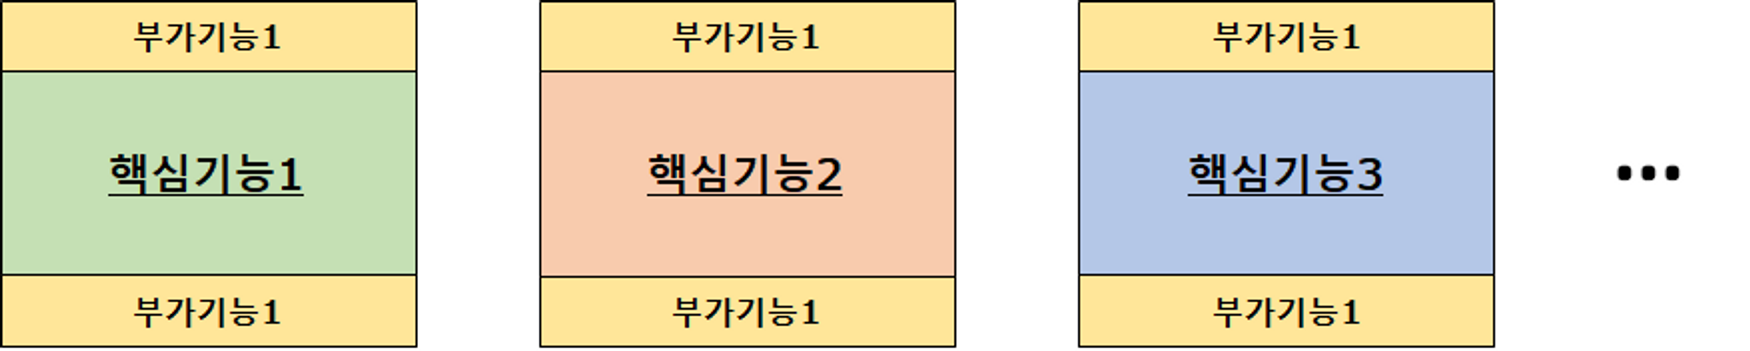
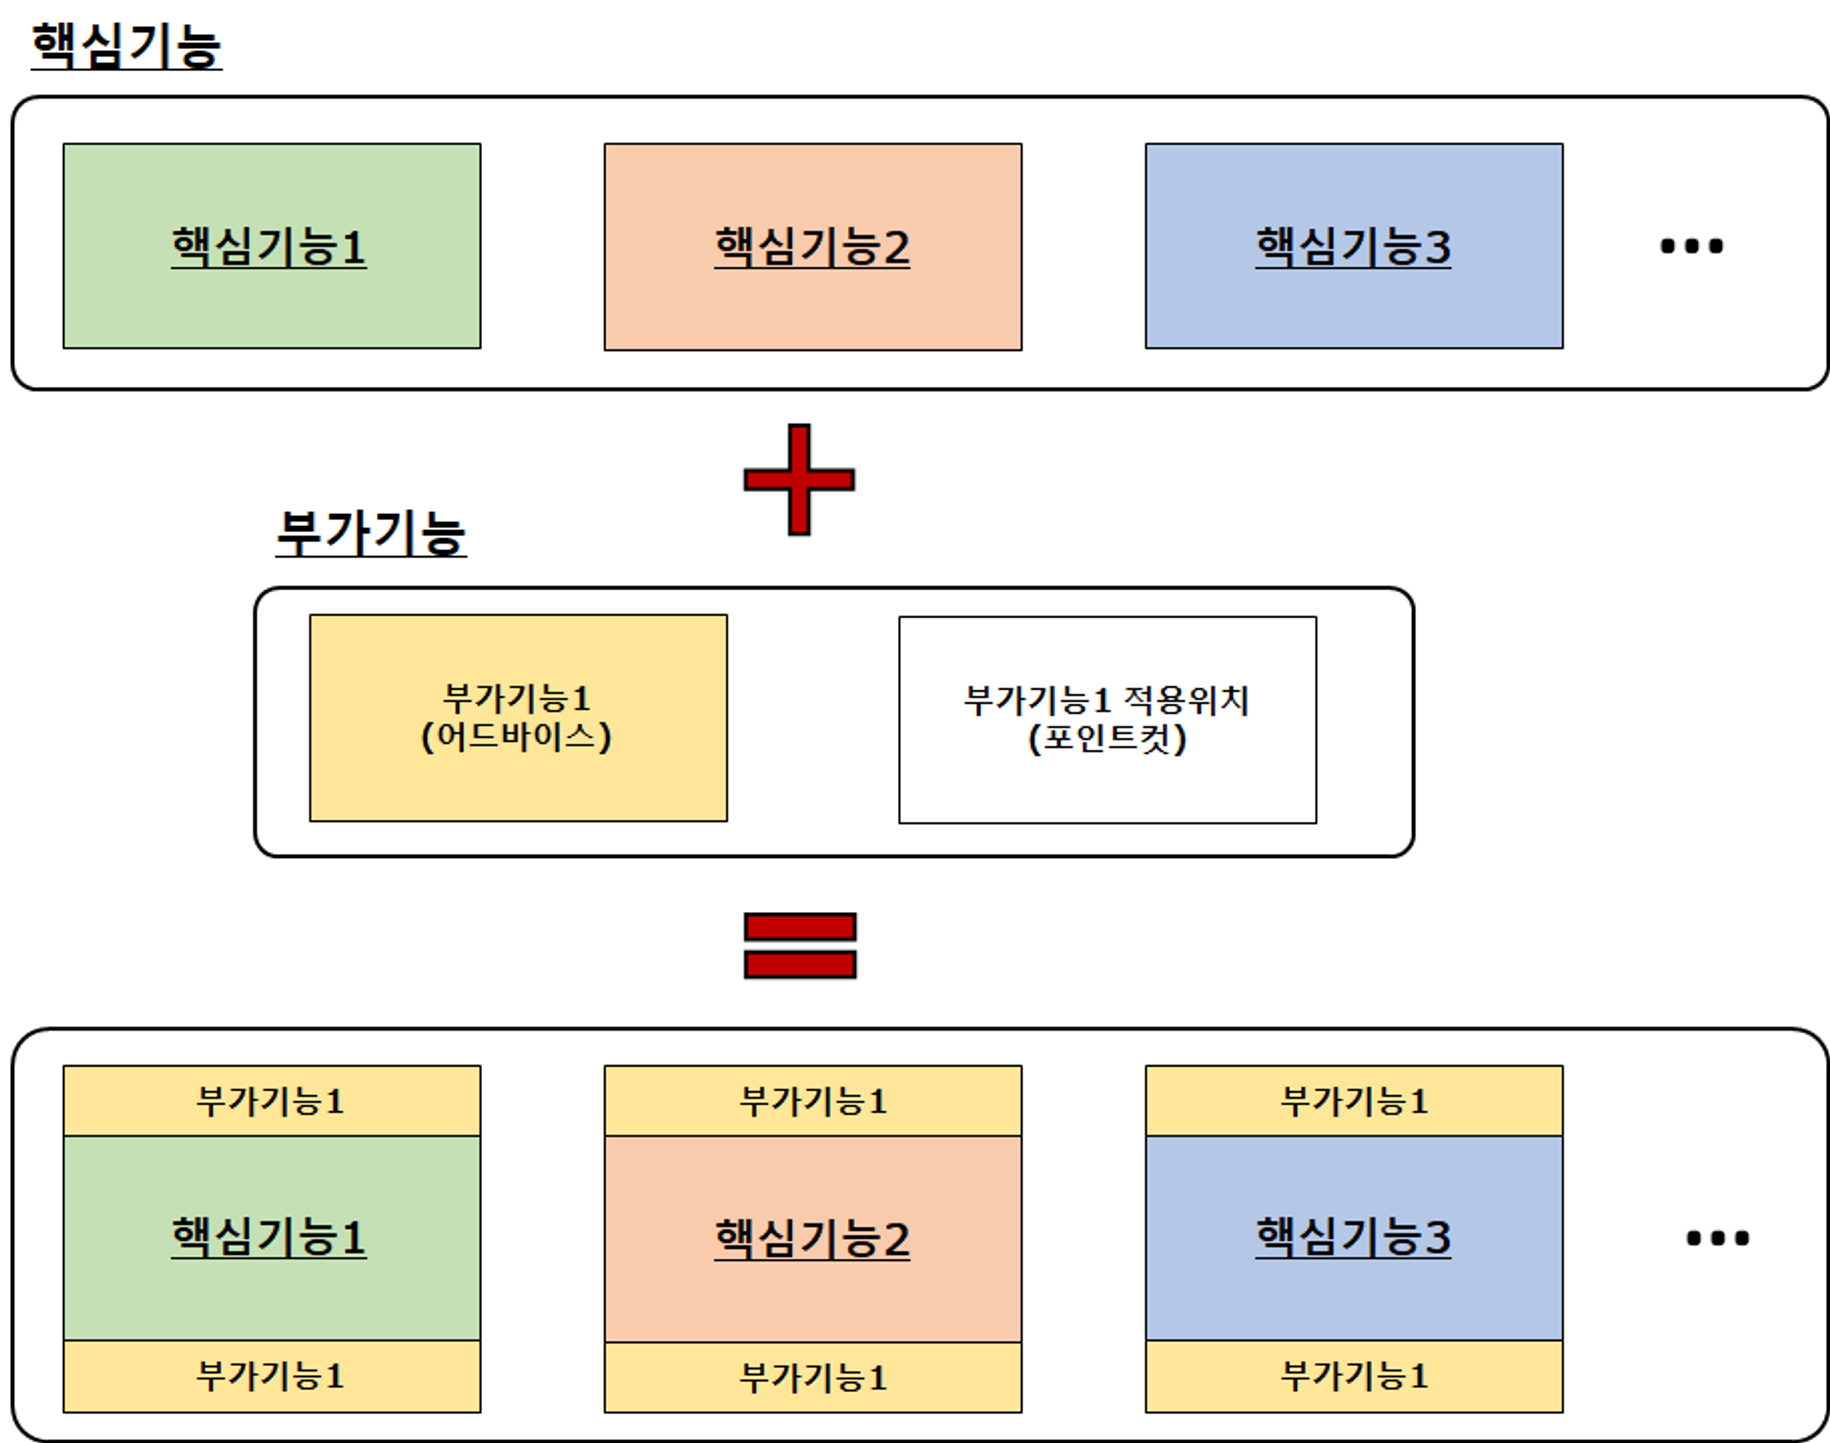
- 우리가 작성한 핵심로직( 회원가입, 로그인 , 상품추가 등... )

- 부가기능 : 핵심 기능을 보조하는 역할( 회원들은 행동패턴 로그 기록, API사용 시간 구하기 ...)
SelectShop Project에 부가기능 적용하기
- 이용시간이 많은 TOP5 를 추리려고 한다.
->기능 종료시간 - 기능 시작시간=Controller에서 응답 나간시간 - 요청 들어온 시간
- Scratch 파일 작성
class Scratch {
    public static void main(String[] args) {
        // 측정 시작 시간
        long startTime = System.currentTimeMillis();

        // 함수 수행
        long output = sumFromOneTo(1_000_000_000);

        // 측정 종료 시간
        long endTime = System.currentTimeMillis();

        long runTime = endTime - startTime;
        System.out.println("소요시간: " + runTime);
    }

    private static long sumFromOneTo(long input) {
        long output = 0;

        for (int i = 1; i < input; ++i) {
            output = output + i;
        }

        return output;
    }
}
- User의 이용시간을 저장하기 위한 Entity생성
ApiUserTime
package com.sparta.myselectshop.entity;

import lombok.Getter;
import lombok.NoArgsConstructor;

import javax.persistence.*;

@Getter
@Entity
@NoArgsConstructor
public class ApiUseTime {
    // ID가 자동으로 생성 및 증가합니다.
    @GeneratedValue(strategy = GenerationType.AUTO)
    @Id
    private Long id;

    @OneToOne
    @JoinColumn(name = "USER_ID", nullable = false)
    private User user;

    @Column(nullable = false)
    private Long totalTime;

    public ApiUseTime(User user, long totalTime) {
        this.user = user;
        this.totalTime = totalTime;
    }

    public void addUseTime(long useTime) {
        this.totalTime += useTime;
    }
}
ApiUseTimeRepository
package com.sparta.myselectshop.repository;

import com.sparta.myselectshop.entity.ApiUseTime;
import com.sparta.myselectshop.entity.User;
import org.springframework.data.jpa.repository.JpaRepository;

import java.util.Optional;

public interface ApiUseTimeRepository extends JpaRepository<ApiUseTime, Long> {
    Optional<ApiUseTime> findByUser(User user);
}
ProductController ( 관심 상품 추가할 때만 일단 적용 된 부분 )
public class ProductController {

    private final ProductService productService;
    private final ApiUseTimeRepository apiUseTimeRepository;

    // 관심 상품 등록하기
    //@Secured(UserRoleEnum.Authority.ADMIN)
    @PostMapping("/products")
    public ProductResponseDto createProduct(@RequestBody ProductRequestDto requestDto, @AuthenticationPrincipal UserDetailsImpl userDetails) {
        // 측정 시작 시간
        long startTime = System.currentTimeMillis();
        try {
            return productService.createProduct(requestDto, userDetails.getUser());
        } finally {
            // 측정 종료 시간
            long endTime = System.currentTimeMillis();
            // 수행시간 = 종료 시간 - 시작 시간
            long runTime = endTime - startTime;

            // 로그인 회원 정보
            User loginUser = userDetails.getUser();

            // API 사용시간 및 DB 에 기록
            ApiUseTime apiUseTime = apiUseTimeRepository.findByUser(loginUser)
                    .orElse(null);
            if (apiUseTime == null) {
                // 로그인 회원의 기록이 없으면
                apiUseTime = new ApiUseTime(loginUser, runTime);
            } else {
                // 로그인 회원의 기록이 이미 있으면
                apiUseTime.addUseTime(runTime);
            }

            log.info("[API Use Time] Username: " + loginUser.getUsername() + ", Total Time: " + apiUseTime.getTotalTime() + " ms");
            apiUseTimeRepository.save(apiUseTime);
        }
    }
- 여기서는 현재 관심상품을 추가할 때 API수행 시간을 구하는 로직에만 API사용시간을 구하는 부가 기능이 들어가 있다.
- 하지만 우리가 원하는건 전체 API를 이용하는 시간이 필요하다.
- 그럼 핵심 기능을 담당하는 로직에 전부
Try~Finally코드가 중복으로 들어가야 한다는 소리..!
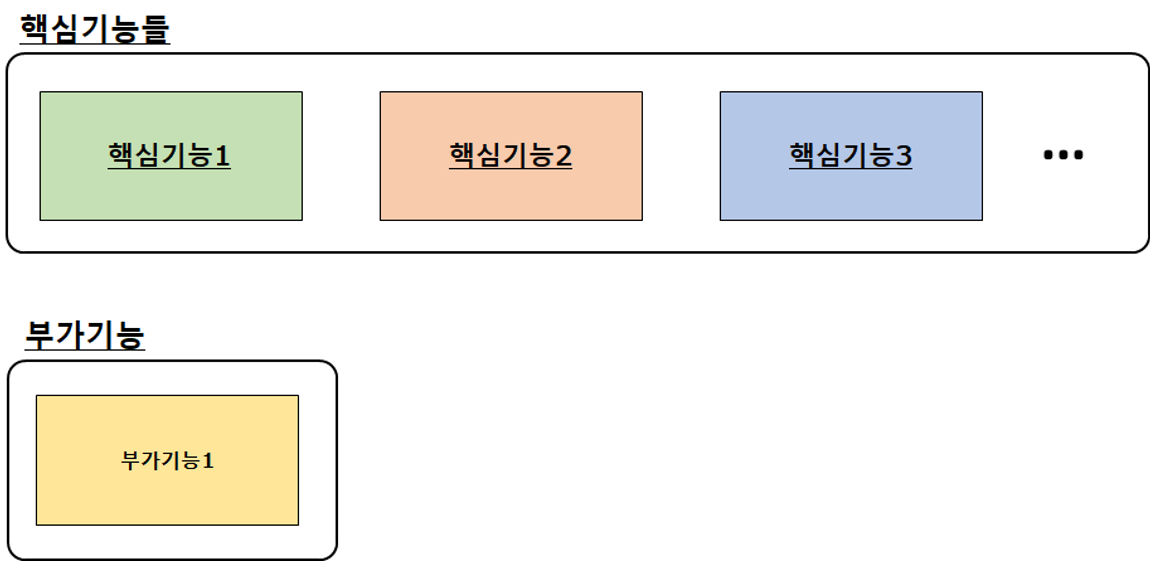
AOP의 모듈화
부가기능과핵심기능은 관점(Aspect)이 다르다.- 따라서
부가기능은핵심기능과 분리하여부가기능중심의 개발 구현 가능
- Spring이 제공하는 AOP
- 일단 아까 관심 상품 추가하기에 넣어줬던 API사용시간 로직을 제거하자!..
- 그리고 그 로직을 AOP로 만들자 = 부가기능을 모듈화하여 필요한 부분에 적용하자라는 말!!!
API 이용시간 구하는 AOP예제 코드
 package com.sparta.myselectshop.aop;

import com.sparta.myselectshop.entity.ApiUseTime;
import com.sparta.myselectshop.entity.User;
import com.sparta.myselectshop.repository.ApiUseTimeRepository;
import com.sparta.myselectshop.security.UserDetailsImpl;
import lombok.RequiredArgsConstructor;
import lombok.Synchronized;
import lombok.extern.slf4j.Slf4j;
import org.aspectj.lang.ProceedingJoinPoint;
import org.aspectj.lang.annotation.Around;
import org.aspectj.lang.annotation.Aspect;
import org.springframework.security.core.Authentication;
import org.springframework.security.core.context.SecurityContextHolder;
import org.springframework.stereotype.Component;


@Slf4j
@Aspect
@Component
@RequiredArgsConstructor
public class UseTimeAop {

    private final ApiUseTimeRepository apiUseTimeRepository;

    @Around("execution(public * com.sparta.myselectshop.controller..*(..))")
    public synchronized Object execute(ProceedingJoinPoint joinPoint) throws Throwable {
        // 측정 시작 시간
        long startTime = System.currentTimeMillis();

        try {
            // 핵심기능 수행
            Object output = joinPoint.proceed();
            return output;
        } finally {
            // 측정 종료 시간
            long endTime = System.currentTimeMillis();
            // 수행시간 = 종료 시간 - 시작 시간
            long runTime = endTime - startTime;

            // 로그인 회원이 없는 경우, 수행시간 기록하지 않음
            Authentication auth = SecurityContextHolder.getContext().getAuthentication();

            if (auth != null && auth.getPrincipal().getClass() == UserDetailsImpl.class) {
                // 로그인 회원 정보
                UserDetailsImpl userDetails = (UserDetailsImpl) auth.getPrincipal();
                User loginUser = userDetails.getUser();

                // API 사용시간 및 DB 에 기록
                ApiUseTime apiUseTime = apiUseTimeRepository.findByUser(loginUser)
                        .orElse(null);
                if (apiUseTime == null) {
                    // 로그인 회원의 기록이 없으면
                    apiUseTime = new ApiUseTime(loginUser, runTime);
                } else {
                    // 로그인 회원의 기록이 이미 있으면
                    apiUseTime.addUseTime(runTime);
                }

                log.info("[API Use Time] Username: " + loginUser.getUsername() + ", Total Time: " + apiUseTime.getTotalTime() + " ms");
                apiUseTimeRepository.save(apiUseTime);

            }
        }
    }
}
- 이제 AOP를 하나씩 보도록 하자.
@Aspect: AOP를 등록하는 부분이며, 빈의 경우에만 AOP등록이 가능하다..!!@Around(): 핵심기능 수행전과 후!!!!@Before: 핵심기능 수행전!!!!@After: 핵심기능 수행후!!!!@AfterReturing: 핵심기능 호출 성공시( 함수의 return ) 값 사용가능@AfterThrowing: '핵심기능' 호출 실패 시. 즉, 예외 (Exception) 가 발생한 경우만 동작 (ex. 예외가 발생했을 때 개발자에게 email 이나 SMS 보냄)
@Around("execution(public * com.sparta.myselectshop.controller..*(..))")
-> 저 경로에 있는 패키지의 모든 클래스에 적용한다는 뜻
..*: 해당 패키지의 모든 클래스에 적용..: 해당 패키지 및 하위 클래스까지 적용- (com.sparta.springcore.dto.FolderRequestDto) -> FolderRequestDto 인수 (arguments) 만 적용
- () - 인수 없음
- (*) - 인수 1개 (타입 상관없음)
- (..) - 인수 0~N개 (타입 상관없음)

기록하는 습관