프로젝트 생성
사전 준비물
- JAVA 11 설치
- IDE: IntelliJ 또는 Eclipse 설치
스프링부트 스타터 페이지로 가서 스프링 프로젝트 생성

Spring Boot 3.0.1을 하면 빌드에서 오류가 나서 2.7.7로 하니 문제없이 빌드되었다.
GENERATE 버튼을 눌러 다운로드 후 프로젝트 폴더 안의 build.gradle 파일로 open 한다. (build.gradle 파일로 open하면 바로 build가 된다)
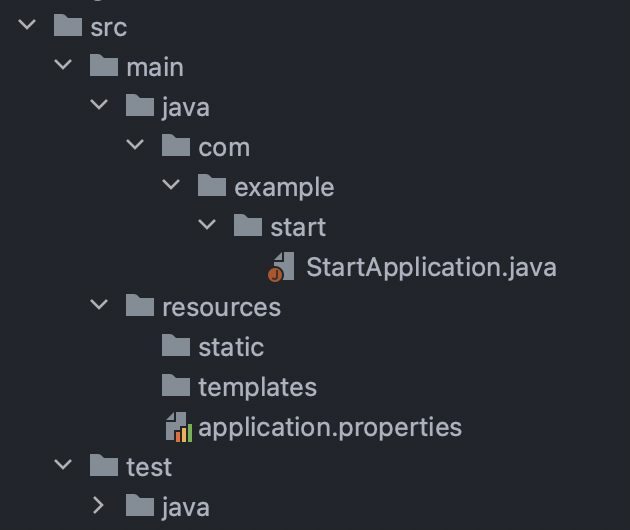
프로젝트를 열면 src 폴더 아래에 main과 test가 있다.
main 안에는 java와 resources가 있고 java 안에 실제 package와 소스코드가 있다. resources는 실제 java 파일을 제외한 xml, properties 등의 설정 파일들이 들어가있다.
test는 테스트 코드와 관련된 코드들이 있다.
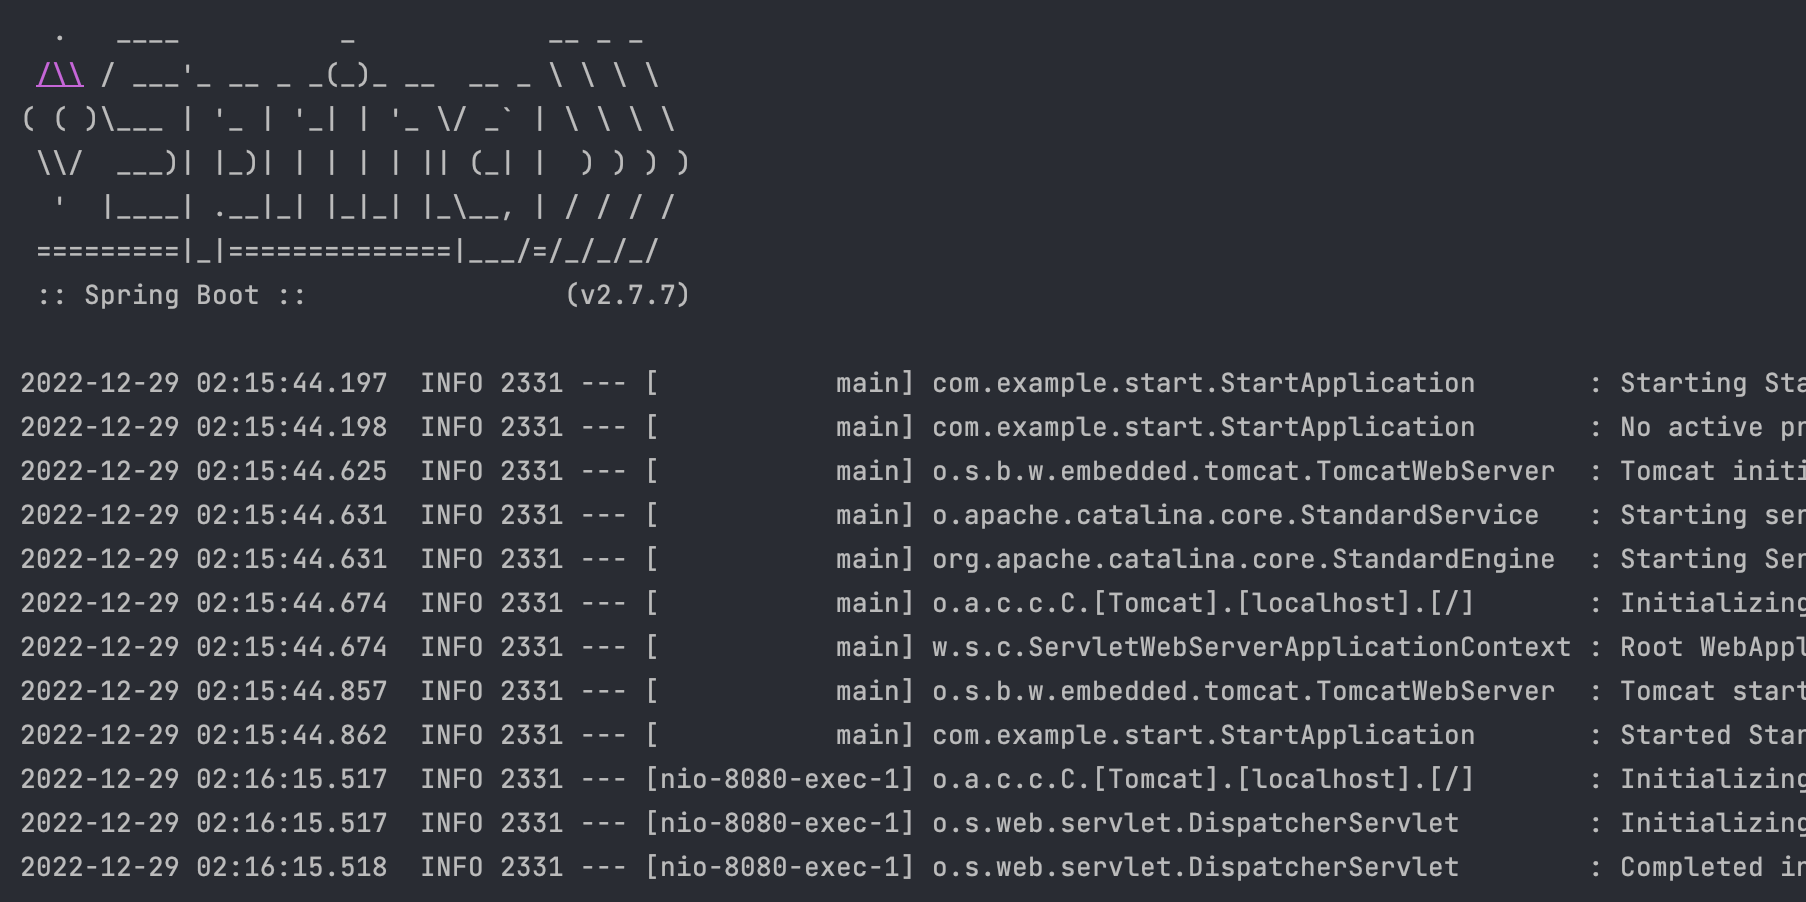
StartApplication.java 파일을 들어가서 run을 하면 아래 사진과 같이 뜬다.
이 다음으로 웹브라우저에 localhost:8080을 입력하면 다음과 같이 에러 페이지가 뜨는데 현재는 아무것도 입력하지 않은 상태이기 때문에 이렇게 뜨면 성공한 것이다. 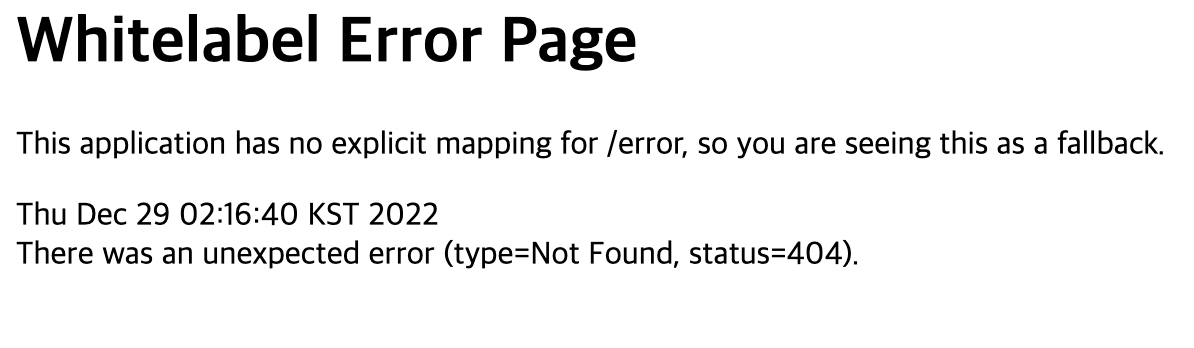
View 환경설정
Welcome 페이지 만들기
resources/static/index.html<!DOCTYPE HTML>
<html>
<head>
<title>Hello</title>
<meta http-equiv="Content-Type" content="text/html; charset=UTF-8" />
</head>
<body>
Hello
<a href="/hello">hello</a>
</body>
</html>
다시 실행해서 웹브라우저에서 localhost:8080을 입력하면 아래 사진과 같이 페이지가 변한 것을 확인할 수 있다. 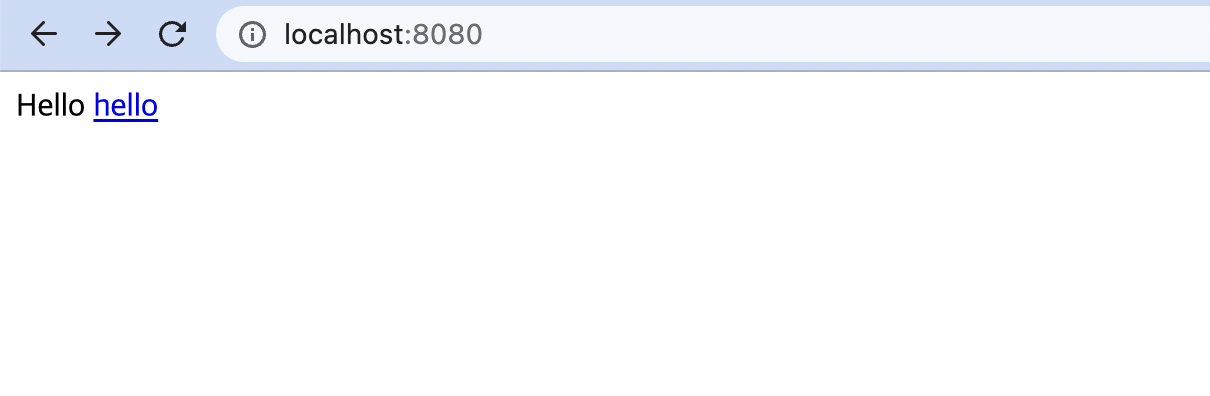
java.com.example/controller/HelloController@Controller
public class HelloController {
@GetMapping("hello") // /hello가 들어오면 다음 메소드를 실행한다.
public String hello(Model model) {
model.addAttribute("data", "hello!!");
return "hello";
}
}resources/templates/hello.html<!DOCTYPE HTML>
<html xmlns:th="http://www.thymeleaf.org">
<head>
<title>Hello</title>
<meta http-equiv="Content-Type" content="text/html; charset=UTF-8" />
</head>
<body>
<p th:text="'안녕하세요. ' + ${data}" >안녕하세요. 손님</p>
</body>
</html>이렇게 작성하고 나면 localhost:8080/hello 로 들어갔을 떄 hello.html 파일이 나와야하는데 Whitelabel Error Page가 나온다.
-> build 폴더를 삭제한 후 controller 패키지를 start 패키지 안으로 넣었더니 잘 동작하였다.

동작 환경 그림
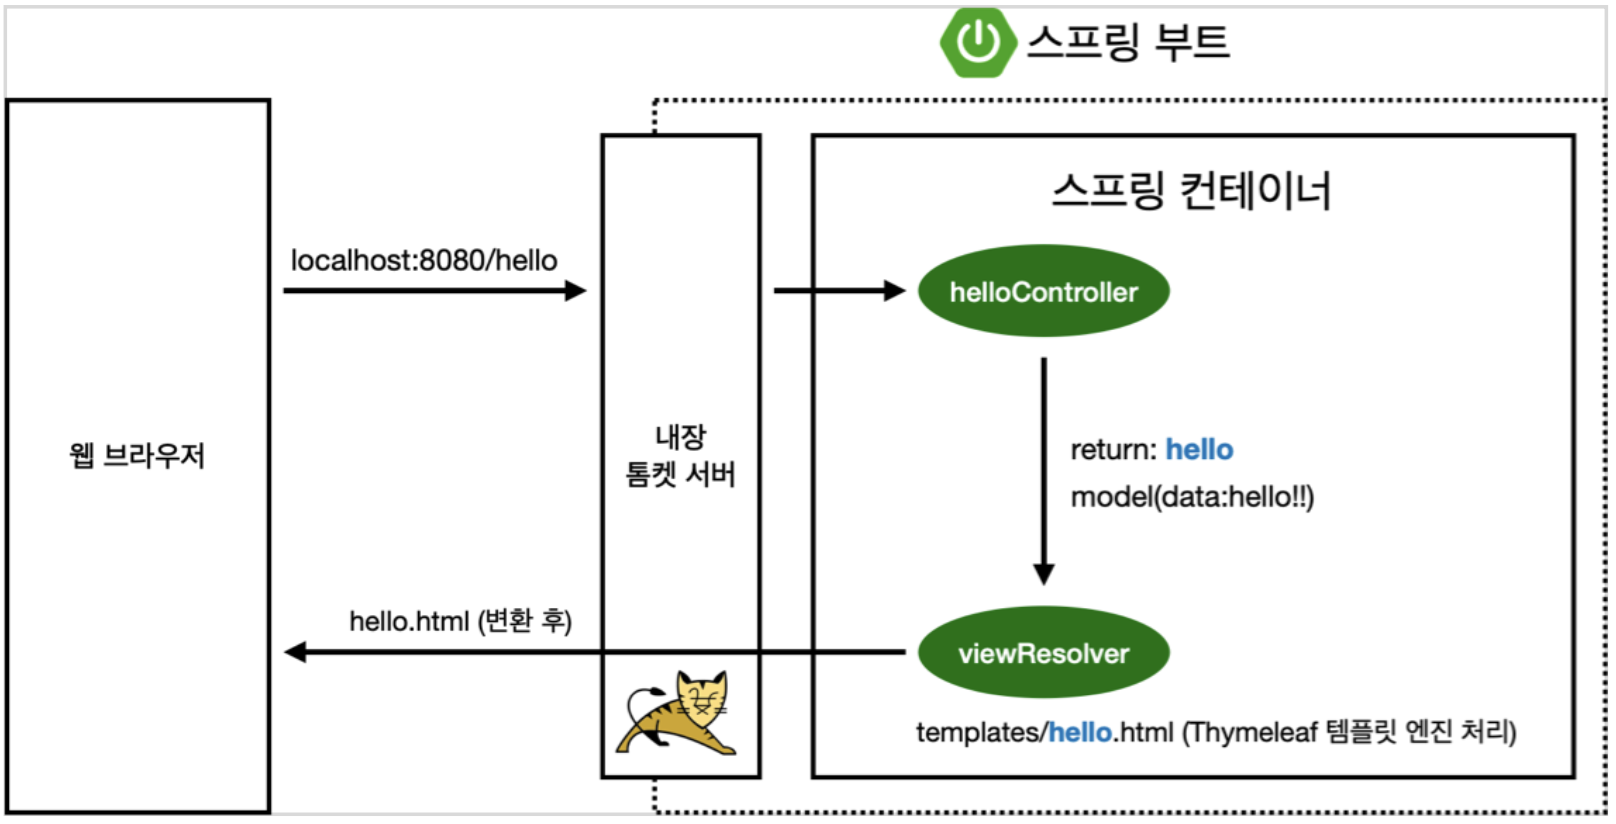
- 컨트롤러에서 리턴 값으로 문자를 반환하면 viewResolver가 화면을 찾아서 처리한다.
현재 코드로 설명하자면 웹 브라우저에서 /hello로 들어왔으니 helloController에서 @GetMapping()을 통해 실행할 함수를 찾아서 실행한다. 그 함수의 리턴 값인 문자(hello)를 resources/templates에서 찾는다. (hello.html)
빌드하고 실행하기
터미널에서 현재 프로젝트 경로로 간 후 다음 명령어를 입력하면 빌드된다.
./gradlew build다음으로 build/libs로 이동한 뒤 ls -arlth를 입력하면 다음과 같이 뜬다.

이제 다음과 같이 입력을 하면 실행이 된다.
java -jar start-0.0.1-SNAPSHOT.jar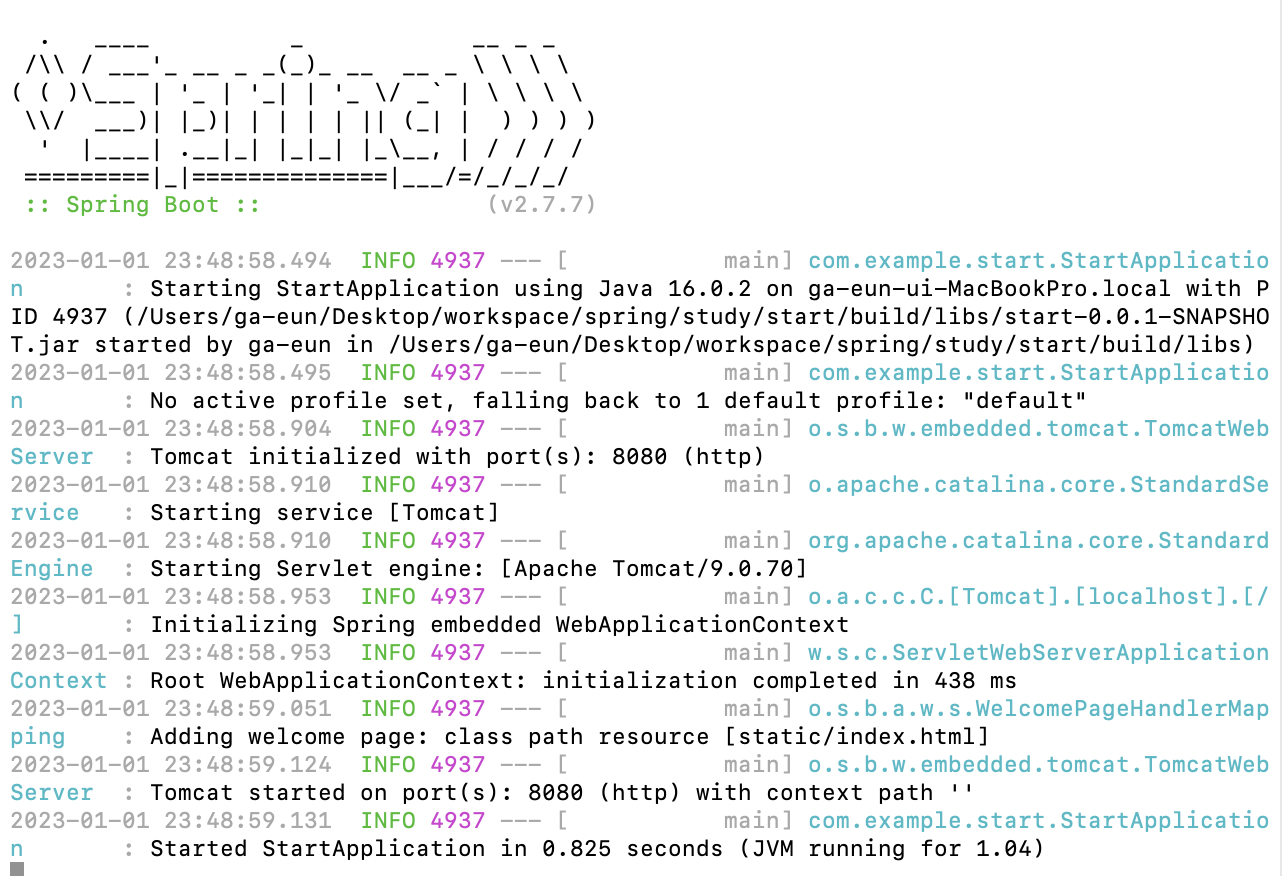
서버를 배포할 때는 start-0.0.1-SNAPSHOT.jar 이것만 복사하여 서버에 넣고 위와 같이 실행을 시키면 된다.
혹시나 빌드가 잘 되지 않는 경우에는 clean을 한 후 빌드하자.
./gradlew clean build