Istio Service Mesh란?
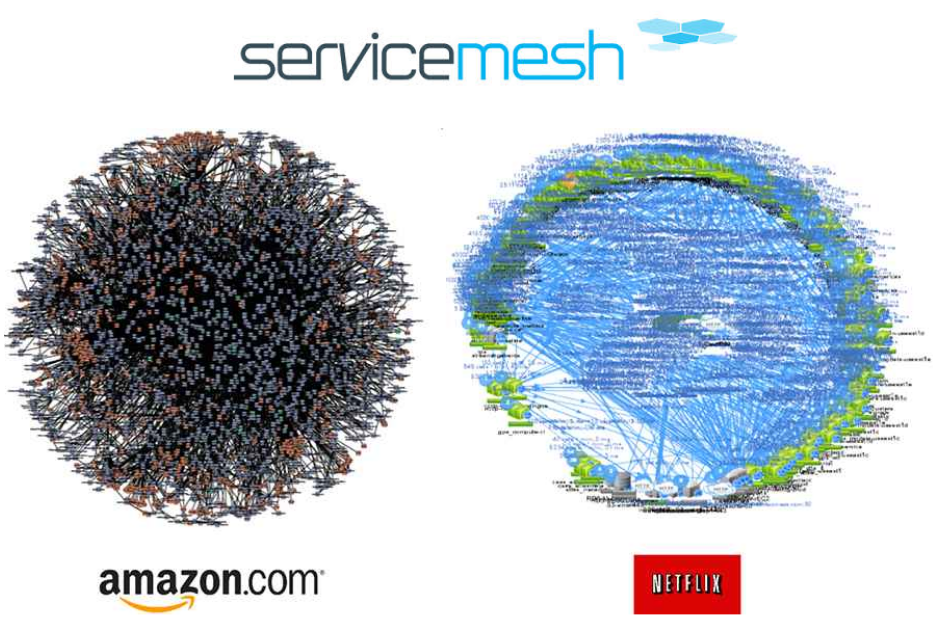
서비스 매쉬란?
- 마이크로 서비스를 위한 인프라 계층
- 레거시 코드의 변경 없이 각 서비스에 대해 가시성, 트래픽 관리, 보안 기능 등을 추가
- 복잡하고 방대한 규모의 마이크로서비스에 대한 관리 용이
이스티오(Istio)란?
- 서비스 매쉬 오픈소스
- 기존의 응용프로그램 위에 레이어링되어 다양한 동작들을 수행
이스티오가 제공하는 기능들
- 클러스터 내부에서 TLS 암호화를 이용한 서비스간 안전한 통신 제공
- HTTP, gRPC, WebSocket 및 TCP 트래픽에 대한 로드 밸런싱
- 재시도, 다양한 라우팅 규칙, fault injection 등을 통해 세부 트래픽 동작을 제어
- 클러스터 내의 모든 트래픽에 대한 메트릭 수집과 로그 추적
이스티오의 아키텍처
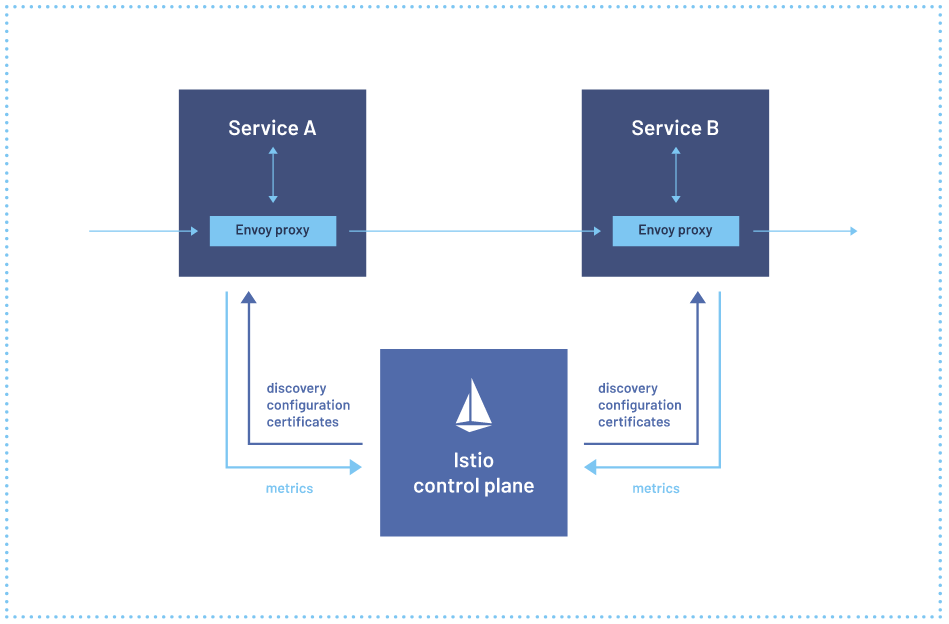
- 데이터 플레인
- 각 서비스를 Envoy proxy와 함께 배포(사이드카 패턴 방식)
- 서비스로 또는 서비스로부터 나가는 모든 네트워크 패킷을 변환, 전달 및 모니터링
- 컨트롤 플레인
- 회로 차단, 로드 밸런싱, 타임아웃 등의 기본 구성 정보를 저장
- 기본 구성 정보에 맞게 각 서비스의 프록시를 동작
이스티오 실습하기
다음 환경에서 실습을 진행합니다.
Ubuntu18.04
CPU: 4
RAM: 6GB
미니큐브가 설치된 환경
이스티오 설치하기
1. 다운로드
istio 공식 홈페이지에서 최신 버전을 다운합니다.
curl -L https://istio.io/downloadIstio | sh -2. 환경 변수 path 설정
istioctl 사용을 위해 bashrc에서 환경 변수 설정 후, 현재 이스티오 버전으로 경로를 설정합니다.
echo "export PATH=$HOME/istio-1.11.4/bin:$PATH" >> .bashrc
source .bashrc
istioctl이 잘 설치되었는지 확인합니다.
istioctl --help3. 이스티오 컨트롤 플레인 설치하기
클러스터에 이스티오의 컨트롤 플레인을 설치합니다.
옵션 없이 설치시 istiod와 ingress gateway만 있는 default profile을 다운합니다.
istioctl install
설치가 완료되면, istio-system namespace에 생성된 Istio의 component를 확인할 수 있습니다.

Istio Automation Injection
istio는 데이터 플레인 구성을 위해 각 pod안에 proxy를 생성합니다.
proxy를 생성하는 다양한 방법이 있지만
자동으로 프록시 컨테이너를 Inject해주는 방법을 사용하겠습니다.
프록시 생성을 원하는 네임스페이스에 레이블링을 해주면
pod 생성과 함께 자동으로 proxy가 생성됩니다.
default namespace에 label 지정하기
kubectl label ns default istio-injection=enabledInjection Test하기
nginx deployment 생성하기
kubectl create deploy nginx --image nginx --port=80구성 살펴보기
kubectl describe pods nginx-7848d4b86f-gpf9wnginx deployment 삭제하기
kubectl delete deployment nginx 이스티오 모니터링 도구
키알리(Kiali)
이스티오 서비스 매시 관리 콘솔로 다음과 같은 기능들을 수행
- Topology
- Health
- Detail
- Tracing
키알리 설치하기
- 이스티오 메트릭을 수집하기 위해 프로메테우스 설치
kubectl apply -f https://raw.githubusercontent.com/istio/istio/release-1.11/samples/addons/prometheus.yaml- kiali를 설치
kubectl apply -f https://raw.githubusercontent.com/istio/istio/release-1.11/samples/addons/kiali.yaml- kiali 서비스를 nodeport 타입으로 변경
kubectl edit service kiali -n istio-system노드포트를 30001번 포트로 지정합니다. 이스티오 기능 사용하기
1. 키알리 대시보드를 이용한 서비스 모니터링
2. 카나리 배포 실습
3. Circuit breaking 실습
다음 소스를 이용해서 진행합니다.
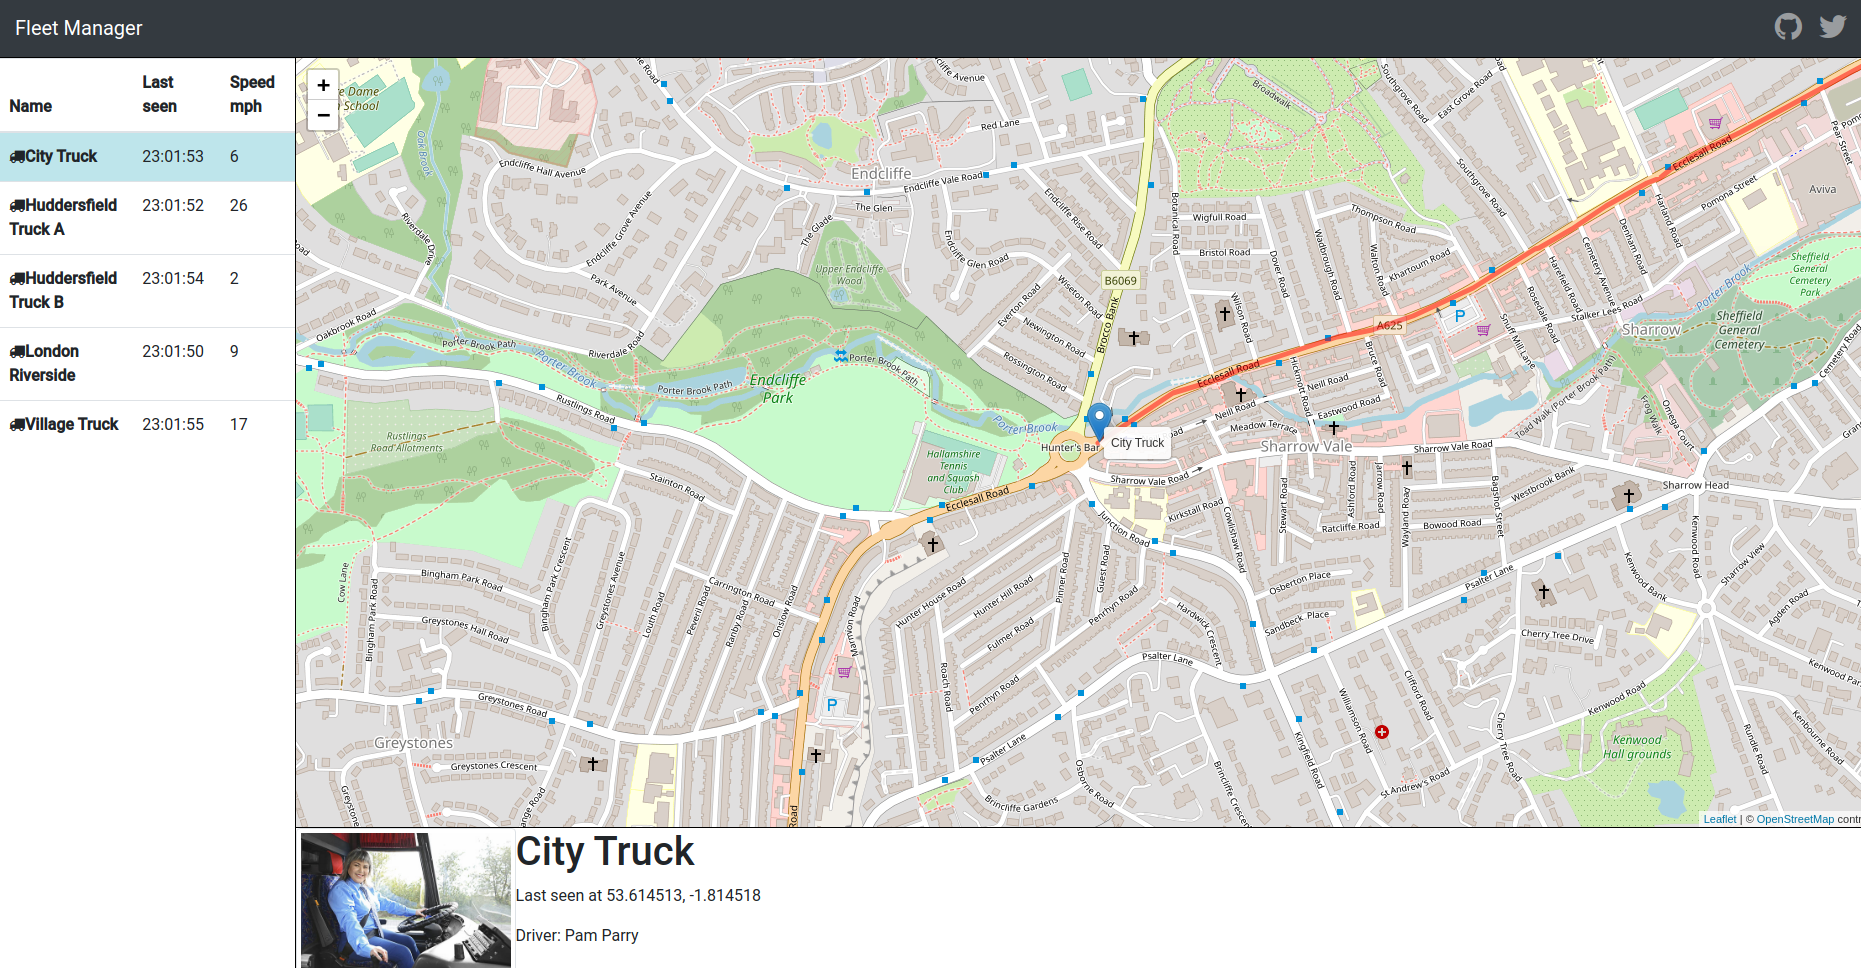
git clone https://github.com/sjoh0704/Istio-demo.gitfleet management application: 차랑을 추적하는 GPS 애플리케이션
키알리 대시보드를 이용한 모니터링 실습
- application 배포하기
kubectl apply -f Istio-demo/no_istio/application.yaml -
배포된 application 확인하기
노드포트 30000번 포트를 통해서 application을 배포했기 때문에
30000번으로 접속해서 확인합니다.

- 키알리 대시보드에 접속하기
kubectl get svc kiali -n istio-system노드포트 30001번으로 지정해놨으므로 키알리대시보드를 확인합니다. 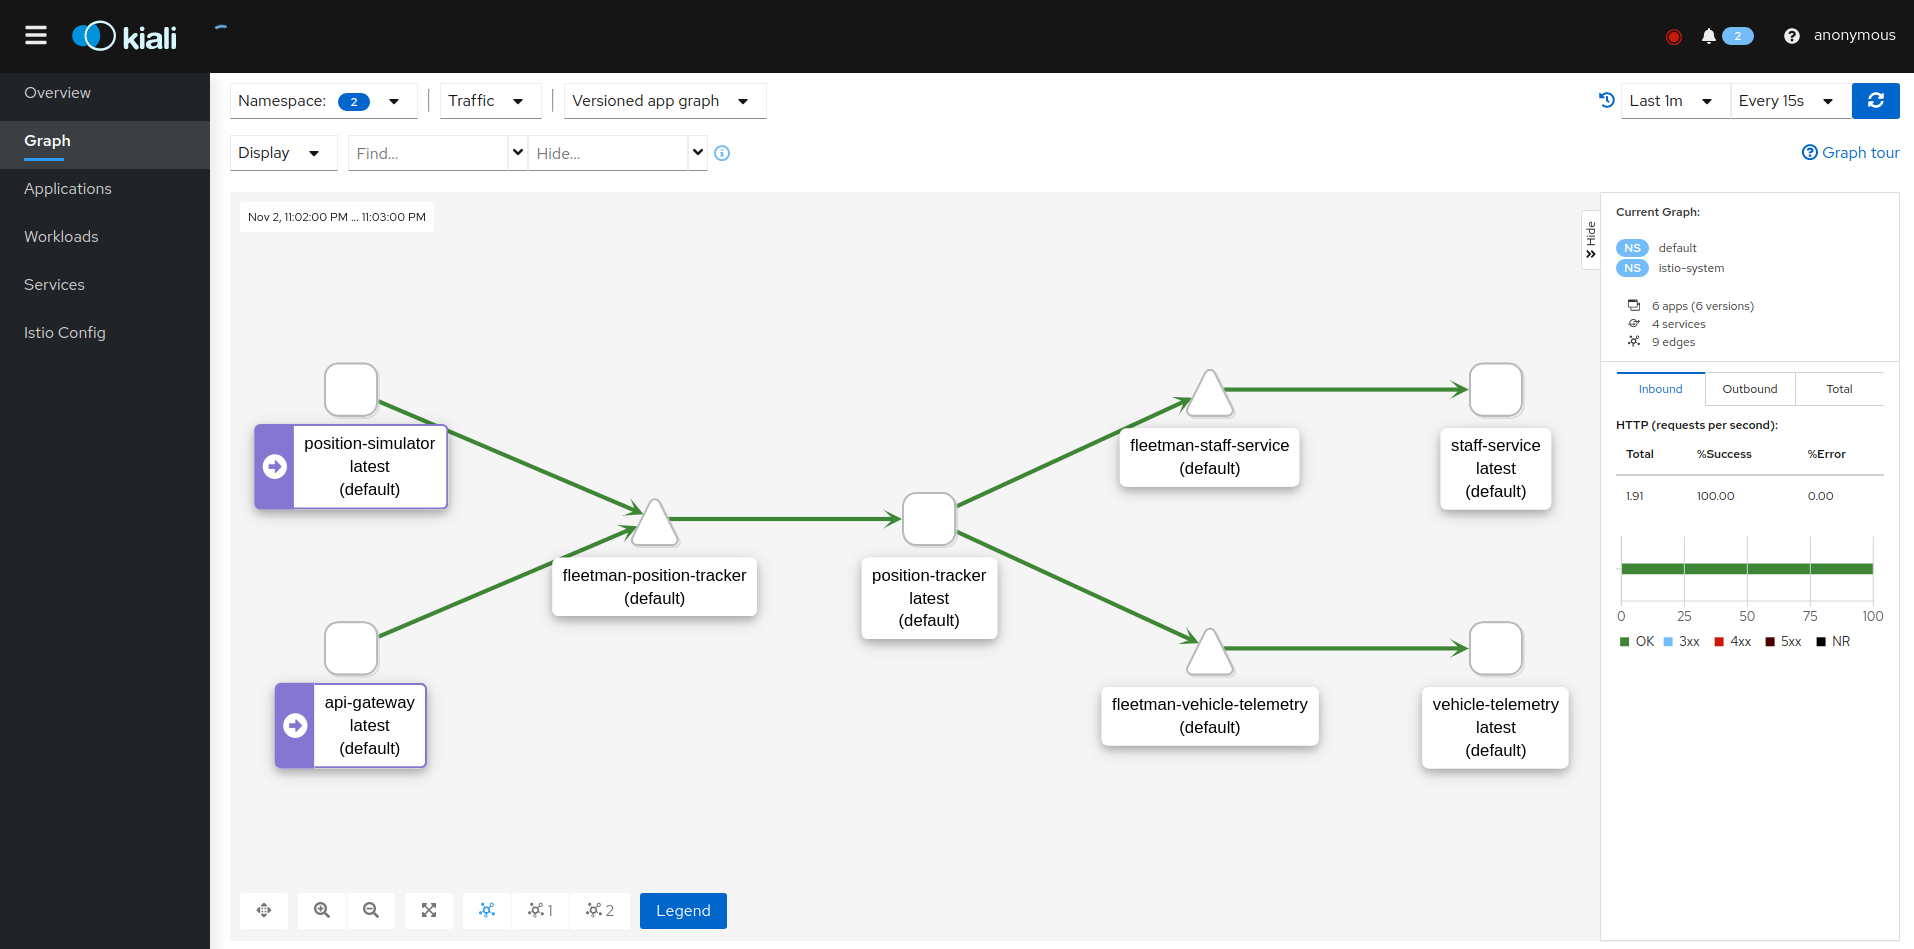
- 모든 리소스 삭제하기
kubectl delete -f Istio-demo/no_istio/application.yaml 카나리 배포 실습
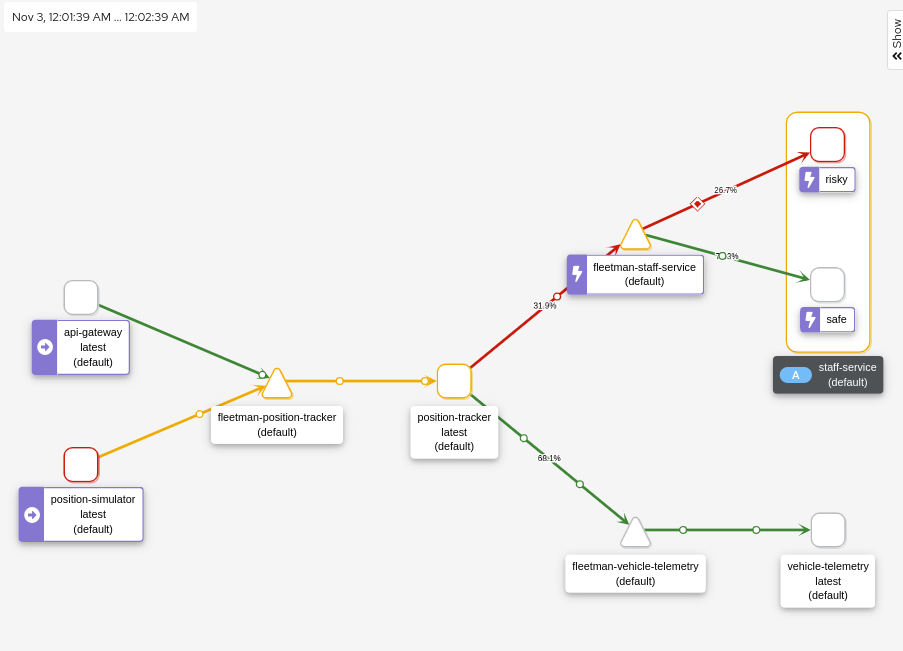
fleetman-staff-service를 카나리로 배포합니다.
staff-service의 risky-version과 safe-version을 1 대 9의 비율로 로드밸런싱할 것 입니다.
- application 배포하기
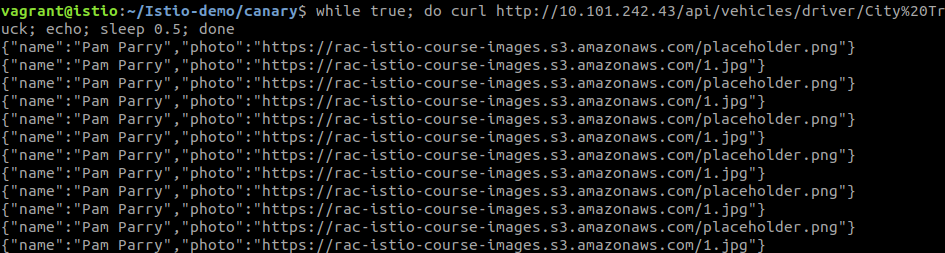
kubectl apply -f Istio-demo/canary/application.yaml - request 보내기
while true; do curl http://[fleetman-webapp의 cluseterIP]/api/vehicles/driver/City%20Truck; echo; sleep 0.5; done기존에는 어떤 설정도 되어 있지 않으므로 라운드로빈 방식으로 로드밸런싱 됩니다.
- canary로 배포하기
kubectl apply -f Istio-demo/canary/canary.yaml < canary.yaml >
kind: VirtualService
apiVersion: networking.istio.io/v1alpha3
metadata:
  name: a-set-of-routing-rules-we-can-call-this-anything  # "just" a name for this virtualservice
  namespace: default
spec:
  hosts:
    - fleetman-staff-service.default.svc.cluster.local  # The Service DNS (ie the regular K8S Service) name that we're applying routing rules to.
  http:
    - route:
        - destination:
            host: fleetman-staff-service.default.svc.cluster.local # The Target DNS name
            subset: safe-group  # The name defined in the DestinationRule
          weight: 90
        - destination:
            host: fleetman-staff-service.default.svc.cluster.local # The Target DNS name
            subset: risky-group  # The name defined in the DestinationRule
          weight: 10

---

kind: DestinationRule       # Defining which pods should be part of each subset
apiVersion: networking.istio.io/v1alpha3
metadata:
  name: grouping-rules-for-our-photograph-canary-release # This can be anything you like.
  namespace: default
spec:
  host: fleetman-staff-service # Service
  subsets:
    - labels:   # SELECTOR.
        version: safe # find pods with label "safe"
      name: safe-group
    - labels:
        version: risky
name: risky-group- 카나리 배포 후, request 보내기
while true; do curl http://[fleetman-webapp의 cluseterIP]/api/vehicles/driver/City%20Truck; echo; sleep 0.5; done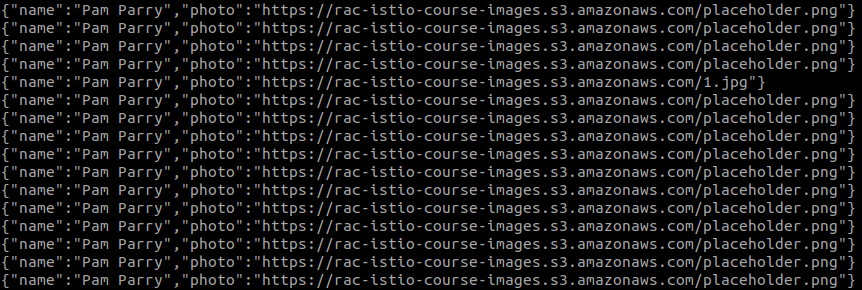
place holder(safe-version)가 더 많은 비율로 응답하는 것을 알 수 있습니다.
- 모든 리소스 삭제하기
kubectl delete -f Istio-demo/canary/.Circuit breaking
서킷브레이킹이란 서비스의 failure에 대한 영향을 제한하는 패턴방식으로
분산 서비스간의 장애 전파 현상을 방지합니다.
이번에도 staff-service의 safe-version과 risky-version을 사용합니다.
그러나 이번에는 staff-service-risky-version에 5xx 에러를 발생시켰습니다.
- application 배포하기
kubectl apply -f Istio-demo/circuitbreaking/application.yaml - request 보내기
while true; do curl http://[fleetman-webapp의 cluseterIP]/api/vehicles/driver/City%20Truck; echo; sleep 0.5; done
종종 500에러가 발생합니다.
- Circuit breaking 적용하기
kubectl apply -f Istio-demo/circuitbreaking/circuitbreaking.yaml < circuitbreaking.yaml >
apiVersion: networking.istio.io/v1alpha3
kind: DestinationRule
metadata:
  name: circuit-breaker-for-the-entire-default-namespace
spec:
  host: "fleetman-staff-service.default.svc.cluster.local"
  trafficPolicy:
    outlierDetection: # Circuit Breakers HAVE TO BE SWITCHED ON
      maxEjectionPercent: 100
      consecutive5xxErrors: 2
      interval: 10s
baseEjectionTime: 30s- 회로 차단 후, request 보내기
while true; do curl http://[fleetman-webapp의 cluseterIP]/api/vehicles/driver/City%20Truck; echo; sleep 0.5; done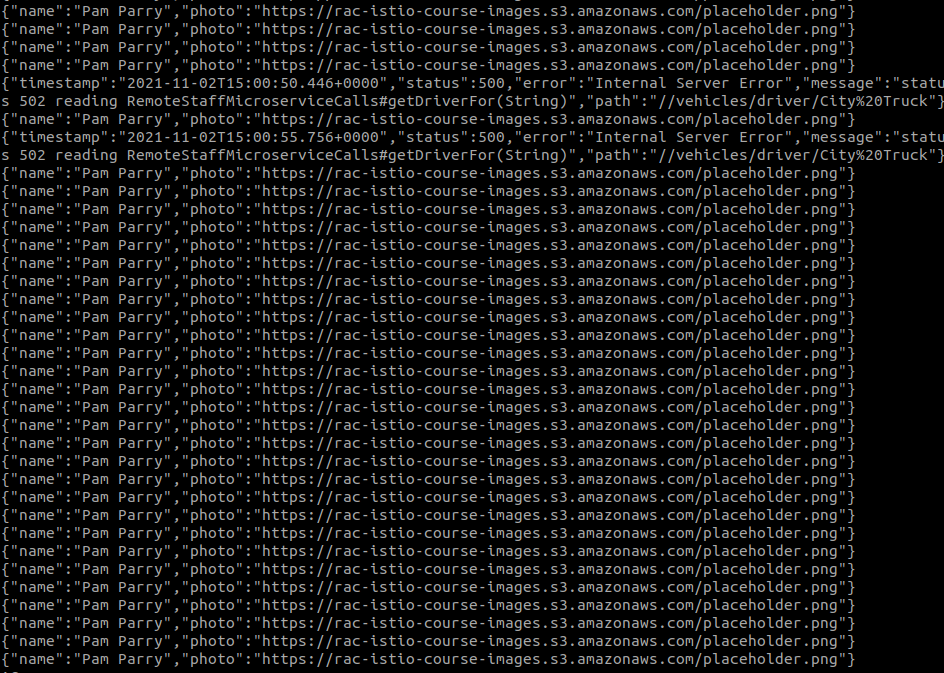
- 모든 리소스 삭제하기
kubectl delete -f Istio-demo/circuitbreaking/.다음 강의를 참고해서 작성했습니다.
https://www.udemy.com/course/istio-hands-on-for-kubernetes/

2개의 댓글

영상 보고 내용이 너무 좋아서 블로그도 차자 들어 왔네요.
저 질문이 있는데 만약 istio 를 설치 해서 운영하면 ingress 쓸 필을것 같은 생각이 드는데
맞는지 궁금하네요
https://www.youtube.com/watch?v=B8C7ScR_z4k