1. JS 데이터
String
구문
- String 전역 객체는 문자열(문자의 나열)의 생성자 입니다.
- 문자열 리터럴은 다음과 같은 형식을 사용합니다.
'string text'
"string text"
"中文 español Deutsch English देवनागरी العربية português বাংলা русский 日本語 norsk bokmål ਪੰਜਾਬੀ 한국어 தமிழ் עברית"- 문자열은 String 전역 객체를 직접 사용하여 생성할 수 있습니다.
String(thing)매개변수
thing : 문자열로 변환할 아무 값.
템플릿 리터럴
`hello world` `hello! world!` `hello ${who}` tag `<a>${who}</a>`긴 문자열 리터럴
작성한 코드가 매우 긴 문자열을 포함해야 하는 경우, 끝 없이 뻗어나가는 한 줄이나 편집기의 재량에 따라 자동으로 줄을 넘기는 대신 직접 여러 줄로 나누되 내용에는 영향을 주지 않고 싶을 때가 있을겁니다. 이런 상황에는 두 가지 방법을 사용할 수 있습니다.
+연산자
let longString = "여러 줄에 걸쳐 작성해야 할 정도로 " +
                 "긴 문자열인데 왜 한 줄에 다 적으면 안되냐면 " +
"코드를 읽기 힘들어지니까요.";- 역슬래시 문자("\")
let longString = "여러 줄에 걸쳐 작성해야 할 정도로 \
긴 문자열인데 왜 한 줄에 다 적으면 안되냐면 \
코드를 읽기 힘들어지니까요.";
2. JS 클래스
클래스
function user(first, last) {
  this.firstName = first;
  this.LastName = last;
}

user.prototype.getFullName = function() {
  return `${this.firstName} ${this.LastName}`
}

const sungdae1 = new user('sungdae', 'jin');
const amy1 = new user('Amy', 'Clarke');
const neo1 = new user('Neo', 'Smith');

console.log(amy1.getFullName());
console.log(neo1.getFullName());
console.log(sungdae1.getFullName());
prototype
- JavaScript는 클래스라는 개념이 없다. 그래서 기존의 객체를 복사하여(Cloning) 새로운 객체를 생성하는 프로토 타입 기반 언어다.
- 프로토타입 기반 언어는 객체 원형인 프로토타입을 이용하여 새로운 객체를 만들어 낸다.
- 이렇게 생성된 객체 역시 다른 객체의 원형이 될 수 있다.
- 프로토타입은 객체를 확장하고 객체 지향적인 프로그래밍을 할 수 있게 해준다.
- 프로토 타입은 크게 두가지로 해석되는데 객체를 참조하는
prototype 속성과 객체 맴버인proto속성이 참조하는 숨은 링크가 있다.
This
-
일반(Normal)함수는 호출 위치에 따라 this를 정의한다.
-
화살표(Arrow)함수는 자신이 선언된 함수 범위에서 this를 정의한다.
const sungdae2 = {
  name: 'Sungdae',
  normal() {
    console.log(this.name);
  },
  arrow: () => {
    console.log(this.name);
  }
}
sungdae2.normal();
sungdae2.arrow();
const amy3 = {
  name: 'Amy',
  normal: sungdae2.normal,
  arrow: sungdae2.arrow
}
amy3.normal();
amy3.arrow();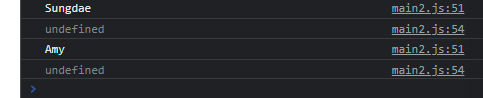
function User2(name) {
  this.name = name;
}

User2.prototype.normal = function() {
  console.log(this.name);
}

User2.prototype.arrow = () => {
  console.log(this.name);
}

const sungdae4 = new User2('Sungdae');
sungdae4.normal();
sungdae4.arrow();
화살표 함수를 사용할 예제
ex) 타임 함수
const timer = {
  name: 'Sungdae!!',
  timeout: function() {
    setTimeout(() => {
      console.log(this.name);
    }, 2000)
  }
}
timer.timeout();
ES6 Classes
- function 대신 class를 사용하여 객체 정의
class User {
  constructor(first, last){
    this.firstName = first;
    this.lastName = last;
  }
  getFullName() {
    return `${this.firstName} ${this.lastName}`
  }
}

const sungdae = new User('sungdae', 'jin');
const amy = new User('Amy', 'Clarke');
const neo = new User('Neo', 'Smith');

console.log(sungdae);
console.log(amy.getFullName());
console.log(neo.getFullName());
상속
class Vehicle{
  constructor(name, wheel) {
    this.name = name;
    this.wheel = wheel;
  }
}

const myVehicle = new Vehicle('운송수단', 2);
console.log(myVehicle);

class Bicycle extends Vehicle {
  constructor(name, wheel) {
    super(name, wheel);
  }
}

const myBicycle = new Bicycle('삼천리', 2);
const daugtersBicycle = new Bicycle('세발', 3);

console.log(myBicycle);
console.log(daugtersBicycle);

class Car extends Vehicle {
  constructor(name, wheel, license) {
    super(name, wheel);
    this.license = license;
  }
}

const myCar = new Car('벤츠', 4, '1종 보통');
const yourCar = new Car('bmw', 4, '2종 보통');

console.log(myCar);
console.log(yourCar);
3. JS 함수
화살표 함수
() => {}
const doubleArrow = (x) => {
  return x * 2;
}
console.log('doubleArrow: ', doubleArrow(7));
function() {}
const double = function (x) {
  return x * 2;
}

console.log('double: ' , double(7));


const doubleArrow2 = x => x * 2;
console.log('doubleArrow2', doubleArrow2(7));


const doubleArrow3 = x => ({
  name: "jinsungadae"
});
console.log('doubleArrow3: ', doubleArrow3(7));
즉시 실행 함수(IIFE, Immediately-Invoked Function Expression)
(function () {
  console.log(a * 2);
})();


(function () {
  console.log(a7 * 2);
}());
호이스팅(Hoisting)
- 함수 선언부가 유효범위 최상단으로 끌어올려지는 현상
const a8 = 8;
double3();

function double3() {
  console.log(a8 * 2);
}
타이머 함수
setTimeout(함수, 시간)
- 일정 시간 후 함수 실행
setTimeout(function() {
  console.log('sungdae jin!');
}, 3000);
clearTimeout()
- 설정된 Timeout함수를 종료
const timer = setTimeout(() => {
  console.log('sungdae jin!');
}, 3000);

const h1El = document.querySelector('h1');
h1El.addEventListener('click', () => {
  clearTimeout(timer);
});
setInterval(함수, 시간)
- 시간 간격마다 함수 실행
const timer = setInterval(() => {
  console.log('sungdae jin!');
}, 3000);
clearInterval()
- 설정된 Interval함수를 종료
const timer = setInterval(() => {
  console.log('sungdae jin!');
}, 3000);

const h1El = document.querySelector('h1');
h1El.addEventListener('click', () => {
  clearInterval(timer);
});
콜백(CallBack)
- 함수의 인수로 사용되는 함수
function timeout(cb) {
  setTimeout(() => {
    console.log('sungdaeJIn!');
    cb();
  }, 3000);
}

timeout(() => {
  console.log('Done!');
});
4. JS 시작하기
export and default Keyword를 통해서 다른 js file에서 사용할 수 있도록 해준다.
export default function getType(data) {
  return Object.prototype.toString.call(data).slice(8, -1);
}
외부 함수 를 가져와서 사용할 수 있도록 하는 방법
import - from Keyword
import getType from "./getType";산술 연산자
console.log(1 + 2);
console.log(1 - 2);
console.log(1 * 2);
console.log(1 / 2);
console.log(1 % 2);
할당 연산자 (assignment operator)
let a = 2;
a += 1;

console.log(a);
비교 연산자(comparison operator)
const x = 1;
const y = 1;

console.log(x === y);

function isEqual(x , y) {
  return (x === y);
}

console.log(isEqual(10, 10));
논리 연산자(Logical operator)
const a1 = 1 === 1;
const b1 = 'AB' === 'AB';
const c1 = true;

console.log(a1);
console.log(b1);
console.log(c1);

console.log('&&: ', a1 && b1 && c1);
console.log('|| : ' , a1 || b1);
삼항 연산자(ternary operator)
const a = 1 < 2;
if (a) {
	console.log('참');
} else {
	console.log('거짓');
}
console.log(a ? '참' : '거짓');
조건문(If statement)
const a3 = random();

if (a3 === 0) {
  console.log('a is 0');
} else if (a3 % 2 === 0) {
  console.log('a is 짝수');
} else {
  console.log('rest....');
}
반복문 (For statement)
- for (시작 조건; 종료 조건; 변화 조건) {}
for (let i = 0; i < 3; i++) {
  console.log(i);
}
변수 유효범위(Variable Scope)
- var, let, const
const, let
- 선언된 블럭 안에서만 동작
function scope() {
  if (true) {
    const a4 = 123
  }
  console.log(a4);
}
scope();
function scope() {
if (true) {
console.log(a4);
const a4 = 123
}
}
scope();--undefined--
var
- 함수범위 내의 유효범위를 가진다.
- 메모리 누수를 가질 수 있다.
function scope() {
  if (true) {
    var a4 = 123
  }
  console.log(a4);
}
scope();
형 변환(Type conversion)
const a5 = 1;
const b5 = '1';

console.log(a5 == b5);
== : 동등 연산자
type변환을 통해서 결과값을 출력
- 의도하지 않는 결과가 출력이 되기 때문에 사용하지 않는 것이 좋다.
Truthy(참 같은 값)
true,{},[],1,2,'false',-12,'3.14'...
Falsy(거짓 같은 값)
false,'',null,undefined,0,-0,NaN
5. node.js
NVM (Npm version manager)
nvm arch [32|64]: Show if node is running in 32 or 64 bit mode. Specify 32 or 64 to override the default architecture.nvm check: Check the NVM4W process for known problems.nvm current: Display active version.nvm install <version> [arch]: The version can be a specific version, "latest" for the latest current version, or "lts" for the most recent LTS version. Optionally specify whether to install the 32 or 64 bit version (defaults to system arch). Set [arch] to "all" to install 32 AND 64 bit versions. Add --insecure to the end of this command to bypass SSL validation of the remote download server.nvm list [available]: List the node.js installations. Type available at the end to show a list of versions available for download.nvm on: Enable node.js version management.nvm off: Disable node.js version management (does not uninstall anything).nvm proxy [url]: Set a proxy to use for downloads. Leave [url] blank to see the current proxy. Set [url] to "none" to remove the proxy.nvm uninstall <version>: Uninstall a specific version.nvm use <version> [arch]:Switch to use the specified version. Optionally use latest, lts, or newest. newest is the latest installed version. Optionally specify 32/64bit architecture.nvm use<arch>will continue using the selected version, but switch to 32/64 bit mode. For information about using use in a specific directory (or using .nvmrc), please refer to issue #16.
-nvm root <path>: Set the directory where nvm should store different versions of node.js. If<path>is not set, the current root will be displayed.nvm version: Displays the current running version of NVM for Windows.nvm node_mirror <node_mirror_url>: Set the node mirror.People in China can use https://npmmirror.com/mirrors/node/nvm npm_mirror <npm_mirror_url>: Set the npm mirror.People in China can use https://npmmirror.com/mirrors/npm/
window 용 nvn https://github.com/coreybutler/nvm-windows
parce-bundler -D
npm install parcel-bundler -D : 개발용 의존성
npm install lodash : 일반 의존성
-D dev dependency에 설치 하는 flag - 개발용 의존성 패키지 설치
개발용 의존성 패키지 설치란?
- 개발할때만 사용하고 일반적으로 웹 브라우저에 사용할 때는 필요가 없음
npm install 을 사용하면 node_modules에 package 가 추가 된다.
node_modules를 삭제 한다 하더라도 다시 npm install을 하면 한번 설치한 패키지는 내역으로 남게 되고 그걸 바탕으로 다시 추가 된다.
package.json은 직접적으로 관리를 할 수 있지만 package-lock.json은 직접 관리할 수 가 없다.
유의적 버전(Semantic Versioning, SemVer)
Major.Minor.Patch
- E.g, 12.14.1
Major : 기존 버전과 호환되지 않는 새로운 버전.
Minor : 기존 버전과 호환되는 새로운 기능이 추가된 버전.
Patch : 기존 버전과 호환되는 버그 및 오타 등이 수정된 버전.
^ : Major 버전 안에서 가장 최신 버전으로 업데이트 가능
npm install lodash@4.17.20
npm update lodash
6. JavaScript Event
Event
Onclick
- when element is clicked.
Ondblclick
- when element is double-clicked.
Onfocus
- when an element gets focus such as button, input, textarea etc.
Onblur
- when form loses the focus from an element.
Onsubmit
- when form is submitted.
Onkeydown
- when key is being pressed.
Onkeypress
- when user presses the key.
Onkeyup
- when key is released.
Onload
- when document, object or frameset is loaded.
Onunload
- when body or frameset is unloaded.
Onscroll
- when document is scrolled.
Onresize
- when document is resized.
Onreset
- when form is reset.
Onmouseover
- when mouse is moved over an element.
Onmouseout
- when mouse is moved out from an element (after moved over).
Onmousedown
- when mouse button is pressed over an element.
Onmouseup
- when mouse is released from an element (after mouse is pressed).

주니어 개발자