들어가기
잘 만들어진 웹 서비스는 기술과 편의성도 중요하지만 버그 없이, 여러가지 예외상황에 맞춰 오류 처리를 잘 하는 것이 중요합니다. 예전에 한번 ErrorResolver에 대해서 포스팅을 했지만 이번에 김영한 선생님의 MVC 2 인강을 들으면서 알게된 내용을 정리해볼려고 합니다.
Web Page Error화면 구현하기
1. Servlet 예외처리
Spring이 아닌 순수 Servlet Container에서는 어떻게 예외처리를 하는지 기초를 알아 봅시다.
- Exception (예외)
- response.sendError(HTTP 상태 코드, 오류 메시지)
기본적으로 다음과 같이 우리가 익히 알고 쓰는 throw Exception을 이용하거나 response.sendError()를 이용합니다.
throw Exception
테스트를 해보기 전에 boot를 사용하고 계신다면 application.properties를 설정 합시다.
server.error.whitelabel.enabled=false해당 설정을 함으로써 Web에 자동으로 error page를 반환해주는 기능을 끌 수 있습니다.
@Slf4j
@Controller
public class ServletExController {
 	@GetMapping("/error-ex")
 		public void errorEx() {
 		throw new RuntimeException("예외 발생!");
	}
}
실행해봅시다.
HTTP Status 500 – Internal Server Error
다음과 같이 Web page가 글씨로만 찍혀나옵니다. tomcat은 java내부에서 발생하는 Exception은 다음과 같이 항상 500에러를 발생합니다.(page가 없는건 404 - Not found가 뜨겠죠?)
WAS(여기까지 전파) <- 필터 <- 서블릿 <- 인터셉터 <- 컨트롤러(예외발생)
response.sendError()
이번에는 response.sendError()를 알아봅시다.
@GetMapping("/error-404")
public void error404(HttpServletResponse response) throws IOException {
 	response.sendError(404, "404 오류!");
}
@GetMapping("/error-500")
public void error500(HttpServletResponse response) throws IOException {
 	response.sendError(500);
}
각각 다음과 같이 에러가 나타날 겁니다.
HTTP Status 404 – Bad Request
HTTP Status 500 – Internal Server Error
WAS(sendError 호출 기록 확인) <- 필터 <- 서블릿 <- 인터셉터 <- 컨트롤러
(response.sendError())
커스텀 오류화면 만들기
이제 우리가 직접 오류 페이지를 만들고 errorCode에 맞춰 화면을 Mapping 해봅시다.
- 404 page
<!DOCTYPE HTML>
<html xmlns:th="http://www.thymeleaf.org">
<head>
<meta charset="utf-8">
</head>
<body>
<div class="container" style="max-width: 600px">
<div class="py-5 text-center">
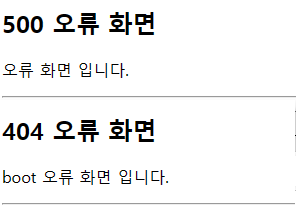
<h2>404 오류 화면</h2>
</div>
<div>
<p>오류 화면 입니다.</p>
</div>
<hr class="my-4">
</div> <!-- /container -->
</body>
</html>- 500 page
<!DOCTYPE HTML>
<html xmlns:th="http://www.thymeleaf.org">
<head>
 <meta charset="utf-8">
</head>
<body>
<div class="container" style="max-width: 600px">
 <div class="py-5 text-center">
 <h2>500 오류 화면</h2>
 </div>
 <div>
 <p>오류 화면 입니다.</p>
 </div>
 <hr class="my-4">
</div> <!-- /container -->
</body>
</html>
html file resource의 경로는 본인이 지정한 resource경로에 맞춰하시면 됩니다.
boot의 경우 resources/templates 아래가 되겠죠? 하위 폴더는 error-page 했습니다.
만든 페이지를 Mapping하기
Web Context로 만들기.
기존에 Servelt방식을 이용한 셋팅은 xml로 작성하는 것 입니다.
<web-app>
  <error-page>
 	<error-code>404</error-code>
 	<location>/error-page/404.html</location>
  </error-page>
  <error-page>
 	<error-code>500</error-code>
 	<location>/error-page/500.html</location>
  </error-page>
  <error-page>
 	<exception-type>java.lang.RuntimeException</exception-type>
 	<location>/error-page/500.html</location>
  </error-page>
</web-app>
Java Config로 만들기.
어노테이션을 이용한 방식이 편하실거라 생각이 듭니다. 다음과 같이 작성해 주시면 됩니다.
@Component
public class WebServerCustomizer implements WebServerFactoryCustomizer<ConfigurableWebServerFactory> {

    @Override
    public void customize(ConfigurableWebServerFactory factory) {
        ErrorPage errorPage404 = new ErrorPage(HttpStatus.NOT_FOUND, "/error-page/404");
        ErrorPage errorPage500 = new ErrorPage(HttpStatus.INTERNAL_SERVER_ERROR, "/error-page/500");

        ErrorPage errorPageEx = new ErrorPage(RuntimeException.class, "/error-page/500");

        factory.addErrorPages(errorPage404, errorPage500, errorPageEx);
    }
}
위와 같이 @Component로 등록해주시면 됩니다. 이해해시는것은 어렵지 않으실겁니다.
결과:
2. Spring Boot 예외처리
기본적인 원리는 위에서 확인했습니다. 자 그럼, boot를 사용하여 처리하는 방법을 알아 봅시다.
boot는 ErrorMvcAutoConfiguration의 설정에 따라 자동으로 error page를 셋팅해줍니다.
따라서 저희는 그냥 boot가 하라는 경로에다가 page 만 구현해주면 됩니다.
(위에서 만들어 놓은 Mapping 설정은 지우거나 @Component를 제거해주세요)
- Error page를 찾는 우선순위
1. 뷰 템플릿
resources/templates/error/500.html
resources/templates/error/5xx.html
2. 정적 리소스( static , public )
resources/static/error/400.html
resources/static/error/404.html
resources/static/error/4xx.html
3. 적용 대상이 없을 때 뷰 이름( error )
resources/templates/error.html
위 설명에서 나타나듯 1순위 2순위 3순위에 맞춰 page가 있는지 찾고 적정한 errorCode에 맞춰 페이지를 출력해줍니다. 5xx, 4xx와 같이 설정하면 code에 일치하는 page가 없을시, 번호 범위에 맞는 page를 공통 출력해줍니다.
API Error Response 구현하기
Web Page의 경우 지금까지 설명했던 것 처럼 4xx, 5xx와 같은 오류 페이지만 있으면 대부분의 문제를 해결할 수 있습니다. 애초에 기본적인 Field 오류는 Front page단에서도 구현이 가능하기 때문에 해결하기 쉽습니다.
API는 각 오류 상황에 맞는 오류 응답 스펙을 정하고, JSON으로 데이터를 내려주어야 하기 때문에 더 복잡합니다.
1. API Servlet 구현
일단 위에서 구현한 error page를 그대로 사용해볼거니 설정을 다시 해줍니다.
@Component
public class WebServerCustomizer implements WebServerFactoryCustomizer<ConfigurableWebServerFactory> {

    @Override
    public void customize(ConfigurableWebServerFactory factory) {
        ErrorPage errorPage404 = new ErrorPage(HttpStatus.NOT_FOUND, "/error-page/404");
        ErrorPage errorPage500 = new ErrorPage(HttpStatus.INTERNAL_SERVER_ERROR, "/error-page/500");

        ErrorPage errorPageEx = new ErrorPage(RuntimeException.class, "/error-page/500");

        factory.addErrorPages(errorPage404, errorPage500, errorPageEx);
    }
}RestController도 하나 만들어 줍니다.
@Slf4j
@RestController
public class ApiExceptionController {

    @GetMapping("/api/members/{id}")
    public MemberDto getMember(@PathVariable("id") String id ) {
        if (id.equals("ex")) {
            throw new RuntimeException("잘못된 사용자");
        }

        return new MemberDto(id, "hello " + id);
    }

    @Data
    @AllArgsConstructor
    static class MemberDto {
        private String memberId;
        private String name;
    }
}
API 호출을 해봅니다. 여기서는 Postman을 이용했습니다. httpie를 이용하던 curl을 이용하던 맘대로 하시면 됩니다. 보내실때 Method랑 mediaType : application/json 확인해주세요
정상 호출 : http://localhost:8080/api/members/spring
결과 :
{
 	"memberId": "spring",
 	"name": "hello spring"
}
에러 호출 : http://localhost:8080/api/members/ex
결과 :
<!DOCTYPE HTML>
<html>

<head>
	<meta charset="utf-8">
</head>

<body>
	<div class="container" style="max-width: 600px">
		<div class="py-5 text-center">
			<h2>500 오류 화면</h2>
		</div>
		<div>
			<p>오류 화면 입니다.</p>
		</div>
		<hr class="my-4">
	</div> <!-- /container -->
</body>

</html>
다음과 에러가 발생시 결과를 View형식으로 출력해버립니다. 당연한겁니다. ErrorController를 View에 맞춰서 만들었으니깐요...
이제 우리는 API 스팩에서도 사용가능한 ErrorController를 만들어야합니다.
	// 기존 web page용입니다.
    @RequestMapping("/error-page/500")
    public String errorPage500(HttpServletRequest request, HttpServletResponse response){
        log.info("errorPage 500");
        printErrorInfo(request);
        return "error-page/500";
    }
	// API 용입니다.
    @RequestMapping(value = "/error-page/500", produces = MediaType.APPLICATION_JSON_VALUE)
    public ResponseEntity<Map<String, Object>> errorPage500Api(HttpServletRequest request, HttpServletResponse response) {
        log.info("Api errorPage 500");

        Map<String, Object> result =new HashMap<>();
        Exception ex = (Exception) request.getAttribute(ERROR_EXCEPTION);
        result.put("status", request.getAttribute(ERROR_STATUS_CODE));
        result.put("message", ex.getMessage());

        Integer statusCode = (Integer) request.getAttribute(RequestDispatcher.ERROR_STATUS_CODE);

        return new ResponseEntity<>(result, HttpStatus.valueOf(statusCode));
    }
특이한점은 produces = MediaType.APPLICATION_JSON_VALUE)입니다.
produces를 선언함으로써 해당 RequestMapping은 Json타입을 허용할때만 반응하게 설계가 된것입니다.
다시한번 전송을 해봅시다
에러 호출 : http://localhost:8080/api/members/ex
결과 :
{
 	"message": "잘못된 사용자",
 	"status": 500
}
2. API Spring Boot 구현
이번에는 boot의 기능을 살펴 봅시다. 앞서 설명하였듯 ErrorMvcAutoConfiguration에서 알아서 다 해줍니다. 일단 WebServerCustomizer를 비활성화 합니다.
//@Component 비활성화
public class WebServerCustomizer implements WebServerFactoryCustomizer<ConfigurableWebServerFactory> {
그리고 그대로 호출해보면 됩니다.
에러 호출 : http://localhost:8080/api/members/ex
결과 :
{
    "timestamp": "2023-08-02T01:58:30.478+00:00",
    "status": 500,
    "error": "Internal Server Error",
    "message": "",
    "path": "/api/members/ex"
}
뭔가 더 상세하게 나왔네요?
여기에 boot설정을 추가해주면 더 많은 정보를 담게하는게 가능합니다.
#값은 always, never, on_param 이 있습니다.
server.error.include-binding-errors=always
server.error.include-exception=true
server.error.include-message=always
server.error.include-stacktrace=always
다시 실행해보면...
에러 호출 : http://localhost:8080/api/members/ex
결과 :
{
    "timestamp": "2023-08-02T02:01:16.121+00:00",
    "status": 500,
    "error": "Internal Server Error",
    "exception": "java.lang.RuntimeException",
    "trace": "java.lang.RuntimeException: 잘못된 사용자\r\n\tat hello.itemservice.web.exception.api.ApiExceptionController.getMember(ApiExceptionController.java:17)\r\n\tat ...",
    "message": "잘못된 사용자",
    "path": "/api/members/ex"
}
이렇게 결과가 나옵니다. 이 설정은 위에 ResponseBody가 아닌 WebPage Error 방식에도 적용이 됩니다. 단, 이 경우 서버의 중요한 내용을 포함할 수 있으므로 boot는 기본적으로 설정을 막아둔것 입니다.
여기서도 저의 Package 정보가 노출 되었네요 ㅎㅎ..
Status Code를 임의로 수정하기, HandlerExceptionResolver
여기까지 우리는 Web page와 API service에서 에러를 처리하는 방법을 알아 봤습니다.
사용자의 다양한 요청에 대해서 에러를 출력하게는 만들었지만, 사용자의 입력값은 결국 서버에서 오류 검증을 통해 에러를 발생시킵니다. 서버입장에선 에러를 500으로 출력하는게 현실입니다.
하지만 따지고 보면 사용자가 입력을 잘못한것에 대해서 Bad Request - 400을 발생시키고 싶을때가 있습니다. 이럴때 사용하는게 HandlerExceptionResolver 입니다.
HandlerExceptionResolver 적용하기
우선 'HandlerExceptionResolver'을 상속받는 클래스를 만들고 다음과 같이 작성합니다.
@Slf4j
public class MyExceptionResolver implements HandlerExceptionResolver {

    private final ObjectMapper objectMapper = new ObjectMapper();

    @Override
    public ModelAndView resolveException(HttpServletRequest request, HttpServletResponse response, Object handler, Exception ex) {

        try{
            //IllegalArgument 가 발생하면 sendError로 was에 넘기게 된다.
            //이때 return new ModelAndView()를 설정 가능하며, 새로운 페이지를 설정해주는 것도 가능(Web Page)하고 빈값이면 적용된 서블릿을 리턴한다.
            if(ex instanceof IllegalArgumentException){
                log.info("IllegalArgumentException resolver to 400");
                response.sendError(HttpServletResponse.SC_BAD_REQUEST);
                return new ModelAndView();
            }
        } catch (IOException e) {
            log.error("resolver ex", e);
        }

        return null; // 그냥 하던데로 기본 예외 처리가 진행한다. 예외가 발생되고 서블릿 밖(was)으로 예외가 던저진다.
    }
}ModelAndView를 리턴하는 것을 보면 눈치 채셨겠지만 여기서 페이지를 설정하여 Web Page를 리턴하는 것도 가능합니다.
해당 Resolver를 사용하기 위해서는 MVC로 등록해야합니다. web.xml config 방법은 제외하겠습니다.
@Configuration
public class WebConfig implements WebMvcConfigurer {

    @Override
    public void extendHandlerExceptionResolvers(List<HandlerExceptionResolver> resolvers) {
        resolvers.add(new MyExceptionResolver());
    }
}
API Controller도 수정해 줍시다.
    @GetMapping("/api/members/{id}")
    public MemberDto getMember(@PathVariable("id") String id ) {
        if (id.equals("ex")) {
            throw new RuntimeException("잘못된 사용자");
        }
        //추가
        if (id.equals("bad")) {
            throw new IllegalArgumentException("잘못된 입력 값");
        }

        return new MemberDto(id, "hello " + id);
    }
에러 호출 : http://localhost:8080/api/members/bad
결과 :
{
    "timestamp": "2023-08-02T02:20:55.453+00:00",
    "status": 400,
    "error": "Bad Request",
    "message": "",
    "path": "/api/members/bad"
}400으로 잘나옵니다. 원래는 500입니다.
HandlerExceptionResolver 최적화
위와 같이 작성하면 결국 boot의 WebServerCustomizer -> BasicErrorController -> sendError() 을 이용하게 됩니다. 결국 response.sendError()를 이용하므로 Tomcat was까지 에러를 이관하게 되는 꼴입니다.
그럼 Resolver 안에서 모든걸 해결해주면 되지 않을까요? 맞습니다. 어차피 HttpServletResponse 인자로 갖고 있으므로 커스텀 가능합니다.
@Slf4j
public class MyExceptionResolver implements HandlerExceptionResolver {
	// 이부분을 추가해주세요.
    private final ObjectMapper objectMapper = new ObjectMapper();

    @Override
    public ModelAndView resolveException(HttpServletRequest request, HttpServletResponse response, Object handler, Exception ex) {

        try{
            if(ex instanceof IllegalArgumentException){
                log.info("IllegalArgumentException resolver to 400");
                response.sendError(HttpServletResponse.SC_BAD_REQUEST);
                return new ModelAndView();
            }
			// 이부분을 추가해주세요.
            if (ex instanceof UserException) {
                log.info("UserException resolver to 400");
                String acceptHeader = request.getHeader("accept");
                response.setStatus(HttpServletResponse.SC_BAD_REQUEST);

                if ("application/json".equals(acceptHeader)) {
                    Map errorResult = new HashMap();
                    errorResult.put("ex", ex.getClass());
                    errorResult.put("message", ex.getMessage());
                    String result = objectMapper.writeValueAsString(errorResult);

                    response.setContentType("application/json");
                    response.setCharacterEncoding("utf-8");
                    response.getWriter().write(result);
                    return new ModelAndView();
                } else {
                    return new ModelAndView("error/500");
                }
            }
        } catch (IOException e) {
            log.error("resolver ex", e);
        }

        return null;
    }
}UserException은 임의로 만든 Error입니다. RuntimeException을 상속받아 하나 만들어 주시면 돼요.
public class UserException extends RuntimeException{
    public UserException() {
        super();
    }

    public UserException(String message) {
        super(message);
    }

    public UserException(String message, Throwable cause) {
        super(message, cause);
    }

    public UserException(Throwable cause) {
        super(cause);
    }

    protected UserException(String message, Throwable cause, boolean enableSuppression, boolean writableStackTrace) {
        super(message, cause, enableSuppression, writableStackTrace);
    }
}
Controller도 추가합시다.
    @GetMapping("/api/members/{id}")
    public MemberDto getMember(@PathVariable("id") String id ) {
        if (id.equals("ex")) {
            throw new RuntimeException("잘못된 사용자");
        }
        if (id.equals("bad")) {
            throw new IllegalArgumentException("잘못된 입력 값");
        }
        if (id.equals("user-ex")) {
            throw new UserException("사용자 오류");
        }

        return new MemberDto(id, "hello " + id);
    }
에러 호출 : http://localhost:8080/api/members/user-ex
결과 :
{
    "ex": "hello.itemservice.web.exception.ex.UserException",
    "message": "사용자 오류"
}
자, 그런데 매번 API나 page 스팩에 맞춰서 resolver를 만들어주는건 좀 아닌거 같죠?
그래서 존재하는게 @ExceptionHandler입니다.
@ExceptionHandler
뭐, 직전 설명에서 다 설명해서 따로 이게 무엇이다라고 설명해드릴 필요는 없을거 같습니다.
다시한번 말씀드리면, 복잡하게 ExceptionResolver에 조건을 여러개주고 API, WEB Error를 설계하는 방식을 이 어노테이션 한방으로 끝낼 수 있습니다. 이것만 알아도... 무방한거죠...
우선 들어가기전에 Spring boot의 Error 처리 우선도를 확인해보겠습니다.
- 우선순위
1. ExceptionHandlerExceptionResolver
2. ResponseStatusExceptionResolver
3. DefaultHandlerExceptionResolver
즉, 위에서 설명하는 ExceptionHandlerExceptionResolver를 어노테이션 화 시킨 Spring의 @ExceptionHandler이 가장 우선순위에 있습니다.
@ResponseStatus
해당 기능을 알아보기전에 2 순위인 ResponseStatusExceptionResolver의 기능을 알아보려고 합니다.
해당 어노테이션은 Exception class에 선언이 가능합니다.
@ResponseStatus(code = HttpStatus.BAD_REQUEST, reason = "잘못된 요청 오류")
public class BadRequestException extends RuntimeException {
}
참고로 messageSource도 적용 가능합니다.
@ResponseStatus(code = HttpStatus.BAD_REQUEST, reason = "error.bad")그 외 수정이 불가능한 클래스에는 직접 ResponseStatusException를 호출단에서 사용가능합니다.
@GetMapping("/api/response-status-ex2")
public String responseStatusEx2() {
 	throw new ResponseStatusException(HttpStatus.NOT_FOUND, "error.bad", new IllegalArgumentException());
}
결과는 생략하겠습니다.
DefaultHandlerExceptionResolver
다음은 3순위인 DefaultHandlerExceptionResolver를 알아봅시다.
해당 기능은 셋팅할게 없습니다 그냥 boot에서 해주는겁니다.
이때 우리가 알고있던데로 사용자 요청에서 에러가나면 500에러를 발생하는게 기본이지만, boot는 해당 에러의 문제점을 케치하고 적절한 Exception과 code, message를 출력해줍니다.
//숫자형 타입입니다. 숫자만 인식이 가능합니다.
@GetMapping("/api/default-handler-ex")
public String defaultException(@RequestParam Integer data) {
 	return "ok";
}
정상 호출 : http://localhost:8080/api/default-handler-ex?data=11
결과 :
ok에러 호출 : http://localhost:8080/api/default-handler-ex?data=words
결과 :
{
 "status": 400,
 "error": "Bad Request",
 "exception":
"org.springframework.web.method.annotation.MethodArgumentTypeMismatchException"
,
 "message": "Failed to convert value of type 'java.lang.String' to required
type 'java.lang.Integer'; nested exception is java.lang.NumberFormatException:
For input string: \"hello\"",
 "path": "/api/default-handler-ex"
}
다음과 같이 500에러가 나야할 부분을 사용자 에러인 400으로 리턴해줍니다. '당신이 숫자를 넣어야 할 곳에 문자를 넣었으니 이런게 발생한겁니다.' 하고 알려주고 있네요. message는 server.error.include-message=always 설정해주셔야 합니다.
@ExceptionHandle
자 그럼 1순위를 알아봅시다. 가장 많이 사용되고 현업에서도 이걸 위주로 사용할 겁니다. 특히 API 개발자는 더더욱이요.
우선 Error를 Json으로 만들어줄 객체를 하나 생성합니다.
@Data
@AllArgsConstructor
public class ErrorResult {
 	private String code;
 	private String message;
}
그리고 ErrorResolver를 적용할 Controller에 다음을 추가 시킵니다.
    @ResponseStatus(HttpStatus.BAD_REQUEST)
    @ExceptionHandler
    public ErrorResult illegalExHandler(IllegalArgumentException e) {
        log.error("@ExceptionHandler " , e);
        return new ErrorResult("BAD", e.getMessage());
    }

    @ExceptionHandler
    public ResponseEntity<ErrorResult> userExHandler(UserException e){
        log.error("@ExceptionHandler " , e);
        ErrorResult errorResult = new ErrorResult("USER-EX", e.getMessage());
        return new ResponseEntity<>(errorResult, HttpStatus.BAD_REQUEST);
    }

    @ResponseStatus(HttpStatus.INTERNAL_SERVER_ERROR)
    @ExceptionHandler
    public ErrorResult exHandler(Exception e) {
        log.error("@ExceptionHandler " , e);
        return new ErrorResult("EX", "내부 오류");
    }
위의 예제에서는 3가지 방법을 제시했습니다. 맨위에 껏만 설명해드리면 이해가 가실 겁니다.
@ResponseStatus(HttpStatus.BAD_REQUEST)를 선언한 것을 확인가능합니다. 이유인 즉 응답코드를 200으로 전송하기 때문입니다.

음... 맞죠. Error난 것을 정상적으로 처리해줬잖아요? 그런데 우리가 원하는건 이게 아니죠.
그럴때 쓰는것이 @ResponseStatus(HttpStatus.BAD_REQUEST) 입니다. 400으로 바꿔서 결과를 뿌려줍니다. 결과는 직접 확인해보세요.
첫번째 매서드의 파라미터 값이 (IllegalArgumentException e) 되어있는데, IllegalArgumentException 오류가 발생하면 해당 매서드를 실행시키겠다는 의미입니다.
세번째의 (Excption e)는 눈치 채셨겠지만, 그 외 나머지 에러는 여기에 걸릴게 됩니다.
@ControllerAdvice
@ExceptionHandle을 작성하는 법을 알아봤습니다. 그런데, 이걸 Controller마다 다 붙혀넣어줘야 적용이 되는건가요? ㅋㅋ 아니죠. 이럴때 쓰는게 Advice 입니다 AOP같은 개념이죠
@Slf4j
@RestControllerAdvice("hello.itemservice.web.exception.api")
public class ExControllerAdvice {

    @ResponseStatus(HttpStatus.BAD_REQUEST)
    @ExceptionHandler
    public ErrorResult illegalExHandler(IllegalArgumentException e) {
        log.error("@ExceptionHandler " , e);
        return new ErrorResult("BAD", e.getMessage());
    }

    @ExceptionHandler
    public ResponseEntity<ErrorResult> userExHandler(UserException e){
        log.error("@ExceptionHandler " , e);
        ErrorResult errorResult = new ErrorResult("USER-EX", e.getMessage());
        return new ResponseEntity<>(errorResult, HttpStatus.BAD_REQUEST);
    }

    @ResponseStatus(HttpStatus.INTERNAL_SERVER_ERROR)
    @ExceptionHandler
    public ErrorResult exHandler(Exception e) {
        log.error("@ExceptionHandler " , e);
        return new ErrorResult("EX", "내부 오류");
    }

}
다음과 같이 새로운 Class 파일을 작성하여 @RestControllerAdvice, @ControllerAdvice를 선언해주면 죕니다.
해당 파일은 global 단위로 setting이 가능해요.
- 모든 @RestController 어노테이션 기반을 참고합니다. 커스텀 어노테이션도 가능하겠죠?
@ControllerAdvice(annotations = RestController.class)
public class ExampleAdvice1 {}- Package 단위로 설정가능합니다. 이게 AOP랑 익숙해서 하기 쉽겠네요.
@ControllerAdvice("org.example.controllers")
public class ExampleAdvice2 {}- 당연히 class 단위로도 가능하겠죠?
@ControllerAdvice(assignableTypes = {ControllerInterface.class, AbstractController.class})
public class ExampleAdvice3 {}
결론
결국 우리는 boot를 사용할테니 View 기반의 Error page는 그냥 error.html, 400.html만 만들어서 넣어주면 될거 같습니다.
API 기반의 Error response는 @ExceptionHandle와 @RestControllerAdvice를 사용하면 되겠구요... 그래도 기반이 되는 원리를 한번씩 익혀보는건 개발자의 소양입니다