이주의 property
gesture 인식
UIImageView, UILabel를 비롯 몇몇 UI component는 UIControl을 상속받지 않아서 gesture를 인식하지 않는다.
UIControl
The base class for controls, which are visual elements that convey a specific action or intention in response to user interactions.
Controls implement elements such as buttons and sliders, which your app can use to facilitate navigation, gather user input, or manipulate content. Controls use the target-action mechanism to report user interactions to your app.
이들이 유저의 interaction, 탭이나 스크롤을 인식하기 위해선 2가지를 활용할 수 있다.
backgroundColor가UIColor.clear인 투명 버튼을 해당 component 위에 올리기
이 방법의 문제점은 저번에도 언급했지만 유저의 터치 animation과 같은 부드러운 효과가 나타나지 못한다는 것이 있다.
UITapGestureRecognizer를 추가
해당 component에서 tab을 인식하도록 gestureRecognizer를 추가한다. 이 경우 필수로 userInteractionEnabled가 true로 되어야 실제로 인식한다.
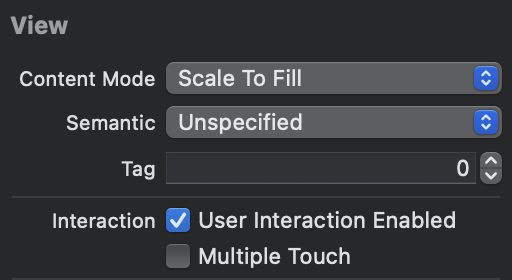
참고) UIView는 default로 isUserInteractionEnabled가 true로 설정되어 있다.
tag
UIView의 속성으로 정의는 다음과 같다.
tag
An integer that you can use to identify view objects in your application.
The default value is 0. You can set the value of this tag and use that value to identify the view later.
UIView의 property로 component를 구분하는데 활용한다.
예를 들어 UIButton이 여러 개고, 동일한 IBAction 함수에 연결을 했다면, 이를 구분하는데 tag를 활용한다.
이 때, enum으로 각 button의 tag와 해당 button이 연관된 case로 원하는 결과값을 도출하는 데 연결할 수 있다.
enum ButtonType: Int {
	case PlusButton = 1
    case MinusButton

    var buttonResult: UIImage {
		switch self {
        case .PlusButton:
        	return UIImage(named: "PlusEffect")
        case .MinusButton:
        	return UIImage(named: "MinusEffect")
    	}
    }
}

class ViewController: UIViewController {
	@IBOutlet weak var imageView: UIImageView!

    //...중략....

    @IBAction func buttonTapped(_ sender: UIButton) {
    	imageView.image = ButtonResult(rawValue: sender.tag).buttonResult
    }
}
UITextView 관련
UITextView
A scrollable, multiline text region.
placeholder는 Interfacec Builder 없이 code로 설정해야 한다.
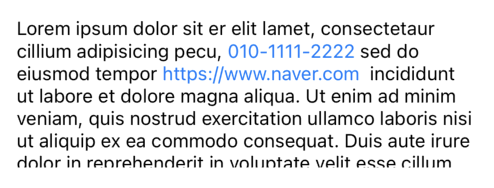
Data Detectors 속성을 활용할 수 있다. 이 경우, 유저의 interaction을 막아서, detection된 정보만 활용하도록 Editable option이 false로 설정되어야 한다.
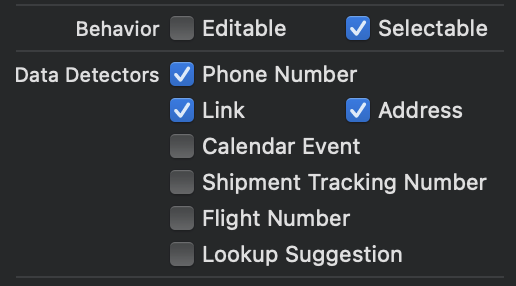
해당하는 옵션과 연관된 정보를 인식하면 다음과 같이 표시해준다.
UINavigationBar와 BarButtonItem
UIBarButtonItem
A specialized button for placement on a toolbar, navigation bar, or shortcuts bar.
UINavigationBar를 비롯해 Bar에 특화된 UI component이다.
따라서 일반 UIButton을 비롯한 component를 Bar 내부에 위치하면 UI 요소로 올라가지만, 사용자와 interaction을 하지 못한다.
코드를 활용하면UIButton instance를 생성한 뒤, customView로 활용해서 새로운 UIBarButtonItem instance를 생성하는 방향으로는 활용할 수 있다.
AutoLayout 관련 고민
비율로 잡기
이전까지 constant로 고정값을 주는 방식을 많이 활용했지만 View의 개수가 많아지고 고려해야 할 device 개수가 갈 수록 늘어나면서 고정값은 큰 화면에서 볼 수록 화면 구성이 이상해지는 문제점이 점차 보였다.
SuperView와의 비율, 혹은 동일 위치의 View와의 align 연결 관계를 만들어 Equal Widths/Heights를 통해 2:1, 0.3 multiplier를 적용해 어느 디바이스에서도 해당 비율로 크기가 잡히는 것을 볼 수 있었다.
동일 크기와 간격을 주기 위해선 매번 간격을 따로 설정하기 보단 해당 UI component들을 동시에 선택한 뒤, constraint를 주어 동시에 적용되도록 한다.
좀 더 많은 화면에서 유동적으로 대응하기 위해선 고정값, 특히 height를 비롯한 크기 자체 값을 주는 것보단 비율로 잡는 방향으로 가야겠다.
배민 UI 예시
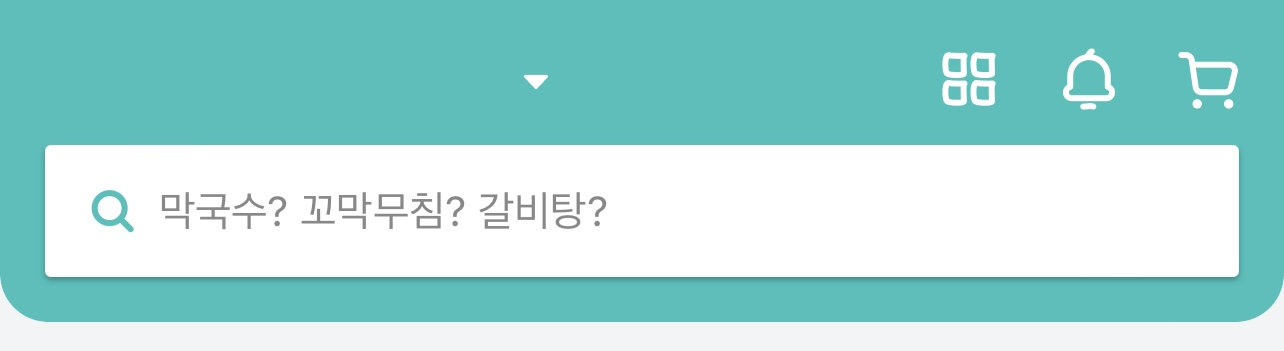
해당 UI를 구성해보려할 때, 처음에는UINavigationBar에 UISearchBar가 포함된 줄 알았다. 하지만 위에서 언급했듯이 UINavigationBar에는ÙIBarButtonIte만 실제 기능을 할 수 있다. 일반 UI component는 동작하지 않는다.
따라서 UINavigationBa에 간격 0으로 UISearchBar가 붙었다 생각해서 밑으로 당겨보니 다음처럼 나타난다.
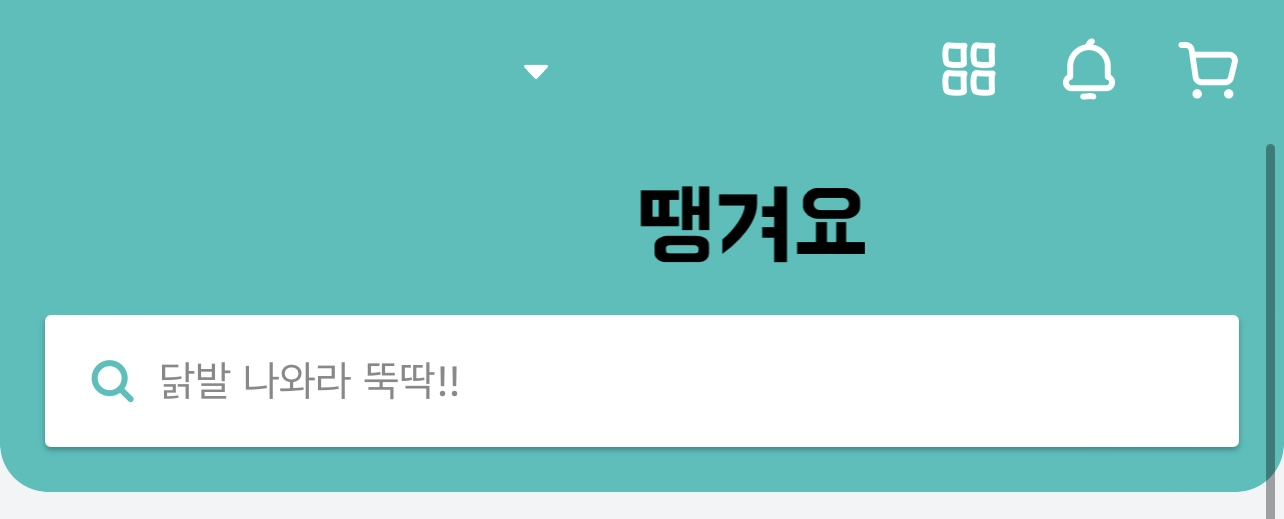
고정된 UINavigationBa와 다르게 당길 수 있었다.
(물론 하단의 여러 카드뷰를 가지고 있는 UICollectionView에서 pull refresh를 구현해야 한다.)
또한 UISearchBar의 maskedCorner를 설정해서 하단 모서리만 둥글게 만들 수 있었다.
카카오톡 프로필 cell 예시
상태 메시지 여부에 따라 UI 구성이 달라진다.

상태 메시지가 없다면 이름이 profile image의 가운데 위치한다.

상태 메시지가 존재하면 이름과 메시지가 병렬을 이뤄 profile image 옆에 위치한다.
UIStackView에서는 속한 UI component가 isHidde이 되면 화면 구성에서 마치 사라진 것처럼 보인다. (존재하긴 하나, axis 구성에 따라 width 혹은 height가 0로 잡히는 듯 하다)
따라서 UITableViewCel의 Content View 내에서 작업할 때 다음과 같은 과정을 거쳤을 것으로 추측된다.
UILabel2개를UIStackView로 묶음fillEqually- 두 Label은
Equal Height로 설정
UIImageVie옆에 constraint으로 간격 두기
Profile 설정에서 상태 메시지 입력값에 따라 상태 메시지 설정을 조건문으로 분기처리를 한다.
if statusTextField.hasText {
	statusLabel.text = statusTextField.text
} else {
	statusLabel.isHidden = true
}
RawString
전통적인 String literal에서 중간의 "들도 출력하기 위해선 \와 함께 작성했어야 했다.
print("This is an example for printing \" inside of String literals")

//결과물
//This is an example for printing " inside of String literals
또한 \들도 출력하기 위해선 다음과 같이 작성했어야 했다.
print("This is an example for printing \" and \\ inside of String literals")

//결과물
//This is an example for printing " and \ inside of String literals
내부 literal들이 복잡해질 수록 코드도 괴랄해짐을 경험할 수 있다.
print("Isn't this weird to use \"Escaping Character\", which is \\. But then can we use \"\\\\\" for printing \\\\ ?")

//결과물
//Isn't this weird to use "Escaping Character", which is \. But then can we use "\\" for printing \\ ?"는 문자열 범위의 경계를 나타내는 기호 (String Delimiters),\는 \n, \t와 같은 Escape characters로 사용되기에 문자 그대로 출력하는 것인지 맡은 역할을 해야하는 것인지 구분해줄 필요가 있기 때문이다.
이에 Swift 5가 되면서 이 문제점을 해결하기 위해 Raw String을 지원하기 시작했다.
String literals can now be expressed using enhanced delimiters. A string literal with one or more number signs (#) before the opening quote treats backslashes and double-quote characters as literal unless they’re followed by the same number of number signs. Use enhanced delimiters to avoid cluttering string literals that contain many double-quote or backslash characters with extra escapes
#를 양쪽에 붙이면 내부에 어떤 문자가 존재하든 그대로 출력을 해준다.
print(#"<a href="\#(url)" title="Apple Developer">"#)

// Equivalent to:
print("<a href=\"\(url)\" title=\"Apple Developer\">")
그렇다면 \n과 같은 Escaping Sequence는 그대로 출력되는 것이 아닐까?
print(#"Isn't this \n printed as it is shown, not working as return key"#)

//결과물
//Isn't this \n printed as it is shown, not working as return key
역시나 문법에 관계없이 그대로 출력한다. 따라서 이를 해결하기 위해 \가 자기 역할을 하는 것을 나타내기 위해 \#로 작성한다.
print(#"This is an example for using # next to \ for showing \n works as \#n string literals"#)

//결과물
//This is an example for using # next to \ for showing \n works as
// string literals
String Interpolation, 문자열 보간법에서도 동일하게 활용한다.
let number = 5
print(#"This is an example for using # next to \ for showing \() works as this number is \#(number) in string literals"#)

//결과물
//This is an example for using # next to \ for showing \() works as this number is 5 in string literals
참고
Swift Github Issue: Enhancing String Literals Delimiters to Support Raw Text
LaunchScreen
목적성
A launch screen isn’t an onboarding experience or a splash screen, and it isn’t an opportunity for artistic expression. A launch screen’s sole function is to enhance the perception of your experience as quick to launch and immediately ready to use.
LaunchScreen은 사용자가 앱을 사용하기 전 단계에서 뜨는 화면 역할이다. 따라서 실제 앱 사용 전에 미리 준비를 시킨다든지, 애니메이션을 보여준다든지 하는 것이 아니라 앱이 설치되고 첫 화면으로 빠르게 교체되는 것이 중요하다.
따라서 애플 가이드라인에서는 첫 화면과 최대한 유사하길 권장한다.
Design a launch screen that’s nearly identical to the first screen of your app. Also make sure that your launch screen matches the device’s current appearance.
이 LaunchScreen은 최소한의 행동만 나타나야 하므로 정적인 View 위주로 추가할 수 있으며 메모리에 load하는데 오래 걸리는 큰 파일들을 활용하는 것도 좋지 않다.
또한 다른 storyboard들과 다르게 코드와 연결하지 않는다. 정책 사항이라 어찌할 도리가 없다.
다른 앱들은 잘만 애니메이션 쓰고 비디오 틀고 날아다니던데?
앱 실행때마다 LaunchScreen 이미지가 달라지고, 앱 아이콘 효과 등 모두 LaunchScreen인 척 하는 것이다. 실제로는 storyboard의 scene들을 유려하게 연결해서 2,3초 후에 지나가도록 하는 등 화면 전환 효과를 준다.
모든 앱이 LaunchScreen 사용?
앱의 플랫폼에 따라 달라진다. 가이드라인에는 다음과 같이 나타난다.
Not every platform requires a launch screen.
- iOS, iPadOS, and tvOS apps must supply a launch screen.
- macOS, visionOS, and watchOS apps don’t need a launch screen.
iOS는 무조건 제공해줘야 한다. 따라서 무턱대고 LaunchScreen.storyboard 파일을 삭제하면 안된다. iOS 앱 개발에 LaunchScreen이 없다면 App Store 심사에서 reject 사유가 될 수 있다.
참고
Control Event
배경
UIControl을 상속받는 UI component들은 사용자와의 상호 작용 중 control event를 다뤄야 한다. 이를 위해 Target-Action 디자인 패턴을 활용한다.
Target-action is a design pattern to help you handle these user interactions efficiently. By only registering actions against specific events on your controls, you simplify your event processing, while making your code more maintainable and easier to read.
사용자와의 상호 작용 중 일어날 수 있는 event만 액션 함수로 관리해서 사용 관리가 용이해진다.
종류
UIControl에서 나타날 수 있는 event들 목록은 다음과 같다.
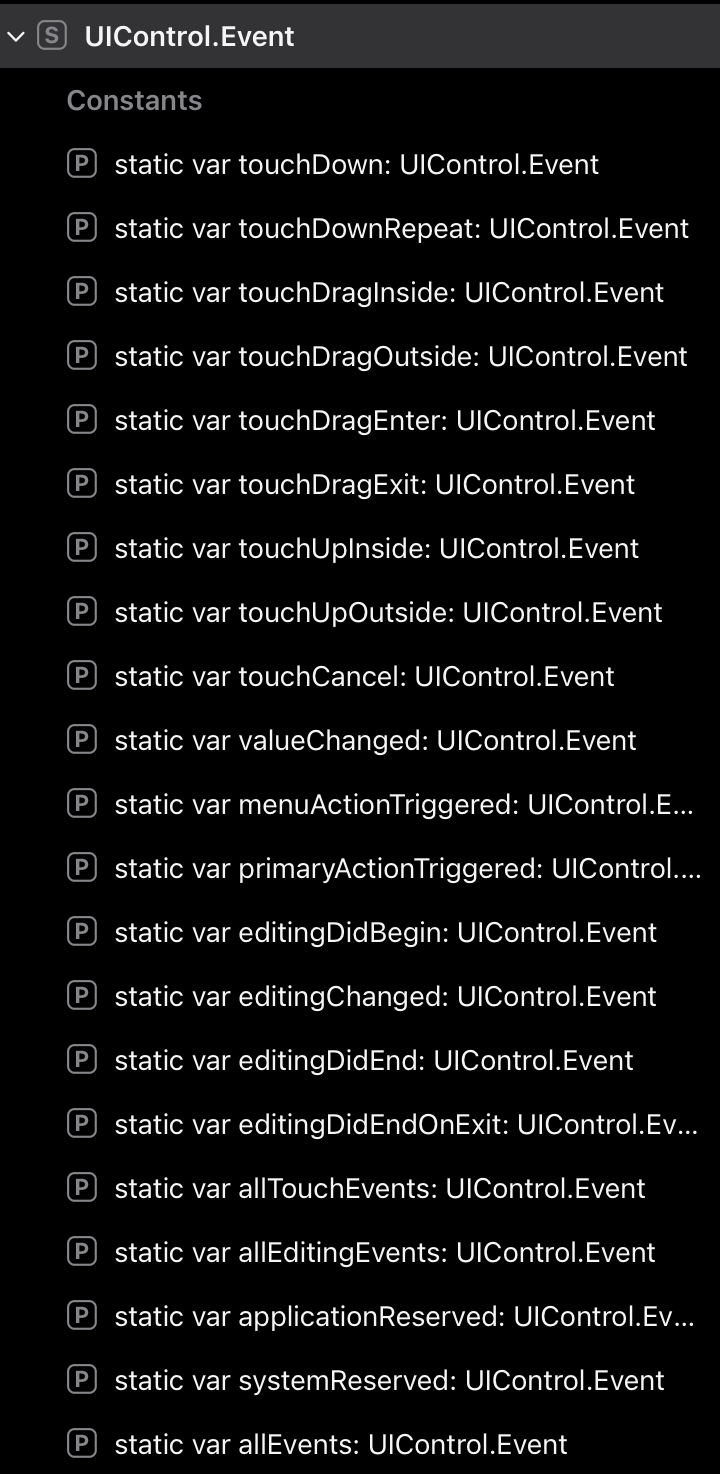
키워드 touch로 시작하는 event들은 유저의 탭과 관련된 이벤트이다.
여기서는 touch 이외의 event들에 대해 알아보자
valueChanged
A touch dragging or otherwise manipulating a control, causing it to emit a series of different values.
사용자의 액션으로 값이 변경되는 event이다.
관련 UI component들은 UISwitch, UISlider, UIDatePicker가 있다.
menuActionTriggered
A menu action has triggered prior to the menu being presented.
UIButton 중 menu 버튼이 나타나기 전에 이미 action이 수행되는 event이다.
primaryActionTriggered
A semantic action triggered by buttons.
버튼이 눌릴때 발생하는 이벤트로 주로 tvOS에서 사용한다.
애플TV에서는 TouchUpInside와 같이 유저가 직접 화면의 버튼을 누를 수 없으므로 focus 인식을 통한 이 event를 활용한다.
키워드 editing으로 시작하는 event들은 UITextField와 유저의 입력과 관련된 이벤트이다.
editingDidBegin
A touch initiating an editing session in a text field by entering its bounds.
입력칸에 커서가 뜨면서 편집이 시작될 때 호출된다.
editingChanged
A touch making an editing change in a text field.
유저가 입력한 값이 변할 때마다 호출된다.
editingDidEnd
A touch ending an editing session in a text field by leaving its bounds.
유저의 입력이 끝나면 호출된다. 키보드를 아직 내리지 않은 상태이다.
editingDidEndOnExit
A touch ending an editing session in a text field.
키보드의 return 키를 터치했을 때 발생, 입력이 종료되어 키보드가 내려가게 된다.
allEditingEvents
All editing touches for text fields.
모든 editing과 관련되어 UITextField를 사용자가 누르면 호출된다.
나머지는 전체적인 상황과 관련된 event들이다.
applicationReserved
A range of control-event values available for app use.
각 앱에서 프로그래머가 임의로 지정할 수 있는 이벤트 값의 범위를 나타낸다. 개발자가 직접 지정할 수 있다.
systemReserved
A range of control-event values reserved for internal framework use.
내부 프레임워크 내에서 사용하도록 예약된 이벤트 값의 범위를 나타낸다.
allEvents
All events, including system events.
시스템 이벤트를 포함해 어떤 이벤트가 발생하더라도 호출된다.
참고
Respond to UIControl Events: Target-Action
Alert 모듈화
유저에게 알림을 주기 위해 alert가 필요한 상황마다 UIAlertController instance를 생성해서 활용했다.
"동작한다"의 레벨에선 작동하기에 넘어가도 되지만 "유지/보수" 관점에선 그냥 넘어가선 안된다.
AlertController의 타이틀과 메시지, 혹은 AlertAction의 메시지를 매 생성마다 작성하고 끝내면 이후 수정할 일이 발생 시 일일이 찾아가야 하는 번거로움이 있다.
따라서 부정적인 Alert, 긍정적인 Alert 2개 정도로 함수를 만든 뒤, 필요한 상황마다 함수 호출만 해주면 차후 함수 부분만 수정을 해주면 간단하게 해결된다.
func positiveAlert(title: String, message: String) {
	let alert = UIAlertController(title: title, message: message, preferredStyle: .alert)
    let action = UIAlertAction(title: "확인", style: .cancel)
    //필요 시, action에 handler 추가해서 action 버튼 누르면 어떤 작업할 지 추가 코드

    alert.addAction(action)
    present(alert, animated: true)
}

func negativeAlert(title: String, message: String) {
	let alert = UIAlertController(title: title, message: message, preferredStyle: .alert)
    let action = UIAlertAction(title: "삭제", style: .destructive)

    alert.addAction(action)
    present(alert, animated: true)
}
추가로 alert 관련하여 버튼 누른 뒤, 해당 데이터를 바로 삭제하거나 추가하는 것은 Compiler 기준으로 아무런 문제가 없다. 하지만 유저 데이터 관리 입장에서 조금 위험할 수 있다.
따라서 UserConfirmationRequired 와 같은 custom struct로 실제 삭제 시, 유저 허가를 요구해서 추가 작업이 필요함을 개발자 자신에게 알린다. 이 경우, 코드를 단순 UIAction만 작성하지 않고 유저의 허가가 필요한 안전장치를 추가해서 유저 데이터 관리에 안전을 더한다.
참고
Building Reusable code for UIAlertController
UIAlertAction: Turning Compile-time Safety into Safety for Your Users