React와 Spring을 활용한 게시판의 CRUD 기능을 구현해보기로 했다.
게시판에서 사용하는 Read 기능은 리스트, 그리고 객체 1개로 나누어서 구현할 수 있다.
리스트 구현하기 (파라미터 없는 Get 호출)
최종 화면
테이블에 리스트 번호와 제목, 작성 일자를 순서대로 표기하도록 구현했다.

React단
NoticeMain.js
리스트 화면을 보여주는 컴포넌트이다.
import React, {useEffect, useState} from 'react';
import axios from 'axios';
import './NoticeMain.css';
import {
    Link, Switch, Route, BrowserRouter
} from 'react-router-dom';
function NoticeMain() {
    // 리스트 객체
    const [noticeList, setList] = useState([{
        idx: '',
        title: '',
        content: '',
        updateDate: ''
    }]);
    // 백엔드단에서 리스트 객체를 가져오는 부분
    useEffect(() => {
        axios.get("/notice/list")
            .then(res => setList(res.data.noticeList))
            .catch(error => console.log(error))

    }, []);
    return (
        <div>
            <input type="button" value="추가하기"  className="btn-input btn-toolbar btn-close-white" onClick={insertNotice}/>
            <div className="noticeList">
                <table className="noticeTable">
                    <thead>
                    <tr>
                        <th className="col-lg-2">
                            번호
                        </th>
                        <th className="col-lg-8">
                            제목
                        </th>
                        <th className="col-lg-2">
                            작성일자
                        </th>
                    </tr>
                    </thead>
                    <tbody>
                    {/* list.map을 사용해서 반복문 구현 */}
                    {noticeList.map((notice, idx) => {
                        return (
                            <tr key={notice.idx}>
                                <td>{notice.idx}</td>
                                <td>{notice.title}</td>
                                <td>{notice.updateDate.split("T")[0]}</td>
                            </tr>
                        )
                    })}

                    </tbody>
                </table>
            </div>
        </div>
    );
}
export default NoticeMain;
Spring단
NoticeController.java
컨트롤러에서는 요청을 받아서 서비스에 리스트를 가져오고 리턴해준다.
@GetMapping("/notice/list")
@ResponseBody
public Map<String, Object> getNoticeList() {
Map<String, Object> result = new HashMap<>();
List<NoticeDTO> noticeList = noticeService.getNoticeList();
result.put("noticeList", noticeList);
return result;
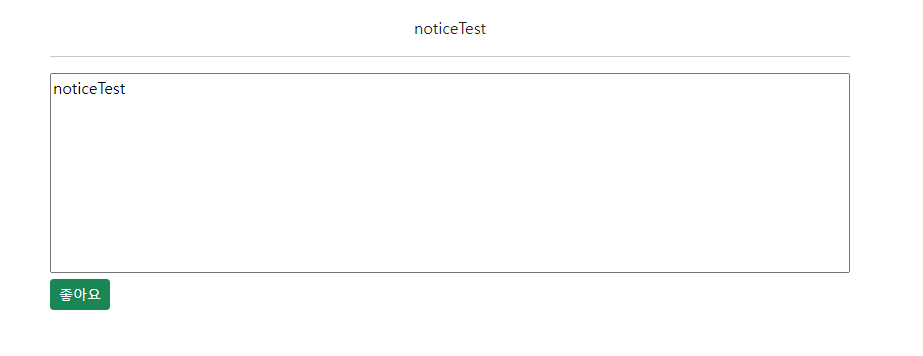
}상세페이지 구현하기 (파라미터 있는 Get 호출)
최종 화면
제목화 내용이 보이는 간단한 구현 페이지이다.
React단
NoticeMain.js
상세페이지를 보기 위한 링크를 걸어주도록 코드를 변경했다.
<tbody>
  {/*클릭 시 상세 페이지로 이동 */}
  {noticeList.map((notice, idx) => {
    return (
            <tr key={notice.idx}>
              <td>{notice.idx}</td>
              <td className="list-title">
                <Link to={"/notice/detail?idx=" + `${notice.idx}`} className="title-link">
                  {notice.title}
                </Link>
              </td>
              <td>{notice.updateDate.split("T")[0]}</td>
            </tr>
			)})}
</tbody>
NoticeDetail.js
import React, {useEffect, useState} from 'react';
import axios from 'axios';
import './NoticeDetail.css';

function NoticeDetail() {
	const location = useLocation();
    //상세페이지에서 보여줄 객체의 id값
    const keyword = getIdx(location);
    const [notice, setNotice] = useState({
        idx : '',
        title : '',
        contents : '',
        updateDate : ''
    });

    //파라미터를 함께 전달하여 api를 호출한다.
    useEffect(() => {
        axios.get("/notice/detail", {
            params : {
                idx : parseInt(keyword)
            }
        })
            .then(res => setNotice(res.data.notice))
            .catch(error => console.log(error));
    }, []);

    return (
        <div className="noticeContent">
            <div>
                {notice.title} <br/>
            </div>
            <div>
                <hr/>
                <textarea readOnly={true} value={notice.contents} >
                </textarea>

            </div>
            <input type="button" value = "좋아요" className="thumbsUp btn btn-success btn-sm" />
            <input type="button" value = "뒤로가기" onClick={handleHistory}  className="backToPage btn btn-toolbar btn-sm"/>

        </div>

    );
}
function getIdx(location) {
    var searchString = location.search;
    const params = new URLSearchParams(searchString);
    const keyword = params.get('idx');

    return keyword
}
export default NoticeDetail;
App.js
path 트리 구조 상 자식 컴포넌트들은 부모컴포넌트보다 위에 있어야 정상적으로 작동한다.
아마 위에서부터 컴파일러가 읽으면서 일치하면 바로 라우팅을 하는 구조일 것 같다.
스프링 시큐리티의 config에서도 비슷한 경우가 있다.
<Route path="/notice/list">
  <NoticeMain/>
</Route>
<Route path="/notice/detail">
  <NoticeDetail/>
</Route>
<Route path="/">
  <MainHome/>
</Route>
Spring단
NoticeController.java
파라미터를 이용해서 DB에서 객체를 가져오고, return해준다.
@GetMapping("/notice/detail")
@ResponseBody
public Map<String, Object> getNotice(@RequestParam long idx) {
        Map<String, Object> result = new HashMap<>();

        NoticeDTO notice = noticeService.getNotice(idx);
        result.put("notice", notice);
        return result;
}
⌒_⌒