Spring
item-service 예제 사용
MySQL
[MySQL 접근]
mysql -u root -p [database 생성 + 권한부여]
CREATE DATABASE connectdb;
CREATE USER guestbook@localhost IDENTIFIED BY 'connect123!@#';
GRANT ALL PRIVILEGES ON connectdb.* TO 'guestbook'@'localhost';
FLUSH PRIVILEGES:
[사용 중인 데이터베이스 전환]
use mydb;연동
1. bulid.gradle 파일에 MySQL 의존성 추가
dependencies {
implementation 'mysql:mysql-connector-java'
	implementation 'org.springframework.boot:spring-boot-starter-data-jpa'
}
2. application.properties 에 DB 정보 추가
[설정 샘플]
# MySQL 설정
spring.datasource.driver-class-name=com.mysql.cj.jdbc.Driver

# DB Source URL
spring.datasource.url=jdbc:mysql://<IP>:<Port/<DB>?useSSL=false&useUnicode=true&serverTimezone=Asia/Seoul

# DB username
spring.datasource.username=<username>

# DB password
spring.datasource.password=<password>

# true 설정시 JPA 쿼리문 확인 가능
spring.jpa.show-sql=true

# DDL(create, alter, drop) 정의시 DB의 고유 기능을 사용할 수 있다.
spring.jpa.hibernate.ddl-auto=update

# JPA의 구현체인 Hibernate가 동작하면서 발생한 SQL의 가독성을 높여준다.
spring.jpa.properties.hibernate.format_sql=true
[설정 예시]
spring.datasource.driver-class-name=com.mysql.cj.jdbc.Driver
spring.datasource.url=jdbc:mysql://127.0.0.1:3306/itemservice?useSSL=false&useUnicode=true&serverTimezone=Asia/Seoul

spring.datasource.username=root
spring.datasource.password=12345678

spring.jpa.show-sql=true
spring.jpa.hibernate.ddl-auto=update
spring.jpa.properties.hibernate.format_sql=true
[MySQL Workbench에서 정보 찾기]
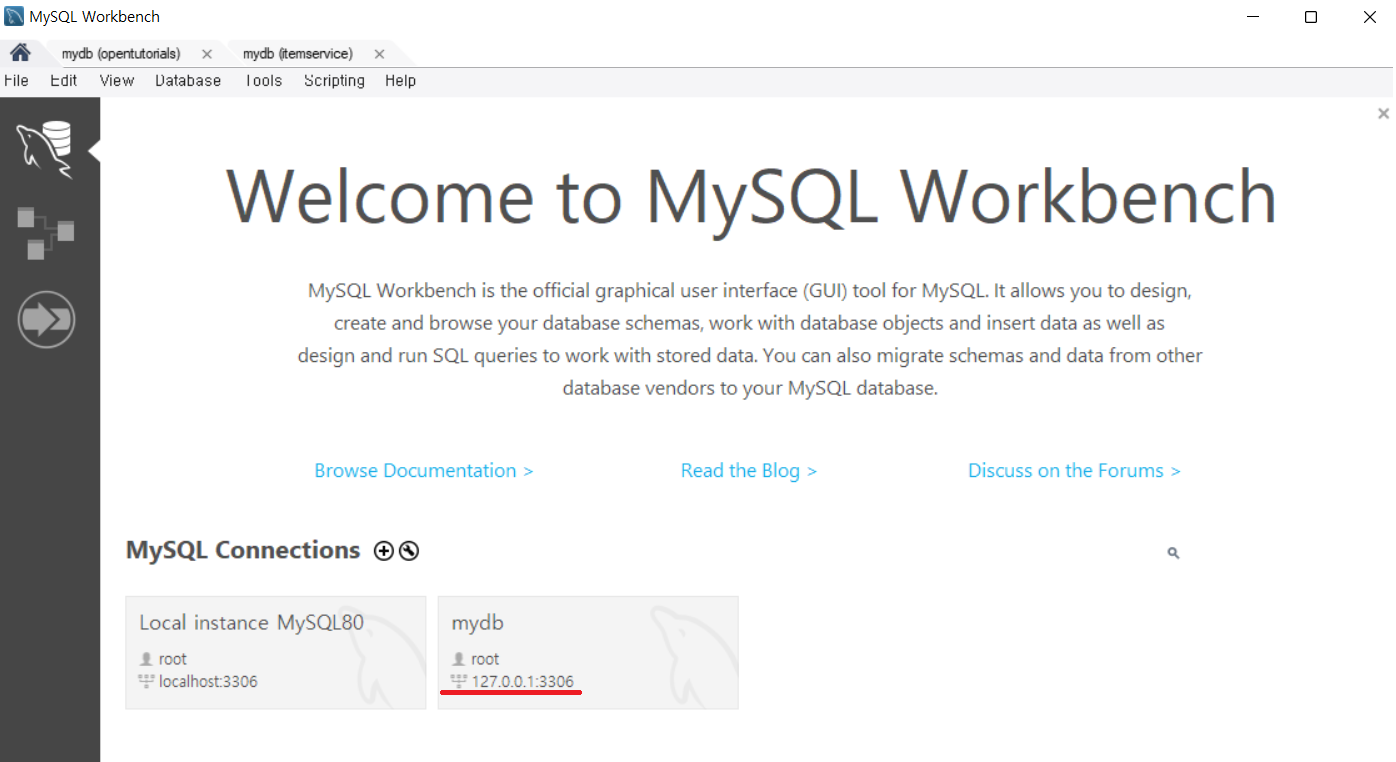
<IP>에 밑줄친 주소를 입력하면 됨<DB>는 사용자가create database할 때 생성한 Database의 이름<username>과<password>는 db 시작할 때 사용자가 입력한 이름과 비밀번호
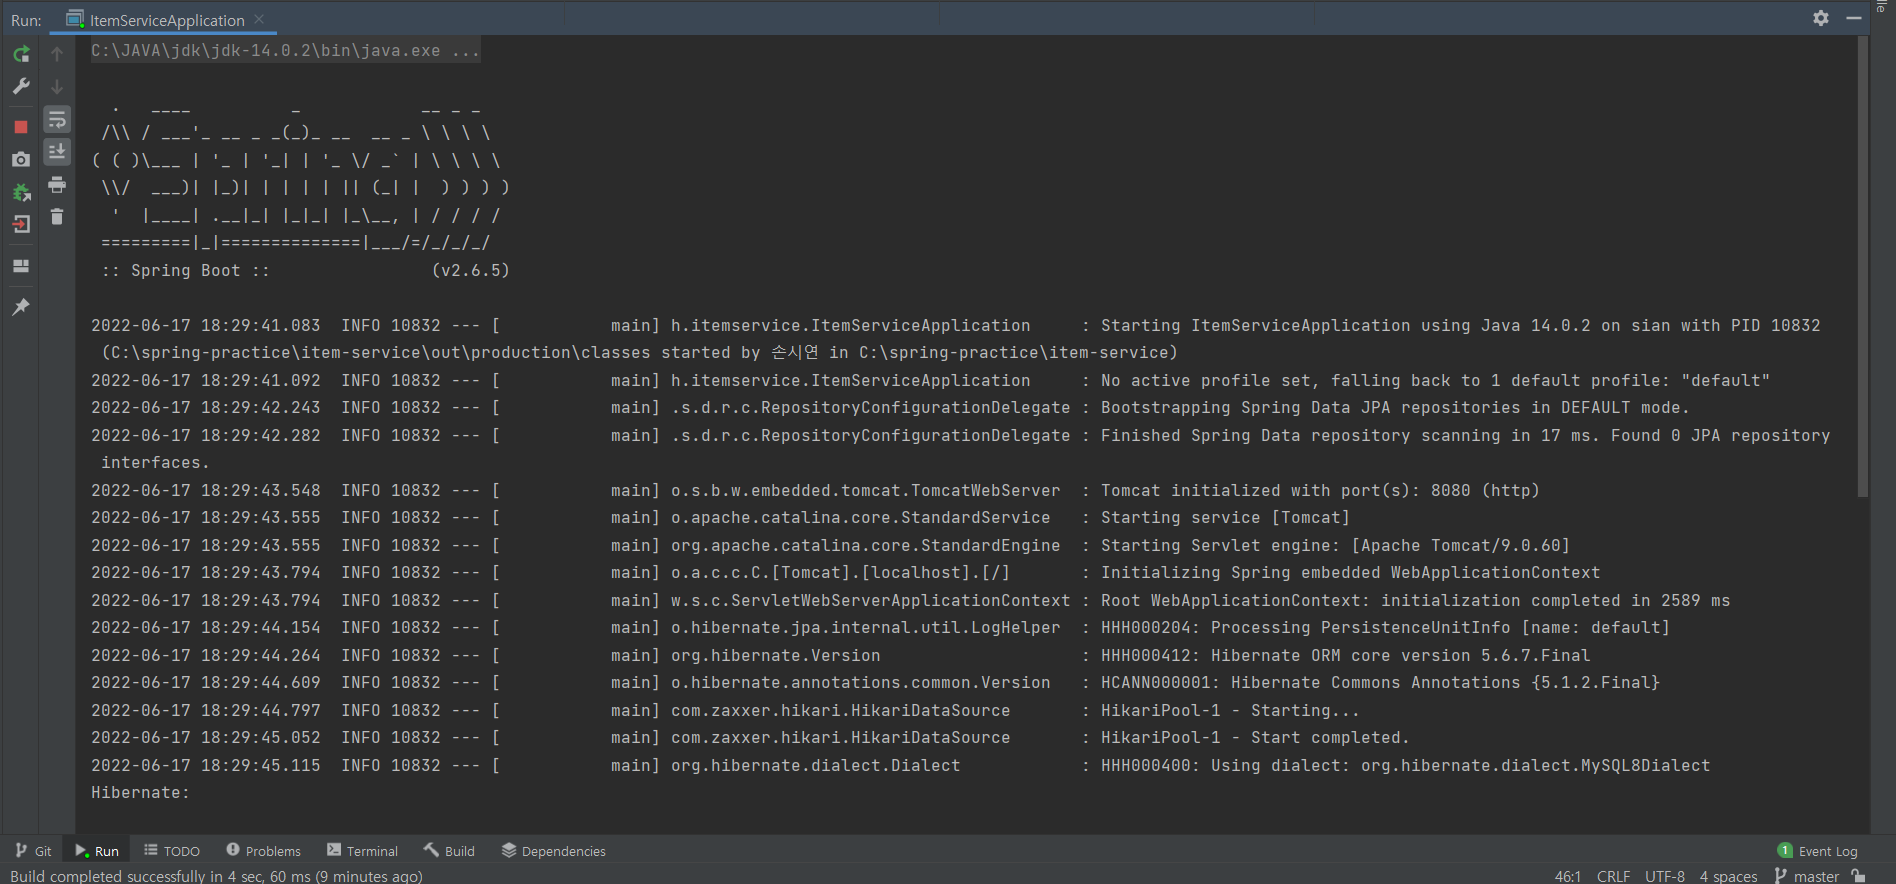
[Intellij 실행화면]

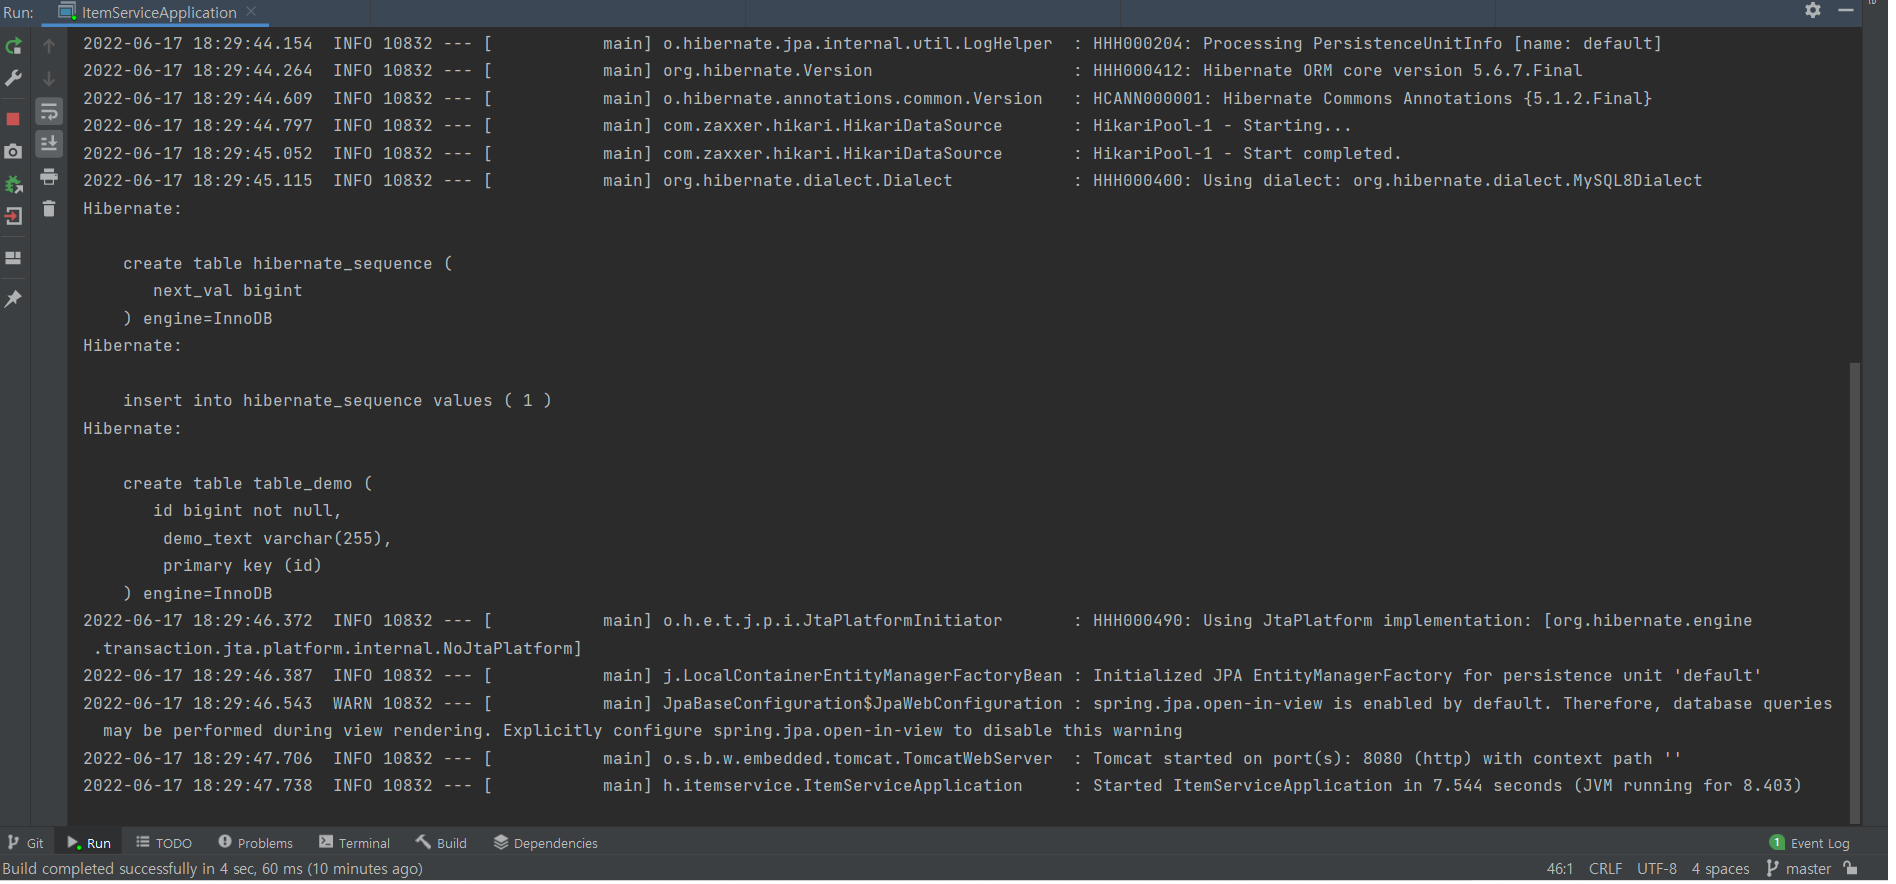
3.JPA Hibernate 엔티티(Entity) 생성 확인
[Demo Entity 생성]
@Table(name = "table_demo")
@Entity
public class Demo {

    @Id @GeneratedValue
    private Long id;

    private String demoText;

}
[Intellij에서 쿼리문 확인]
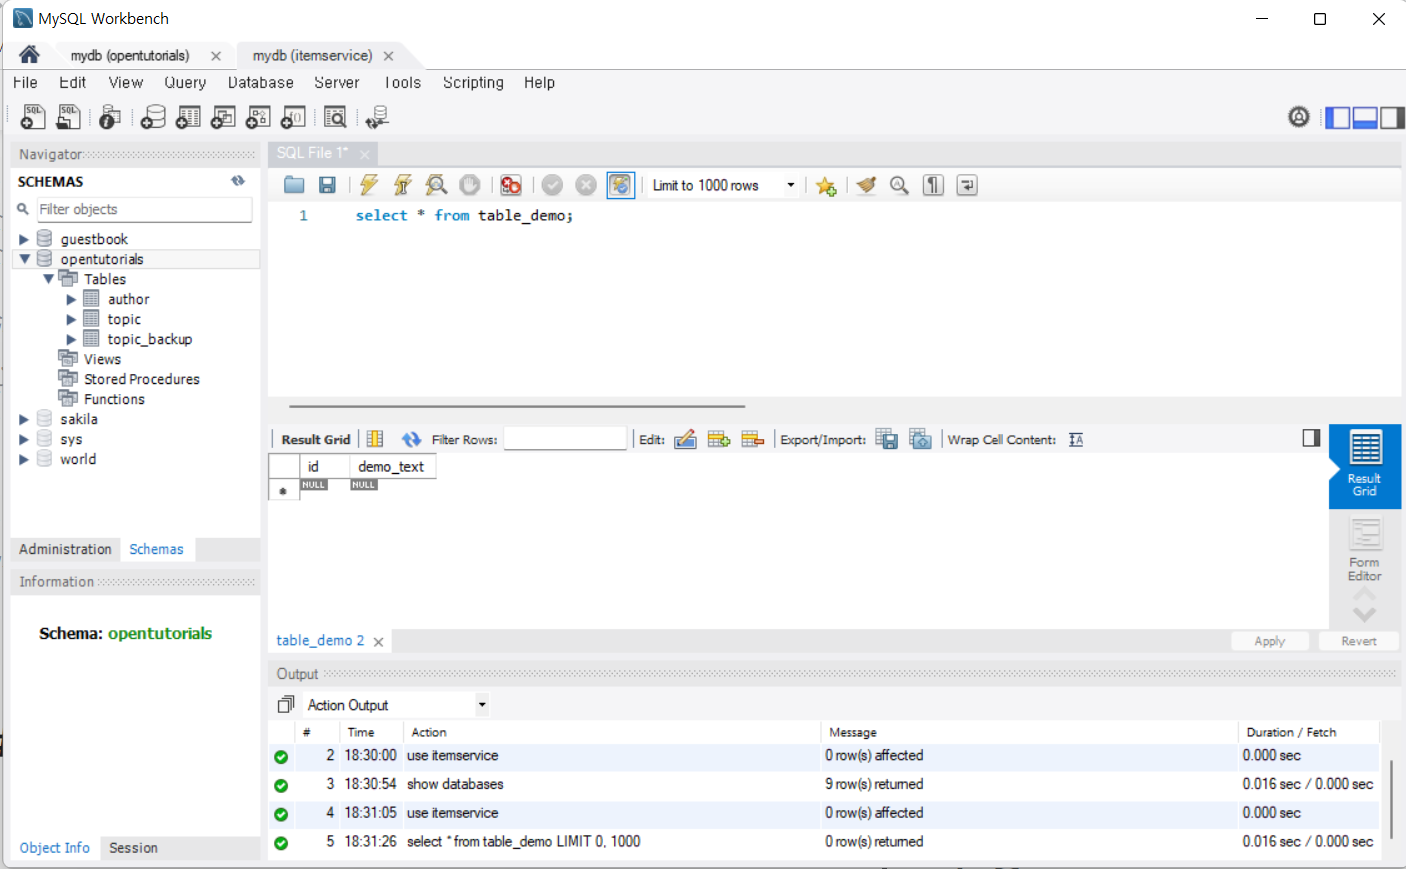
[MySQL에서 table 확인]

Server Engineer