Javascript로 마우스 커서 제어하기
1
mouse move 제어
마우스의 좌표값 찾기
function mouseFunc(event) {
        console.log(event.clientX, event.clientY);
      }

window.addEventListener("mousemove", mouseFunc, false);
- `mousemove` 이벤트를 통해 `mouseFunc`함수를 실행 - `mousemove` 이벤트의 `clientX` / `clientY` 속성을 통해 마우스의 좌표값 구하기 가능
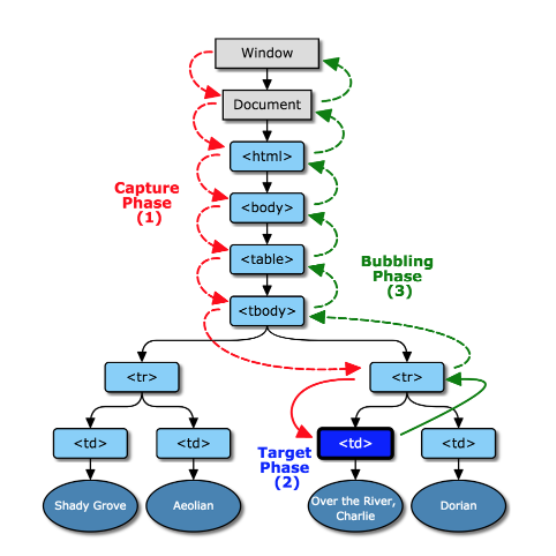
캡처링과 버블링
- 캡처링 - window로 부터 이벤트가 발생한 요소까지 이벤트를 전파한다.
- 버블링 - 이벤트가 발생한 요소로 부터 window 까지 이벤트를 전파한다.
방향의 차이
캡처링과 버블링 제어
- 이벤트를 등록할 때 정의 가능
- addEventListener 메소드를 자세히 보면 알 수 있다.
target.addEventListener(type, listener[, useCapture]);
- 세번째 인자인 useCapture 가 캡처링 여부를 뜻한다.
- default 값은 false
이벤트 전파를 원하지 않는다면?
event.stopPropagation()메소드를 사용하면 된다target.addEventListener("click", function(event){ event.stopPropagation(); });
출처: 마이구미의 HelloWorld
window.onload
- 화면이 전부 로딩된 이후에 실행 시켜줌
window.onload = function () {
function mouseFunc(event) {
console.log(event.clientX, event.clientY);
}
window.addEventListener("mousemove", mouseFunc, false);
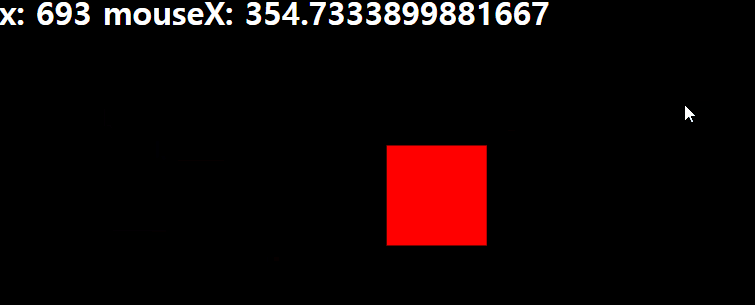
};마우스 커서 바꾸기 코드
<style>
      body {
        position: relative;
        background-color: black;
        cursor: none;           // 커서가 안보이게 바꿔줌
      }
      h1 {
        color: #fff;
      }
      .cursor_item {
        position: absolute;
        width: 100px;           // 빨간 사각형 모양 잡아주기
        height: 100px;
        background-color: red;
        top: 0;               // 기준값에 대한 상대적인 위치 (default는 부모)
        left: 0;
      }
    </style>
  </head>
  <body>
    <h1>test</h1>
    <div class="cursor_item"></div>      // 빨간네모 태그
    <script>
      // window.onload 화면이 전부 로딩된 후 실행
      window.onload = function () {
        // h1 태그 지정
        let h1 = document.getElementsByTagName("h1")[0];
        // class="cursor_item" 지정
        let cursor_item = document.getElementsByClassName("cursor_item")[0];
        // mouseFunc정의
        function mouseFunc(event) {
          // h1에 마우스 x좌표, y좌표 출력
          h1.innerText = "x: " + event.clientX + " y: " + event.clientY;
          // 객체의 위치를 커서로 이동
          cursor_item.style.transform = `translate(${event.clientX}px, ${event.clientY}px)`;
          // console.log(event.clientX, event.clientY);
        }
        // 이벤트 리스너 선언
        window.addEventListener("mousemove", mouseFunc, false);
      };
    </script>
  </body>
객체의 위치 조정 + 각도 조정
transform: translate([X]px, [Y]px) rotate([D]deg);translate([X]px, [Y]px)으로 객체의 위치를 해당 좌표로 이동rotate([D]deg)으로 객체의 각도를 조정
requestAnimationFrame (loop, 자연스러운 움직임)
function callback() {
    console.log("계속 실행됩니다.");
    window.requestAnimationFrame(callback);
}- callback(); 를 한번만 실행 해주면 계속 실행 된다
- requestAnimationFrame : 애니메이션의 프레임을 향상시켜준다
let mouseX = 0;
let mouseY = 0;
let speed = 0.05;

function loop() {
    mouseX += (x - mouseX) * speed;
    mouseY += (y - mouseY) * speed;

    cursor_item.style.transform = `translate(${mouseX}px, ${mouseY}px)`;
    window.requestAnimationFrame(loop);
}- 웹상의 커서 위치와 실제 마우스 커서위치의 차이만큼에 속도를 곱해서 임의로 가속도값을 만들어준다
speed값이 빠를수록 원래 커서와 이동속도가 같아지지만 애니메이션이 끊기게 된다.
CSS transition 옵션으로 간단하게 구현 가능
- 공식문서
- 가속도 값은 https://matthewlein.com/tools/ceaser 사이트에서 변경후 넣어줄 수 있음
transition: all 0.3s ease-in-out;
transition: all 500ms cubic-bezier(0.720, 0.105, 0.375, 1.030);
커서가 아닌 다른 객체에서도 활용 가능
- 적용 전

- 적용 후

프론트엔드개발자를 꿈꾸는 예비 개발자