✏️ Eureka Server
📍 dependencies
- Lombok
- Eureka Server
- Eureka Client
📍 어노테이션 선언
- 서버 실행 객체에 어노테이션을 설정해준다.
package com.baeker.eureka;

import org.springframework.boot.SpringApplication;
import org.springframework.boot.autoconfigure.SpringBootApplication;
import org.springframework.cloud.netflix.eureka.server.EnableEurekaServer;

@EnableEurekaServer // 유레카 서버로 선언
@SpringBootApplication
public class EurekaApplication {

	public static void main(String[] args) {
		SpringApplication.run(EurekaApplication.class, args);
	}

}
📍 환경설정
- 아래 설정을 완료하고 8761 포트로 접속하면 Eureka 관리 페이지에 접속할 수 있다.
server:
  port: 8761 # 유레카는 기본적으로 8761 포트를 사용한다.

eureka:
  client:
    register-with-eureka: false # 유레카 서버를 registry 에 등록할지 여부
    fetch-registry: false # registry 에 있는 정보들을 가져올지 어부

spring:
  application:
    name: eureka-server # 마이크로 서버 이름

# AP 로그 설정
logging:

  charset:
    console: UTF-8
    file: UTF-8

  file:
    name: ./log/${spring.application.name}.log
    max-history: 30 # 로그 보관 기간
✏️ Eureka Client
📍 dependency
// eureka client
implementation 'org.springframework.cloud:spring-cloud-starter-netflix-eureka-client'
📍 어노테이션 선언
- 서버 실행 객체에 어노테이션을 설정해준다.
package com.baeker.member;

import org.springframework.boot.SpringApplication;
import org.springframework.boot.autoconfigure.SpringBootApplication;
import org.springframework.cloud.client.discovery.EnableDiscoveryClient;

@EnableDiscoveryClient
@SpringBootApplication
public class MemberApplication {

	public static void main(String[] args) {
		SpringApplication.run(MemberApplication.class, args);
	}
}
📍 환경설정
- 서버포트값에
0을 입력하면 매번 랜덤으로 사용가능한 포트를 만들어준다.- 포트번호를 입력하고 관리하는것 자체도 규모가 커지면 하드코딩이 될 수 있기 때문에 이런 방식을 사용한다.
- MSA 에서는 포트가 중요하지 않다.
- API Gateway 를 통해 요청이 들어오고, Eureka 를 통해 등록된 IP 로 나눠지기 때문
- port 를 지정해 주기로 했다면 지정된 포트번호를 사용하면 된다.
- 포트번호를 입력하고 관리하는것 자체도 규모가 커지면 하드코딩이 될 수 있기 때문에 이런 방식을 사용한다.
server:
  port: 0

spring:
  application:
    name: baeker-member

eureka:
  instance:

    # IP 와 랜덤문자열을 통해 id
    instance-id: ${spring.client.ip-address}:${random.valuef}

    # IP 와 서버 포트를 통해 Id 설정
#    instance-id: ${spring.client.ip-address}:&{server.port}

  client:
    service-url:
      # Eureka 서버 주소 (만약 2개 이상일경우 , 를 통해 연속 입력)
      defaultZone: http://127.0.0.1:8761/eureka
✏️ 서버 실행
- Eureka Server 가 실행된 상태로 Client 서버를 실행하면 콘솔에 아래의 log 가 찍힌다.
INFO 49403 --- [nfoReplicator-0]
  com.netflix.discovery.DiscoveryClient    :
  DiscoveryClient_BAEKER-MEMBER/${spring.client.ip-address}:
8081 - registration status: 204- 반대로 Eureka Server 엔 등록됬다는 log 찍힌다.
INFO 44985 --- [nio-8761-exec-9]
  c.n.e.registry.AbstractInstanceRegistry  :
  Registered instance BAEKER-MEMBER/${spring.client.ip-address}:
8081 with status UP (replication=false)- 그리고 Eureka Server 에 접속하면 새로 등록된 Client 서버를 확인할 수 있다.

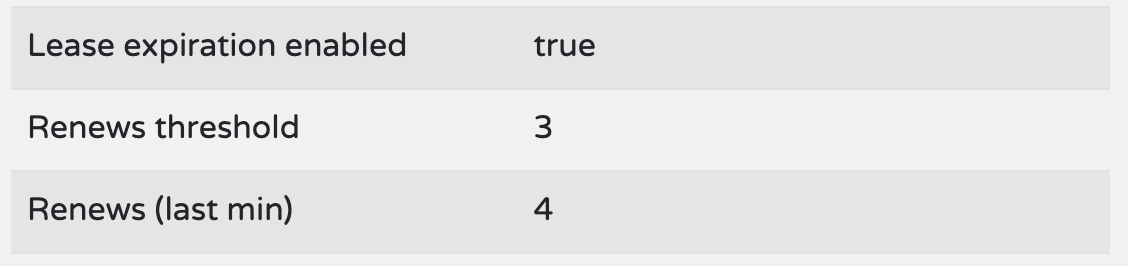
- 이 외에 빨간색 경고문이 발생했다.
- 주기적으로 요청을 보내면서 Renews threshold 에 적힌 숫자 만큼 실패할경우 자동으로 서버에 문제가 있다고 판단하게 된다.
- 아직 서버를 띄운지 얼마 안되서 당연히 실패한다.

- 잠시 뒤면 정상적으로 연결된다.
✏️ API Gateway 연결
- 이제 준비된 Eureka Server 와 API Gateway 를 연결해주면 된다.
📍 Dependency 추가
- API Gateway 도 Client 디팬던시를 추가해준다.
📍 어노테이션 선언
package com.baeker.apigateway;

import org.springframework.boot.SpringApplication;
import org.springframework.boot.autoconfigure.SpringBootApplication;
import org.springframework.cloud.client.discovery.EnableDiscoveryClient;

@EnableDiscoveryClient
@SpringBootApplication
public class ApigatewayApplication {

	public static void main(String[] args) {
		SpringApplication.run(ApigatewayApplication.class, args);
	}
}
📍 환경설정
- 앞서 설정한 Client 의 설정을 해주고
routes설정을 추가로 해줘야 한다.
server:
  port: 9000

eureka:
  instance:
    instance-id: localhost:${server.port}

  client:
    service-url:
      defaultZone: http://127.0.0.1:8761/eureka

spring:

  application:
    name: api-gateway # 로그 파일 설정용

  cloud:
    gateway:

      default-filters:
        - GlobalFilter # gateway 의 요청 ~ 응답 시간을 체크하는 글로벌 필터

      routes:
        - id: baeker-member
          uri: lb://baeker-member # Eureka 에 등록된 서버로 연결
          predicates:
- Path=/api/member/**- gateway 를 실행하면 server 와 client 콘솔에 log 가 찍히고,
Eureka server 에 접속하면 gateway 가 새롭게 등록된걸 확인할 수 있다.

✏️ 백엔드 서버에 요청 보내기
- 이제 Client 는 Gateway 에 요청을 보내는 것으로 마이크로 서버의 비즈니스 로직을 수행할 수 있게 되었다.
- 포스트맨으로 요청을 보내면 정상적으로 json 이 반환된다.

잘못된 내용 PR 환영