한 번에 끝내는 Javascript !
먼저, Javascript란 무엇일까?
가장 기본적으로 웹페이지의 동적인 동작(기능)을 하는 것이라고 볼 수 있다.
그렇다면 Javascript를 사용하는 방법은 어떤 것이 있을까?
<script></script>태그안에서 사용하는 방법
1)head태그안에서script사용하는 방법
2)body태그안에서script사용하는 방법
- Javascript만 담고있는
.js파일을 이용하는 방법
1) Javascript코드가 위치해있는 곳에서 실행한다.
2).js를 사용하면 Javascript코드가 노출되지 않는다.
이제, Javascript를 간단히 사용해볼까?
- 출력
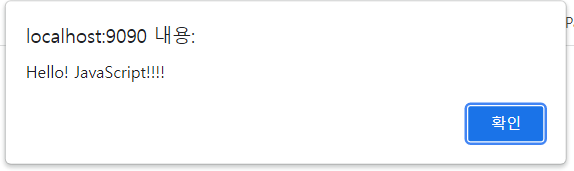
1)alert("Hello! JavaScript");은 새로운(경고) 창으로 출력
2)console.log("Hello JavaScript World!");콘솔창으로 출력
2)document.write("Hello!");document.write("Javascript!");브라우저 화면에 출력
기본 자료형(소문자로 적어야함!)
- 숫자 ⟶ number
- 문자열 ⟶ string
- 논리형 ⟶ boolean
- null ⟶ null
- 언디파인드 ⟶ undefind
변수 선언
- 변수 선언 시 자료형을 명시 안해도 된다!
- 저장되는 값에 따라서 자동으로 자료형이 결정된다.
- 변수명은 문자+숫자+특수문자(_, $)를 조합할 수 있다.
- 첫 글자는 숫자를 사용할 수 없다.
- 공백 문자를 사용할 수 없다.
- 선언하지 않은 변수도 사용할 수 있다.
- 변수 선언 방법
var 변수명; - 문자열은 쌍따옴표("")와 홀따옴표('')를 둘 다 사용 가능하다.
document.write("Hello Javascript <br>");
document.write('Hello Javascript <br>');
따라서 위의 두 코드는 같은 결과를 가지고 온다. - 문자는 별도로 존재하지 않은 자료형이다.
document.write('Hello "Javascript" <br>');
document.write("Hello 'Javascript' <br>");
위의 두 내용 속 따옴표는 그냥 문자로 인식해버린다.
형 변환
var a = true;
var b = 100;
var c = "Hello";
var d = Math.sqrt(4); Math.sqrt()는 값에 √를 씌움.
var e = Math.sqrt(-4); 이렇게 변수 선언을 할 때,
위의 내용을 출력하게 된다면?
document.write(a + "<br>"); ⟶ true
document.write(b + "<br>"); ⟶ 100
document.write(c + "<br>"); ⟶ Hello
document.write(d + "<br>"); ⟶ 2
document.write(e + "<br>"); ⟶ NaN
마지막 e는 음수에 √를 씌우게 된다면 Not a Number(NaN이 뜬다.)
-
숫자로의 변환: Number(값)
document.write(Number(a) + "<br>");⟶ 1
a는 true == 1, false == 0
document.write(Number(b) + "<br>");⟶ 100
document.write(Number(c) + "<br>");⟶ NaN
"Hello"는 숫자 변환이 안되므로 NaN
document.write(Number(d) + "<br>");⟶ 2
document.write(Number(e) + "<br>");⟶ NaN -
문자열로 변환: String(값)
document.write(String(a) + "<br>");⟶ true
document.write(String(b) + "<br>");⟶ 100
document.write(String(c) + "<br>");⟶ Hello
document.write(String(d) + "<br>");⟶ 2
document.write(String(e) + "<br>");⟶ NaN
연산자
- 문자열 연결 연산자 : +
- 산술 연산자 : +, -, *, /(나누기), %(나머지), ++(1증가), --(1감소)
- 논리 연산자 : &&(and), ||(or), !(not)
- == : 값 비교O, 타입비교X, === : 값 비교O, 타입비교O
내장객체 (date)
getter: 날짜에서 필요한 정보를
1.getFullYear():년도(YYYY)
2.getMonth():월(0~11)
3.getDate():일(1~31)
4.getDay():요일번호(0:일, 1:월, ..., 6:토)
5.getHours():시(0~23)
6.getMinutes():분(0~59)
7.getSeconds():초(0~59)
8.getMiliseconds():밀리초(0~999)
9.getTime():1970년 1월 1일 기준 몇 밀리초가 지났는지 추출
setter: 날짜나 시간을 원하는 정보로 변경
1.setFullYear(년도):년도(YYYY)
2.setMonth(월):월(0~11)
3.setDate(일):일(1~31)
4.setHours(시):시(0~23)
5.setMinutes(분):분(0~59)
6.setSeconds(초):초(0~59)
7.setMiliseconds(밀리초):밀리초(0~999)
선언적 함수
- 이름이 있는 함수
- 함수를 정의하고, 호출하는 과정이 필요하다.
- 정의와 호출 순서는 상관없다.
- 선언적 함수는 변수에 저장할 수 있다.
- 선언적 함수를 나중에 따로 변수에 저장할 수 있다.
- 오버로딩이 안된다.
- 선언적 함수 정의
function myFunction(){
	document.write("<h3>myFunction이 실행된다.</h3>");
}- 선언적 함수 호출
myFunction();
- 선언적 함수 정의 (변수에 저장하는 방법)
var view = function yourFunction(){
          document.write("<h1>yourFunction이 실행된다.</h1>")
}- 선언적 함수 호출
view();
- 선언적 함수 만들기
function ourFunction(){
	document.write("<h1>ourFunction이 실행된다.</h1>");
}- 정의된 함수를 변수에 저장하기
var view = ourFunction; // 함수명 뒤에 ()가 없어야한다.- 변수에 저장된 선언적 함수 실행
view();
그러면, 같은 함수 2번 쓰면 어떻게 될까?
	function view(){
		document.write("<h1>첫 번째 view</h1>");
	}

	function view(){
		document.write("<h1>두 번째 view</h1>");
	}
오버로딩이 되지 않는다!
표현식 함수
- 이름이 없는 함수
- 표현식 함수는 "변수"에 저장한 뒤 호출
- 표현식 함수 정의 및 변수에 저장
var view = function(){
	document.write("<h1>첫 번째 표현식 함수</h1>");
}- 표현식 함수 호출
view();* Javascript의 영역은 두 번 읽힌다. 첫 번째로는 "선언적 함수"부분을 읽고, 두 번째로는 나머지 부분을 순차적으로 읽어낸다.
* 호이스팅(hoisting) : 자바스크립트 함수가 실행되기 전에 함수 안에 필요한 변수값들을 모두 모아서 유효 범위의 최상단에 선언하는 것
---> 선언적 함수는 호이스팅의 영향을 받지만 표현식 함수는 호이스팅 영향을 받지 않는다.
근데,, 모르겠으면 그냥 함수를 위에 다 정의하고 나중에 호출을 몰아서 해도 상관없다.
- 표현식 함수와 선언식 함수의 사용 예시
function view01(){
	document.write("<h1>선언적 함수</h1>");	// 선언적 함수
}

var view01 = function(){
	document.write("<h1>표현식 함수</h1>"); // 표현식 함수
}

view01();		// 출력하면?
그렇다면, 정의하는 위치를 다르게 한다면..?
view02();

function view02(){
	document.write("<h1>선언적 함수</h1>");
}

var view02 = function(){
	document.write("<h1>표현식 함수</h1>");
}

view02(); 
위에는 선언적함수, 아래는 표현식 함수의 결과가 나타난다.
자기 호출 함수
- 만들면 바로 호출되는 함수
- 익명 함수()로 묶는 형태
- 다른 개발자와 충동을 방지하기 위해 사용
(function(){
	alert("자기호출함수");
})();
내부함수
- function 내부에 포함된 function을 의미한다.
- function 외부에서는 호출할 수 없다.
콜백함수
- 이름 그대로 나중에 호출되는 함수
- 특별한 선언이나 문법적 특징을 가지고 있지 않다.
// 선언적 함수 정의
function callback(){
	document.write("<h3>callback 함수 호출!</h3>");
}

// 다른 선언적 함수 정의
function callTenTimes( func ){
	for(var n=0; n<10; n++){
		func();
	}
}

// 다른 선언적 함수 호출
callTenTimes(callback);		// 괄호 없이 이름만 전달해야한다
타이머함수
- 특정한 시간에 특정한 함수를 실행시켜주는 함수(주로 익명함수를 많이 사용한다.)
- 전달인자 : 함수, 시간(밀리초)
- 종류
1)id = setTimeout(함수, 시간): 지정된 시간 후 함수를 1번으로 실행
2)clearTimeout(id): 해당 id의setTimeout중지 (1&2번은 세트로 쓴다.)
3)id2 = setInterval(함수, 시간): 지정된 시간마다 함수를 반복해서 실행
4)clearInterval(id2): 해당 id의setInterval중지(3&4번은 세트로 쓴다.) setInterval함수의 경우는 지정된 시간마다 함수를 스택에 쌓아두는 방식을 사용한다.
스택에 많이 쌓이면 원래 실행하기로 한 만큼 실행되지 않을 수도 있다.(사용자제)setInterval함수 대신setTimeout함수를 재귀 호출하자.
1. setTimeout 함수 이용 : 5초 후에 "안녕하세요" 경고창 출력하기
var hello = setTimeout(function(){
	alert("안녕하세요.");
}, 5000);
clearTimeout(hello);

2. setInterval 함수 이용 : 1초 마다 숫자를 1씩 증가시켜서 출력하기
(10초만 진행하고 종료)
var n = 0;
var id2 = setInterval(function(){
	if(n>=9){
		clearInterval(id2);
	}
	document.write(++n);
}, 1000);
	clearInterval(id2);
배열(array)
- 대괄호 [] 로 데이터를 묶어서 저장
- 데이터 구분은 쉼표(,)로 한다.
- 모든 타입을 섞어서 저장할 수 있다.
1. 배열의 생성
	var arr1 = [1, 2, 3, 4, 5];		// 추천
	var arr2 = new Array(1, 2, 3, 4, 5);	// 비추천

2. 배열의 타입
	document.write("<h1>arr1의 타입 : " + typeof(arr1) + "</h1>");
	document.write("<h1>arr2의 타입 : " + typeof(arr2) + "</h1>");

3. 배열 내용
	document.write("<h1>arr1의 내용 : " + arr1 + "</h1>");
	document.write("<h1>arr2의 내용 : " + arr2 + "</h1>");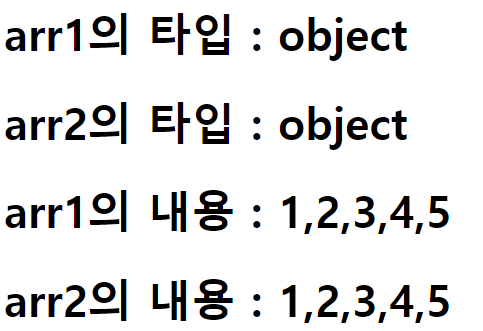
- 중간에 값이 없는 배열도 생성할 수 있다.(홀(hole)이 있다고 한다)
var arr = [1, 2, 3, 4, 5]; 라는 배열을 만들었다.

arr[5] = 6; 와 같이 존재하지 않는 인덱스를 넣었다.

document.write("<h1>" + arr + "</h1>");	  하지만 출력하면 어떻게 될까?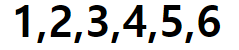
arr[7] = 7;	 한 칸을 건너 뛰어서 값을 넣어주었다.

document.write("<h1>" + arr + "</h1>");	과연 어떻게 출력될까?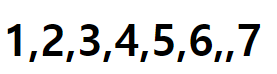
그렇다면 배열의 길이는 얼마일까?
document.write("<h1> arr의 길이 : " + arr.length + "</h1>");
배열의 요소 수정하기
var arr1 = [1, 2, 3, 4, 5]; 가 있다고 가정하자.

arr.push(6); (배열의 마지막에 추가하기 : push(값))

arr.unshift(0); (배열의 첫번째 요소에 추가하기 : unshift(값))

document.write("<h1>" + arr + "</h1>");

arr.pop(); (배열의 마지막 요소를 삭제하기 : pop())

arr.shift(); (배열의 첫번째 요소를 삭제하기 : shift())
객체생성
	var 객체명 = {속성: 값, 속성: 값, ...};

	객체 프로퍼티(속성) 접근
	1. 마침표 표기법
		객체명.프로퍼티
	2. 대괄호 표기법
		객체명["프로퍼티"]
	* 객체명이 없이 객체가 있을 수도 있다.

예제)
 	// 1. 객체 생성
	var obj = {name:"홍길동", age:50, height:"180cm"};

	// 2. 객체 프로퍼티 접근
	document.write("<h1>" + obj.name + "</h1>");			// .(마침표) 표기법
	document.write("<h1>" + obj["age"] + "</h1>");			// []표기법(큰 따옴표로 묶어준다.)
	document.write("<h1>" + obj["height"] + "</h1>");
생성자 함수
	1. 객체를 생성하는 함수
	2. 첫 글자를 대문자로 만든다.  ★★★

	ex) 기존 book 객체생성
	var book = {};

	생성자 함수를 통한 객체 생성  - 1
	function book(){}
	var book = new Book();

	생성자 함수를 통한 객체 생성  - 2
	function book(title){this.title = title;}
	var book = new Book("자바스크립트 정석");

	// 1. 생성자 함수 정의
	function Book(title, price){
		this.title = title;
		this.price = price;
	}

	// 2. 생성자 함수를 이용한 객체 생성
	var book = new Book("자바스크립트 정석", 30000);

	// 3. 객체 book의 정보 확인
		for(var p in book){
		document.write(book[p]);	 // .(마침표) 표기법
	}
BOM(Browser Object Model) : 브라우저 객체 모델
	1. window 객체
		1) 브라우저 내장 객체 중에서 최상위 객체
		2) 모든 전역 객체, 함수, 변수 등은 자동적으로  window 객체에 속함
		3) window.함수(), window.변수 등과 같은 형태로 사용이 가능
		4) window 객체를 생략한 형태로 사용이 가능
				window.alert() -> alert()

	2. window 객체 생성
			1) open("URL", "name", "feature");
				- URL : 주소, 파일의 경로
				- name : <a> 태그의 target으로 사용가능
				- feature : 크기, 위치 등


	3. window 객체 소멸
			1) close()
새로운 창(팝업 창) 만들기
	var newWindow = window.open("", "", "width=400, height=300");
	// 너비와 높이는 px 단위, 단위는 붙이지 않는다.

	if(newWindow){ // 새 창이 열림
		newWindow.document.write("나는 팝업이야!!!");
	}else{		// 새창이 열리지 않음
		alert("팝업 차단을 해제 해주세요.");
	}
버튼을 이용한 창 열고 닫기
<!DOCTYPE html>
<html>
<head>
<meta charset="UTF-8">
<title>Insert title here</title>
<script type="text/javascript">

   // 1,전역 객체 선언
   var newWindow;

   // 2.창 열기
   function winOpen(){
      var feature = "width=400, height=300, top=100,left=100";
      feature += "menubar=yes, location=yes, scrollbars=yes, statue=yes,resizeable=yes";

      newWindow = window.open("./index.html","",feature);
   }
   // 3.창 닫기
   function widClose(){
      newWindow.close();
   }


</script>
</head>
<body>
   	<form action="#">
   	<input type="button" value="창 열기" onclick="winOpen();">
   	<input type="button" value="창 닫기" onclick="winClose();">
	</form>
</body>
</html>
같은 위치에 index.html 파일을 만들어서 그 내용을 창 열기 하였다.
index.html의 내용은 다음과 같다.
<!DOCTYPE html>
<html>
<head>
<meta charset="UTF-8">
<title>인덱스 페이지</title>
</head>
<body>
	<h1>안녕하세요</h1>
</body>
</html>
창이 열려있는지 확인하는 함수는 다음과 같다.
<!DOCTYPE html>
<html>
<head>
<meta charset="UTF-8">
<title>인덱스 페이지</title>
</head>
<body>
	<h1>안녕하세요</h1>
</body>
</html>
그리고 창을 이동할 수 있다.
창을 이동할 때는
1) moveTo(x, y) : 스크린 기준으로 x, y 방향으로 이동한다.
2) moveBy(x, y) : 현재 창의 위치 기준으로 x, y 방향으로 이동한다.
	1. 위로 이동 - moveUp
	function moveUp(){
		win.focus();
		win.moveBy(0, -20);
	}
	2. 아래로 이동 - moveDown
	function moveDown(){
		win.focus();
		win.moveBy(0, 20);
	}
	3. 왼쪽으로 이동 - moveLeft
	function moveLeft(){
		win.focus();
		win.moveBy(-20, 0);
	}
	4. 오른쪽으로 이동 - moveRight
	function moveRight(){
		win.focus();
		win.moveBy(20, 0);
	}
script에서 body의 내용을 읽어낼 수도 있다.
window.onload를 사용하면 body 태그 확인 후에 처리한다.
<!DOCTYPE html>
<html>
<head>
<meta charset="UTF-8">
<title>Insert title here</title>
<script type="text/javascript">

	window.onload = function(){
	// 환영합니다. 라는 내용을 입력할 때
	document.getElementById("welcome").innerHTML = "환영합니다.";

	}
</script>
</head>
<body>
	<h1 id="welcome"></h1>

</body>
</html>
h1의 welcome에 환영합니다에 innerHTML을 이용해서 "환영합니다."라는 문구를 넣어줬다.
history : 웹 상단의 뒤로가기 앞으로가기
입력된 양식이 삭제되지 않고 유지되기 때문에 회원가입 페이지에서 많이 이용된다.
	// 1. 뒤로 가기
	history.back();			// history.go(-1);와 동일

	// 2. 앞으로 가기
	history.forward();		// history.go(1);와 동일

	// 3. 이전 페이지로 가기
	history.go(-1);

	// 4. 이전 이전 페이지로 가기
	history.go(-2);
// 5.히스토리 남기기
function winGo1(){
// location.href = "http://www.google.com"; -> 밑에와 동일
location.assign("http://www.google.com");
}
// 6.히스토리 안 남기기
function winGo2(){
location.replace("http://www.google.com");
}
5번은 뒤로가기가 가능하지만, 6번은 불가능하다.
아래의 내용은 경로를 나타낼 수 있다.
   document.write("location href = " + location.href + "<br>");
   document.write("location hostname = " + location.hostname + "<br>");
   document.write("location pathname = " + location.pathname + "<br>");
DOM(Document Object Model) : 문서 객체 모델
개인적인 생각이지만, 이부분은 매우 중요한 것 같다.
1. 웹 문서를 로드할 때 브라우저는 구성 요소들을 트리 구조의 DOM으로 생성한다.
2. DOM을 통해서 HTML 구성요소들을 획득, 추가, 변경, 삭제 등이 가능하다.
3. 주요 선택 메소드
	1) document.getElementById("아이디")
	2) document.getElementByTagName("태그")	--> getElements : 리턴이 여러개 이다.
	3) document.getElementByClassName("클래스")
	4) document.querySelector("선택자")			--> 아이디 등 하나만 사용할때!
	5) document.querySelectorAll("선택자")		--> 클래스나 태그명 등 여러개를 사용할때!

4. 요소 관련 메소드
	1. document.createElement(element) 	: element(요소)생성
	2. document.removeChild(element) 	: element(요소)삭제
	3. document.appendChild(element)	: element(요소)추가
	4. document.replaceElement(new element, old element) : old element -> new element로 변경
DOM 생성
<!DOCTYPE html>
<html>
<head>
<meta charset="UTF-8">
<title>Insert title here</title>
<script type="text/javascript">
	window.onload = function(){
		// 1. <h1> 태그 만들기
		var headElement = document.createElement("h1");
		// 2. 텍스트 노드 만들기
		var textNode = document.createTextNode("Hello JavaScript");
		// 3. <h1> 태그에 텍스트 노드 추가하기
		headElement.appendChild(textNode);
		// 4. <h1> 태그를 <body>에 추가하기
		document.body.appendChild(headElement);
	}
</script>
</head>
<body>
	<h1>안녕 자바스크립트</h1>
</body>
</html>
DOM 삭제
<!DOCTYPE html>
<html>
<head>
<meta charset="UTF-8">
<title>Insert title here</title>
<script type="text/javascript">
	window.onload = function() {
    	var box = document.getElementById("box");//p1을 제거하려면 제거 대상의 부모도 알아야 한다.
    	var p1 = document.getElementById("p1");   // 제거대상

  		box.removeChild(p1);

		// h1 태그명을 가져와서 삭제해보자(태그는 복수이기 때문에 배열로 인식하면 된다.)
		var h1 = document.getElementsByTagName("h1");		// 제거대상
		document.body.removeChild(h1[0]);
	}
</script>
</head>
<body>
	<h1>DOM삭제</h1>
	<div id="box">
		<p id="p1">첫 번째 문단</p>
		<p id="p2">두 번째 문단</p>
	</div>
</body>
</html>
결국엔 id="p2"만 남게된다.
- getElementById()
배열을 getElementById()을 이용해서 for문의 list로 출력하기
<!DOCTYPE html>
<html>
<head>
<meta charset="UTF-8">
<title>Insert title here</title>
<script type="text/javascript">
	window.onload = function(){
		var arr = ["spring", "summer", "fall", "winter"];
		var list ="";

		list += "<ul>";
		for(var i=0; i<arr.length; i++){
			list += "<li>" + arr[i] + "</li>";
		}
		list += "</ul>";

		var ex = document.getElementsById("ex");
		ex.innerHTML = list;
	}
</script>
</head>
<body>
	<div id="ex"></div>
</body>
</html>- getElementsByTagName()
hobbies의 내용을 배열이 되어있는 h1에 하나씩 집어넣기
<!DOCTYPE html>
<html>
<head>
<meta charset="UTF-8">
<title>Insert title here</title>
<script type="text/javascript">
	onload = function(){
		var hobbies = ["reading", "fishing", "movie", "riding", "travel"];

		var h1 = document.getElementsByTagName("h1");

		for (var i=0; i<hobbies.length; i++){
			h1[i].innerHTML = hobbies[i];
		}
		// h1[i].innerHTML = hobbies[i];  	1번 방법
		// h1[i].append(hobbies[i]);		2번 방법
	}
</script>
</head>
<body>
	<h1></h1>
	<h1></h1>
	<h1></h1>
	<h1></h1>
	<h1></h1>
</body>
</html>- getElementsByClassName()
class 이름이 ex인 객체들을 가지고와서 글자의 색을 바꾸는 예제
객체[i].style.color를 변경
<!DOCTYPE html>
<html>
<head>
<meta charset="UTF-8">
<title>Insert title here</title>
<script type="text/javascript">
	window.onload = function(){

		var list = document.getElementsByClassName("ex");


		for (var i=0; i<list.length; i++){
			list[i].style.color="#d3d3d3";
		}

	}
</script>
</head>
<body>
	<div>
		<h1>DOM</h1>
		<p class="ex">Document</p>
		<p class="ex">Object</p>
		<p class="ex">Model</p>
	</div>
</body>
</html>